


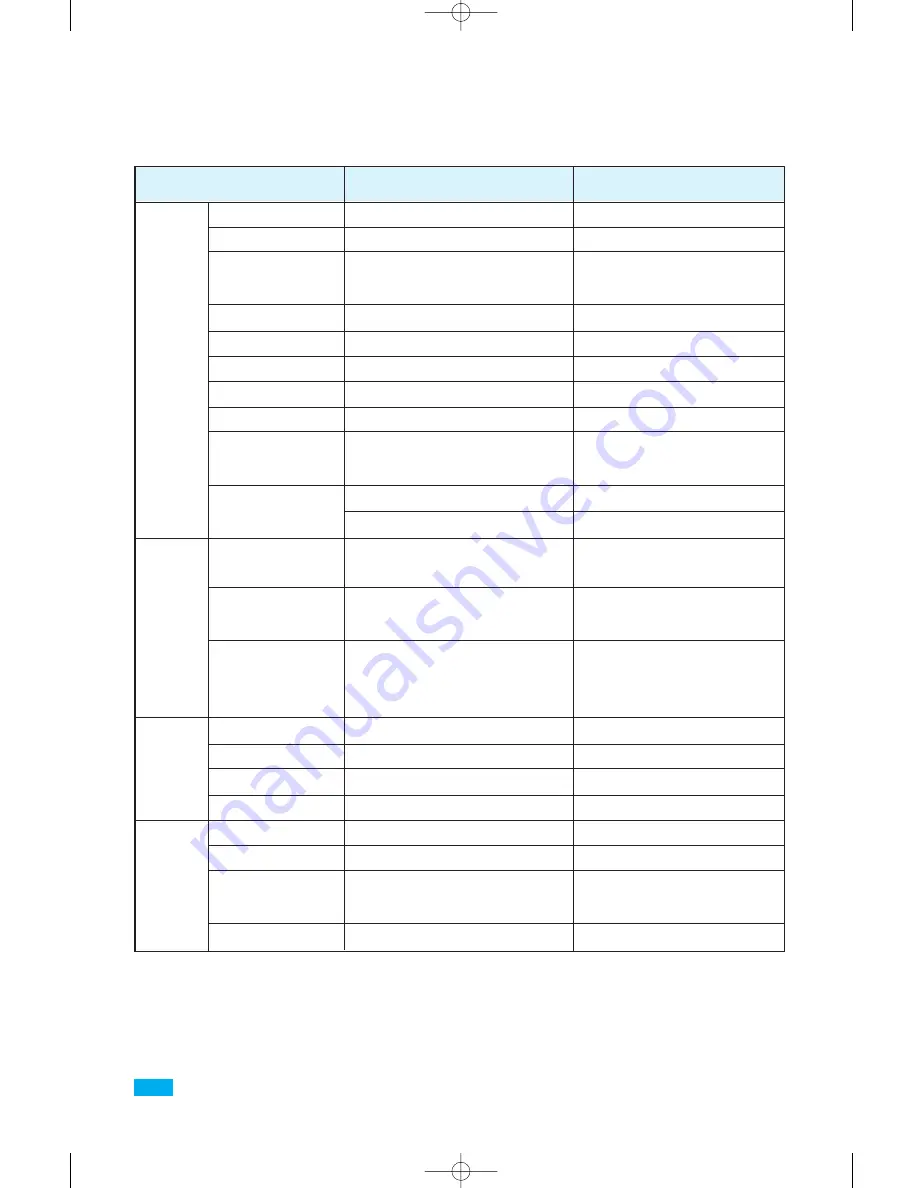
Item
Description
Remarks
Speed
Resolution
Developing
method/Toner
Warm up time
First print time
Duty cycle
Size (w x d x h)
Weight
Power consumption
Noise level
Input capacity
Output capacity
Paper size
Type
Life time
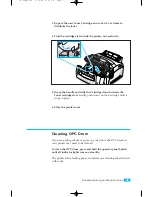
Charging/Transfer
Econo mode
CPU
Emulation
Memory
Interface
8 PPM
600 DPI
Eletrophotography
Non-mag monocomponent
Less than 30 sec.
Less than 19 sec.
Maximum 6,000 pages per month
13.6 x 14.4 x 8.8 in (345 x 365 x 224 mm)
Less than 16.5 Ib (7.5 Kg)
Printing: 200W avg./450 W max.
Sleep mode: Less than 25 W
Printing: <48 dBA
Sleep mode: Background noise
150 sheets (automatic feeder)
1 sheet (manual feeder)
100 sheets in face-down stacker
1 sheet in face-up stacker
A4, Letter, Legal, Executive, B5
COM-10, Monarch, DL, C5, C6, A5,
Custom paper size
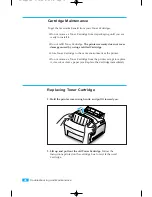
Cartridge
5,000 pages at 5 % density
Contact roller Charging & Transfer
Yes
32 bit RISC CPU 33 MHz
PCL5e,PCL6
4 Mb Standard
Max up to 32 Mb
IEEE1284 B type 1,USB
at normal condition
from idle mode
USA: 100~127 VAC, 47~63 Hz
EUROPE: 220~240 VAC, 47~63 Hz
ISO 7779
Multi-Page Feeding
By Controller
Specifications
Engine
Paper
Handling
Toner
Cartridge
Controller
60
Appendix
06-Appendix 5/10/99 1:58 PM Page 6
Summary of Contents for ML-5100A
Page 1: ...LASER PRINTER ML 5100A User s Manual 00 Cover Contents 5 10 99 4 35 PM Page 1 ...
Page 6: ...Setting Up Your Printer Chapter 1 01 Setup 5 10 99 4 28 PM Page 1 ...
Page 22: ...Paper Handling Chapter 2 02 Printing 5 13 99 10 34 AM Page 1 ...
Page 31: ...26 Paper Handling MEMO 02 Printing 5 13 99 10 34 AM Page 10 ...
Page 32: ...Operating Your Printer Chapter 3 03 Troubleshooting 5 10 99 4 04 PM Page 1 ...
Page 44: ...Troubleshooting and Maintenance Chapter 4 04 Supplies 5 10 99 4 00 PM Page 1 ...
Page 55: ...50 Troubleshooting and Maintenance MEMO 04 Supplies 5 10 99 4 00 PM Page 12 ...
Page 56: ...Printer Options Chapter 5 05 Options 5 10 99 2 01 PM Page 1 ...


