


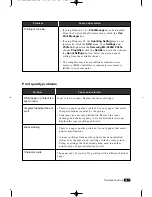
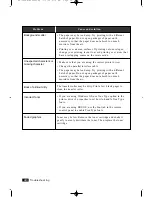
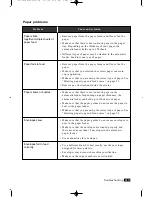
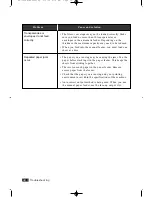
3
.6
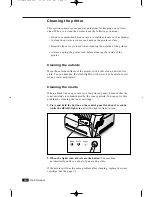
Maintenance
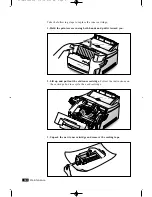
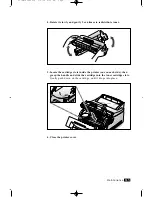
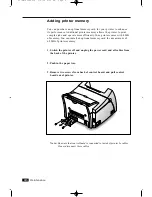
Adding printer memory
You can purchase an optional memory card for your printer to enhance
its performance. Additional printer memory allows the printer to print
complex jobs and operate more efficiently. Your printer comes with 4 MB
of memory. You can install an optional memory card for a maximum of
68 MB of printer memory.
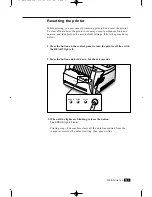
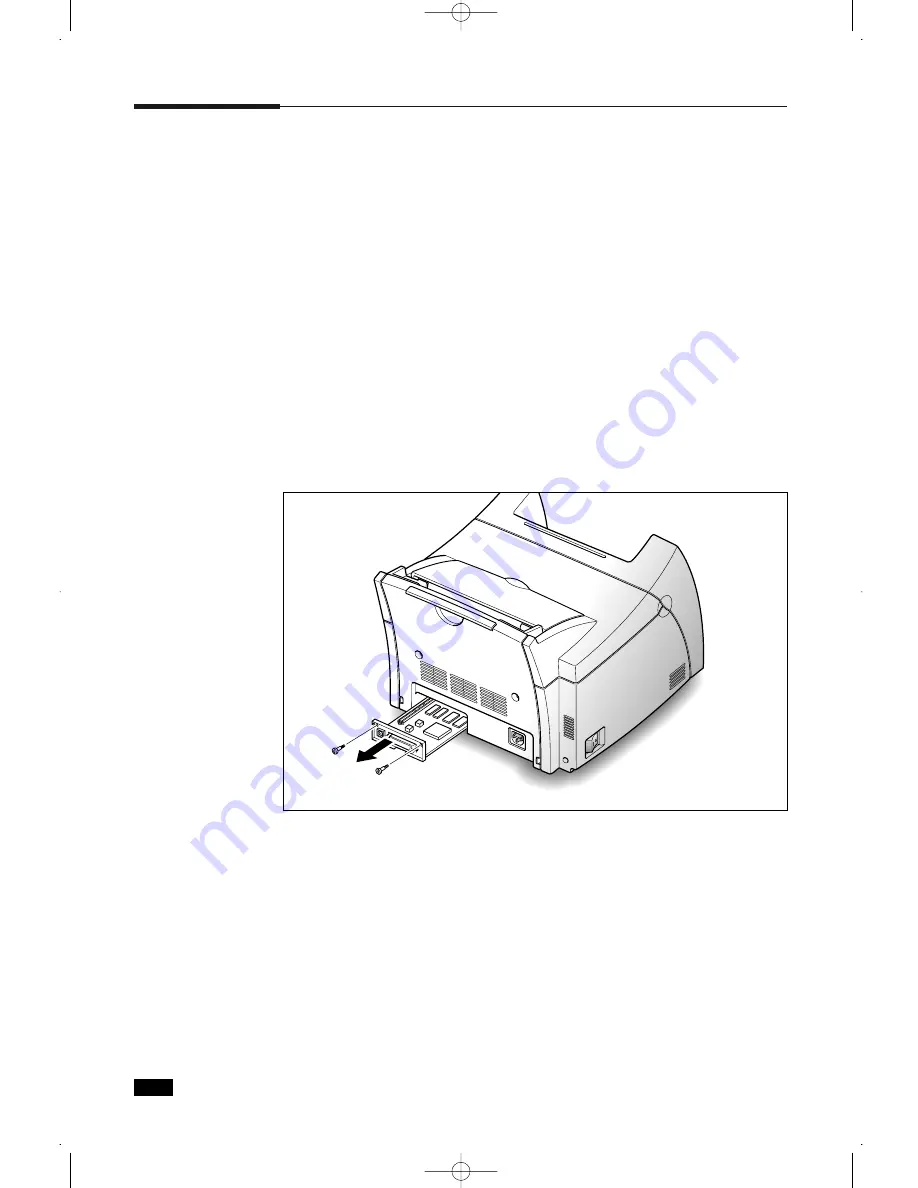
1. Switch the printer off and unplug the power cord and all cables from
the back of the printer.
2. Push in the paper tray.
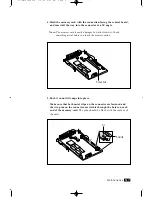
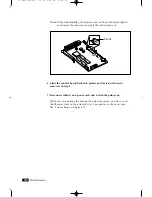
3. Remove two screws from back of control board, and pull control
board out of printer.
Note : Be aware that control board is connected to inside of printer by cables.
Do not disconnect these cables.
03-Maintenance 3/2/00 9:20 AM Page 8
Summary of Contents for ML-5200A
Page 1: ...LASER PRINTER User s Guide ML 5200A ...
Page 5: ...Setting up your printer Chapter 1 01 Setup 3 2 00 9 43 AM Page 2 ...
Page 25: ...Operating your printer Chapter 2 02 Operating 3 2 00 9 35 AM Page 2 ...
Page 51: ...Maintenance Chapter 3 03 Maintenance 3 2 00 9 20 AM Page 2 ...
Page 60: ...3 9 MEMO 03 Maintenance 3 2 00 9 20 AM Page 11 ...
Page 61: ...Troubleshooting Chapter 4 04 Troubleshooting 3 2 00 9 15 AM Page 2 ...
Page 73: ...Appendix Chapter 5 05 Appendix 3 2 00 9 08 AM Page 2 ...


