GB
21
It always takes a little time to become familiar with a new appliance.
If you have any of the problems listed below, try the solutions given.
They may save you the time and inconvenience of an unnecessary
service call.
If the above guidelines do not allow you to solve the problem, take a
note of:
The model and serial numbers, normally printed on the rear of
the system
Your warranty details
A clear description of the problem
Then contact your local dealer or SAMSUNG after-sales service.
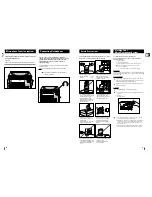
Check that the tape in the cassette is sufficiently taught.
To prevent erasing a cassette that you wish to keep, remove the
safety tab on the upper edge of the cassette. To record a cassette,
where the tab has been broken, simply cover the opening with
adhesive tape.
When you have finished playing a cassette, always put it back in its
case.
Store your cassettes in a clean place, out of direct sunlight, where
they will not be exposed to high temperatures.
Avoid using 120-minute cassettes as they place unnecessary strain
on the tape mechanism.
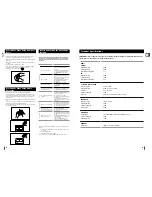
Handle your compact discs with care. Always hold them by the
edges to avoid leaving fingerprints on the shiny surface.
When you have finished playing a compact disc, always put it back
in its case.
Do not fix paper or adhesive tape to the discs and do not write on
the label.
Clean them with a special-purpose cloth.
Store your compact discs in a clean place, out of direct sunlight,
where they will not be exposed to high temperatures.
Always use compact discs marked .
Precautions When Using Compact
Discs
Before Contacting the After-Sales
Service
Precautions When Using Audio
Cassettes
COMPACT
DIGITAL AUDIO
Problem
The system does not work
There is no sound
The Timer does not work
In case it does not work, even the
action is taken as above.
The compact disc player does not
start playing
The tape does not start playing
The volume falls off
The cassette is not erased correctly
There is excessive wow and flutter
Reception is poor or no radio
stations are received at all
G
E
N
E
R
A
L
C
D
R
A
D
I
O
C
A
S
S
E
T
T
E
S
Checks/Explanation
• The main lead is not correctly plugged into
a wall socket or the wall socket is not
switched on.
• The remote control batteries need replacing
or the polarity has not been respected.
• The
On/Standby
button has not been
pressed.
• The volume has been completely turned
down.
• The correct function (TUNER, CD, TAPE,
AUX) has not been selected.
• You have connected a set of earphones.
• The loudspeaker wires have been
disconnected.
• The
Mute
button has been pressed.
• The timer has been stopped by pressing
Timer On/Off
.
• Press the
S.Bass
button for 5
seconds in power ‘OFF’(standby), then it is
returned the original position (RESET)
• The CD function has not been selected.
• The disc has been inserted face down or is
either dirty or scratched.
• The laser sensor is dirty or dusty.
• The system has not been installed on a flat,
horizontal surface.
• Condensation has formed in the player;
leave the system in a warm, airy room for at
least one hour.
• The TAPE function has not been selected.
• The cassette has not been inserted correctly.
• The cassette player has not been closed.
• The tape is either slack or broken.
• The audio heads are dirty.
• The rollers or drive capstans are dirty.
• The tape is worn.
• The TUNER function has not been selected.
• The radio frequency has not been correctly
selected.
• The aerial has been disconnected or is not
facing the right way. Turn it until you find
the best orientation.
• You are in a building that blocks radio
waves; you must use an outside aerial.
20
B
SAMSUNG strives to improve its products at all times. Both the design specifications and these user
instructions are thus subject to change without notice.
Technical Specifications
RADIO
AM (MW)
Signal/noise ratio
40 dB
Usable sensitivity
56 dB
Total harmonic distortion
2 %
FM
Signal/noise ratio
54 dB
Usable sensitivity
16 dB
Total harmonic distortion
0.5 %
COMPACT DISC PLAYER
Frequency range
20 Hz - 20 KHz
Signal/noise ratio
80 dB (at 1 KHz) with filter
Distortion
0.1 % (at 1 KHz)
Channel separation
75 dB
Disc sizes
Diameter: 120 or 80 mm. Thickness: 1.2 mm
TAPE DECK
Frequency range
125 Hz ~ 8 KHz
Signal/noise ratio
40 dB
Channel separation
30 dB
Erasing effect
50 dB
AMPLIFIER
Output power
2 X 7.5 Watts RMS (total harmonic distortion : 10%)
Channel separation
40 dB
Signal/noise ratio
70 dB
GENERAL
Dimensions
150(W) x 235 (H) x 270(D) mm

