background image

ENG

43

44

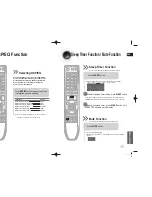
CD RIPPING Function

You can rip a compact disc as a MP3 file on the USB 
This feature enables you to ripping with the start of the disc or track of your choice.

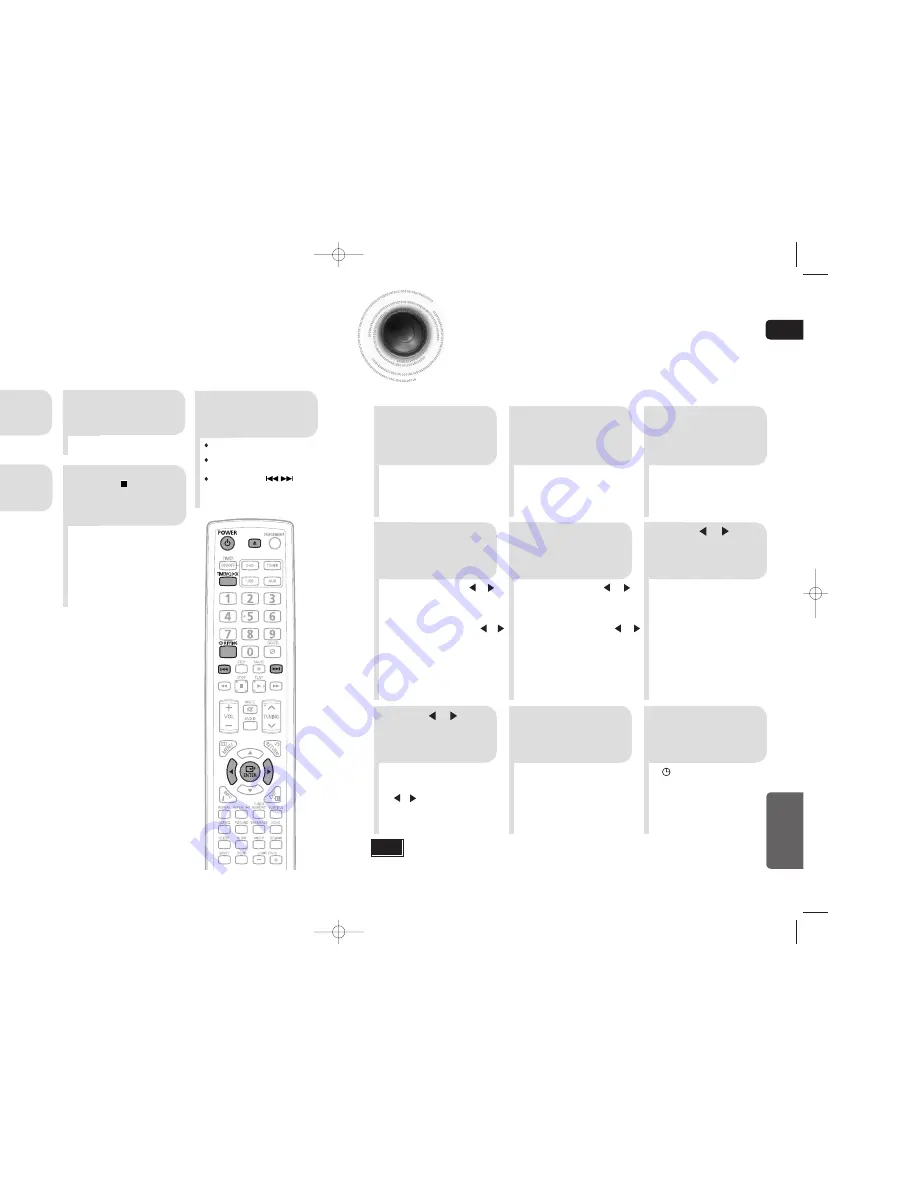
Timer Function

• 


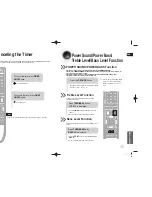
The timer enables you to switch the system on or off at specific times.

• 


If you no longer want the system to be switched on or off automatically, you must cancel the timer.

• 


Before setting the timer, check that the current time is correct.

• 


For each step, you have a few seconds to set the required options. 

If you exceed this time, you must start again.

Example:

 You wish to wake up to music every morning.

• 


ON TIME

 is displayed (instead 

of the equalizer symbols) for a 
few seconds, followed by any 
switch-on time already set; you 
can set the timer switch-on time.

•  

The source to be selected is 
displayed.

2

1

3

Switch the system 

on by pressing 

POWER

.

Press 

TIMER/

CLOCK

 until 

TIMER

 is 

displayed.

Press the 

ENTER 

button.

• 


      is displayed to the top right of 
the time, indicating that the timer 
has been set. 

•  

The system will switch on and 
off automatically at the required 
times.

8

7

9

Press     or     button 

to select the source to 

be played when the 

system switches on.

Press 

ENTER

 to 

confirm the timer.

Press 

POWER 

to 

set the system to 
standby mode.

5

4

a

.  Set the hour by pressing      or  

button.

b.

  Press 

ENTER 

.

• 

The minutes flash.

c.

  Set the minutes by pressing      or  

button.

d.

  Press 

ENTER

.

•  

OFF TIME

 is displayed (instead 

of the equalizer symbols) for a few 
seconds, followed by any switch-
off time already set; you can now 
set the timer switch-off time.

a

.  Set the hour by pressing      or  

button.

b.

  Press 

ENTER

.

• 

The minutes flash.

c.

  Set the minutes by pressing      or  

button.

d.

  Press 

ENTER

.

•  

VOL 10

 is displayed, where 10 

corresponds to the volume 
already set.

Set the timer 
switch-off time.

6

Press     or     button 

to adjust the volume 

level and press 

ENTER

.

Set the timer 
switch-on time.

Note

•  

If the timer switch on and off times are identical, the word 

ERROR

 is displayed. 

•  

If there is no disc or usb, when you select the “DVD, USB, it will automatically change to 

“TUNER”.

•  

TUNER (radio) :

   a

 Press 

ENTER

.


b

  Select a preset station by pressing

    or      .

•  

DVD/CD (compact disc) :  

   Load on or more compact disc.

•  

USB :Insert a USB.

2

1

3

Connect the 
USB. 

Switch the system 

on by pressing 

POWER

.

Load a compact 
disc(Digital 
Audio).

4

Press CD 

RIPPING button 

on remote control 

to starting ripping.

 Press the 

OPEN/CLOSE

 button to open 

the CD door.

 Insert a CD and press the 

OPEN/CLOSE


button to close the CD door.

Use the CD selection (

 ) buttons 

to select the desired song.

5

To stop ripping, press 

STOP( )button.and

then automatically 

create and save as 

the MP3 file.

After CD-Ripping,a directory named 
“RIPPING FOLDER” will be created in your 
device.The file name is same with the disc.

Note

MISCELLANEOUS

Don’t disconnected USB and AC Cord  during CD-Ripping. This may cause 


the file damage. If you want to stop CD-Ripping during CD-Ripping, you must 

press stop Key first and after the CD Stopped, then you can remove the USB 

device.

If you disconnected USB device when CD Ripping, the main unit will be 


power off and you may not delete the ripped file, In this case, please connect 

the USB on the PC and backup the USB data on the PC first and then 

formate the USB device .

When the USB memory is not enough, it will be displayed “RIPPING 


ERROR”.

DTS-CD can’t for CD Ripping.


With external HDD, FAT format the USB can be CD Ripping, but not NTFS.


The CD Ripping function of this product does not support all USB devices. 

When you use CD high speed search function or in the Pause or Stop mode, 


the CD Ripping can’t work.

During CD Ripping, do not deal impact.If is shocked while CD Ripping, CD 


Ripping maybe disengage. 

Sometimes, some of USB devices, CD Ripping time is long.


In program mode, you can't use CD RIPPING function.


When CD Ripping completes or Stops, the CD will reload.


If the system is playing state, p


¡

ress this button, 

“TRACK RIPPING” is displayed and CD 
RIPPING starts.
If the system is playing state, p


¡

ress and hold this 

button, “FULL CD RIPPING” is displayed and CD 
RIPPING starts.
During CD ripping, do not disconnect USB 


¡

device.

MM-C330D-Latin-xsp-ENG-2.indd   42-43

MM-C330D-Latin-xsp-ENG-2.indd   42-43

2010-3-4   8:42:59

2010-3-4   8:42:59

Summary of Contents for MM-C330D

Page 1: ...D imagine the possibilities Thank you for purchasing a Samsung product To receive a more complete service please register your product at www samsung com register MM C330D Latin xsp ENG 1 indd 2 3 MM C330D Latin xsp ENG 1 indd 2 3 2010 3 4 8 37 47 2010 3 4 8 37 47 ...

Page 2: ...in your house complies with the identification sticker located on the back of your player Install your player horizontally on a suitable base furniture with enough space around it for ventilation 3 4inches Make sure the ventilation slots are not covered Do not stack anything on top of the player Do not place the player on amplifiers or other equipment which may become hot Before moving the player ...

Page 3: ...ction The MM C330D automatically shuts itself off after 20 minutes in the stop mode only for USB DVD TV Screen Saver Function The MM C330D automatically brightens and darkens the brightness of the TV screen after 3 minutes in the stop mode The MM C330D automatically switches itself into the power saving mode after 20 minutes in the screen saver mode DVD Digital Versatile Disc offers fantastic audi...

Page 4: ...UTTON 5 PLAY PAUSE BUTTON 6 SEARCH FUNCTION BUTTON UP 7 OPEN CLOSE 1 2 3 5 4 6 7 8 1 2 3 4 5 6 1 Component Output Connectors Connect a TV with component video input jacks to these jacks 2 AUX IN 3 Video Output Connector Connect the TV s video input jacks VIDEO IN to the VIDEO OUT connector 4 FM Antenna Connector 5 Speaker Connector Terminals 6 Clamp Wire Fasten the speaker wires The accessories ma...

Page 5: ...s replace both batteries at the same time Do not expose batteries to heat or flame Insert Remote Batteries DSP EQ button VOLUME button MENU button TIMER CLOCK button POWER button TIMER ON OFF button CANCEL button PAUSE button Number 0 9 buttons USB button AUX button TUNER button DVD button DEMO DIMMER button OPEN CLOSE button REMAIN button ANGLE button TREB BASS button MIC VOL button TUNER MEMORY ...

Page 6: ... the speaker Do not take the speaker near from TV or computer monitor The speaker near the TV or computer monitor may influence the quality of the screen display Directions in Installing Speaker The loudspeaker connector terminals are located on the rear of the system There are two terminals on the system left speaker marked L right speaker marked R To achieve the correct sound quality insert thos...

Page 7: ...progressive scanning method scans one full frame of video consecutively down the screen line by line An entire image is drawn at one time as opposed to the interlaced scanning process by which a video image is drawn in a series of passes The progressive scanning method is desirable for dealing with moving objects Progressive Scan FULL FRAME What is Progressive or Non Interlaced Scanning This funct...

Page 8: ...ppears in the display 2 CONNECTIONS 1 Connect the FM antenna supplied to the FM COAXIAL Jack 2 Slowly move the antenna wire around until you find a location where reception is good then fasten it to a wall or other rigid surface This unit does not receive AM broadcasts Note 8 Audio Cable If the external analog component has only one Audio Out connect either left or right not supplied 8 FM Antenna ...

Page 9: ...stop position This function works only with DVDs If pressed twice STOP is displayed and if PLAY button is pressed playback starts from the beginning To stop playback press STOP button during playback Checking the Remaining Time Each time the REMAIN button is pressed the time is displayed as below Press the REMAIN button For checking the remaining time of a title or chapter being played DVD CD MP3 ...

Page 10: ...rder or JPEG files on a PC can be stored on a CD and then played back with this DVD player JPEG 17 18 OPERATION Rotate Flip Function Zoom Auto play Function button Flip Vertically button Flip Vertically button Rotate 90 Counterclockwise button Rotate 90 Clockwise Press Cursor buttons during playback Press INFO button during playback TV displays as below Original Image 1 Use to select icon and then...

Page 11: ... the audio and video data these must be stored on CD in the ISO 9660 format MPEGs containing DivX can be divided into Video and Audio Video compatibility All versions of DivX later than 3 11 including the latest 5 1 are supported In addition XviD is supported Audio compatibility MP3s encoded at bit rates from 8kbps to 320kbps AC3s from 32kbps to 640kbps and WMAs from 48kbps to 384kbps are supporte...

Page 12: ...ions installed only one drive or partition can be connected A device supporting USB 1 1 alone may cause a difference in the picture quality depending on the device Compliant Devices USB Storage Device 1 MP3 Player 2 Digital Camera 3 Removable HDD 4 Removable HDDs equipped with less than 160 Gbytes are supported Removable HDDs equipped with 160Gbytes or more may not be recognized depending on the d...

Page 13: ...ns are being operated that operation is not possible with the disc currently being played What is a Track File A section of video or a music file recorded on a CD or MP3 CD Depending on the disc the disc information display may appear different Note OPERATION To resume normal playback press PLAY button Press SLOW button Each time the button is pressed during playback the playback speed changes as ...

Page 14: ...me Press STEP button Skip Skip Step 26 OPERATION 1 3 1 3 2 3 3 3 DVD 1Press ANGLE button Each time the button is pressed the angle changes as follows The Angle function works only with discs on which multiple angles have been recorded Note 2 Press Cursor buttons or numeric buttons to select the desired angle DivX CD Track01 Track01 Track02 Track03 Track04 Track05 Track06 Track07 Track02 Track01 Tr...

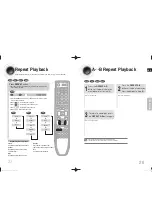
Page 15: ...AT button Each time the button is pressed during playback the repeat playback mode changes as follow Press the REPEAT button or cursor button to select one mode then press ENTER button Select Cancel Repeat playback Select Repeat playback one Chapter Select Repeat playback one Title Select Repeat playback A B DVD DVD CD MP3 DIVX CD MP3 DIVX Repeat Playback Options Track Off Folder Track Folder Disc...

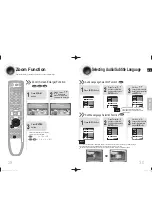
Page 16: ... press ENTER button Press Cursor buttons to select the Subtitle and then press ENTER button 1Press INFO button Audio Language Selection Function DVD Subtitle Language Selection Function DVD Note 1Press INFO button 3 3 PressCursor ornumericbuttonstoselectthe desiredAudiolanguageandthen pressENTERbutton PressCursor ornumericbuttonstoselectthe desiredSubtitlelanguageand thenpressENTERbutton You can u...

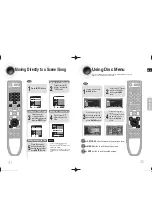
Page 17: ...ou may not be able to move to the selected title or time Note 32 OPERATION Using Disc Menu You can use the menus for the audio language subtitle language profile etc DVD menu contents differ from disc to disc DVD 2 1 In stop mode press MENU button Press Cursor buttons to move to DISC MENU and then press ENTER button 4 3 Press Cursor buttons to select the desired item and then press ENTER button Pr...

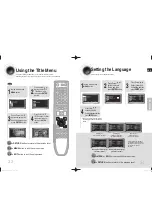
Page 18: ...glish by default 2 1 In stop mode press MENU button Press Cursor button to move to Setup and then press ENTER button 3 Once the setup is complete if the language was set to English OSD will be displayed in English Selecting the Audio Language recorded on the disc Selecting the Subtitle Language recorded on the disc Selecting the Subtitle Language recorded on the disc 4 Press Cursor button to selec...

Page 19: ...called the aspect ratio When playing DVDs recorded in different screen size you should adjust the aspect ratio to fit your TV or monitor For a standard TV select either 4 3LB or 4 3PS option according to personal preference Select 16 9 if you have a wide screen TV Select this to view a 16 9 picture in the full screen mode on your wide screen TV You can enjoy the wide screen aspect Select this to p...

Page 20: ...adult material 3 5 Press Cursor button to move to Parental Setup and then press ENTER button button ting Level ENTER Press Cursor button to select the Change Password and then press ENTER button Enter the password and then press ENTER button Note 2 1 In stop mode press MENU button Press Cursor button to move to Setup and then press ENTER button Enter the old password a new password and confirm new...

Page 21: ...tatus to fit the video Press Cursor buttons to move to AV SYNC and then press ENTER button In stop mode press MENU button ting the DRC Dynamic Range Compression use this function to enjoy Dolby Digital sound when watching movies at me at night 1 2 In stop mode press MENU button Press Cursor button to move to Audio and then press ENTER button 3 4 Press Cursor to adjust the DRC Press RETURN button t...

Page 22: ...stening to an FM station Refer to Step 2 on page 41 to automatically or manually tune in to a station 2 1 3 Example Presetting FM 89 1 in the memory Press TUNING or to select 89 10 Press the TUNER button and select the FM band If you can t press TUNER MEMORY in 5 seconds the preset disappears and FM displays 5 4 You can select between 1 and 15 Press the TUNER MEMORY button Press the TUNER MEMORY b...

Page 23: ...tton d Press ENTER VOL 10 is displayed where 10 corresponds to the volume already set Set the timer switch off time 6 Press or button to adjust the volume level and press ENTER Set the timer switch on time Note If the timer switch on and off times are identical the word ERROR is displayed If there is no disc or usb when you select the DVD USB it will automatically change to TUNER TUNER radio a Pre...

Page 24: ... tones providing thudding sound effects Press the button to select from TREB 04 to TREB 04 You can select the level of high tones you desire Press TREB BASS button TREB 00 is displayed Bass Level Function BASS function stresses low tones providing thudding sound effects Press the button to select from BASS 04 to BASS 04 You can select the level of low tones you desire Press TREB BASS button BASS 0...

Page 25: ...sic you are listening to 48 MISCELLANEOUS Sleep Timer Function Mute Function The remaining time before the DVD player will shut itself off is displayed Pressing the button again changes the sleep time from what you have set earlier To confirm the sleep timer setting press SLEEP button Each time the button is pressed the selection changes as follows 90 MIN 60 MIN 45 MIN 30 MIN 15 MIN SLEEPOFF Press...

Page 26: ...turbing other people in the room The headphones must have a 3 5ø jack or an appropriate adapter You can also insert microphone to sing along with your favorite Cds tions available are listed in turn on the display ns are described in detail in this booklet on how to use them refer to the appropriate sections MO Function view the various functions available on your system MO Function DIMMER Functio...

Page 27: ...n off the power and then turn it back on Check the region number of the DVD DVD discs purchased from abroad may not be playable CD ROMs and DVD ROMs cannot be played on this DVD player Make sure that the rating level is correct Are you using a deformed disc or a disc with scratches on the surface Wipe the disc clean Disc tray does not open Playback does not start Playback does not start immediatel...

Page 28: ... may be played Only CD R discs with JPEG files in ISO 9660 or Joliet format can be played JPEG file names should be 8 characters or less in length and contain no blank spaces or special characters Only a consecutively written multisession disc can be played If there is a blank segment in the multisession disc the disc can be played only up to the blank segment A maximum of 9 999 images can be stor...

Page 29: ...egion number of the DVD player the player cannot play the disc Translated appearing at the bottom of the screen A DVD disc can contain up to 32 subtitle languages These numbers are recorded on DVD discs When a disc contains two or more movies these movies are numbered as Title 1 Title 2 etc These numbers are assigned to the tracks which are recorded on video and audio CDs They enable specific trac...

Page 30: ......

Reviews: