background image

GB

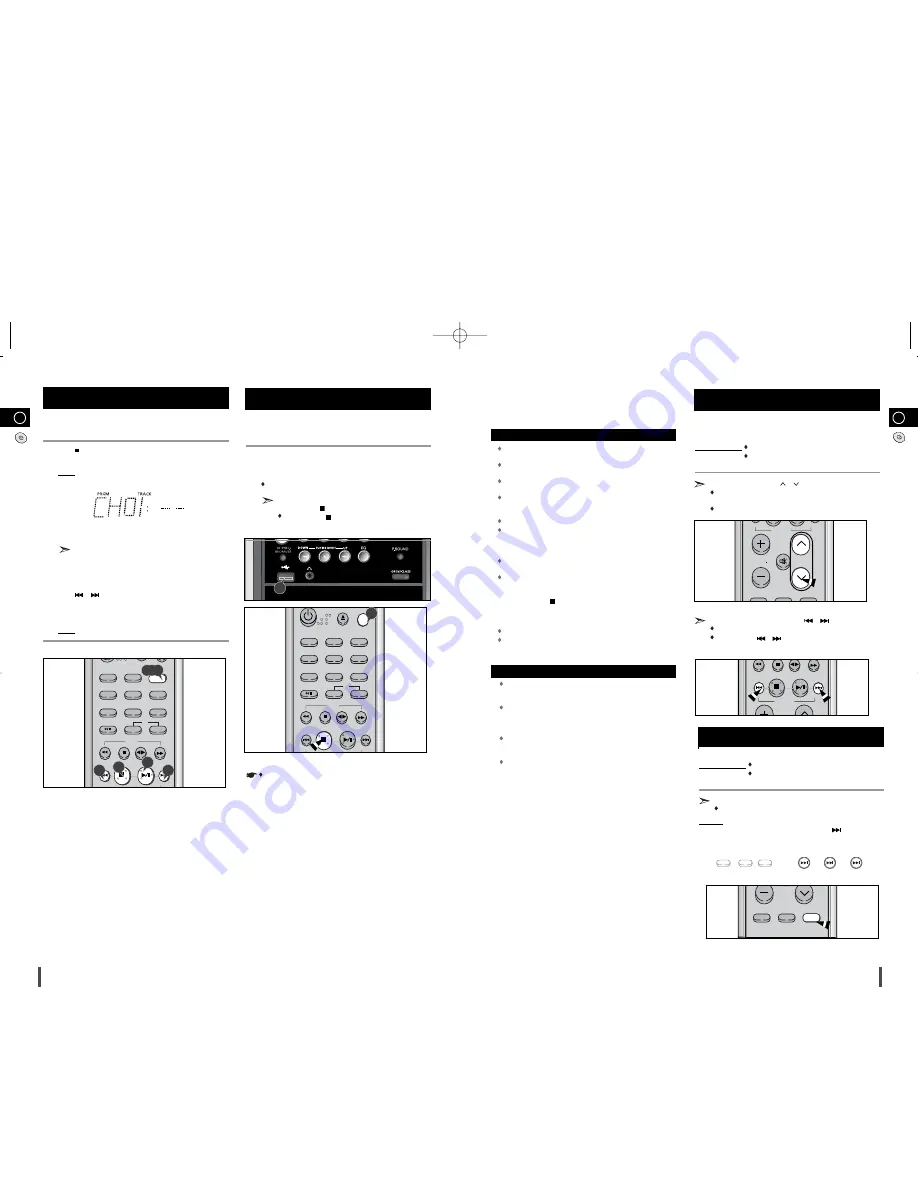
You can check or change your selection of tracks at any time.

Press 

once if you have started listening to the selection.

Press 

PROGRAM/SET 

button twice.

Result: The following indications are displayed:   

(01 = Program no., – – = Track no. on the disc)

If you have already programmed 24 tracks, 

CH 

is displayed

instead of 

PR

when you press 

PROGRAM/SET

.

Press 

PROGRAM/SET

one or more times until the track to be

changed is displayed.

Press 

or

to select a different track.

Press 

PROGRAM/SET

to confirm your change.

Press 

MP3-CD/CD

(

/

»

) to start listening to the selection.

Result: The first track selected is played.

1
2

3

4
5

6

Checking or Changing Programmed
Tracks

GB

15

14

Playing USB

You can play MP3/WMA files by connecting to various external USB
storage devices such as USB flash memory or HDD. time.

Connect the external USB storage device to your player.

Select USB function by using the 

USB

button.

The first track of the first directory plays automatically.

1
2

Please be aware of the followings before using USB.

Depending on the type of external USB storage device, it may not
work even if it’s connected to the player.
With external HDD, FAT format can be played, but not NTFS
format.
With USB 2.0 HDD, connect to a separate power source. 
If it’s not connected to a separate power source, it may not work.
If memory of an external USB storage device is segmented
into several parts, MP3 files of only the first hard disk drive
can be played.
Regarding directories, up to fourth directory can be played.
DRM applied files are not played.
Digital Rights Management: Technology and service that protect the
profit and rights of copyright owners by disallowing unauthorized use
of digital contents.
Even if the file name ends with .mp3, the file does not play if actual
file format is MPEG layer 1 or 2.
Disconnect the external USB storage device only in safe
removal mode(“USB REMOVE” display ON/OFF). Otherwise,
internal file can be damaged.
Press the Stop (

) button more than 3 times to get into the

safe removal mode.
If you want to play files in the safe removal mode, disconnect
and reconnect the external USB storage device.
USB hub will not be recognized.
Directory names are shown up to 14 letters, and MP3 file names up
to 30 letters.

Delay

When selecting USB function, depending of the speed of the 
external USB storage device, reading (READ-IN) internal information
can take several minutes.

When playing a USB device, recording or finding next track may
introduce some delay. Especially with a mass storage device such as
HDD, depending on the type and the number of files, the delay might
be several minutes.
Even with the external USB storage devices of same capacity,
depending on the speed of each product, the amount of oper-
ating time can vary.
If the external USB storage device supports only USB VER 1.1 and
the access speed is slow, the recording may not work well or noise
can be recorded.

1

To stop playing

Press the Stop (

) button to stop playing.

Press the Stop (

) button once to pause, 

and press the button twice to stop completely.

Do not connect USB charging device to the USB connection port
of the player, because it may cause damage to the product.

REV.MODE

TIMER 

SLEEP REP 

A-B REPEAT 

MO/ST 

CD SYNC 

DISPLAY 

TAPE 

PTY 

RDS 

DIMMER

DEMO

TIMER/CLOCK 

PROGRAM/SET 

ON/OFF 

2,3,5

4

4

1

REV.MODE

TIMER 

SLEEP REP 

A-B REPEAT 

MO/ST 

CD SYNC 

DISPLAY 

TAPE 

PTY 

RDS 

DIMMER

DEMO

TIMER/CLOCK 

PROGRAM/SET 

ON/OFF 

USB

CLOSE

USB

2

6

Selecting a Track from USB Device

You can select a desired directory and an MP3 file during the play or
when it stopped.

Before you begin!

Connect the external USB storage device to your player.
Select USB function by using the USB button.

Press the 

TUNING/ALBUM

buttons to move the directory.

Each time you press the button, it will move to the directory before
or after and play.
This function works only in the remote control.

If you want to move the file, press the 

button shortly.

It moves the file within the directory.
If you press the 

button more times than the number of

the files in the directory, it will move over to the next directory.

+10

VOLUME

P.SOUND

EQ

TUNING MODE

USB/MP3-CD/CD 

MUTE

TUNING/

ALBUM

USB/MP3-CD/CD 

To skip next 10 tracks

Before you begin!

Connect the external USB storage device to your player.
Select USB function by using the USB button.

Press the 

+10

button on the remote control shortly during the play.

A track that is 10 tracks after the current track plays.

Example:

If you want to select 43rd track while 15th track is playing, press
the +10 button 3 times and then press the 

button 3 times.

15 

20 

30 

40 

41 

42 

43

+10

+10

+10

+10

P.SOUND

EQ

TUNING MODE

+10

MM-T8(GB)-5  4/24/06 16:1912:0  Page 14

Summary of Contents for MM-T8

Page 1: ...Instruction Manual MICRO COMPONENT AUDIO SYSTEM MP3 WMA CD CD R RW PLAY BACK MM T8 MM T8 GB 5 4 24 06 16 1812 0 Page 1 ...

Page 2: ... 16 To use Last Memory function 16 TUNER Searching for and Storing the Radio Stations 17 Selecting a Stored Station 17 Improving Radio Reception 17 About RDS broadcasting 18 About RDS DISPLAY function 18 PTY Program Type indication and PTY SEARCH function 19 TAPE DECK Listening to a Cassette 20 Selecting the Cassette Playback Mode 20 Recording a Compact Disc 21 Recording a Radio Program 21 OTHER F...

Page 3: ...SB 30 TAPE 31 AUX 1 STANDBY ON 2 CD SYNCHRO REC PAUSE 3 USB JACK 4 HEADPHONE JACK CONNECTOR 5 SEARCH FUNCTION BUTTONS TUNING MODE OR STOP BUTTON 6 EQ 7 CD DOOR OPEN CLOSE 8 POWER SOUND 9 USB AUX 10 FUNCTIONS MP3 CD CD TUNER TAPE 11 VOLUME CONTROL 12 MULTI JOG PUSH ENTER 13 PUSH EJECT CASSETTE DOOR OPEN CLOSE 1 1 2 3 4 5 7 6 8 9 10 11 12 13 2 3 4 5 6 7 16 8 9 10 11 12 13 14 15 30 29 28 27 26 25 24 ...

Page 4: ...e sure that both speakers are placed at an equal distance above the floor Where to Install Your Micro Component System Connecting your System to the Power Supply 2 GB 6 Rear Panel View 1 Voltage 2 Loudspeaker Connector Terminals 3 AUX Input 4 FM Aerial Connector Terminal 5 AM Aerial Connector Terminals Inserting Remote Control Batteries Insert or replace remote control batteries when you Purchase ...

Page 5: ... In addition you need an RCA connection cable Set the system to standby mode and disconnect it and the external source from the main socket Connect the audio cable to the rear of the micro component system Connect the To the connector marked Red jack R right White jack L left For optimum sound quality do not invert the right and left channels Plug the system back into the main socket and press to ...

Page 6: ...nit Select the CD function by pressing MP3 CD CD button Press the Open Close button Result The compartment opens Place your disc in the compartment with the label on the disc facing upwards Close the compartment by pressing the Open Close button again Press the MP3 CD CD button Your CD Player will take a few moments to scan through all the tracks recorded on a particular MP3 WMA CD The English nam...

Page 7: ... you want to finish the Repeat playback press REP A B REPEAT A B Function This function is not available during playback of an MP3 WMA CD 1 2 3 4 VOLUME REV MODE USB MP3 CD CD SLEEP REP A B REPEAT MO ST CD SYNC DISPLAY TAPE PTY RDS DIMMER DEMO MUTE TUNING ALBUM Last Memory Function This function is only available during playback of an MP3 WMA CD When CD playback is selected again after your CD pla...

Page 8: ...etters Delay When selecting USB function depending of the speed of the external USB storage device reading READ IN internal information can take several minutes When playing a USB device recording or finding next track may introduce some delay Especially with a mass storage device such as HDD depending on the type and the number of files the delay might be several minutes Even with the external US...

Page 9: ...NING MODE station Manually One or more times until MANUAL is displayed Automatically One or more times until AUTO is displayed PRESET function is explained in detail in the section Selecting a Stored Station on Select the station to be stored by Pressing or buttons on the front panel or or buttons on the remote control to increase or decrease the frequency respectively To scroll through the freque...

Page 10: ...a System function which enables for the various information such as broadcasting station radio text time and 30 types of programs News Rock Classic etc to be received from the FM RDS station together with normal radio signal Press the button Receive the FM radio See the radio receiving method on the page 17 FM and frequency are shown on the display If the received station transfers the RDS informa...

Page 11: ...music being played To stop recording press button Synchronised recording Funcation is available for CD only Synchronised recording 1 2 3 4 5 6 1 2 Direct recording Recording a Compact Disc 4 6 1 4 2 Load a compact disc Press the OPEN CLOSE button to open the CD door Insert a CD and press the OPEN CLOSE button to close the CD door Press the MP3 CD CD button Use the CD selection buttons to select th...

Page 12: ... a Set the hour by pressing or button b Press PROGRAM SET Result The minutes flash c Set the minutes by pressing or button d Press PROGRAM SET Result OFF TIME is displayed instead of the equalizer symbols for a few seconds followed by any switch off time already set you can now set the timer switch off time Set the timer switch off time a Set the hour by pressing or button b Press PROGRAM SET Resu...

Page 13: ...or any extended period Leaking batteries can cause serious damage to the remote control When using headphones take care not to listen at excessive volumes Extended use of headphones at high volumes will lead to hearing damage Do not place heavy items on the main lead Main cable damage can lead to damage of the equipment fire hazard and can cause electric shock Do not remove any equipment panels Th...

Page 14: ... tape to the discs and do not write on the label Clean them with a special purpose cloth Store your compact discs in a clean place out of direct sunlight where they will not be exposed to high temperatures Always use compact discs marked Precautions When Using Compact Discs Before Contacting the After Sales Service Precautions When Using Audio Cassettes COMPACT DIGITAL AUDIO Problem The system doe...

Page 15: ...m other types of wastes and recycle it responsibly to promote the sustainable reuse of material resources Household users should contact either the retailer where they purchased this product or their local government office for details of where and how they can take this item for environmentally safe recycling Business users should contact their supplier and check the terms and conditions of the p...

Reviews: