background image


 English

23

O

v

en use

Checking that your oven is operating correctly 

The following simple procedure enables you to check that your oven is working correctly 
at all times. If you are in doubt, refer to the section entitled “Troubleshooting” on the page 
43 to 47.

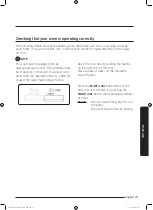
Press the 

START/+30s

 button and set the 

time to 4 or 5 minutes, by pressing the 

START/+30s

 button the appropriate number 

of times.

Result:


The oven heats the water for 4 or 
5 minutes.  
The water should then be boiling.

NOTE

The oven must be plugged into an 
appropriate wall socket. The turntable must 
be in position in the oven. If a power level 
other than the maximum (100 % - 1000 W) 
is used, the water takes longer to boil.

Open the oven door by pulling the handle 
on the right side of the door. 
Place a glass of water on the turntable. 
Close the door.

MS28J5215AS_EF_DE68-04333B-00_EN.indd   23

2015-01-20     2:16:19

Summary of Contents for MS28J5215 series

Page 1: ...pport CYPRUS 8009 4000 only from landline toll free www samsung com gr support GREECE 80111 SAMSUNG 80111 726 7864 only from land line 30 210 6897691 from mobile and land line LUXEMBURG 261 03 710 www samsung com support NETHERLANDS 0900 SAMSUNG 0900 7267864 0 10 Min www samsung com nl support NORWAY 815 56480 www samsung com no support PORTUGAL 808 20 7267 www samsung com pt support SPAIN 0034902...

Page 2: ...15 Please be advised that the Samsung warranty does NOT cover service calls to explain product operation correct improper installation or perform normal cleaning or maintenance MS28J5215AS_EF_DE68 04333B 00_EN indd 1 2015 01 20 2 16 13 ...

Page 3: ...erating correctly 23 Cooking Reheating 24 Setting the time 25 Power levels and time variations 26 Adjusting the cooking time 26 Stopping the cooking 27 Setting the energy save mode 27 Using the healthy cooking features 28 Using the my plate features 31 Using the power defrost features 32 Using the soften melt features 34 Using the plate warming features 36 Using the deodorisation features 38 Using...

Page 4: ... English 3 Contents Cookware guide 41 Troubleshooting 43 Troubleshooting 43 Information code 47 Technical specifications 48 MS28J5215AS_EF_DE68 04333B 00_EN indd 3 2015 01 20 2 16 13 ...

Page 5: ...ul cooking tips Cooking tips The following symbols are used in this User Manual WARNING Hazards or unsafe practices that may result in severe personal injury or death CAUTION Hazards or unsafe practices that may result in minor personal injury or property damage NOTE Useful tips recommendations or information that helps users manipulate the product Using this user manual MS28J5215AS_EF_DE68 04333B...

Page 6: ...ves the removal of a cover which gives protection against exposure to microwave energy WARNING Liquids and other foods must not be heated in sealed containers since they are liable to explode This appliance is intended to be used in household only and it is not intended to be used such as staff kitchen areas in shops offices and other working environments farm houses by clients in hotels motels an...

Page 7: ...on The microwave oven is intended for heating food and beverages Drying of food or clothing and heating of warming pads slippers sponges damp cloth and similar may lead to risk of injury ignition or fire If smoke is emitted observed switch off or unplug the appliance and keep the door closed in order to stifle any flames WARNING Microwave heating of beverages can result in delayed eruptive boiling...

Page 8: ... for their safety Children should be supervised to ensure that they do not play with the appliance If the supply cord is damaged it must be replaced by the manufacturer its service agent or similarly qualified persons in order to avoid a hazard The appliance should not be cleaned with a water jet This oven should be positioned proper direction and height permitting easy access to cavity and contro...

Page 9: ...n WARNING Accessible parts may become hot during use Young children should be kept away A steam cleaner is not to be used WARNING Ensure that the appliance is switched off before replacing the lamp to avoid the possibility of electric shock Do not use harsh abrasive cleaners or sharp metal scrapers to clean the oven door glass since they can scratch the surface which may result in shattering of th...

Page 10: ...ces are not intended to be operated by means of an external timer or separate remote control system General safety WARNING Only qualified staff should be allowed to modify or repair the appliance Do not heat liquids and other food in sealed containers for microwave function For your safety do not use high pressure water cleaners or steam jet cleaners Do not install this appliance near heater infla...

Page 11: ... a damaged power plug damaged power cord or loose wall socket When the power plug or power cord is damaged contact your nearest service centre Do not pour or directly spray water onto the oven Do not place objects on the oven inside or on the door of the oven Do not spray volatile material such as insecticide onto the surface of the oven Do not store flammable materials in the oven Take special ca...

Page 12: ...Also do not heat airtight or vacuum sealed bottles jars containers nuts inshells tomatoes etc Do not cover the ventilation slots with cloth or paper They may catch fire as hot air escapes from the oven The oven may also overheat and switch itself off automatically and will remain off until it cools sufficiently Always use oven mitts when removing a dish from the oven to avoid unintentional burns S...

Page 13: ...damage to the unit and or damage to or loss of the accessory was caused by the customer Items this stipulation covers include A A dented scratched or broken door handle out panel or control panel B A broken or missing tray guide roller coupler or wire rack Use this appliance only for its intended purpose as described in this instruction manual Warnings and Important Safety Instructions in this man...

Page 14: ...es with separate collection systems This marking on the product accessories or literature indicates that the product and its electronic accessories e g charger headset USB cable should not be disposed of with other household waste at the end of their working life To prevent possible harm to the environment or human health from uncontrolled waste disposal please separate these items from other type...

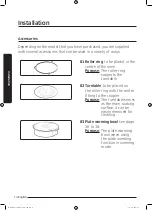
Page 15: ...f the oven Purpose The roller ring supports the turntable 02 Turntable to be placed on the roller ring with the centre fitting to the coupler Purpose The turntable serves as the main cooking surface it can be easily removed for cleaning 03 Plate warming bowl see page 36 to 38 Purpose The plate warming bowl when using the plate warming function in warming mode MS28J5215AS_EF_DE68 04333B 00_EN indd ...

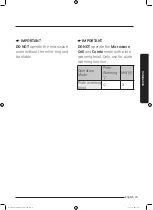
Page 16: ...ithout the roller ring and turntable IMPORTANT DO NOT operate the Microwave Grill and Combi mode with plate warming bowl Only use for plate warming function Operation Mode Plate Warming MW Plate warming bowl O X MS28J5215AS_EF_DE68 04333B 00_EN indd 15 2015 01 20 2 16 16 ...

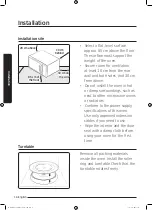
Page 17: ...such as next to other microwave ovens or radiators Conform to the power supply specifications of this oven Use only approved extension cables if you need to use Wipe the interior and the door seal with a damp cloth before using your oven for the first time Remove all packing materials inside the oven Install the roller ring and turntable Check that the turntable rotates freely Turntable 10 cm behi...

Page 18: ... of the oven Rinse and dry well To remove stubborn impurities with bad smells from inside the oven 1 With an empty oven put a cup of diluted lemon juice on the centre of the turntable 2 Heat the oven for 10 minutes at max power 3 When the cycle is complete wait until the oven cools down Then open the door and clean the cooking chamber To clean inside swing heater models To clean the upper area of ...

Page 19: ... you encounter a problem with hinges sealing and or the door contact a qualified technician or a local Samsung service centre for technical assistance If you want to replace the light bulb contact a local Samsung service centre Do not replace it yourself If you encounter a problem with the outer housing of the oven first unplug the power cord from the power source and then contact a local Samsung ...

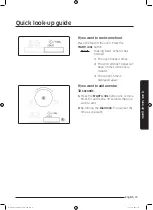
Page 20: ...1 The oven beeps 4 times 2 The end reminder signal will beep 3 times once every minute 3 The current time is displayed again If you want to add an extra 30 seconds 1 Press the START 30s button one or more times for each extra 30 seconds that you wish to add 2 By turning the Dial Knob You can set the time as you want 1 2 MS28J5215AS_EF_DE68 04333B 00_EN indd 19 2015 01 20 2 16 18 ...

Page 21: ...ures Oven 01 02 03 04 05 08 09 06 07 10 01 Door handle 04 Light 07 Coupler 02 Door 05 Door latches 08 Roller ring 03 Ventilation holes 06 Turntable 09 Safety interlock holes 10 Control panel MS28J5215AS_EF_DE68 04333B 00_EN indd 20 2015 01 20 2 16 18 ...

Page 22: ...Melt Button 05 Microwave Button 06 Plate Warming Button 07 Deodorisation Button 08 Child Lock Button 09 Turntable On Off Button 10 Dial Knob Weight Serving Time 11 Select Clock Button 12 Stop Eco Button 13 Start 30s Button 05 09 10 11 12 13 06 01 02 03 04 07 08 MS28J5215AS_EF_DE68 04333B 00_EN indd 21 2015 01 20 2 16 18 ...

Page 23: ...e microwaves are absorbed by the food up to a depth of about 1 inch 2 5 cm Cooking then continues as the heat is dissipated within the food 3 Cooking times vary according to the container used and the properties of the food Quantity and density Water content Initial temperature refrigerated or not IMPORTANT As the centre of the food is cooked by heat dissipation cooking continues even when you hav...

Page 24: ...ssing the START 30s button the appropriate number of times Result The oven heats the water for 4 or 5 minutes The water should then be boiling NOTE The oven must be plugged into an appropriate wall socket The turntable must be in position in the oven If a power level other than the maximum 100 1000 W is used the water takes longer to boil Open the oven door by pulling the handle on the right side ...

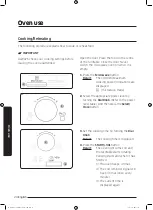
Page 25: ...er level by turning the Dial Knob Refer to the power level table And then press the Select Clock button 3 Set the cooking time by turning the Dial Knob Result The cooking time is displayed 4 Press the START 30s button Result The oven light comes on and the turntable starts rotating Cooking starts and when it has finished 1 The oven beeps 4 times 2 The end reminder signal will beep 3 times once eve...

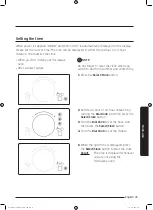
Page 26: ...o start the clock Result The time is displayed whenever you are not using the microwave oven Setting the time When power is supplied 88 88 and then 12 00 is automatically displayed on the display Please set the current time The time can be displayed in either the 24 hour or 12 hour notation You must set the clock 1 5 4 3 2 When you first install your microwave oven After a power failure NOTE Do no...

Page 27: ...crease cooking time turn to right and to decrease cooking time turn to left Power levels and time variations The power level function enables you to adapt the amount of energy dissipated and thus the time required to cook or reheat your food according to its type and quantity You can choose between six power levels Power level Percentage Output FULL 100 1000 W HIGH 85 850 W MEDIUM HIGH 60 600 W ME...

Page 28: ...the cooking settings press the STOP ECO button again Setting the energy save mode The oven has an energy save mode Press the STOP ECO button Result Display off To remove energy save mode open the door or press the STOP ECO button and then display shows current time The oven is ready for use NOTE Auto energy saving function If you do not select any function when appliance is in the middle of settin...

Page 29: ...o the pre programmed setting selected 1 The oven beeps 4 times 2 The end reminder signal will beep 3 times once every minute 3 The current time is displayed again Using the healthy cooking features The Healthy Cooking features has 16 pre programmed cooking times You do not need to set either the cooking times or the power level You can adjust the size of the serving by turning the Dial Knob 2 1 4 ...

Page 30: ...ach 150 g Rinse and clean spinach Put into a glass bowl with lid Do not add water Put bowl in the centre of turntable Cook covered Stir after cooking Stand for 1 2 minutes 1 5 Corn on the Cob 200 g Rinse and clean corn on the cobs and put into an oval glass dish Cover with microwave cling film and pierce film Stand for 1 2 minutes 1 6 Peeled Potatoes 250 g Wash and peel the potatoes and cut into a...

Page 31: ...minutes 2 3 Fresh Fish Fillets 300 g 2 pcs Rinse fish and put on a ceramic plate add 1 tbsp lemon juice Cover with microwave cling film Pierce film Put dish on turntable Stand for 1 2 minutes 2 4 Fresh Salmon Fillets 300 g 2 pcs Rinse fish and put on a ceramic plate add 1 tbsp lemon juice Cover with microwave cling film Pierce film Put dish on turntable Stand for 1 2 minutes 2 5 Fresh Prawns 250 g...

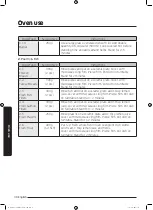
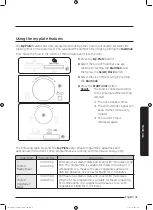
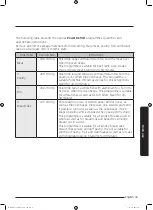
Page 32: ...gnal will beep 3 times once every minute 3 The current time is displayed again 2 1 4 3 The following table presents the My Plate auto reheat programmes quantities and appropriate instructions Those programmes are running with microwave energy only Code Food Serving Size Instructions 1 Chilled Ready Meal 300 350 g 400 450 g Put meal on a ceramic plate and cover with microwave cling film This progra...

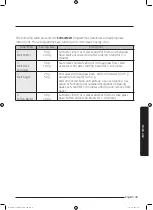
Page 33: ...t the size of the serving by turning the Dial Knob Refer to the table on the side 4 Press the START 30s button Result Defrosting begins The oven beeps through defrosting to remind you to turn the food over 5 Press the START 30s button again to finish defrosting Result 1 The oven beeps 4 times 2 The end reminder signal will beep 3 times once every minute 3 The current time is displayed again 2 1 5 ...

Page 34: ... 20 60 minutes 3 Fish 200 1500 g Shield the tail of a whole fish with aluminium foil Turn the fish over when the oven beeps This programme is suitable for whole fishes as well as for fish fillets Stand for 20 50 minutes 4 Bread Cake 125 1000 g Put bread on a piece of kitchen paper and turn over as soon as the oven beeps Place cake on a ceramic plate and if possible turn over as soon as the oven be...

Page 35: ...t button 2 Select the type of food that you are cooking by turning the Dial Knob And then press the Select Clock button 3 Select the size of the serving by turning the Dial Knob Refer to the table on the side 4 Press the START 30s button Result The food is cooked according to the preprogrammed setting selected 1 The oven beeps 4 times 2 The end reminder signal will beep 3 times once every minute 3...

Page 36: ... g 100 g Grate dark chocolate and put in small glass bowl Melt uncovered Stir after melting Stand for 1 2 minutes 3 Melt Sugar 25 g 50 g Put sugar on small glass bowl Add 10 ml water for 25 g and add 20 ml water for 50 g Melt uncovered Take out carefully use oven gloves Use spoon or fork and pour caramel decorations on baking paper Let stand for 10 minutes until dry and remove from paper 4 Soften ...

Page 37: ...e warming features You can serve perfectly warmed dishes with the plate warming feature Use this function to warm plates a hot or comfortable temperature You can select warming temperature either hot or mild by turning the Dial Knob Refer to the previous page for instructions 1 Hot 2 Mild Recommend Menu Hot Lasagne Soup Gratin Casserole Pizza Steak Well done Bacon Fish dishes Dry cakes Mild Pie Br...

Page 38: ...rning the Dial Knob 1 Hot 2 Mild 7 Press the START 30s button Result The food is cooked according to the preprogrammed setting selected 1 The oven beeps 4 times 2 The end reminder signal will beep 3 times once every minute 3 The current time is displayed again 5 6 7 MS28J5215AS_EF_DE68 04333B 00_EN indd 37 2015 01 20 2 16 24 ...

Page 39: ...g function in Warming mode Operation Mode Plate Warming MW Plate warming bowl O X Using the deodorisation features Use this features after cooking odorous food or when there is a lot of smoke in the oven interior First clean the oven interior Press the Deodorisation button after you have finished cleaning As soon as you press the Deodorisation button the operation will start automatically when it ...

Page 40: ...n enables you to use large dishes which fill the whole oven by stopping the turntable from rotating only manual cooking mode 1 Press the Turntable On Off button Result The turntable will not rotate 2 To switch the turntable rotating back on press the Turntable On Off button again Result The turntable will rotate NOTE This Turntable On Off button is available only during cooking 2 1 IMPORTANT The r...

Page 41: ... Press the START 30s and STOP ECO button at the same time Result The oven does not beep to indicate the end of a function 2 To switch the beeper back on press the START 30s and STOP ECO button again at the same time Result The oven operates normally 2 1 MS28J5215AS_EF_DE68 04333B 00_EN indd 40 2015 01 20 2 16 26 ...

Page 42: ... plate Do not preheat for more than 8 minutes China and earthenware Porcelain pottery glazed earthenware and bone china are usually suitable unless decorated with a metal trim Disposable polyester cardboard dishes Some frozen foods are packaged in these dishes Fast food packaging Polystyrene cups containers Can be used to warm food Overheating may cause the polystyrene to melt Paper bags or newspa...

Page 43: ...ome other plastics may warp or discolour at high temperatures Do not use Melamine plastic Cling film Can be used to retain moisture Should not touch the food Take care when removing the film as hot steam will escape Freezer bags Only if boilable or oven proof Should not be airtight Prick with a fork if necessary Wax or grease proof paper Can be used to retain moisture and prevent spattering Recomm...

Page 44: ... Remove the foreign matter and try again The oven stops while in operation The user has opened the door to turn food over After turning over the food press the Start button again to start operation The power turns off during operation The oven has been cooking for an extended period of time After cooking for an extended period of time let the oven cool The cooling fan is not working Listen for the...

Page 45: ...s being cooked or improper cookware is being used Put one cup of water in a microwave safe container and run the microwave for 1 2 minutes to check whether the water is heated Reduce the amount of food and start the function again Use a cooking container with a flat bottom Heating is weak or slow The oven may not work too much food is being cooked or improper cookware is being used Put one cup of ...

Page 46: ...ation The oven is not level The oven is installed on an uneven surface Make sure the oven is installed on flat stable surface There are sparks during cooking Metal containers are used during the oven thawing functions Do not use metal containers When power is connected the oven immediately starts to work The door is not properly closed Close the door and check again There is electricity coming fro...

Page 47: ...ating The microwave oven is designed to operate by pressing the 30sec button when it was not operating Turntable While turning the turntable comes out of place or stops turning There is no roller ring or the roller ring is not properly in place Install the roller ring and then try again The turn table drags while turning The roller ring is not properly in place there is too much food or the contai...

Page 48: ...here is water on the surface around key If it occurs again turn off the microwave oven over 30 seconds and try setting again If it appears again call your local SAMSUNG Customer Care Centre NOTE If the suggested solution does not solve the problem contact your local SAMSUNG Customer Care Centre MS28J5215AS_EF_DE68 04333B 00_EN indd 47 2015 01 20 2 16 26 ...

Page 49: ... are thus subject to change without notice Model MS28J5215 Power source 230 V 50 Hz AC Power consumption Microwave 1500 W Output power 100 W 1000 W 7 levels IEC 705 Operating frequency 2450 MHz Dimensions W x H x D Outside Oven cavity 517 x 297 x 428 mm 357 x 255 x 357 mm Volume 28 liter Weight Net 14 5 kg approx MS28J5215AS_EF_DE68 04333B 00_EN indd 48 2015 01 20 2 16 27 ...

Page 50: ...Memo MS28J5215AS_EF_DE68 04333B 00_EN indd 49 2015 01 20 2 16 27 ...

Page 51: ...Memo MS28J5215AS_EF_DE68 04333B 00_EN indd 50 2015 01 20 2 16 27 ...

Page 52: ...Memo MS28J5215AS_EF_DE68 04333B 00_EN indd 51 2015 01 20 2 16 27 ...

Reviews: