background image

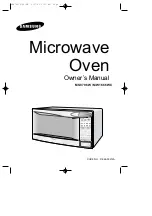
Microwave 

Oven

Owner’s Manual

;;;;;;;;;;;;;;;;;;;;;;;;;;;;;;;;;;;;;;;;;;;;;;;;;;;;;;;;;;;;;;;;;;;;

;;;;;;;;;;;;;;;;;;;;;;;;;;;;;;;;;;;;;;;;;;;;;;;;;;;;;;;;;;;;;;;;;;;;

;;;;;;;;;;;;;;;;;;;;;;;;;;;;;;;;;;;;;;;;;;;;;;;;;;;;;;;;;;;;;;;;;;;;

;;;;;;;;;;;;;;;;;;;;;;;;;;;;;;;;;;;;;;;;;;;;;;;;;;;;;;;;;;;;;;;;;;;;

;;;;;;;;;;;;;;;;;;;;;;;;;;;;;;;;;;;;;;;;;;;;;;;;;;;;;;;;;;;;;;;;;;;;

;;;;;;;;;;;;;;;;;;;;;;;;;;;;;;;;;;;;;;;;;;;;;;;;;;;;;;;;;;;;;;;;;;;;

;;;;;;;;;;;;;;;;;;;;;;;;;;;;;;;;;;;;;;;;;;;;;;;;;;;;;;;;;;;;;;;;;;;;

;;;;;;;;;;;;;;;;;;;;;;;;;;;;;;;;;;;;;;;;;;;;;;;;;;;;;;;;;;;;;;;;;;;;

;;;;;;;;;;;;;;;;;;;;;;;;;;;;;;;;;;;;;;;;;;;;;;;;;;;;;;;;;;;;;;;;;;;;

;;;;;;;;;;;;;;;;;;;;;;;;;;;;;;;;;;;;;;;;;;;;;;;;;;;;;;;;;;;;;;;;;;;;

;;;;;;;;;;;;;;;;;;;;;;;;;;;;;;;;;;;;;;;;;;;;;;;;;;;;;;;;;;;;;;;;;;;;

;;;;;;;;;;;;;;;;;;;;;;;;;;;;;;;;;;;;;;;;;;;;;;;;;;;;;;;;;;;;;;;;;;;;

;;;;;;;;;;;;;;;;;;;;;;;;;;;;;;;;;;;;;;;;;;;;;;;;;;;;;;;;;;;;;;;;;;;;

;;;;;;;;;;;;;;;;;;;;;;;;;;;;;;;;;;;;;;;;;;;;;;;;;;;;;;;;;;;;;;;;;;;;

;;;;;;;;;;;;;;;;;;;;;;;;;;;;;;;;;;;;;;;;;;;;;;;;;;;;;;;;;;;;;;;;;;;;

;;;;;;;;;;;;;;;;;;;;;;;;;;;;;;;;;;;;;;;;;;;;;;;;;;;;;;;;;;;;;;;;;;;;

;;;;;;;;;;;;;;;;;;;;;;;;;;;;;;;;;;;;;;;;;;;;;;;;;;;;;;;;;;;;;;;;;;;;

;;;;;;;;;;;;;;;;;;;;;;;;;;;;;;;;;;;;;;;;;;;;;;;;;;;;;;;;;;;;;;;;;;;;

;;;;;;;;;;;;;;;;;;;;;;;;;;;;;;;;;;;;;;;;;;;;;;;;;;;;;;;;;;;;;;;;;;;;

;;;;;;;;;;;;;;;;;;;;;;;;;;;;;;;;;;;;;;;;;;;;;;;;;;;;;;;;;;;;;;;;;;;;

;;;;;;;;;;;;;;;;;;;;;;;;;;;;;;;;;;;;;;;;;;;;;;;;;;;;;;;;;;;;;;;;;;;;

;;;;;;;;;;;;;;;;;;;;;;;;;;;;;;;;;;;;;;;;;;;;;;;;;;;;;;;;;;;;;;;;;;;;

;;;;;;;;;;;;;;;;;;;;;;;;;;;;;;;;;;;;;;;;;;;;;;;;;;;;;;;;;;;;;;;;;;;;

;;;;;;;;;;;;;;;;;;;;;;;;;;;;;;;;;;;;;;;;;;;;;;;;;;;;;;;;;;;;;;;;;;;;

;;;;;;;;;;;;;;;;;;;;;;;;;;;;;;;;;;;;;;;;;;;;;;;;;;;;;;;;;;;;;;;;;;;;

;;;;;;;;;;;;;;;;;;;;;;;;;;;;;;;;;;;;;;;;;;;;;;;;;;;;;;;;;;;;;;;;;;;;

;;;;;;;;;;;;;;;;;;;;;;;;;;;;;;;;;;;;;;;;;;;;;;;;;;;;;;;;;;;;;;;;;;;;

;;;;;;;;;;;;;;;;;;;;;;;;;;;;;;;;;;;;;;;;;;;;;;;;;;;;;;;;;;;;;;;;;;;;

;;;;;;;;;;;;;;;;;;;;;;;;;;;;;;;;;;;;;;;;;;;;;;;;;;;;;;;;;;;;;;;;;;;;

;;;;;;;;;;;;;;;;;;;;;;;;;;;;;;;;;;;;;;;;;;;;;;;;;;;;;;;;;;;;;;;;;;;;

;;;;;;;;;;;;;;;;;;;;;;;;;;;;;;;;;;;;;;;;;;;;;;;;;;;;;;;;;;;;;;;;;;;;

;;;;;;;;;;;;;;;;;;;;;;;;;;;;;;;;;;;;;;;;;;;;;;;;;;;;;;;;;;;;;;;;;;;;

;;;;;;;;;;;;;;;;;;;;;;;;;;;;;;;;;;;;;;;;;;;;;;;;;;;;;;;;;;;;;;;;;;;;

;;;;;;;;;;;;;;;;;;;;;;;;;;;;;;;;;;;;;;;;;;;;;;;;;;;;;;;;;;;;;;;;;;;;

;;;;;;;;;;;;;;;;;;;;;;;;;;;;;;;;;;;;;;;;;;;;;;;;;;;;;;;;;;;;;;;;;;;;

;;;;;;;;;;;;;;;;;;;;;;;;;;;;;;;;;;;;;;;;;;;;;;;;;;;;;;;;;;;;;;;;;;;;

;;;;;;;;;;;;;;;;;;;;;;;;;;;;;;;;;;;;;;;;;;;;;;;;;;;;;;;;;;;;;;;;;;;;

;;;;;;;;;;;;;;;;;;;;;;;;;;;;;;;;;;;;;;;;;;;;;;;;;;;;;;;;;;;;;;;;;;;;

;;;;;;;;;;;;;;;;;;;;;;;;;;;;;;;;;;;;;;;;;;;;;;;;;;;;;;;;;;;;;;;;;;;;

;;;;;;;;;;;;;;;;;;;;;;;;;;;;;;;;;;;;;;;;;;;;;;;;;;;;;;;;;;;;;;;;;;;;

;;;;;;;;;;;;;;;;;;;;;;;;;;;;;;;;;;;;;;;;;;;;;;;;;;;;;;;;;;;;;;;;;;;;

;;;;;;;;;;;;;;;;;;;;;;;;;;;;;;;;;;;;;;;;;;;;;;;;;;;;;;;;;;;;;;;;;;;;

;;;;;;;;;;;;;;;;;;;;;;;;;;;;;;;;;;;;;;;;;;;;;;;;;;;;;;;;;;;;;;;;;;;;

;;;;;;;;;;;;;;;;;;;;;;;;;;;;;;;;;;;;;;;;;;;;;;;;;;;;;;;;;;;;;;;;;;;;

;;;;;;;;;;;;;;;;;;;;;;;;;;;;;;;;;;;;;;;;;;;;;;;;;;;;;;;;;;;;;;;;;;;;

;;;;;;;;;;;;;;;;;;;;;;;;;;;;;;;;;;;;;;;;;;;;;;;;;;;;;;;;;;;;;;;;;;;;

;;;;;;;;;;;;;;;;;;;;;;;;;;;;;;;;;;;;;;;;;;;;;;;;;;;;;;;;;;;;;;;;;;;;

;;;;;;;;;;;;;;;;;;;;;;;;;;;;;;;;;;;;;;;;;;;;;;;;;;;;;;;;;;;;;;;;;;;;

;;;;;;;;;;;;;;;;;;;;;;;;;;;;;;;;;;;;;;;;;;;;;;;;;;;;;;;;;;;;;;;;;;;;

;;;;;;;;;;;;;;;;;;;;;;;;;;;;;;;;;;;;;;;;;;;;;;;;;;;;;;;;;;;;;;;;;;;;

;;;;;;;;;;;;;;;;;;;;;;;;;;;;;;;;;;;;;;;;;;;;;;;;;;;;;;;;;;;;;;;;;;;;

;;;;;;;;;;;;;;;;;;;;;;;;;;;;;;;;;;;;;;;;;;;;;;;;;;;;;;;;;;;;;;;;;;;;

;;;;;;;;;;;;;;;;;;;;;;;;;;;;;;;;;;;;;;;;;;;;;;;;;;;;;;;;;;;;;;;;;;;;

MS8796W /

MW1666WC

CODE NO. : DE68-00212A

MS8796/9796-GB  9/27/00 3:21 AM  Page 1

Summary of Contents for MS8796W

Page 1: ...Microwave Oven Owner s Manual MS8796W MW1666WC CODE NO DE68 00212A MS8796 9796 GB 9 27 00 3 21 AM Page 1 ...

Page 2: ...e name of an authorized service center near you IMPORTANT SAFETY INSTRUCTIONS WARNING Some items like whole eggs and food in sealed containers may explode if heated in this oven Use this appliance only for its intended use as described in the manual Do not use corrosive chemicals or vapors in this appliance This type of oven is specifically designed to heat cook or dry food It is not designed for ...

Page 3: ... the oven door closed turn the oven off disconnect the power cord or shut off the power at the fuse or circuit breaker panel d Do not use the oven compartment for storage purposes Do not leave paper products cooking utensils or food in the oven when not in use Do not try to preheat oven or operate while empty Do not cook without the glass tray in place on the oven floor Food will not cook properly...

Page 4: ...cord is provided to reduce the risk of becoming entangled in or tripping over a longer cord Longer cord sets or extension cords are available and may be used if care is exercised in their use If a long cord or extension cord is used 1 The marked electrical rating of the cord set or extension cord should be at least as great as the electrical rating of the appliance 2 The extension cord must be a g...

Page 5: ...stage Cooking 13 Using the More Less Button 14 Adjusting the Volume 14 Using the Kitchen Timer 15 Setting the Child Protection Lock 15 Demonstration Mode 15 Cooking Instructions 16 Cooking Utensils 16 Testing Utensils 16 Cooking Techniques 17 General Tips 17 Auto Sensor Cook 18 Utensils Cover For Sensor Cooking 18 Important 18 Cooking Guides 19 20 Sensor Cooking Guide 21 22 Sensor Reheat Guide 22 ...

Page 6: ..._________ Serial Number _________________________ Date Purchased _________________________ Dealer _________________________ Setting Up Your Microwave Oven 1 Place the oven on a flat sturdy surface and plug the cord into a grounded outlet Once plugged in the display on your oven will show Make sure there is adequate ventilation for your oven by leaving at least four inches of space behind above and...

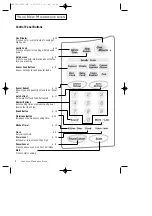
Page 7: ...the fea ture you are using Gentle Cook p 10 Press to set gentler cooking with reduced power Number Buttons Sets cooking times or amounts and power levels other than high Sound Button p 14 More Less Button p 14 Increases or decreases cooking time Kitchen Timer p 15 Start Press to start cooking Auto Defrost p 11 Sets weight of food to be defrosted Power Level p 13 Sets power to level other than high...

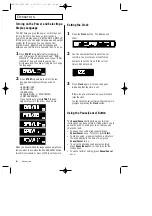
Page 8: ...ess the PAUSE CANCEL button to end this procedure or press CLOCK to set the clock Setting the Clock 1 Press the Clock button The display will show 2 Use the number buttons to enter the cur rent time You must press at least three numbers to set the clock If the current time is 5 00 enter 5 0 0 3 Press Clock again A colon will appear indicating that the time is set If there is a power interruption y...

Page 9: ...Cook button corre sponding to the food you are cooking Popcorn for example The display shows POPCORN and your microwave oven will begin cooking automatically OPERATION 9 OPERATION When cooking popcorn wait at least five minutes between each bag to avoid overheating the glass tray If you want to adjust the cooking time you can use the MORE LESS button See page 14 for more information Ifyouwanttoche...

Page 10: ...ute you wish to cook the food For example press it twice for two min utes The time will display and the oven starts automatically Add minutes to a program in progress by pressing the One Minute button for each minute you want to add Using the Gentle Cook Button This button is for slower gentler cooking with reduced power It is ideal for heat sensitive foods such as those containing egg yolks sour ...

Page 11: ... the Auto Defrost button repeatedly This increases the weight by 0 5 lb incre ments up to 6 0 lbs You can also use the number buttons to enter the weight of the food directly The oven calculates the defrosting time and starts automatically Twice during defrosting the oven will beep and the display will read TURN THE FOOD OVER 3 Press the Pause Cancel button open the oven door and turn the food ove...

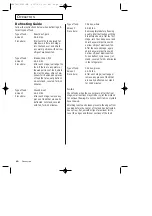
Page 12: ...s Procedure Remove giblets before freezing poultry Start defrosting with the breast side down After the first stage turn the chicken over and shield any warm portions with narrow strips of aluminum foil After the second stage again shield any warm portions with narrow strips of aluminum foil When defrost cycle is over let stand covered for 30 60 minutes in the refrigerator Type of food Chicken pie...

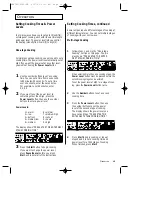
Page 13: ...Press the Start button to begin cooking If you want to change the power level press Pause Cancel before you press Start and reenter all of the instructions Setting Cooking Times continued Some recipes require different stages of cooking at different temperatures You can set multiple stages of cooking with your microwave Multi stage Cooking 1 Follow steps 1 and 2 in the One Stage Cooking section on...

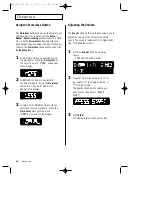
Page 14: ...tton twice The word LESS will appear in the display 3 To return to the NORMAL time set for an automatic cooking procedure Press the More Less button until the word NORMAL appears in the display Adjusting the Volume The Sound button on the microwave allows you to adjust the volume of the microwave s chime sound The sound is initially set to its highest set ting To change the volume 1 Press the Soun...

Page 15: ... PRESS START 3 Press the Start button The display shows LOCK then returns to the time of day At this point the microwave oven cannot be used until it is unlocked To unlock it repeat steps 1 3 above Demonstration Mode You can use the Demonstration Mode to see how your microwave oven operates without the oven heating 1 Press the 0 button The display shows PRESS 1 DEMO 2 CHILD LOCK 2 Press the 1 butt...

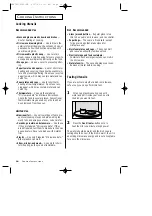
Page 16: ...porcelain and stoneware Use these if they are labeled Microwave Safe If they are not labeled test them to make sure they can be used safely Never use dishes with metallic trim Plastic Use only if labeled Microwave Safe Other plastics can melt Straw wicker and wood Use only for short term heating as they can be flammable Not Recommended Glass jars and bottles Regular glass is too thin to be used in...

Page 17: ...nd a moment before serv ing When heating baby food stir well and test the temperature before serving Adding Moisture Microwave energy is attracted to water molecules Food that is uneven in moisture content should be covered or allowed to stand so that the heat dis perses evenly Add a small amount of water to dry food to help it cook General Tips Dense foods such as potatoes take longer to heat tha...

Page 18: ...ooking time and power level When you cover a container with its lid or plas tic wrap during Sensor Cooking the Auto Sensor will detect the gases generated after the container has been saturated with steam Shortly before cooking ends the remaining cooking time will begin its count down This will be a good time for you to rotate or stir the food for even cooking if it is necessary Before auto sensor...

Page 19: ...ax paper Turn over when half of the cook ing time is up Cook until juices run clear and meat near the bone is no longer pink Let stand 5 10 min GUIDE for Cooking Poultry in Your Microwave Place poultry on a microwave safe roasting rack in a microwave safe dish Cover poultry with wax paper to prevent spattering Use aluminum foil to shield bone tips thin meat areas or areas that start to overcook Ch...

Page 20: ...nding time Standing time refers to the time necessary for dense large foods and vegetables to finish cooking after they come out of the oven A baked potato can stand on the counter for five minutes before cooking is completed while a dish of peas can be served immediately GUIDE for Cooking Eggs in Your Microwave Never cook eggs in the shell and never warm hard cooked eggs in the shell they can exp...

Page 21: ...range fresh vegetables in microwave safe ceramic glass or plastic dish and combine with 2 Tbs water For even cooking stir or turn vegetables according to instructions Let vegetables stand 3 minutes before serving Let oven cool for at least 5 minutes before using again Frozen Dinner 7 to 18 oz Remove packing from outer wrapping and follow box instructions for covering and standing Let oven cool for...

Page 22: ...efer after heating with SENSOR REHEAT continue heating using time and power Contents 3 4 oz meat poultry or fish up to 6 oz with bone 1 2 cup starch potatoes pasta rice etc 1 2 cup vegetables about 3 4 oz Casseroles Soups Sauces 1 to 4 servings Use only refrigerated foods Cover plate with lid or vented plastic wrap If food is not as hot as you prefer after heating with SENSOR REHEAT continue heati...

Page 23: ...ace on plate or on paper towel in oven Microwave at HIGH 10 for 2 to 4 minutes or use Sensor Reheat Sensor Recipes French Onion Soup 4 servings 3 tablespoons butter or margarine 3 cups about 3 medium sliced onions 3 cups beef broth 1 cup water 1 teaspoon Worcestershire sauce Salt pepper croutons grated parmesan cheese to taste 2 tablespoons brandy optional 1 Combine butter and onions in 3 quart ca...

Page 24: ...tes or use Sensor Fresh Vegetable Remove wrap immediately scatter olive slices attractively over all 3 Place butter or magarine in 1 cup glass mea sure and Microwave at HIGH 10 for 30 sec onds to 1 minute to melt Add oregano and lemon juice Pour over vegetables Sprinkle with parmesan cheese and serve Franks And Beans Casserole 4 to 6 servings 1 2 cup chopped onions 2 tablespoons butter or margarin...

Page 25: ...are posi tioned correctly Using your microwave causes TV or radio interference This is similar to the interference caused by other small appliances such as hair dryers Move your microwave further away from other appliances like your TV or radio Care and Cleaning Follow these instructions to clean and care for your oven Keep the inside of the oven clean Food parti cles and spilled liquids can stick...

Page 26: ... on how long an implied warranty lasts so the above limitations or exclusions may not apply to you This warranty gives you specific legal rights and you may also have other rights which vary from state to state APPENDIX 26 APPENDIX Warranty Information Limited Warranty for Original Purchaser This Samsung product is warranteed by Samsung Electronics America Inc hereafter referred to as SEA against ...

Page 27: ...pri ma una vez al botón PAUSE CANCEL Para detener el horno y borrar las instruc ciones para cocinar oprima dos veces al botón PAUSE CANCEL Para corregir un error de programación oprima una vez al botón PAUSE CANCEL y vuelva a programr las instrucciones Para cancelar un ajuste del cronómetro oprima una vez al botón PAUSE CANCEL Encendiendo el Horno y Seleccionando el Idioma del desPliegue Enchufe e...

Page 28: ...a cada minuto que desea cocinar Usando el Teclado de Cocina Sensor cook Selecione el botón Sensor cook POP CORN FROZEN DINNER etc apropiado para el tipo de comida que desea cocinar oprima este botón repetidamente para pro gramar el tamaño de la porción Ajustando el Tiempo de Cocinado Si desea ajustar el tiempo de cocinado mientras el horno está en operación opri ma el botón MORE LESS repetidamente...

Page 29: ... a SAMSUNG Authorized Service Center Along with this Statement the Original Limited Warranty Statement and a dated Bill of Sale as Proof of Purchase must be presented to the Service Center Transportation to and from the Service Center is the responsibility of the purchaser Conditions covered are limited only to manufacturing defects in material or workmanship and only those encountered in normal u...

Page 30: ...s un centre de réparation agréé SAMSUNG En plus de la présente garantie la garantie lim itée originale et une facture datée en tant que preuve d achat doivent être présentées au centre de réparation Le transport de l appareil au et à partir du centre de réparation demeure la responsabilité de l acheteur Les conditions couvertes ne sont limitées qu aux vices de matériaux et de fabrication dans des ...

Page 31: ...3 When prompted by oven display open oven door and turn food over Press START to resume defrosting cycle 1 Press SENSOR REHEAT repeatedly to select type of dish to reheat 2 To increase serving size press the corresponding number button 3 Press START to begin reheating cycle 1 Use number buttons to set cooking time 2 To set power level at other than HIGH press POWER LEVEL and use the number buttons...

Reviews: