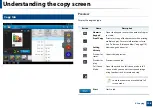
Understanding the copy screen
112
4. Copying
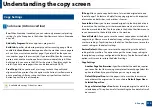
Reduce/Enlarge
The reduce/enlarge feature allows you print an image larger or smaller than the
original. Tap the icons on the screen to reduce a copy by 25 % to 99 %, or enlarge
a copy by 101 % to 400 %.
•
Auto:
Reduces or enlarges the copy based on the size of the output paper.
•
100%(
Original
)
:
Prints the copy at the same size as the original.
•
Custom:
Specifies a custom percentage (between 25% and 400%).
•
Adding a custom percentage preset
1
Set the custom percentage (between 25% and 400%).
2
Tap the
button, and then input the preset name.
3
Tap
OK
.
•
Editing or deleting a custom preset
1
Tap and hold the custom preset that you want to edit or delete.
2
Select
Edit
or
Delete
.
•
XY Custom:
Specifies custom XY values (between 25% and 400%).
•
Adding a custom XY preset
1
Set the custom XY values (between 25% and 400%).
2
Tap the
button, and then input the name of the preset.
3
Tap
OK
.
•
Editing or deleting a custom preset
1
Tap and hold the custom item what you want to edit or delete.
2
Select
Edit
or
Delete
.
Finishing
The Finishing menu allows you to set the print output options.
•
Skip Blank Pages:
Specifies whether to scan and print the blank pages in
the original.
•
Image Rotation:
Rotates the image in the output depending on the
scanned data and output paper size.
•
Sort:
Specifies whether to sort the copy job. For example, if you make 2
copies of a 3-page original, then the first copy of the complete 3-page
document will print followed by the second complete copy.
-
Collated:
Prints the output in sets to match the sequence of originals.
-
Uncollated:
Prints the output in stacks of individual pages.
•
Rotate:
Stacks the printouts in criss-crossed sets.

