139
5. Scan & Send(Scanning)
ID Send
4
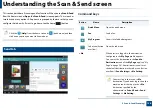
Command keys
5
ID Send
The ID Send menu allows you to scan and send 2-sided originals onto one sheet.
The machine scans one side of the original on the upper or left half of the sheet
and the other side on the lower or right half without reducing the size of the
original. You can use this feature to quickly scan IDs and send the image to an
SMB, FTP, or Email address or save it to the Box or a USB storage device.
The original must be placed on the scanner glass to use this feature.
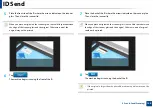
1
From the home or
Apps
screen, tap
Scan & Send
>
sub menu
(action overflow) >
ID Send
.
2
Tap the
From
field and input the sender’s information.
3
Select a destination using
(
Add Destination
),
+ Me
,
,
SMB
,
FTP
,
Box
,
USB
,
PC
or
(
Address book
).
4
If necessary, adjust the settings for the copy. Follow the instructions on
the control panel to adjust the
Image Layout
,
Original Size
,
Send Size
,
Align
,
File Name
,
File Format
and
Resolution
.
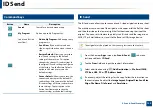
Button
Name
Description
Search
Search for a desired menu or app.
My Program
Add an app to My Program List.
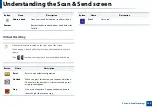
Sub menu (Action
overflow)
•
Add to My Program:
Add an app to my
program list.
•
Send Now:
If you want to send one
side, using this function when scan one
side.
•
Restore Default:
Allows you to restore
the ID send settings to the default
settings of the machine. This option
changes the current ID send settings to
the original ID send settings configured
at the factory. Tap the Restore Default
option in this menu to restore the
default settings.
•
Save as Default:
Allows you to save the
current send options as the default ID
send settings. After you save the default
ID send settings, all future send tasks use
these settings. Tap this option in the
Action Overflow menu to save the
current settings as the default settings.

