background image

Code No.: DE68-

3

2

6

5

4

9

8

7

0

1

Microwave Oven

Owner’s Manual

MW1030WA /  MW1030BA
MW1060WA / MW1060BA
MW1060SA /  MW1230WA
MW1230BA / MW1255WA
MW1255BA / MW1260WA
MW1260BA / MW1430WA
MW1430BA / MW1455WA 
MW1455BA / MW1460WA
MW1460BA / MW1660WA
MW1660BA / MW1960WA
MW1960BA 
 

XGt~XW]W~h†t~XY]W~hU”GGwˆŽŒGXGGzˆ›œ™‹ˆ SGqˆ•œˆ™ GY^SGYWWXGG\aY]Gwt

Exhibit 8

Summary of Contents for MW1030BA

Page 1: ...anual MW1030WA MW1030BA MW1060WA MW1060BA MW1060SA MW1230WA MW1230BA MW1255WA MW1255BA MW1260WA MW1260BA MW1430WA MW1430BA MW1455WA MW1455BA MW1460WA MW1460BA MW1660WA MW1660BA MW1960WA MW1960BA XGt XW W h t XY W hU GGw GXGGz SGq GY SGYWWXGG aY Gwt Exhibit 8 ...

Page 2: ...wing WARNING To reduce risk of burns electric shock fire personal injury or exposure to excessive microwave energy Read all safety instructions before using the appliance Read and follow the specific Precautions to Avoid Possible Exposure to Excessive Microwave Energy on this page This appliance must be grounded Connect only to properly grounded outlets See Important Grounding Instructions on page...

Page 3: ...the fuse or circuit breaker panel d Do not use the oven compartment for storage purposes Do not leave paper products cooking utensils or food in the oven when not in use Do not try to preheat oven or operate while empty Do not cook without the glass tray in place on the oven floor Food will not cook properly without the tray Do not defrost frozen beverages in narrow necked bottles The containers c...

Page 4: ...ord is provided to reduce the risk of becoming entangled in or tripping over a longer cord Longer cord sets or extension cords are available and may be used if care is exercised in their use If a long cord or extension cord is used 1 The marked electrical rating of the cord set or extension cord should be at least as great as the electrical rating of the appliance 2 The extension cord must be a gr...

Page 5: ...ook Buttons 12 Using the One Minute Button 13 Reheating Automatically 13 Operation 14 Defrosting Automatically 14 Setting Cooking Times Power Levels 14 One stage Cooking 14 Multi stage Cooking 15 Using the More Less Button 15 Adjusting the Volume 15 Using the Kitchen Timer 16 Demonstration Mode 16 Setting the Child Protection Lock 16 Cooking Instructions 17 Cooking Utensils 17 Testing Utensils 17 ...

Page 6: ..._________ Serial Number ________________________________ Date Purchased ________________________________ Dealer ________________________________ Setting Up Your Microwave Oven 1 Place the oven on a flat sturdy surface and plug the cord into a grounded outlet Once plugged in the display on your oven will show Make sure there is adequate ventilation for your oven by leaving at least four inches of s...

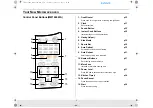
Page 7: ...o Defrost p 15 Sets weight of food to be defrosted 9 Auto Reheat p 11 Selects type of dish to be rebested 10 Number Buttons p 11 Sets cooking times or amants 11 More Less Increase or decrease cooking time 12 Power Level p 11 Press this pad to set power level other than high 13 Kitchen Timer p 14 14 Pause Cancel Press th pause oven or correct mistake 15 Start p 16 Press to start cooking 2 3 4 1 1 2...

Page 8: ...s Meals p 11 6 Sports Bar p 16 7 Number Buttons p 15 Sets cooking times or amounts 8 More Less p 11 Increase or decrease cooking time 9 Powel Level p 11 Press this pad to set power level other than high 10 Kitchen Timer 11 Clock p 11 Sets current time 12 Sound Button p 14 13 Pause Cancel Press th pause oven or correct mistake 14 Start p 16 Press to start cooking 2 3 1 5 1 2 3 4 5 6 8 7 9 0 6 8 12 ...

Page 9: ...ls p 11 6 Sports Bar p 16 7 Number Buttons p 15 Sets cooking times or amounts 8 More Less p 11 Increase or decrease cooking time 9 Powel Level p 11 Press this pad to set power level other than high 10 Kitchen Timer 11 Clock p 11 Sets current time 12 Sound Button p 14 13 Pause Cancel Press th pause oven or correct mistake 14 Start p 16 Press to start cooking 3 2 1 6 5 4 9 8 7 0 1 3 6 7 8 14 2 4 5 9...

Page 10: ...ts cooking times or amounts 7 More Less p 11 Increase or decrease cooking time 8 Auto Defrost p 11 Increase or decrease cooking time 9 Powel Level p 11 Sets weight of food to be defrosted 10 Kitchen Timer 11 Clock p 11 Sets current time 12 Sound Button p 14 13 Pause Cancel Press th pause oven or correct mistake 14 Start p 16 Press to start cooking 1 3 2 1 6 5 4 9 8 7 0 2 3 4 5 6 7 6 8 9 11 10 13 1...

Page 11: ... Use the number buttons to enter the current time You must press at least three numbers to set the clock If the current time is 5 00 enter 5 0 0 3 Press Clock again A colon will blink indicating that the time is set If there is a power interruption you will need to reset the clock You can check the current time while cooking is in progress by pressing the Clock button Using the Pause Cancel Button...

Page 12: ...pping and follow package instructions for covering and standing After cooking let stand 1 3 min On Lock Demo I On Lock Demo I Lock Demo II I On Lock Demo II I START ENTER COOK TIME TIME2 Kg g Oz Lbs QTY On Lock Demo I On Lock Demo I Lock Demo II I On Lock Demo II I START ENTER COOK TIME TIME2 Kg g Oz Lbs QTY Frozen Breakfast 2 4 oz 4 6 oz 6 8 oz Remove Package from outer wrapping and follow packag...

Page 13: ...r buttons to increase the serving size For example for three servings press the 3 button Refer to the Auto Reheat Chart below for the servings The display shows the number of servings you have selected 3 Press the Start button The display will show Cooking Time Auto Reheat Chart On Lock Demo I On Lock Demo I Lock Demo II I On Lock Demo II I START ENTER COOK TIME TIME2 Kg g Oz Lbs QTY TART ENTER CO...

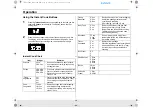
Page 14: ...up to two different stages of cooking each with its own time length and power level The power level lets you control the heating intensity from Warm 1 to High 0 One stage Cooking For simple one stage cooking you only need to set a cooking time The power level is automatically set at High If you want to set the power to any other level you must set it using the Power Level button 1 Use the number b...

Page 15: ...the More Less Button The More Less button allows you to adjust pre set cooking times It only works with Auto Recalentado and the Instant Cook buttons Use the More Less button only after you have already begun cooking with one of these procedures The More Less key cannot be used with the Baby Food key 1 To ADD more time to an automatic cooking procedure Press the More 9 button 2 To REDUCE the time ...

Page 16: ...es without the oven heating 1 Press the 0 button and then 1 button simultaneously To turn demo mode off repeat steps 1 above Setting the Child Protection Lock You can lock your microwave oven so it can t be used by unsupervised children 1 Press the 0 button and then 2 button stimultaneously At this point the microwave oven cannot be used until it is unlocked To unlock it repeat steps 1 above kg g ...

Page 17: ...rowave Safe If they are not labeled test them to make sure they can be used safely Never use dishes with metallic trim Plastic Use only if labeled Microwave Safe Other plastics can melt Straw wicker and wood Use only for short term heating as they can be flammable Not Recommended Glass jars and bottles Regular glass is too thin to be used in a microwave and can shatter Paper bags These are a fire ...

Page 18: ... or hot chocolate should be shaken or stirred when cooking is complete Let liquids stand a moment before serving When heating baby food stir well and test the temperature before serving Adding Moisture Microwave energy is attracted to water molecules Food that is uneven in moisture content should be covered or allowed to stand so that the heat disperses evenly Add a small amount of water to dry fo...

Page 19: ...x paper Turn over when cooking time is half up Let stand 10 min Pork Boneless or bone in Up to 4 lbs Cooking Time 10 14 min lbs for 160 F Well Done Power Level High 10 for first 5 min then Medium 5 Place roast fat side down on roasting rack Cover with vented plastic wrap Turn over when cooking time is half up Let stand 10 min Bacon 2 6 slices Cooking Time 2 slices 1 1 min 4 slices 3 3 min 6 slices...

Page 20: ...5 3 0 lbs After each stage rearrange the food If there are any warm or thawed portions of food shield them with narrow flat pieces of aluminum foil Remove any pieces of food that are nearly defrosted Let stand covered for 5 10 minutes Ground Meat 0 5 3 0 lbs After each stage remove any pieces of food that are nearly defrosted Let stand covered with foil for 5 10 minutes Whole Chicken 2 5 6 0 lbs R...

Page 21: ...eef Hamburger patties 4 oz each inch thick Meat Ioaf Sirloin steak to 1 inch thick Tenderloin steak 8 oz each 1 inch thick 2 patties 4 patties 1 to 2 lbs 1 to 2 4 2 3 min 3 5 min 20 25 min 4 5 min ib 3 4 min lb for 120 F Rare 4 6 min lb for 135 F Medium 6 8 min lb for 150 F Well Done HIGH 10 MEDIUM HIGH 7 MEDIUM HIGH 7 MEDIUM HIGH 7 MEDIUM HIGH 7 MEDIUM HIGH 7 6 8 min 8 10 min 8 min 8 10 min 8 10 ...

Page 22: ...er with wax paper Turn over after the cooking time Drain after microwaving Brush with melted butter before grilling Place directly on rack to grill Fish Fish Fillets inch thick Fish Fillets inch thick Fish steaks 1 inch thick Whole Fish 8 to 10 oz 1 lb 2 lbs 1 lb 1 to 2 lbs 3 4 min 6 8 min 4 5 min 4 6 min MEDIUM HIGH 7 MEDIUM HIGH 7 MEDIUM HIGH 7 MEDIUM HIGH 7 5 9 min 6 10 min 7 11 min 8 10 min 10...

Page 23: ...ed microwavable plastic wrap Whole unpeeled vegetables such as potatoes squash eggplant etc should have their skin pricked in several spots before cooking to prevent them from bursting For more even cooking stir or rearrange whole vegetables halfway through the cooking time Generally the denser the food the longer the standing time Standing time refers to the time necessary for dense large foods a...

Page 24: ...es Remove bay leaf before serving Makes 6 servings Broccoli and Cheese Casserole cup butter or margarine cup chopped onion 1 Tbs flour tsp salt tsp dry mustard 1 8 tsp pepper 1 cups milk cup chopped red pepper 8 oz 2 cups cheddar cheese shredded 1 pkg 9 10 oz frozen chopped broccoli thawed 4 cups cooked spiral shaped pasta 8 oz dry 1 In a 2 quart casserole cook butter and onion at High for 1 to 2 ...

Page 25: ...ur celery seed and pepper Cook at High until mixture boils 30 40 sec Stir in vinegar and cup water Cook at High until liquid boils and thickens slightly 1 2 min stir once Add bacon to dressing Pour dressing over potatoes Stir well Makes 6 servings Black Bean Soup 1 cup chopped onion 1 clove garlic minced 2 cans 15 oz each black beans drained 1 can 14 16 oz stewed tomatoes chopped 1 can 13 75 14 5 ...

Page 26: ... sure the turntable and roller ring are positioned correctly Using your microwave causes TV or radio interference This is similar to the interference caused by other small appliances such as hair dryers Move your microwave further away from other appliances like your TV or radio Care and Cleaning Follow these instructions to clean and care for your oven Keep the inside of the oven clean Food parti...

Page 27: ...2 D Oven Cavity Dimensions 137 32 W X 93 32 H X 1323 32 D Net Gross Weight 35 3 38 6 lbs Model Number MW1455WA MW1455BA Oven Cavity 1 4cuft Controls 10 power levels including defrost Timer 99 minutes 99 seconds Power Source 120 VAC 60 Hz Power Output 1200 Watts Outside Dimensions 2157 64 W X 1221 64 H X 1631 32 D Oven Cavity Dimensions 1449 64 W X 913 16 H X 161 16 D Net Gross Weight 38 8 42 3 lbs...

Page 28: ...ctions cleaning maintenance and environmental instructions that are covered and prescribed in the instruction book product removal and reinstallation problems caused by pest infestations and overheating or overcooking by user glass tray or turntable reduced magnetron power output related to normal aging SAMSUNG does not warrant uninterrupted or error free operation of the product THERE ARE NO EXPR...

Page 29: ...al Limited Warranty Statement and a dated Bill of Sale as Proof of Purchase must be presented to the Service Center Transportation to and from the Service Center is the responsibility of the purchaser Conditions covered are limited only to manufacturing defects in material or workmanship and only those encountered in normal use of the product Excluded but not limited to are any original specified ...

Page 30: ...rost 2 Enter weight of food by pressing AUTO DEFROST button repeatedly or using the number buttons 3 When prompted by beep Sound press Pause Cancel button and turn food over Press INICIO to resume defrosting cycle Auto Reheat 1 Press AUTO RECALENTADO repeatedly to select type of dish to reheat 2 To increase serving size press the corresponding number button 3 Press INICIO to begin reheating cycle ...

Reviews: