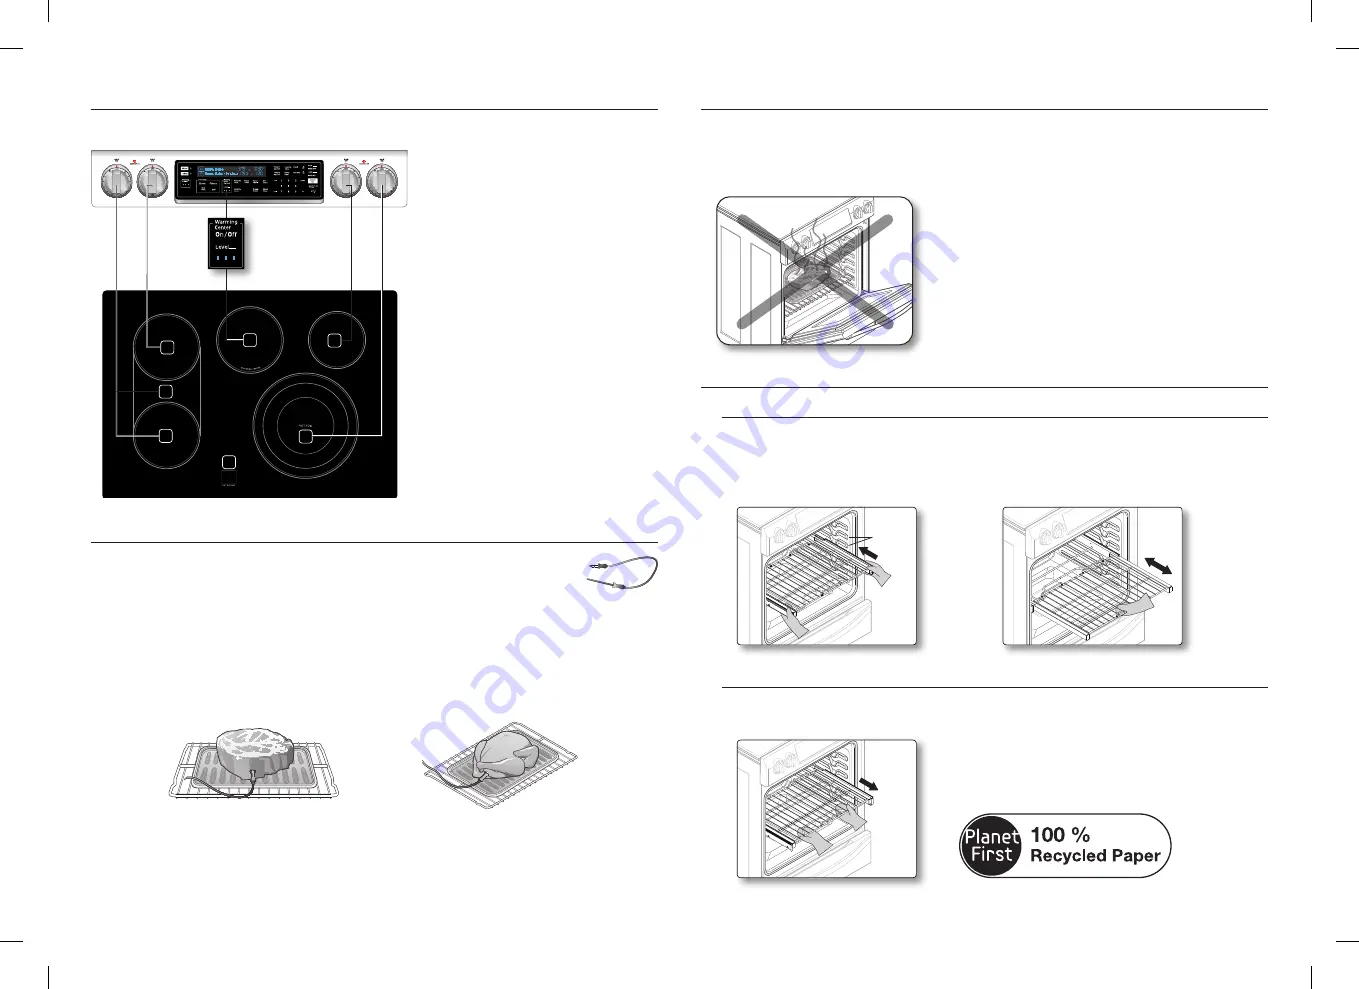
LOCATION OF THE RADIANT SURFACE ELEMENTS AND CONTROLS
The radiant control knobs operate the radiant surface elements on the cooktop as shown below.
1
5
2
3
4
6
1
1. Left Front:
7”, 1,800 W
(Bridge 2,600 W)
2. Left Rear:
7”, 1,800 W
3. Right Front:
6”/9”/12”, 3,000 W
4. Right Rear:
6”, 1,200 W
5. Warming Center:
100 W
6. Hot surface indicator
USING THE TEMP PROBE
For many foods, especially roasts and poultry (beef, chicken, turkey, pork, lamb etc),
measuring the internal temperature is the best way to determine if the food is properly
cooked.
The temp probe lets you cook meat to the exact internal temperature you want, taking the guess
work out of determining whether a piece of meat is done or not.
This function can be used with Chef Bake, Convection Bake, or Convection Roast in Single mode.
After the internal temperature of the food reaches 100 °F, the increasing internal temperature will be
shown in the display.
•
Push the tip of the temp probe into the meat as fully as possible, so that the tip is in the center
of the meat.
•
Insert the probe completely into the meat as shown in the illustrations. It should not touch bone,
fat, or gristle.
•
If you do not fully insert the probe into the meat, the Temp Probe function will not work correctly
because the probe will sense the oven temperature, not the temperature of the meat.
•
Available temperature : 100 °F to 200 °F
BROILING
Broil mode is best for meats, fish, and poultry up to 1” thick. Broiling is a method of cooking tender
cuts of meat by direct heat under the broil element of the oven. The high heat cooks quickly and
gives a rich, brown outer appearance. Temp probe cannot be used with this mode.
•
This oven is designed for CLOSE DOOR broiling. The oven door must be closed during broiling.
USING THE GLIDING RACK
Installing the Gliding rack
•
With the Gliding rack in the “Closed” position and the oven off, carefully insert the Gliding
Rack between the guides until the rack reaches the back.
•
When using the Gliding Rack in the oven, be sure to pull on the handle of the rack only to slide it
in and out. If you grasp the frame while using the rack, the entire Gliding Rack will be removed.
Rack
Guides
Removing the Gliding rack
•
With the Sliding rack in the “Closed” position and the oven off and cool, grasp the rack and
frame and pull both forward to remove.
This manual is made with 100 % recycled paper.
Manual guide_NE58H9950WS_AA_AC_DG68-00530A-00_EN.indd 2
2014-02-11 �� 3:05:48


