background image

English  47

Maint

aining y

our applianc

e

Do not to attempt to activate any other program feature except BAKE while 
the Sabbath feature is active. ONLY the following key pads will function 
correctly with the Sabbath feature on: 

Number

Bake

START/SET

 and 

OFF

All other keys should not be used once the Sabbath feature is activated.

You can change the oven temperature, but the display will not change 
and tones will not sound when a change occurs. (The oven temperature 
adjustment feature should be used only on Jewish holidays). After changing 
the temperature while the unit is in Sabbath mode, there is a 15-second 
delay before the unit recognizes the change.

You can set the Cook time function before activating the Sabbath feature.

Should you experience a power failure or interruption, the oven will shut off. 
When power is returned, the oven will not turn back on automatically. SAb 
will be displayed in the oven control display, but the oven will not operate. 
Food may be safely removed from the oven while it is still in the Sabbath 
mode, however the oven cannot be turned back on until after the Sabbath/
Holidays. After the Sabbath observance, turn OFF the Sabbath mode. Press 
and hold both 

Bake

 and 

Timer

 for at least 3 seconds simultaneously to turn 

the Sabbath mode off. The oven can then be used with all normal functions.

Do not open the oven door or change the oven temperature for about 30 
minutes after you have started Sabbath mode to allow the oven to reach the 
set temperature. Note that, for best performance, the oven fan operates only 
when the oven temperature is rising.

Do not use the cooktop when the oven is in the Sabbath mode.

Maintaining your appliance

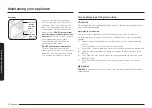
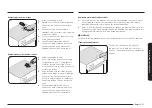
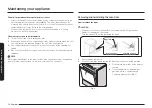
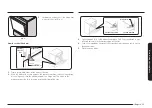
Self-cleaning

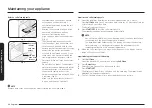
This self-cleaning oven uses high temperatures (well above cooking temperatures) 
to burn off leftover grease and residue completely or reduce them to a finely 
powdered ash that you can wipe away with a damp cloth.

CAUTION

• 

During the self-cleaning cycle, the outside of the range will become very hot 
to the touch. 

Do not

 leave small children unattended near the appliance.

• 

Some birds are extremely sensitive to the fumes given off during the self-
cleaning cycle of any range. Move birds to another well-ventilated room.

• 

Do not

 line the oven walls, racks, bottom, or any other part of the range with 

aluminum foil. Doing so will result in poor heat distribution, poor baking 
results, and cause permanent damage to the oven interior. Aluminum foil will 
melt and adhere to the interior surface of the oven.

• 

Do not

 force the oven door open. This can damage the automatic door locking 

system. Use care when opening the oven door after the self-cleaning cycle is 
complete. Stand to the side of the oven when opening the door to allow hot 
air or steam to escape. The oven may still be 

VERY HOT

.

• 

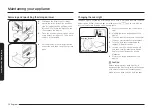
Wear the glove during cleaning.

Summary of Contents for NE63B8611SS/AA

Page 1: ...Electric Range User manual NE63 861 NE63 861 ...

Page 2: ...device in place and engaged e Failure to do so can result in death or serious burns to children or adults WARNING Do not step lean or sit on the doors of the range You can cause the range to tip resulting in burns or serious injuries Confirm that the Anti Tip device is installed properly Then to verify that the Anti Tip device is engaged grasp the top rear edge of the range and carefully attempt t...

Page 3: ...aged to try to correct the interference by one or more of the following measures Reorienting or relocating the receiving antenna Increasing the separation between the equipment and receiver Connecting the equipment to an outlet that is on a different circuit than the radio or TV Consulting the dealer or an experienced radio TV technician for help Regulatory Notice 1 FCC Notice CAUTION FCC CAUTION ...

Page 4: ...lled environment This equipment should be installed and operated so there is at least 8 inches 20 cm between the radiator and your body This device and its antenna s must not be co located or operated in conjunction with any other antenna or transmitter General safety instructions This unit has been tested and found to comply with the limits for a class B digital device pursuant to Part 18 of the ...

Page 5: ... 31 Setting the clock 32 Setting the kitchen timer 32 Timed cooking 32 Delay start 33 Turning the oven light on and off 33 Minimum and maximum settings 33 Using the oven racks 34 Baking 35 Convection baking 36 Convection roasting 37 Broiling 37 Air fry 38 Using the special function 40 Using the keep warm feature 41 Using the smart control feature 42 Using the voice control 42 Using the options fun...

Page 6: ...m www P65Warnings ca gov Important safety instructions Read and follow all instructions before using your range to prevent the risk of fire electric shock personal injury or damage when using the range This guide does not cover all possible conditions that may occur Always contact your service agent or the manufacturer about problems that you do not understand WHAT YOU NEED TO KNOW ABOUT SAFETY IN...

Page 7: ...ower to the appliance before servicing by removing the fuse or switching off the circuit breaker Do not enter the oven Do not store items of interest to children in cabinets above the range or on the back guard of the range Children climbing on the range to reach items could be seriously injured Do not leave children alone Never leave children alone or unattended in an area where this appliance is...

Page 8: ...oved from the appliance before operating it Keep plastics clothes and paper away from parts of the appliance that may become hot Wear proper apparel Never wear loose fitting or hanging garments while using the appliance Use only dry potholders Placing moist or damp potholders on hot surfaces may result in burns from steam Do not let the potholder touch hot heating elements Do not use a towel or ot...

Page 9: ...of glass glass ceramic ceramic earthenware or other glazed cookware are suitable for range top service without breaking due to the sudden change in temperature Never leave surface elements unattended at high heat settings Boilovers cause smoking and greasy spillovers that may ignite A pan that has boiled dry may melt Metallic objects such as knives forks spoons and lids should not be placed on the...

Page 10: ...y Flush mounted appliances may be operated only after they have been installed in cabinets and workplaces that conform to the relevant standards This ensures that the appliances are installed in compliance with the appropriate safety standards If your appliance malfunctions or if fractures cracks or splits appear switch off all cooking zones unplug the range from the AC wall outlet contact your lo...

Page 11: ...G Accessible parts may become hot during use To avoid burns young children should be kept away OVEN DO NOT TOUCH THE HEATING ELEMENTS OR INTERIOR SURFACES OF THE OVEN Heating elements may be hot even though they are dark in color Interior surfaces of an oven become hot enough to cause burns During and after use do not touch let clothing or other flammable materials contact the heating elements or ...

Page 12: ... rack must be moved while the oven is hot use potholders Do not let the potholders come in contact with the hot heating element in the oven Do not allow aluminum foil or a meat probe to contact the heating elements During use the appliance becomes hot Care should be taken to avoid touching heating elements inside the oven Do not use harsh abrasive cleaners or sharp metal scrapers to clean the oven...

Page 13: ...od Before operating the self clean cycle wipe grease and food soils from the oven Excessive amounts of grease may ignite leading to smoke damage to your home Do not use a protective coating to line the oven and do not use commercial oven cleaner unless certified for use in a self cleaning oven Remove the nickel oven shelves from the oven before you begin the self cleaning cycle or they may discolo...

Page 14: ...a be careful to avoid steam burns Some cleaners can produce noxious fumes if applied to a hot surface CRITICAL INSTALLATION WARNINGS WARNING This appliance must be installed by a qualified technician or service company Failing to have a qualified technician install the range may result in electric shock fire an explosion problems with the product or injury Unpack the oven remove all packaging mate...

Page 15: ... pull or excessively bend the power cord Do not twist or tie the power cord Do not hook the power cord over a metal object place a heavy object on the power cord or insert the power cord between objects This may result in electric shock or fire If the power cord is damaged contact your nearest Samsung service center CRITICAL USAGE WARNING CAUTION If the appliance is flooded by any liquid please co...

Page 16: ...ste it may result in a problem with the appliance Take care when removing the wrapping from food taken out of the appliance If the food is hot hot steam may be emitted abruptly when you remove the wrapping and this may result in burns Do not attempt to repair disassemble or modify the appliance yourself Since a high voltage current enters the product chassis it may result in electric shock or fire...

Page 17: ...ontact your product provider or nearest Samsung service center Do not tamper with or make any adjustments or repairs to the door Under no circumstances should you remove the door or outer shell of the oven Do not store or use the oven outdoors Never use this appliance for purposes other than cooking Using the appliance for any purpose other than cooking may result in fire Open the cap or stopper o...

Page 18: ...to cause burns after cooking use cooking gloves to protect your hands from burns USAGE CAUTIONS CAUTION If the surface is cracked turn the appliance off Failing to do so may result in electric shock Dishes and containers can become hot Handle with care Hot foods and steam can cause burns Carefully remove container coverings directing the steam away from your hands and face Remove lids from baby fo...

Page 19: ...e As well as being harmful to humans it may also result in electric shock fire or problems with the product Do not put your face or body close to the appliance while cooking or when opening the door just after cooking Take care that children do not come too close to the appliance Failing to do so may result in children burning themselves Do not place food or heavy objects over the edge of the oven...

Page 20: ...eating food may result in fire CRITICAL CLEANING WARNINGS CAUTION Do not clean the appliance by spraying water directly on to it Do not use benzene thinner or alcohol to clean the appliance This may result in discoloration deformation damage electric shock or fire Take care not to hurt yourself when cleaning the appliance externally or internally You may hurt yourself on the sharp edges of the app...

Page 21: ... with a you can buy it from the Samsung Contact Center 1 800 726 7864 Introducing your new range Overview 03 04 05 06 07 08 09 01 02 01 Touch display 02 Surface control knobs See page 23 for more information 03 Vent 04 Oven door 05 Storage drawer 06 Broil oven heater 07 Oven light 08 Convection system 09 Shelf position ...

Page 22: ...p even when it is not being used Turn the induction cooktop on only after placing the cookware on it Do not store heavy items above the cooktop surface They could fall and damage it CAUTION DURING COOKING Metallic objects such as knives forks spoons and lids should not be placed on the induction cooktop surface since they can get hot After use switch off the induction element using its control Do ...

Page 23: ...ion time may differ depending on the temperature of the internal sensor 10 minutes or 20 minutes If you have cabinet storage directly above the cooking surface make sure that the items in the cabinet are infrequently used and can be safely stored in an area subjected to heat Temperatures may be unsafe for items such as volatile liquids cleaners or aerosol sprays NOTE When you operate the knob you ...

Page 24: ...kware has been placed on the cooking zone Displayed when the Sabbath or Self clean mode is operating How to set the appliance for cooktop cooking CAUTION The cooktop elements may be hot even when off and burns can occur Do not touch the cooktop elements until they have cooled down sufficiently Never leave cooking food unattended when you set the heating element to 6 or higher Boilovers cause smoke...

Page 25: ...s automatically return to power level NOTE If you turn the control knob to 9 Boost from another power level the Induction cooking zone will operate at power level You cannot set Boost if you rotate the knob to the left In certain circumstances the Power boost function may be deactivated automatically to protect the internal electronic components of the induction element Induction simmer control 9 ...

Page 26: ...ms that make good contact with the entire surface of the Cooking Zone Check for flatness by rotating a ruler across the bottom of the cookware Be sure to follow all the recommendations for using cookware Also remember to Use cookware made with the correct material for induction cooking See Cookware for induction cooking zones on page 27 Use quality cookware with heavier bottoms for better heat dis...

Page 27: ...e cookware identified as suitable below Cookware material Cookware material Suitable Steel Enamelled steel Yes Cast iron Yes Stainless steel If appropriately labelled by the manufacturer Aluminium Copper Brass No Glass Ceramic Porcelain No NOTE Cookware appropriate for induction cooking is labelled as suitable by the manufacturer Certain cookware can make noise when being used on induction cooking...

Page 28: ...the temperature inside It will automatically shut off itself after a short period of time These noises are normal and do not indicate any defects Using suitable induction cookware Suitability test Cookware is suitable for induction cooking if a magnet sticks to the bottom of the cookware and the cookware is labelled as suitable by the cookware manufacturer Induction cookware test You can test whet...

Page 29: ...r draw Better pans produce better results You can recognize good pots and pans by their bases The base should be as thick and flat as possible When buying new pots or pans pay particular attention to the diameter of the base Manufacturers often give only the diameter of the upper rim Do not use pans which have damaged bases with rough edges You can scratch the ceramic cooktop permanently if you sl...

Page 30: ...he area is heated Continuously cooking on a soiled surface can result in a permanent stain Preventing other damage Do not allow plastic sugar or foods with high sugar content to melt onto the hot cooktop Should this happen clean immediately Do not let a pan boil dry as this will damage the cooktop and the pan Do not use the cooktop as a work surface or cutting board Do not cook food directly on th...

Page 31: ...tart or stop cooking Press and hold for 3 seconds to turn off the timer 13 Cook Time Press and then use the number pad to set the amount of time you want your food to cook The oven will shut off when the cooking time has run out 14 Delay Start Press to set the oven to start and stop automatically at a time you set Bake Conv bake Roast Cooking Time and self clean only 15 Smart Control Use to select...

Page 32: ...time you select At the end of the cooking time the oven turns off automatically You can use the timed cooking feature only with another cooking operation bake convection bake convection roast How to set the oven for timed cooking 1 Start the cooking operation you want e g Bake The default temperature is 350 F 2 Press Cook Time You can set the Cook Time at any time After selecting the cook mode dur...

Page 33: ...d The oven will begin to bake Turning the oven light on and off The oven light turns on automatically when the door is opened The oven light turns off automatically when the door is closed You can turn the oven light on and off manually by pressing the pad Minimum and maximum settings All of the features listed in the table below have minimum and maximum time or temperature settings A beep will so...

Page 34: ...ble is for reference only Rack and Pan placement 3 4 Single Oven Rack Single Oven Rack Centering the baking pans in the oven as much as possible will produce better results If baking with more than one pan place the pans so each has at least 1 to 1 of air space around it When baking on a single oven rack place the oven rack in position 3 or 4 See the figure on the left 5 3 Multiple Oven Rack Multi...

Page 35: ...n the ingredients and the size and shape of the baking pan used Dark or nonstick coatings may cook faster with more browning How to set the temperature 1 Press Bake The default temperature is 350 F 2 Enter the temperature you want on the number pad e g 3 7 5 3 Press START SET The temperature display will start to change once the oven temperature reaches 175 F 4 If you want to cancel baking or if y...

Page 36: ... faster cooking times When using convection baking with a single rack place the oven rack in position 3 or 4 If cooking on multiple racks place the oven racks in position 3 and 5 or 2 and 5 When baking a cake using the bake mode not the convection bake mode will produce better results How to set the oven for convection baking 1 Press Bake The default temperature is 325 F 2 Enter the temperature yo...

Page 37: ... shut off automatically When you have finished cooking the cooling fan will continue to run until the oven has cooled down NOTE For performance reasons the convection fan may be turned on or off during the operation Broiling Broiling is a method of cooking tender cuts of meat by direct heat under the broil element of the oven The high heat cooks quickly and gives a rich brown outer appearance Broi...

Page 38: ... can be set between 350 F and 500 F Preheating is not necessary for this mode Follow recipe or package directions for set temperature time or quantity How to set the oven for Air fry mode 1 Place the tray on rack position 3 2 Select Air fry mode 3 Use the number pad to change the default temperature Enter the suggested temperature for your food as recommended cooking guide The default temperature ...

Page 39: ... 3 tbsp of oil Egg Plants Breaded 20 25 oz 425 F 20 25 min Mushroom Breaded 18 22 oz 425 F 20 25 min Onions Breaded 18 22 oz 425 F 20 25 min Cauliflowers Breaded 40 45 oz 400 F 425 F 20 25 min Vegetable Mix Breaded 30 35 oz 425 F 20 25 min Air fry cooking guide NOTE Preheating is not necessary Place the Air fry tray on the position 3 It is recommended to use avocado oil Place a baking sheet or tra...

Page 40: ...e bake ware with low rimmed sides or no sides is recommended when using Air Fry mode The darker pan increases better browning and crisping on the food surface Check foods often and shake it or flip it over for crispier and the best results When using a dark surface bake ware set the cooking time slightly longer than guide time suggested on table with Air Fry Tray CAUTION Foods in high in fat will ...

Page 41: ...ing proofing time do not open the oven door Using the keep warm feature When cooking is finished Keep Warm will hold the food at a safe serving temperature for up to 3 hours After 3 hours the feature will shut off automatically You can use the keep warm feature without any other cooking operations or you can set it to activate after a timed or delay timed cooking operation You should not use this ...

Page 42: ... Control and prevent you from turning the oven on remotely If it is not shown on the display you can still monitor the oven and cooktop status and turn the oven off When oven cooking is finished or cancelled Smart Control will turn off Using the voice control To use the Range s Voice Control function you need Bixby Amazon Alexa App Google Assistant App on your mobile device Refer to the table belo...

Page 43: ...ice name to bake Mode for 1hour Time at 350 degrees Temp Set the oven Device name to bake Mode at 350 degrees Temp Set the oven Device name to bake Mode for 1hour time Preheat the oven Device name Start the oven Device name Turn on the oven Device name Set the oven Device name to bake Mode Turn Off Stop Turn off the oven Device name Stop the oven Device name Turn off the oven Device name Stop the ...

Page 44: ...eset at the factory to display in Fahrenheit How to change the display from Fahrenheit to Celsius or Celsius to Fahrenheit 1 Press Options for 3 seconds and then Press 2 on the number pad 2 Press 1 Fahrenheit or 2 Celsius on the number pad 3 Press START SET to save the changes Using the options function This function enables you to control various electronic control options Refer to the following ...

Page 45: ...nvection baking temperatures If this feature is activated the display will show the actual converted reduced temperature For example if you enter a regular recipe temperature of 350 F and press Oven Start Set the display will show the converted temperature of 325 F Default setting off How to enable or disable the auto conversion feature 1 Press Options for 3 seconds and then Press 3 on the number ...

Page 46: ... feature Once the oven light is turned on and the Sabbath feature is active the oven light will remain on until the Sabbath feature is turned off If the oven light needs to be off be sure to turn the oven light off before activating the Sabbath feature How to use the Sabbath feature 1 Press Bake The default temperature is 350 F 2 Enter the temperature you want e g 375 F by using the number pad 3 P...

Page 47: ...d with all normal functions Do not open the oven door or change the oven temperature for about 30 minutes after you have started Sabbath mode to allow the oven to reach the set temperature Note that for best performance the oven fan operates only when the oven temperature is rising Do not use the cooktop when the oven is in the Sabbath mode Maintaining your appliance Self cleaning This self cleani...

Page 48: ...ht bulb cover is in place and the oven light is off NOTE Remove oven racks and accessories before starting the self clean mode How to run a self cleaning cycle 1 Select the length of time for the self cleaning operation e g 3 hours Press Self Clean once for a 3 hour clean time twice for a 5 hour clean time or 3 times for a 2 hour clean time The default setting is 3 hours 2 Press START SET to start...

Page 49: ...ction saves time and energy For heavier duty cleaning use the self cleaning function 1 Remove all accessories from the oven 2 Pour approximately 10 oz 300 ml of water onto the bottom of the empty oven and then close the oven door Use normal water only not distilled water 3 Press Steam Clean 4 Press START SET When the operation is complete the display will blink and a beep will sound 5 Press OFF 6 ...

Page 50: ...once the oven has cooled For heavy residue such as grease left over from roasting we recommend that you rub detergent into the residue before activating the steam cleaning function After cleaning leave the oven door ajar at a 15 angle to allow the interior enamel surface to dry thoroughly Care and cleaning of the oven WARNING Be sure all controls are OFF and all surfaces are COOL before cleaning a...

Page 51: ...lor will turn slightly blue and the finish will be dull After the self cleaning cycle is complete and the oven has cooled rub the sides of the racks with wax paper or a cloth containing a small amount of oil This will help the racks glide more easily on their tracks NOTE Do not clean in a dishwasher If the rack becomes hard to remove or replace lightly wipe the oven rack guides with cooking oil Do...

Page 52: ...ng pad for ceramic cooktops to clean the entire cooktop surface 5 Use a dry cloth or paper towel to remove all cleaning residue No need to rinse WARNING DAMAGE to your glass surface may occur if you use scrub pads other than those recommended Oven door Don t hand Don t hand clean the clean the oven door oven door gasket gasket You may You may hand clean hand clean the door the door Use soap and wa...

Page 53: ...cooktop to cool 2 Spread a few drops of ceramic cooktop cleaner on the entire burned residue area 3 Using a cleaning pad for ceramic cooktops rub the residue area applying pressure as needed 4 If any residue remains repeat the steps listed above as needed 5 For additional protection after all residue has been removed polish the entire surface by applying ceramic cooktop cleaner with a paper towel ...

Page 54: ...as jellies fudge candy syrups or melted plastics can cause pitting of the surface of your cooktop This is not covered under the warranty You should clean the spill while it is still hot Take special care when removing hot substances Refer to the section below When using a scraper be sure it is new and the razor blade is still sharp Do not use a dull or nicked blade Cleaning sugary spills and melte...

Page 55: ... oven cavity to the locked position 5 Close the oven door Fig 2 Fig 2 5 Lift door up and out until the hinge arm is clear of the slot Fig 2 How to re install the door Hinge arm Hinge arm Bottom Bottom edge of edge of slot slot Indentation Indentation 1 Firmly grasp both sides of the door at the top 2 With the door at the same angle as the removal position slide the indentation of the hinge arm int...

Page 56: ...ove it from its socket 5 Insert a new 40 watt appliance bulb and then turn it clockwise to tighten Replace the bulb cover by turning clockwise 6 Plug in the range or reconnect the power CAUTION Before changing your oven light bulb disconnect the electrical power to the range at the main fuse or circuit breaker panel Make sure the oven and the bulb are cool Removing and reinstalling the storage dra...

Page 57: ...e appliance accessible Carpet is interfering with movement of the range Provide sufficient space so the range can be lifted over the carpet CONTROL DISPLAY Problem Possible cause Solution The display goes blank A fuse in your home may be blown or the circuit breaker tripped Replace the fuse or reset the circuit breaker The display flashes There was a power failure Reset the clock COOKTOP Problem P...

Page 58: ...ace of the cooktop To avoid scratches follow the recommended cleaning procedures Make sure cookware bottoms are clean before use and use cookware with smooth bottoms Cookware has been slid across the cooktop surface Problem Possible cause Solution Brown streaks or specks Boilovers have been cooked onto the surface Wait until the surface cools down Then use a single edge razor blade scraper at appr...

Page 59: ...em Possible cause Solution The appliance will not turn on The appliance is not completely plugged into the electrical outlet or a fuse in your home may be blown or a circuit breaker may have tripped Make sure the power cord is plugged into a live properly grounded outlet Check the fuse and circuit breakers Incomplete service wiring Call for service Power outage Check to see if the house lights wil...

Page 60: ... See the section on adjusting the thermostat on page 44 Problem Possible cause Solution The oven will not self clean The oven temperature is too high to start a self clean operation Allow the range to cool and then reset the controls The oven controls have been set incorrectly See the section on self cleaning on page 47 A self cleaning cycle cannot be started if the oven lock feature has been acti...

Page 61: ...n is normal for the first few times the oven is used Operate the oven empty on the bake setting at 400 F for 1 hour Fan noise A convection fan may automatically turn on and off This is not a system failure but normal operation Oven racks are difficult to slide The shiny silver colored racks were cleaned in a self cleaning cycle Apply a small amount of vegetable oil to a paper towel and then wipe t...

Page 62: ...r If this does not solve the problem call for service There is a short in the Oven sensor C 21 This code occurs if the internal temperature rises abnormally high C 22 The sub PCB sensor is open when the oven is operating There is a short in the sub PCB sensor C 30 The main PCB sensor is open when the oven is operating There is a short in the main PCB sensor Displayed Code Possible cause Solution C...

Page 63: ...ain If the problem persists disconnect all power to the range for at least 30 seconds and then reconnect the power If this does not solve the problem call for service COOKTOP Displayed code Possible cause Solution This code occurs if communication between the Main and Inverter PBA is interrupted Turn the knob to Off and then turn it to the setting you want again If the problem persists disconnect ...

Page 64: ...e use and care guide are not covered by this limited warranty The cost of repair or replacement under these excluded circumstances shall be the customer s responsibility Visits by an authorized servicer to explain product functions maintenance or installation are not covered by this limited warranty Please contact SAMSUNG at the number below for assistance with any of these issues Warranty U S A P...

Page 65: ...son firm or corporation with respect to this product shall be binding on SAMSUNG To obtain warranty service please contact SAMSUNG at Samsung Electronics America Inc 85 Challenger Road Ridgefield Park NJ 07660 1 800 SAMSUNG 726 7864 and www samsung com us support Warranty CANADA PLEASE DO NOT DISCARD THIS PAGE REPLACES THE WARRANTY PAGE IN THE USE CARE GUIDE SAMSUNG ELECTRIC RANGE LIMITED WARRANTY...

Page 66: ... spills of sugary materials or melted plastic that are not cleaned according to the directions in the use and care guide are not covered SAMSUNG does not warrant uninterrupted or error free operation of the product EXCEPT AS SET FORTH HEREIN THERE ARE NO WARRANTIES ON THIS PRODUCT EITHER EXPRESS OR IMPLIED AND SAMSUNG DISCLAIMS ALL WARRANTIES INCLUDING BUT NOT LIMITED TO ANY IMPLIED WARRANTIES OF ...

Page 67: ...en Source Announcement The software included in this product contains open source software The following URL http opensource samsung com opensource SMART_TP2_0 seq 0 leads to open source license information as related to this product ...

Page 68: ... OR COMMENTS COUNTRY CALL OR VISIT US ONLINE AT U S A Consumer Electronics 1 800 SAMSUNG 726 7864 www samsung com us support CANADA 1 800 SAMSUNG 726 7864 www samsung com ca support English www samsung com ca_fr support French NE63 861 01 Scan the QR code or visit www samsung com spsn to view our helpful How to Videos and Live Shows Requires reader to be installed on your smartphone ...

Page 69: ...Estufa eléctrica Manual del usuario NE63 861 NE63 861 ...

Page 70: ...u lugar y acoplado e No hacerlo puede provocar la muerte o quemaduras serias a niños o adultos ADVERTENCIA No se pare sobre las puertas de la estufa ni se apoye o siente sobre ellas Puede causar que la estufa se incline o vuelque produciendo quemaduras o lesiones severas Confirme que el dispositivo antivuelco se encuentre instalado correctamente Luego para verificar que dicho dispositivo esté cone...

Page 71: ...a de una de las siguientes maneras Reorientar o reubicar la antena receptora Aumentar la separación entre el equipo y el receptor Conectar el equipo a una toma de un circuito distinto de aquel al que están conectados la radio o el televisor Consultar al distribuidor o a un técnico de radio TV experimentado para obtener ayuda Aviso sobre regulaciones 1 Aviso de la FCC PRECAUCIÓN PRECAUCIÓN DE LA FC...

Page 72: ... establecidos para un entorno no controlado Este equipo debe ser instalado y operado a una distancia mínima de 8 pulgadas 20 cm entre su cuerpo y el radiador Este dispositivo y su s antena s no deben ubicarse cerca ni utilizarse junto con ninguna otra antena o transmisor Instrucciones de seguridad generales Esta unidad ha sido sometida a pruebas y se ha determinado que cumple con los límites para ...

Page 73: ...l horno 31 Ajuste del reloj 32 Cómo programar el temporizador de cocina 32 Cocción por temporizador 32 Retrasar el inicio 33 Cómo encender y apagar la luz del horno 33 Ajustes mínimos y máximos 33 Uso de las parrillas del horno 34 Hornear 35 Horneado por convección 36 Asar por convección 37 Asar a la parrilla 37 Freidora de aire 38 Uso de la función especial 40 Cómo usar la función de mantener cal...

Page 74: ...turas Instrucciones de seguridad importantes Lea y siga todas las instrucciones antes de utilizar su estufa con el fin de evitar riesgos de incendio descargas eléctricas lesiones personales o daños al utilizar su estufa Esta guía no cubre todas las situaciones que podrían ocurrir Siempre tome contacto con su agente de servicio o con el fabricante para consultar sobre cualquier problema que usted n...

Page 75: ... un técnico calificado Antes de realizar tareas de mantenimiento o reparación siempre desconecte la alimentación eléctrica al electrodoméstico quitando el fusible o accionando el disyuntor No se introduzca en el horno Ningún artículo que pueda resultar de interés para los niños debe almacenarse en gabinetes arriba de la estufa o en su anaquel posterior Los niños que se trepasen a la estufa para al...

Page 76: ...es plásticos indumentaria y papeles alejados de las partes del electrodoméstico que podrían calentarse Utilice la indumentaria apropiada Nunca use prendas amplias o colgantes mientras utiliza el electrodoméstico Utilice solamente agarradores aislantes secos Colocar agarradores aislantes mojados o húmedos sobre superficies calientes podría producir quemaduras por vapor No permita que el agarrador e...

Page 77: ...o cerámica o cerámica o con superficies esmaltadas o con otros tratamientos son aptos para uso en la parte superior de la estufa sin romperse por bruscas diferencias de temperatura Nunca deje sin atención elementos de superficie regulados a altas temperaturas Los derrames por exceso de hervor producen humo y los derrames de sustancias grasas pueden arder en llamas Una olla que hierve hasta secarse...

Page 78: ...os montados a nivel pueden operarse solo después de que fueron instalados en gabinetes y lugares de trabajo que cumplen con las normas pertinentes Esto asegura que los electrodomésticos sean instalados cumpliendo con las normas de seguridad adecuadas Si su electrodoméstico funciona mal o si aparecen roturas rajaduras o grietas apague todas las zonas de cocción desenchufe la estufa del tomacorrient...

Page 79: ...HORNO NO TOQUE LOS ELEMENTOS CALENTADORES NI LAS SUPERFICIES INTERIORES DEL HORNO Los elementos calentadores pueden estar calientes aun cuando su color sea oscuro Las superficies interiores de un horno se calientan lo suficiente como para producir quemaduras Durante y después del uso no toque los elementos calentadores ni las superficies interiores del horno y tampoco permita que sus ropas ni otro...

Page 80: ...scindible mover la parrilla mientras el horno se encuentra caliente use agarradores aislantes No deje que los agarradores aislantes entren en contacto con el elemento calentador caliente en el horno No permita que papel de aluminio o una sonda para carne entren en contacto con los elementos calentadores Durante el uso el electrodoméstico se calienta Se debe tener la precaución de evitar tocar los ...

Page 81: ...os alimentos Antes de hacer funcionar el ciclo de autolimpieza limpie la grasa y los restos de comida del horno Unas cantidades excesivas de grasa podrían encenderse y generar daños por el humo en su hogar No use recubrimiento protector para revestir el horno ni use limpiadores comerciales de hornos a menos que estén certificados para su uso en hornos de autolimpieza Retire los estantes niquelados...

Page 82: ...cie de cocción caliente cuídese de posibles quemaduras por vapor Algunos productos de limpieza pueden producir emanaciones nocivas si se aplican sobre una superficie caliente ADVERTENCIAS FUNDAMENTALES PARA LA INSTALACIÓN ADVERTENCIA La instalación de este electrodoméstico debe estar a cargo de un técnico o una compañía de servicio calificados Si la estufa no es instalada por un técnico calificado...

Page 83: ...l cable de alimentación No retuerza ni ate el cable de alimentación No enganche el cable de alimentación de un objeto metálico ni coloque un objeto pesado sobre el cable de alimentación ni inserte el cable de alimentación entre objetos Se puede producir una descarga eléctrica o un incendio Si se daña el cable de alimentación comuníquese con el centro de servicio técnico Samsung más cercano ADVERTE...

Page 84: ...o restos de comida pueden surgir problemas Tenga cuidado al quitar el envoltorio cuando retira comida del electrodoméstico Si la comida está caliente puede salir vapor caliente cuando retira el envoltorio y esto puede provocar quemaduras No intente reparar desarmar ni modificar el electrodoméstico Como ingresa corriente de alta tensión en el chasis del producto esto puede provocar una descarga elé...

Page 85: ...ificios comuníquese con el distribuidor del producto o con el centro de servicio técnico Samsung más cercano No altere ni haga ajustes ni reparaciones en la puerta Bajo ninguna circunstancia debe quitar la puerta o la coraza externa del horno No almacene ni utilice el horno al aire libre Nunca use este electrodoméstico con otros fines que no sean cocinar El uso de este electrodoméstico para otro f...

Page 86: ...quemaduras PRECAUCIONES PARA EL USO PRECAUCIÓN Si la superficie está rajada apague el electrodoméstico No hacerlo puede provocar una descarga eléctrica La vajilla y los envases pueden calentarse Manipúlelos con cuidado Los alimentos calientes y el vapor pueden provocar quemaduras Retire cuidadosamente las tapas de los envases dirigiendo el vapor lejos de las manos y la cara Retire las tapas de los...

Page 87: ...er perjudiciales para las personas pueden producirse descargas eléctricas un incendio o problemas en el producto No acerque el rostro ni el cuerpo al electrodoméstico mientras está cocinando o al abrir la puerta inmediatamente después de la cocción Asegúrese de que los niños no se acerquen demasiado al electrodoméstico No hacerlo puede provocar quemaduras en los niños No coloque alimentos ni objet...

Page 88: ...lentamiento podría provocar un incendio ADVERTENCIAS FUNDAMENTALES PARA LA LIMPIEZA PRECAUCIÓN No rocíe agua directamente sobre el electrodoméstico para limpiarlo No utilice benceno diluyente ni alcohol para limpiar el electrodoméstico Esto puede provocar decoloración deformación daños descarga eléctrica o incendio Tenga cuidado de no lastimarse cuando limpia el electrodoméstico exterior interior ...

Page 89: ...to de Samsung 1 800 726 7864 Introducción a su nueva estufa Descripción general 03 04 05 06 07 08 09 01 02 01 Pantalla táctil 02 Perillas de control de la superficie consulte la página 23 para obtener más información 03 Ventilación 04 Puerta del horno 05 Cajón de almacenamiento 06 Calentador del horno para asar a la parrilla 07 Luz del horno 08 Sistema de cocción por convección 09 Posición del est...

Page 90: ...se o arder en llamas aun cuando no se encuentre en uso Encienda la cubierta de inducción solamente después de colocar los recipientes de cocción sobre ellas No almacene objetos pesados por encima de la superficie de cocción Podrían caerse y dañar tal superficie PRECAUCIÓN DURANTE LA COCCIÓN Los objetos metálicos como cuchillos tenedores cucharas y tapas no deben colocarse en la superficie de cubie...

Page 91: ...ctivación del ventilador puede variar según la temperatura del sensor interno 10 minutos o 20 minutos Si tiene un gabinete de almacenamiento instalado directamente sobre la superficie de cocción asegúrese de que los elementos en su interior sean de uso infrecuente y que puedan ser almacenados con seguridad en un lugar que reciba calor Las temperaturas alcanzadas pueden resultar inseguras para elem...

Page 92: ...cción Aparece cuando está operando el modo Shabat o de Auto limpieza Como regular su estufa para la cocción de cubierta PRECAUCIÓN Los elementos de la cubierta pueden estar calientes incluso cuando están apagados y pueden causar quemaduras No toque los elementos de la cubierta hasta que se hayan enfriado lo suficiente No deje nunca sin atención la comida que está cociéndose si ha ajustado el eleme...

Page 93: ...la perilla hasta 9 Boost 9 Más potencia desde otro nivel de potencia la zona de cocción por inducción funcionará en el nivel de potencia No puede ajustar Más potencia si gira el dial hacia la izquierda En determinadas circunstancias la función Más potencia puede desactivarse automáticamente para proteger los componentes electrónicos internos del elemento de inducción Control de hervor a fuego lent...

Page 94: ... buen contacto con toda la superficie de la zona de cocción Controle que el fondo sea plano haciendo girar una regla sobre la base del recipiente Asegúrese de seguir todas las recomendaciones para usar los utensilios de cocina También recuerde que debe Usar utensilios de cocina fabricados del material correcto para cocción por inducción Consulte Utensilio de cocina para zonas de cocción por inducc...

Page 95: ...o adecuados Material de los utensilios de cocina Material de los utensilios de cocina Adecuado Acero Acero esmaltado Sí Hierro fundido Sí Acero inoxidable Si está correctamente rotulado por el fabricante Aluminio Cobre Latón No Vidrio Cerámica Porcelana No NOTA Los utensilios adecuados para la cocción por inducción están rotulados como adecuados por el fabricante Determinados utensilios de cocina ...

Page 96: ...o Estos ruidos son normales y no indican ningún defecto Usar utensilios de cocina adecuados para inducción Prueba de adecuación Los utensilios de cocina son adecuados para cocción por inducción si un imán se adhiere a la parte inferior del utensilio de cocina y está rotulado como adecuado por el fabricante Prueba de utensilios para cocción por inducción Puede probar si los utensilios son más efici...

Page 97: ...s producen los mejores resultados Puede reconocer buenos recipientes por sus bases La base debe ser lo más gruesa y plana posible Al comprar recipientes nuevos preste especial atención al diámetro de la base Los fabricantes a menudo indican solo el diámetro del borde superior No use recipientes que tienen bases dañadas con bordes rugosos Si desliza un recipiente con la base dañada sobre la superfi...

Page 98: ...e el área La cocción continuada sobre una superficie sucia puede causar manchas permanentes Prevención de otros daños No permita que plásticos azúcar o alimentos con alto contenido de azúcar se derritan sobre la cubierta Si esto ocurriese limpie inmediatamente No permita que un recipiente quede seco por hervor prolongado ya que esto dañará la cubierta y el recipiente No utilice la cubierta como me...

Page 99: ...ga presionado durante 3 segundos para apagar el temporizador 13 Cook Time Tiempo de cocción Presione y luego utilice el teclado numérico para programar la duración de la cocción para los alimentos en cuestión El horno se apagará cuando haya transcurrido el tiempo de cocción 14 Delay Start Retrasar el inicio Presione para programar que el horno se active y detenga automáticamente a las horas que us...

Page 100: ...ompletado ese tiempo de cocción el horno se apaga automáticamente La función de cocción por temporizador se puede utilizar únicamente en combinación con otra operación de cocción hornear hornear por convección asar por convección Cómo programar el horno para cocción con temporizador 1 Comience con la operación de cocción deseada p ej Bake Hornear La temperatura predeterminada es de 350 F 2 Presion...

Page 101: ...á una breve señal sonora El horno comenzará la cocción Cómo encender y apagar la luz del horno La luz del horno se enciende automáticamente cuando se abre la puerta La luz del horno se apaga automáticamente cuando se cierra la puerta La luz del horno se puede encender y apagar manualmente presionando la tecla Ajustes mínimos y máximos Todas las funciones enumeradas en la siguiente tabla tienen aju...

Page 102: ...nte Colocación de parrillas y recipientes 3 4 Única parrilla de horno Única parrilla de horno Colocar los moldes o las charolas lo más cerca posible del centro del horno producirá los mejores resultados Si hornea con más de un recipiente colóquelos de manera tal que cada uno tenga 1 a 1 de espacio libre a su alrededor Cuando hornea en una única parrilla coloque la parrilla del horno en la posición...

Page 103: ... la bandeja de hornear utilizada Los recubrimientos oscuros y antiadherentes cocinan los alimentos más rápidos y los doran más Cómo ajustar la temperatura 1 Presione Bake Hornear La temperatura predeterminada es de 350 F 2 Ingrese la temperatura deseada mediante el teclado numérico p ej 3 7 5 3 Presione START SET INICIO CONFIGURAR El indicador de temperatura comenzará a variar una vez que la tempe...

Page 104: ... cocción más rápidos Cuando hornee por convección con una única parrilla colóquela en la posición 3 o 4 Si cocina con parrillas múltiples colóquelas en las posiciones 3 y 5 o 2 y 5 Si hornea una torta o pastel el modo de hornear simple no el modo de hornear por convección producirá mejores resultados Cómo ajustar el horno para hornear por convección 1 Presione Bake Hornear por convección La temper...

Page 105: ...ya finalizado la cocción el ventilador de enfriamiento continuará funcionando hasta que el horno se haya enfriado NOTA Por razones de rendimiento el ventilador de convección puede encenderse o apagarse durante el funcionamiento Asar a la parrilla Asar a la parrilla es un método de cocinar cortes tiernos de carne mediante el calor directo bajo el elemento de asado a la parrilla del horno La elevada...

Page 106: ...s instrucciones de la receta o el envase para ajustar la temperatura el tiempo o la cantidad Cómo programar el horno para el modo Freidora de aire 1 Coloque la bandeja sobre la parrilla en la posición 3 2 Seleccione el modo Air Fry Freír con aire 3 Use las teclas numéricas para cambiar la temperatura por defecto Ingrese la temperatura sugerida para su comida según recomienda la guía de cocción La ...

Page 107: ...emperature Time Tips Aros de cebolla congelados 20 25 oz 400 F 425 F 15 20 min Varitas de pescado congeladas 20 25 oz 425 F 18 22 min Tiras de pollo congeladas 25 30 oz 425 F 450 F 20 30 min Churros congelados 20 25 oz 425 F 18 22 min Carne de ave Muslos frescos 40 45 oz 425 F 450 F 30 35 min Úntelas con 3 cucharadas de aceite Sazone a gusto con sal y pimienta Los alimentos con alto contenido gras...

Page 108: ...un utensilio para hornear de superficie oscura que tenga laterales con bordes bajos o no tenga laterales El hecho de que sea más oscuro ayuda a que la superficie de los alimentos se doren más y sean más crocantes Controle los alimentos con frecuencia y sacúdalos o voltéelos para que queden más crocantes y obtener mejores resultados Cuando use un utensilio para hornear de superficie oscura fije el ...

Page 109: ...ndo la cocción finaliza Mantener caliente mantiene los alimentos a una temperatura segura para servirlos por hasta 3 horas Después de 3 horas la función se apagará automáticamente Puede usar la función de mantener caliente sin combinar con otras operaciones de cocción o puede configurarla para que se active después de una operación de cocción con temporizador o de inicio retardado No debe usar est...

Page 110: ...ncender el horno remotamente Si no aparece en la pantalla aún puede supervisar el estado del horno y la cubierta y apagar el horno Cuando la cocción del horno finaliza o se cancela el Smart Control se apaga Uso de la función de control por voz Para utilizar la función de control por voz de la estufa debe instalar en su dispositivo móvil la aplicación Bixby Amazon Alexa o el Asistente de Google Con...

Page 111: ...renheit Cómo cambiar la pantalla de Fahrenheit a Centígrados o de Centígrados a Fahrenheit 1 Presione Opciones durante 3 segundos y luego 2 en el teclado numérico 2 Presione 1 Fahrenheit o 2 Centígrados en el teclado numérico 3 Presione START SET INICIO CONFIGURAR para guardar los cambios Cómo usar la función de opciones Esta función le permite controlar diversas opciones de control electrónico Co...

Page 112: ...ales ingresadas a las temperaturas correspondientes para convección Si se encuentra activada esta función en la pantalla se verá la temperatura real convertida reducida Por ejemplo si usted ingresa una temperatura de receta normal de 350 F y presiona Oven Start Set Inicio Configurar horno la pantalla mostrará la temperatura convertida de 325 F Ajuste predeterminado desactivado Cómo activar o desac...

Page 113: ...e encendida y se encuentre activada la función Sabbat la luz del horno permanecerá encendida hasta que la función Sabbat sea desactivada Si la luz del horno debe estar apagada asegúrese de apagarla antes de activar la función Sabbat Cómo utilizar la función Sabbat 1 Presione Bake Hornear La temperatura predeterminada es de 350 F 2 Ingrese la temperatura deseada p ej 375 F mediante el teclado numér...

Page 114: ... del horno ni cambie la temperatura del horno durante alrededor de 30 minutos después de haber iniciado el modo Sabbat para permitir que el horno alcance la temperatura fijada Observe que para obtener un mejor rendimiento el ventilador del horno funciona solamente cuando la temperatura del horno está aumentando No use la cubierta cuando el horno está en modo Sabbat Mantenimiento de su electrodomés...

Page 115: ...uz del horno esté apagada NOTA Quite las parrillas y los accesorios del horno antes de activar el modo de autolimpieza Cómo hacer funcionar un ciclo de autolimpieza 1 Seleccione la duración de la operación de autolimpieza por ejemplo 3 horas Presione Self Clean Autolimpieza una vez para un tiempo de limpieza de 3 horas dos veces para un tiempo de limpieza de 5 horas o 3 veces para un tiempo de lim...

Page 116: ...ejores resultados NOTA Si la temperatura del horno es superior a 100 F no se puede presionar Steam Clean Limpieza con vapor Dado que esta función produce mejores resultados si se inicia cuando el horno está frío le recomendamos que aguarde hasta que el horno se enfríe y Hot caliente desaparezca de la pantalla PRECAUCIÓN Use el guante durante la limpieza Como apagar la función de autolimpieza Es po...

Page 117: ...dos tales como la grasa remanente después de asar le recomendamos que frote detergente sobre el residuo antes de activar la función de limpieza al vapor Después de limpiar deje la puerta del horno entornada en un ángulo de 15 para que la superficie interior esmaltada pueda secarse completamente Cuidado y limpieza del horno ADVERTENCIA Asegúrese de que todos los controles estén APAGADOS y todas las...

Page 118: ... la freidora de aire puede lavarse en lavavajillas PRECAUCIÓN No deje la bandeja de la freidora de aire en el horno durante el ciclo de autolimpieza El calor extremo generado en este ciclo puede pelar de forma permanente el recubrimiento de la bandeja de la freidora de aire su color virará a tonos azulados y se volverá opaca Limpieza de las partes pintadas y las terminaciones decorativas Para su l...

Page 119: ...de vidrio PRECAUCIÓN Al limpiar la cubierta tenga cuidado de no obstruir la ventilación ni los motores de enfriamiento y no permita que cualquier sustancia extraña ingrese en estos Limpieza en el uso normal diario Use solo un producto de limpieza para placas de cocción vitrocerámicas Otras cremas podrían resultar menos efectivas Seguir estos pasos le permitirá mantener y proteger la superficie de ...

Page 120: ...s quemados 1 Espere que la cubierta se enfríe 2 Esparza unas pocas gotas de limpiador para cubiertas vitrocerámicas sobre toda la zona de residuos quemados 3 Utilice un paño de limpieza para cubiertas vitrocerámicas y frote la zona de los residuos aplicando la presión necesaria 4 Si queda algún residuo repita los pasos arriba enumerados según resulte necesario 5 Para protección adicional después d...

Page 121: ...rramada con toallas de papel 3 El remanente del derrame debe dejarse hasta que la superficie de cocción se haya enfriado 4 No vuelva a utilizar las unidades de superficie hasta que todo el residuo haya sido eliminado completamente NOTA Si ya se han producido picaduras o hendiduras en la superficie de vidrio la cubierta de vidrio deberá ser reemplazada En tal caso será necesario llamar al servicio ...

Page 122: ...n en la posición trabada 5 Cierre la puerta del horno Fig 2 Fig 2 5 Levante la puerta y jale hacia afuera hasta que el brazo de la bisagra esté fuera de la ranura Fig 2 Cómo volver a instalar la puerta Brazo de la bisagra Brazo de la bisagra Borde Borde inferior de inferior de la ranura la ranura Muesca Muesca 1 Sujete firmemente ambos lados de la puerta en su extremo superior 2 Con la puerta en e...

Page 123: ...nará durante el ciclo de autolimpieza Retirar Retirar Bombilla Bombilla Volver a colocar Volver a colocar Cubierta de vidrio de Cubierta de vidrio de la bombilla la bombilla 1 Asegúrese de que el horno y la bombilla se encuentren fríos 2 Desenchufe la estufa o desconecte la corriente 3 Para retirar la cubierta de vidrio de la bombilla en la parte trasera del horno gírela en sentido contrario a las...

Page 124: ...caliente Esto es transitorio y desaparecerá a medida que el vidrio se enfríe Resolución de problemas Resolución de problemas Samsung hace grandes esfuerzos para asegurar que usted no experimente problemas con su nueva estufa eléctrica Si se encuentra con problemas inesperados como primera medida busque la solución en las siguientes tablas Si aún experimenta problemas luego de intentar la solución ...

Page 125: ...ficie alterna frecuentemente entre encendido y apagado El elemento pasará por ciclos de encendido y apagado para mantener la regulación de energía Este funcionamiento es normal y no se debe a una falla del sistema Use la estufa como siempre La unidad de superficie deja de estar al rojo vivo cuando se cambia a una regulación más baja Esto es normal La unidad todavía se encuentra encendida y calient...

Page 126: ... estufa no se enciende La estufa no se encuentra bien enchufada al tomacorriente o tal vez en su casa se haya quemado un fusible o activado un disyuntor Asegúrese de que el cable de alimentación se encuentre enchufado en un tomacorriente alimentado con corriente y bien conectado a tierra Controle los fusibles y disyuntores El servicio técnico no completó la conexión de cables Solicite servicio téc...

Page 127: ...baja El sensor del horno requiere ajuste Consulte la sección sobre cómo ajustar el termostato en la página 43 Problema Causa posible Solución El horno no ejecuta el proceso de autolimpieza La temperatura del horno es demasiado alta como para iniciar una operación de autolimpieza Deje que la estufa se enfríe y luego restablezca los controles Los controles del horno se han configurado incorrectament...

Page 128: ...slante que envuelve al horno Opere el horno vacío en el ajuste de horneado a 400 F durante una hora Ruido del ventilador Un ventilador de convección puede encenderse y apagarse automáticamente Esto no es una falla del sistema sino el funcionamiento normal Resulta difícil deslizar las parrillas del horno Las parrillas plateadas quedaron dentro del horno durante un ciclo de autolimpieza Aplique una ...

Page 129: ... el problema llame al servicio de reparaciones Hay un cortocircuito en el sensor del horno C 21 Este código se muestra si la temperatura interna es anormalmente alta C 22 El sensor sub PCB está abierto cuando el horno está funcionando Hay un cortocircuito en el sensor sub PCB C 30 El sensor del PCB principal está abierto cuando el horno está funcionando Hay un cortocircuito en el sensor del PCB pr...

Page 130: ...o Este código se muestra si el motor de ventilador de CC está abierto o bloqueado Código mostrado Causa posible Solución Aparece si el utensilio de cocina que hay sobre un elemento no es adecuado o es demasiado pequeño o no se colocó un utensilio de cocina en la zona de cocción Revise los utensilios Se visualiza si se puso la perilla de un elemento en la posición de encendido cuando el modo Shabat...

Page 131: ...de reparación o reemplazo bajo estas circunstancias excluidas le corresponderá al cliente Las visitas de un técnico de servicio autorizado para que explique las funciones el mantenimiento o la instalación del producto no están cubiertas por esta garantía limitada Comuníquese con SAMSUNG al número que figura a continuación si necesita asistencia con estos problemas Garantía EE UU NO LA DESECHE ESTA...

Page 132: ... y vuelta al centro de servicio EXCLUSIÓN DE GARANTÍAS IMPLÍCITAS GARANTÍAS TÁCITAS INCLUYENDO LAS GARANTÍAS DE COMERCIABILIDAD O APTITUD PARA UN PROPÓSITO ESPECIAL POSEEN UN TÉRMINO LIMITADO DE UN AÑO O EL PERÍODO MÁS CORTO PERMITIDO POR LA LEY Algunos estados no permiten limitaciones en cuanto al plazo de una garantía implícita por lo tanto las limitaciones o exclusiones antedichas pueden no apl...

Page 133: ...cubierta de vidrio causados por derrames endurecidos de sustancias azucaradas o plásticos fundidos que no hubiesen sido limpiados de acuerdo con las instrucciones incluidas en la guía de uso y cuidados SAMSUNG no garantiza el funcionamiento ininterrumpido o sin errores del producto SALVO LO ESTABLECIDO EN ESTE DOCUMENTO NO EXISTEN GARANTÍAS RESPECTO DE ESTE PRODUCTO NI EXPRESAS NI TÁCITAS Y SAMSUN...

Page 134: ...go abierto El software incluido en este producto contiene software de código abierto Consulte la información de licencia de origen relacionada con este producto a través de la siguiente URL http opensource samsung com opensource SMART_TP2_0 seq 0 ...

Page 135: ...Notas ...

Page 136: ...TAS O COMENTARIOS PAÍS LLAME AL O VISÍTENOS EN LÍNEA EN U S A Consumer Electronics 1 800 SAMSUNG 726 7864 www samsung com us support CANADA 1 800 SAMSUNG 726 7864 www samsung com ca support English www samsung com ca_fr support French NE63 861 01 Escanee el código QR o visite www samsung com spsn para ver nuestros útiles videos instructivos y programas en vivo Requiere un lector instalado en su te...

Page 137: ...Cuisinière électrique Manuel d utilisation NE63 861 NE63 861 ...

Page 138: ...sures mortelles chez l enfant et l adulte AVERTISSEMENT Ne marchez pas ne vous appuyez pas et ne vous asseyez pas sur les portes de la cuisinière L appareil risquerait de basculer et provoquer de graves blessures Confirmez que le dispositif anti basculement est correctement installé Puis vérifiez que le dispositif anti basculement est fixé saisissez l arrière de la cuisinière par le bord arrière e...

Page 139: ... suivantes Réorientation ou déplacement de l antenne de réception Augmentation de la distance entre l appareil et le récepteur Branchement de l appareil sur une prise se trouvant sur un circuit différent de la radio ou de la télévision Demande d aide auprès du revendeur ou d un technicien radio TV expérimenté Informations relatives à la réglementation 1 Avis de la FCC ATTENTION MISE EN GARDE DE LA...

Page 140: ...ites d exposition aux rayonnements établies par la norme RSS 102 d IC définies pour un environnement non contrôlé Cet appareil doit être installé et utilisé en laissant une distance d au moins 8 pouces 20 cm entre le radiateur et votre corps Cet appareil ainsi que son ou ses antenne s ne doivent pas être situés au même endroit et être utilisés conjointement à tout e autre antenne ou émetteur Consi...

Page 141: ... four 31 Verrouillage du four 31 Réglage de l horloge 32 Réglage de la minuterie 32 Cuisson minutée 32 Départ différé 33 Activation et désactivation de l éclairage du four 33 Réglages minimum et maximum 33 Utilisation des grilles du four 34 Cuisson traditionnelle 35 Cuisson par convection 36 Rôtissage par convection 37 Cuisson au gril 37 Friture par application d air 38 Utilisation de Fonction spé...

Page 142: ...signes de sécurité importantes Lisez et suivez toutes les consignes avant d utiliser votre cuisinière afin d éviter tout risque d incendie d électrocution de blessure ou de dommage lors de son utilisation Le présent guide ne couvre pas toutes les situations susceptibles de se produire Communiquez toujours avec votre réparateur ou le fabricant en cas de fonctionnement anormal de l appareil CE QUE V...

Page 143: ...nuel vous y autorise Toute autre réparation devra être effectuée par un technicien qualifié Éteignez toujours l appareil avant de procéder à une réparation en retirant le fusible ou en coupant le disjoncteur Ne pénétrez pas à l intérieur du four Ne rangez pas d objets susceptibles d éveiller l intérêt des enfants dans les placards situés au dessus de la cuisinière ou sur le dosseret de la cuisiniè...

Page 144: ...r Maintenez tout objet en plastique vêtement et papier à distance des pièces susceptibles d être chaudes Portez les vêtements appropriés Ne portez jamais de vêtements amples lorsque vous utilisez cet appareil Utilisez uniquement des maniques sèches L utilisation de maniques humides ou mouillées sur les surfaces chaudes peut entraîner des brûlures en raison de la vapeur qui se dégage à ce moment là...

Page 145: ...ues changements de températures utilisez uniquement des ustensiles en verre en vitrocéramique en céramique en terre cuite ou en faïence Ne laissez jamais la table de cuisson sans surveillance lorsqu un foyer fonctionne à puissance élevée en cas de débordement les particules graisseuses provenant des aliments risquent de s enflammer Un récipient continuant de chauffer à vide risque de fondre Ne pos...

Page 146: ...aîner l annulation de la garantie Les appareils encastrés ne doivent être mis en marche qu après avoir été installés dans un meuble ou un lieu de travail conforme aux normes en vigueur Cela garantit une installation des appareils conforme aux normes de sécurité appropriées En cas de dysfonctionnement ou de détérioration cassure fêlure de l appareil éteignez toutes les zones de cuisson débranchez l...

Page 147: ...as âge doivent être tenus à l écart de l appareil afin d éviter toute brûlure FOUR NE TOUCHEZ PAS LES ÉLÉMENTS CHAUFFANTS OU LES SURFACES INTERNES DU FOUR Les éléments chauffants peuvent être chauds même s ils sont noirs Les surfaces internes d un four deviennent suffisamment chaudes pour provoquer des brûlures Pendant et après le fonctionnement ne touchez pas les éléments chauffants et les surfac...

Page 148: ...ppropriée tant que le four est encore froid Si vous devez déplacer une grille alors que le four est chaud utilisez des maniques Les poignées des récipients ne doivent jamais toucher les éléments chauffants du four L aluminium ou la sonde thermique ne doit pas toucher les éléments chauffants Cet appareil devient chaud pendant son utilisation Prenez garde à ne pas toucher les éléments chauffants sit...

Page 149: ...aliments Avant de lancer le cycle d auto nettoyage essuyez la graisse et les résidus alimentaires dans le four Une quantité excessive de graisse peut s enflammer provoquant de la fumée dommageable pour votre intérieur N utilisez pas de revêtement protecteur pour recouvrir le four et n utilisez pas de nettoyant commercial pour four sauf s il est certifié pour une utilisation dans un four autonettoy...

Page 150: ...lez à ne pas vous brûler avec la vapeur Certains nettoyants peuvent former des fumées toxiques s ils sont appliqués sur une surface chaude AVERTISSEMENTS IMPORTANTS RELATIFS À L INSTALLATION AVERTISSEMENT Cet appareil doit être installé par un technicien qualifié ou une société de dépannage Le non respect de cette consigne d installation par un technicien qualifié peut provoquer une électrocution ...

Page 151: ...n et ne le pliez pas de façon excessive Ne vrillez et ne serrez pas le cordon d alimentation N accrochez pas le cordon d alimentation sur un objet métallique ne placez pas d objet lourd sur le cordon d alimentation n insérez pas le cordon d alimentation entre des objets Cela pourrait entraîner un risque d électrocution ou d incendie Si le cordon d alimentation est endommagé contactez le centre de ...

Page 152: ... provoquer un dysfonctionnement de l appareil Retirez l emballage des aliments avec précaution lorsque vous sortez ces derniers du four Si les aliments sont chauds de la vapeur chaude peut s échapper soudainement lorsque vous en retirez l emballage et vous risquez de vous brûler Ne tentez pas de réparer démonter ou modifier vous même l appareil Le châssis de l appareil étant traversé par un couran...

Page 153: ...centre de maintenance Samsung le plus proche N essayez pas de modifier d ajuster ou de réparer la porte NE retirez JAMAIS la porte ou l habillage du four N entreposez et n utilisez jamais le four en extérieur Cet appareil ne doit jamais être utilisé à d autres fins que la cuisson Si vous vous servez de l appareil pour un autre usage que celui auquel il est destiné vous risquez de provoquer un ince...

Page 154: ...ace du four est fissurée n utilisez pas l appareil Le non respect de cette consigne risque d entraîner une électrocution Les plats et récipients peuvent devenir extrêmement chauds Manipulez les avec précaution Les plats chauds et la vapeur peuvent provoquer des brûlures Retirez le couvercle des récipients avec précaution en veillant à éloigner ces derniers de votre visage et de vos mains afin d év...

Page 155: ...ement nocives pour la santé mais elles peuvent également entraîner une électrocution un incendie ou une défaillance de l appareil N approchez pas votre visage ou votre corps de l appareil pendant la cuisson ou lors de l ouverture de la porte juste après la cuisson Veillez à ce que les enfants ne s approchent pas trop près de l appareil Le non respect de cette consigne risque d entraîner des brûlur...

Page 156: ...AVERTISSEMENTS IMPORTANTS RELATIFS AU NETTOYAGE ATTENTION Ne nettoyez pas l appareil en pulvérisant directement de l eau dessus N utilisez pas de benzène de diluant ou d alcool pour nettoyer l appareil Cela pourrait entraîner une décoloration une déformation des dommages sur l appareil ainsi qu un risque d électrocution ou d incendie Prenez garde à ne pas vous blesser en nettoyant l appareil extér...

Page 157: ...ous pouvez le commander auprès du Centre d assistance Samsung 1 800 726 7864 Présentation de votre nouvelle cuisinière Présentation 03 04 05 06 07 08 09 01 02 01 Écran tactile 02 Boutons de commande de la surface reportez vous en page 23 pour plus d informations 03 Ventilation 04 Porte du four 05 Tiroir de rangement 06 Élément chauffant du four pour gril 07 Éclairage du four 08 Système de convecti...

Page 158: ...ipient sur le foyer Ne stockez pas d objets lourds au dessus de la table de cuisson Ils pourraient tomber et l endommager ATTENTION PENDANT LA CUISSON Ne posez pas d objets métalliques tels que couteaux fourchettes cuillères ou encore couvercles sur la table de cuisson à induction car ils chaufferaient à leur tour Après utilisation éteignez les foyers à induction en utilisant son bouton de command...

Page 159: ...tre en marche à des fins de refroidissement Le délai d activation du ventilateur peut varier en fonction de la température du capteur interne 10 minutes ou 20 minutes Si un placard de rangement est installé directement au dessus de la table de cuisson assurez vous que les éléments qu il contient sont rarement utilisés et qu ils ne sont pas sensibles à la chaleur La chaleur peut s avérer dangereuse...

Page 160: ...iche lorsque le mode Sabbath Shabbat ou Self clean Auto nettoyage est activé Comment régler la cuisinière pour utiliser la table de cuisson ATTENTION Les foyers de la table de cuisson peuvent être chauds même éteints et provoquer des brûlures Ne touchez pas les foyers de la table de cuisson avant qu ils n aient suffisamment refroidi Ne laissez jamais cuire vos aliments sans surveillance lorsque vo...

Page 161: ...vous tournez le bouton de commande sur 9 Boost 9 Pleine puissance depuis un autre niveau de puissance la zone de cuisson à induction fonctionnera au niveau de puissance Vous ne pouvez pas régler Pleine puissance si vous tournez le bouton sur la gauche Dans certaines circonstances la fonction Pleine puissance peut être désactivée automatiquement afin de protéger les composants électroniques interne...

Page 162: ...oivent être à fond plat afin d assurer un bon contact avec la surface de la zone de cuisson Vérifiez que le fond du récipient est plat en faisant tourner une règle dessus Assurez vous de suivre scrupuleusement toutes les consignes d utilisation associées au récipient Veillez également à Utiliser des récipients dont le matériau est adapté à la cuisson à induction Reportez vous à la section Récipien...

Page 163: ...mme étant appropriés Matière des récipients Matière des récipients Utilisable Acier acier émaillé Oui Fonte Oui Acier inoxydable Si recommandé par le fabricant Aluminium cuivre laiton N Verre céramique porcelaine N REMARQUE Les récipients adaptés à la cuisson à induction sont étiquetés comme tel par le fabricant Certains récipients peuvent produire du bruit lorsqu ils sont utilisés sur les zones d...

Page 164: ... Le ventilateur s arrêtera automatiquement au bout de quelques minutes Ces bruits sont normaux et ne traduisent pas un dysfonctionnement Utilisation des récipients adaptés à la cuisson à induction Test d aptitude à l emploi Les récipients adaptés à la cuisson à induction possèdent un fond magnétique faire le test de l aimant et sont étiquetés comme étant adaptés à ce type de cuisson par le fabrica...

Page 165: ... Celui ci doit être épais et plat Vérifiez le diamètre du fond du récipient lors de l achat de nouvelles casseroles ou poêles Les fabricants ne mentionnent souvent que le diamètre du bord du récipient N utilisez pas de casseroles dont le fond est endommagé ex rugueux Vous pouvez rayer la surface de cuisson en céramique de manière définitive si vous faites glisser un récipient ou une casserole dont...

Page 166: ...s que celle ci est sale les taches peuvent devenir définitives Prévention d autres dommages Évitez de laisser du plastique du sucre ou des aliments à forte teneur en sucre fondre sur la table de cuisson chaude Si cela se produit nettoyez la immédiatement Ne laissez pas une casserole bouillir jusqu à évaporation complète La table de cuisson et la casserole en seraient endommagées N utilisez pas la ...

Page 167: ...uton pendant 3 secondes pour désactiver la minuterie 13 Cook Time Temps de cuisson appuyez sur cette touche puis utilisez le pavé numérique et définissez le temps de cuisson des aliments Le four s éteint une fois le temps de cuisson écoulé 14 Delay Start Départ différé permet de régler le départ et l arrêt automatique du four selon l heure définie Cuisson traditionnelle Cuisson par convection Rôti...

Page 168: ...nt automatiquement Vous ne pouvez utiliser la fonction de cuisson minutée qu en parallèle à une autre option de cuisson Cuisson traditionnelle Cuisson par convection Rôtissage par convection Comment régler le four pour la cuisson minutée 1 Démarrez le mode de cuisson de votre choix par ex Bake Cuisson traditionnelle La température par défaut est de 350 F 2 Appuyez sur Cook Time Temps de cuisson Vo...

Page 169: ... RÉGLAGE À l heure réglée un court signal sonore retentit Le four commence alors à chauffer Activation et désactivation de l éclairage du four L éclairage du four s allume automatiquement à l ouverture de la porte L éclairage du four s éteint automatiquement à la fermeture de la porte Vous pouvez activer et désactiver l éclairage du four manuellement en appuyant sur Réglages minimum et maximum Tou...

Page 170: ...uniqué qu à titre indicatif Emplacement de la grille et des plats 3 4 Grille unique Grille unique Positionnez les moules à gâteaux le plus au centre possible du four pour assurer de meilleurs résultats Si vous utilisez plusieurs moules espacez les d au moins 1 à 1 Lorsque vous cuisinez sur une seule grille du four placez la en position 3 ou 4 Reportez vous à la figure sur la gauche 5 3 Plusieurs g...

Page 171: ...lat de cuisson utilisé Les revêtements sombres ou antiadhésifs peuvent permettre de cuire les aliments plus rapidement avec plus de brunissement Comment régler la température 1 Appuyez sur Bake Cuisson traditionnelle La température par défaut est de 350 F 2 Saisissez la température de votre choix à l aide du pavé numérique par ex 3 7 5 3 Appuyez sur START SET DÉPART RÉGLAGE La température affichée...

Page 172: ...r convection sur une seule grille placez cette dernière sur la position 3 ou 4 Si vous cuisinez sur plusieurs grilles placez les grilles du four aux positions 3 et 5 ou 2 et 5 Lorsque vous cuisez des gâteaux l utilisation du mode Cuisson traditionnelle et non du mode Cuisson par convection offre de meilleurs résultats Comment régler le four pour la cuisson par convection 1 Appuyez sur Bake Cuisson...

Page 173: ...nuera à fonctionner jusqu à ce que le four ait refroidi REMARQUE Pour des raisons de performance le ventilateur de convection peut être allumé ou éteint durant le fonctionnement Cuisson au gril La cuisson au gril est une méthode de cuisson des morceaux de viande tendres utilisant la chaleur directe sous le gril du four La chaleur élevée permet de cuire plus rapidement et permet de brunir les alime...

Page 174: ...ecette ou les instructions figurant sur l emballage Comment régler le four pour le mode de friture par application d air 1 Placez la plaque à la position 3 2 Sélectionnez le mode Air fry Friture par application d air 3 Utilisez le pavé numérique pour modifier la température par défaut Saisissez la température suggérée pour votre aliment selon le guide de cuisson recommandé La température par défau...

Page 175: ...0 à 30 min Aliment Quantité Température Temps Astuces Rondelles d oignon congelées 20 à 25 oz 400 F à 425 F 15 à 20 min Bâtonnets de poisson surgelés 20 à 25 oz 425 F 18 à 22 min Lamelles de poulet surgelées 25 à 30 oz 425 F à 450 F 20 à 30 min Churros congelés 20 à 25 oz 425 F 18 à 22 min Volaille Pilons de poulet frais 40 à 45 oz 425 F à 450 F 30 à 35 min Badigeonnez avec 3 cuillères à soupe d h...

Page 176: ... Avant de commencer une friture par application d air allumez une hotte aspirante et réglez la à un niveau de ventilation élevé Aérez fréquemment votre cuisine lors de la cuisson en mode Friture par application d air Une fois que le four a refroidi essuyez l intérieur du four avant et après la cuisson par friture par application d air Nettoyez régulièrement les filtres à graisse de la hotte aspira...

Page 177: ...e fois la cuisson terminée la fonction Maintien au chaud maintient les aliments à une température idéale pour le service pendant une durée de 3 heures maximum Au bout de 3 heures la fonction s éteint automatiquement Vous pouvez utiliser la fonction de maintien au chaud sans autre mode de cuisson ou vous pouvez l activer après utilisation de la minuterie ou du départ différé N utilisez pas cette fo...

Page 178: ...re actionnées depuis l application SmartThings peuvent ne pas fonctionner avec fluidité si les conditions de communication se détériorent ou si l appareil est installé dans un endroit avec un faible signal Wi Fi Veuillez vous reporter au tableau suivant pour connaître les principales fonctions pouvant être actionnées depuis l application Lorsque la commande à distance est désactivée Surveillance f...

Page 179: ...s et inversement 1 Appuyez sur Options pendant 3 secondes puis sur la touche 2 du pavé numérique 2 Appuyez sur 1 Fahrenheit ou 2 Celsius sur le pavé numérique 3 Appuyez sur START SET DÉPART RÉGLAGE pour enregistrer les modifications Utilisation de la fonction des options Cette fonction vous permet de contrôler plusieurs options de commande électronique Reportez vous au tableau suivant pour connaît...

Page 180: ...our après 12 heures d utilisation pendant une cuisson traditionnelle ou après 3 heures d utilisation pendant une cuisson au gril Réglage par défaut Activation Comment activer ou désactiver la fonction Économie d énergie 12 heures 1 Appuyez sur Options pendant 3 secondes puis sur la touche 5 du pavé numérique 2 Appuyez sur 1 12Hr ou 2 Hr sur le pavé numérique 3 Appuyez sur START SET DÉPART RÉGLAGE ...

Page 181: ...Le message SAb n est plus affiché Utilisation de la fonction Sabbat Utilisée pour les fêtes juives et le sabbat K Pour en savoir plus et obtenir des instructions d utilisation et une liste complète des modèles équipés de la fonction Sabbat veuillez consulter le site Internet sur http www star k org Vous pouvez utiliser la fonction Sabbat avec la cuisson uniquement La température du four peut être ...

Page 182: ...N ouvrez pas la porte du four et ne changez pas la température du four pendant environ 30 minutes après avoir lancé le mode Sabbat afin que le four atteigne la température réglée Notez que pour de meilleures performances le ventilateur du four ne fonctionne que lorsque la température du four augmente N utilisez pas la table de cuisson lorsque le four est en mode Sabbat Entretien de votre appareil ...

Page 183: ...Verrouillage s affichent à l écran Le verrouillage entraîné par moteur de la porte s enclenche automatiquement 5 Le cycle d auto nettoyage démarre automatiquement à l heure réglée Avant le cycle d auto nettoyage Fig 1 Fig 1 Fig 2 Fig 2 Le joint de la porte Le joint de la porte du four ne doit du four ne doit pas être nettoyé pas être nettoyé manuellement manuellement La porte peut La porte peut êt...

Page 184: ...du four est supérieure à 100 F la fonction Steam Clean Nettoyage vapeur ne peut pas être activée Pour assurer des résultats optimaux il est préférable de démarrer cette fonction à four froid C est pourquoi nous vous conseillons d attendre que le four ait refroidi et que le message Hot Chaud disparaisse de l écran ATTENTION Portez des gants pendant le nettoyage Comment désactiver la fonction d auto...

Page 185: ...r les traces avant d activer la fonction de nettoyage vapeur Une fois le nettoyage terminé laissez la porte du four entrouverte à un angle de 15 pour permettre à la surface émaillée interne de sécher complètement Entretien et nettoyage du four AVERTISSEMENT Avant de nettoyer une quelconque partie de la cuisinière assurez vous que toutes les commandes sont DÉSACTIVÉES et que toutes les surfaces son...

Page 186: ... friture par application d air en utilisant un tampon à récurer en plastique REMARQUE La plaque de friture par application d air peut être nettoyée au lave vaisselle ATTENTION Ne laissez pas la plaque de friture par application d air dans le four pendant le cycle d auto nettoyage La chaleur extrême générée pendant ce cycle peut retirer définitivement le revêtement de la plaque de friture par appli...

Page 187: ...e de ventilation et les moteurs de refroidissement et ne laissez pas non plus y pénétrer de substances étrangères lors du nettoyage de la table de cuisson Nettoyage après une utilisation quotidienne Utilisez uniquement un nettoyant céramique pour la table de cuisson L utilisation d autres crèmes n a pas la même efficacité En respectant les étapes suivantes vous parviendrez à maintenir en bon état ...

Page 188: ...gouttes de nettoyant pour table de cuisson en céramique sur l ensemble de la surface couverte de résidus brûlés 3 En utilisant un tampon de nettoyage conçu pour les surfaces de cuisson en céramique frottez la zone couverte de résidus en appuyant si nécessaire 4 Si des résidus subsistent répétez autant de fois que nécessaire les étapes décrites ci dessus 5 Pour une protection optimale et une fois t...

Page 189: ...rez les éclaboussures à l aide de papier absorbant 3 Aucun résidu d éclaboussure ne doit subsister tant que la table de cuisson est encore chaude 4 Ne réutilisez pas les foyers tant que tous les résidus n ont pas été complètement supprimés REMARQUE Si une piqûre ou des creux se sont déjà formés sur la surface vitrée le verre de la table de cuisson devra être remplacé Dans ce cas une intervention e...

Page 190: ...tre en position de verrouillage 5 Fermez la porte du four Fig 2 Fig 2 5 Soulevez et retirez la porte jusqu à ce que le bras de la charnière soit enlevé de son logement Fig 2 Comment réinstaller la porte Bras de la charnière Bras de la charnière Partie Partie inférieure inférieure du logement du logement Partie creuse Partie creuse 1 Saisissez fermement les deux côtés de la porte par le haut 2 En m...

Page 191: ... appuyez sur pour activer ou désactiver l éclairage L éclairage ne s active pas durant un cycle d auto nettoyage Retirer Retirer Cache en verre Cache en verre Ampoule Ampoule Remise en place Remise en place 1 Assurez vous que le four et l ampoule sont froids 2 Débranchez la cuisinière ou mettez la hors tension 3 Tournez le cache en verre situé à l arrière du four dans le sens inverse des aiguilles...

Page 192: ...rfère avec les mouvements de la cuisinière Ménagez un espace suffisant pour que la cuisinière puisse être soulevée de la moquette ÉCRAN DE COMMANDE Problème Cause possible Solution L affichage s atténue Un fusible de votre habitation est peut être grillé ou le disjoncteur peut s être déclenché Remplacez le fusible concerné ou réenclenchez le disjoncteur L affichage clignote Une coupure de courant ...

Page 193: ...re normalement Problème Cause possible Solution Le foyer s éteint et se rallume fréquemment Le foyer s éteint et se rallume afin de conserver la puissance réglée Ce phénomène est normal et ne constitue pas un dysfonctionnement du système Utilisez la cuisinière normalement Le foyer redevient noir lorsqu un réglage plus faible est sélectionné Ceci est tout à fait normal Le foyer est toujours allumé ...

Page 194: ...ssible Solution La cuisinière ne s allume pas La cuisinière n est pas correctement branchée sur la prise murale un fusible de votre habitation est peut être grillé ou un disjoncteur s est peut être déclenché Assurez vous que le cordon d alimentation est branché sur une prise en état de marche et correctement mise à la terre Vérifiez le fusible et le disjoncteur Câblage incomplet Contactez un centr...

Page 195: ...ès sale Essuyez les éclaboussures importantes avant de démarrer le cycle d auto nettoyage Les fours excessivement sales nécessitent un nouvel auto nettoyage plus long Problème Cause possible Solution Les aliments ne cuisent pas ou ne sont pas rôtis correctement Les commandes du four n ont pas été correctement réglées Reportez vous à la section relative à l utilisation du four commençant en page 31...

Page 196: ...de l isolation de la cavité du four lors des premières utilisations de votre four Faites fonctionner le four à vide en mode Cuisson traditionnelle sur 400 F pendant 1 heure Bruit au niveau du ventilateur Un ventilateur de convection peut se déclencher ou s arrêter automatiquement Ceci est tout à fait normal il ne s agit pas d un dysfonctionnement du système Vous avez des difficultés à faire glisse...

Page 197: ...e coupez l alimentation de la cuisinière pendant 30 secondes puis rétablissez la Si le problème n est pas résolu contactez un centre de dépannage C d1 Le verrou de la porte est désaxé C F0 Ce code apparaît si la communication entre la carte de circuit imprimé principale et la carte de circuit imprimé secondaire est interrompue C F2 Ce code apparaît si la communication entre la carte de circuit imp...

Page 198: ...endant 30 secondes puis rétablissez la Si le problème n est pas résolu contactez le service technique TABLE DE CUISSON Code affiché Cause possible Solution Ce code apparaît si la communication entre la carte de circuit imprimé principale et la carte de circuit imprimé de l onduleur est interrompue Tournez le bouton sur la position Off Arrêt puis tournez le sur le réglage que vous souhaitez à nouve...

Page 199: ...u qui n auraient pas été nettoyées selon les instructions fournies dans le guide d utilisation et d entretien Le coût des réparations ou du remplacement dans de telles circonstances exclues sera à la charge du client Les interventions par un réparateur agréé visant à expliquer les fonctions de l appareil ou les procédures de maintenance ou d installation ne sont pas couvertes par la présente garan...

Page 200: ...S DE QUALITÉ MARCHANDE OU D ADÉQUATION À UN USAGE PARTICULIER SONT LIMITÉES À UN AN OU À LA PLUS COURTE PÉRIODE AUTORISÉE PAR LA LOI Certains États et certaines juridictions n autorisent pas de limitations quant à la durée d une garantie implicite il se peut par conséquent que les limitations et exclusions énoncées ci dessus ne s appliquent pas à votre cas La présente garantie vous confère des dro...

Page 201: ...que stipulé dans les présentes conditions et procédera au remplacement ou au changement des pièces ou des produits si ces derniers s avèrent défectueux dans la limite de la période de garantie mentionnée précédemment Toute pièce ou tout produit remplacé devient la propriété de SAMSUNG et doit lui être restitué Les pièces et produits de rechange sont protégés pendant le reste de la période de garan...

Page 202: ...nnonce de contenu libre Le présent produit contient un logiciel libre L URL http opensource samsung com opensource SMART_TP2_0 seq 0 suivante permet d accéder aux informations sur la licence de source libre relatives à ce produit ...

Page 203: ...Notes ...
Page 204: ... UNE QUESTION UN COMMENTAIRE PAYS N DE TÉLÉPHONE SITE INTERNET U S A Consumer Electronics 1 800 SAMSUNG 726 7864 www samsung com us support CANADA 1 800 SAMSUNG 726 7864 www samsung com ca support English www samsung com ca_fr support French NE63 861 01 Scannez le code QR ou rendez vous sur le site www samsung com spsn pour voir nos vidéos et démonstrations en direct d utilisation Requiert l insta...

Reviews: