background image

Troubleshooting   67

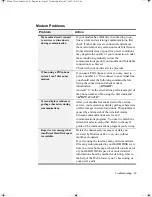
Modem Problems

Problem

Action

My modem doesn't connect 
to services or disconnects 
during communication

If your modem has difficulty in connecting to on-
line services and sustaining communications, first 
check if other devices are connected and remove 
them. Also remove any extension leads. Interference 
from certain devices or poor line power conditions 
may degrade the quality of your connection. Under 
these conditions gradually reduce the 
communication speed of your modem until a reliable 
connection is achieved.
Check with your on-line service provider.

When using a PBX phone 
system I can't dial on my 
modem.

If you use a PBX phone system you may need to 
press a number i.e. '9' to connect to an external line, 
you should enter the following command before 
trying the connection and check modem 
initialization.           (

ATX3&W

)

And add “9,” as the external line prefix (example) of 
the phone number when using the dial command 

ATDT9, 123-4567

”.

Screen displays random or 
garbage characters during 
communications.

After your modem has connected to the on-line 
service, your screen may display garbage characters 
or after-images in screen transitions. This problem is 
caused by a mismatch of the terminal modes 
between communications service and 
communications programs. You need to match the 
terminal modes to each other. Refer to the user's 
guide of the communications program you're using.

Reports error message that 
insufficient Hard Disk space 
is available.

Delete the unnecessary messages or data you 
received by Modem or Fax every one to three 
months as required.
If you're using the internet, many picture and data 
files can get downloaded to your HARD DISK every 
time you visit a home page, which will consume a lot 
of your HARD DISK space. For more detailed 
information about the method of deleting, refer to 
the help of the Web browser you've been using or 
your user's guide.

Matrix 3 Plus (Windows XP) - English.fm  Page 67  Wednesday, March 27, 2002  10:41 AM

Summary of Contents for NT10FK01D1/SUK

Page 1: ... herein are for identification purposes only and may be trademarks and or registered trademarks of their respective companies Macrovision Statement If your computer has a DVD drive and an analog TV Out port the following paragraph applies This product incorporates copyright protection technology that is protected by method claims of certain U S patents and other intellectual property rights owned ...

Page 2: ...ource indicated on the rating label Ensure that the electrical outlet you are using to power your equipment is easily accessible in case of fire or short circuit If your computer has a voltage selector switch make sure that the switch is in the proper position for your area Openings in the computer case are provided for ventilation Do not block or cover these openings Make sure you provide adequat...

Page 3: ... avoid electrical shock always unplug all power cables remove the battery and modem cables from the wall outlets before cleaning the system Unplug the system from the wall outlet and refer servicing to qualified personnel if The power cord or plug is damaged Liquid has been spilled into the system The system does not operate properly when the operating instructions are followed The system was drop...

Page 4: ...e rechargeable batteries in the garbage Contact the Samsung Helpline for information on how to dispose of batteries that you cannot use or recharge any longer Follow all local regulations when disposing of old batteries Notice and Safety With Wireless English fm Page iv Thursday January 31 2002 6 44 PM ...

Page 5: ...ion between the equipment and receiver Connect the equipment into an outlet on a circuit different from that to which the receiver is connected Consult the dealer or an experienced radio TV technician for help If necessary the user should consult the dealer or an experienced radio television technician for additional suggestions The user may find the following booklet helpful Something About Inter...

Page 6: ...tinuance of service may be required But if advance notice is not practical the telephone company will notify the customer as soon as possible Also you will be advised of your right to file a complaint with the FCC if you believe it is necessary The telephone company may make changes in its facilities equipment operations or procedures that could affect the operation of the equipment If this happen...

Page 7: ...tion to the public switched telephone network PSTN However due to differences between the individual PSTNs provided in different countries the approval does not of itself give an unconditional assurance of successful operation on every PSTN network termination point In the event of problems you should contact your equipment supplier in the first instance Canadian Radio Interference Regulations Thi...

Page 8: ... Services DHHS Radiation Performance Standard Should the unit ever need servicing contact an authorized service location Laser Safety Note Use of controls or adjustments or performance of procedures other than those specified in this manual may result in hazardous radiation exposure To prevent exposure to laser beams do not try to open the enclosure of a CD or DVD drive Notice and Safety With Wire...

Page 9: ...below are applicable to all countries The length of the power cord set must be at least 6 00 feet 1 8m and a maximum of 9 75 feet 3 0m All power cord sets must be approved by an acceptable accredited agency responsible for evaluation in the country where the power cord set will be used The power cord set must have a minimum current capacity of 7 A and a nominal voltage rating of 125 or 250 volts A...

Page 10: ...coupler flexible cord and wall plug must bear a T mark and registration number in accordance with the Japanese Dentori Law Flexible cord must be Type VCT or VCTF 2 conductor 0 75 mm conductor size Wall plug must be a two pole grounding type with a Japanese Industrial Standard C8303 15 A 125V configuration Country Accrediting Agency Applicable Note Numbers Australia EANSW 1 Austria OVE 1 Belgium CE...

Page 11: ...ssibility of personal injury Caution Warns you of possible damage to equipment or data Note Informs you of special circumstances Technical Information Informs you of special requirements or limitations for use of item s Keyboard Conventions Keys that you need to press to perform certain functions are displayed in the manual using a small graphic of the button For example Ctrl or Ctrl indicates the...

Page 12: ...e Start Button shown on the right Table 1 Touchpad Click Conventions Windows Conventions Almost all Windows programs will display the name function of a button or icon if you place the touchpad pointer on the item you want information about Software User Documentation Your computer is shipped from the factory with several software programs installed The software may include its own online or print...

Page 13: ...eet your computing needs at home or on the road Figures may be different depending on options Where Everything Is The next 6 figures will explain the location of all of the buttons LEDs and equipment needed to operate your notebook computer Front SENS Keyboard Buttons Touchpad Speaker Touchpad Buttons Power Button LCD Latch LEDs Keyboard Speaker Power Battery Status E mail LEDs Biometric Security ...

Page 14: ...Button E Mail Button Internet Button E Mail Alert Power Battery Status FDD Fan Vent LAN Port CD DVD ROM Hard Drive PC Card Eject Buttons PC Card Slot Fan Vent Security Lock Port Microphone Jack Headphone Jack Battery Wheel Volume Control Line In Jack TV Out Port SPDIF In Jack Matrix 3 Plus Windows XP English fm Page 4 Wednesday March 27 2002 10 41 AM ...

Page 15: ...ort Parallel Printer Port PS 2 Port USB Ports 1394 Port Docking Connector DC In Port Fan Vent Hard Drive Battery Compartment Flex Bay Latch Mini PCI Memory Compartment Compartment Flex Bay Compartment Matrix 3 Plus Windows XP English fm Page 5 Wednesday March 27 2002 10 41 AM ...

Page 16: ... battery compartment cover straight up and off the computer Insert the battery into the battery compartment ensuring the correct orientation so that the battery fits in its slot properly 3 Slide the battery pack into the compartment Make sure the battery is fully inserted into the compartment 4 Align the tabs on the battery compartment cover with the slots on the battery compartment 5 Push the cov...

Page 17: ...dapter into the power connector on the back side of the computer 2 Connect the power cord to the AC adapter and then to an electrical outlet The battery starts charging as soon as you plug the power cord into an electrical outlet The battery charges faster if the computer is turned off during charging If the battery is fully depleted and the computer is turned off the battery charges in about 3 ho...

Page 18: ...een and follow the simple directions You must complete this process in order to use your computer A tutorial is provided if you require it Adjusting the LCD Display You may wish to adjust the LCD Liquid Crystal Display when you begin using your computer A TFT Thin Film Transistor LCD does not require adjustment for contrast because the contrast is set to remain at maximum To adjust the LCD Press F...

Page 19: ...shutdown sequence Power Off If the system does not power off then press and hold the power button for over 5 seconds See Using Power Management Options on page 48 Power Button Functions The power button has several functions other than just turning on and off your computer see Using Power Management Options on page 48 You can also perform a soft boot by saving your files and pressing Ctrl Alt Del ...

Page 20: ...uter in extremely hot or cold areas such as a car on a hot day Keep the computer away from heaters and out of direct sunlight Exposure to excessive heat may damage computer components If you have left your computer in a hot place let it cool down slowly to room temperature with the LCD panel open before using it Do not remove the memory module compartment door or try to install a memory module whe...

Page 21: ... the power cord is easily accessible You may be required to turn on the computer for airport security personnel Be prepared to turn off the computer during take off and landing Locking your Computer As a precaution when you are travelling or using your computer in an unsecured area you should keep your computer as safe as possible An option to do this is the Security Lock System Follow the Securit...

Page 22: ...may jam the keyboard despite your efforts to dry it If you spill liquid on the LCD panel clean it immediately with a soft cloth and denatured alcohol or a proprietary LCD screen cleaner Do not use water window cleaner acetone aromatic solvent or dry rough towels to clean it Some liquids damage the polarized LCD screen If your screen is damaged contact your authorized manufacturer s service center ...

Page 23: ...are arranged like a standard typewriter keyboard and are used for text entry The Windows keys on either side of the spacebar open Windows menus and perform other special functions Function keys when pressed together with the key enable special functions Cursor and Screen control keys move the cursor They may perform other functions depending on your software To clean the computer keyboard use slig...

Page 24: ...o turn on the embedded numeric keypad The numeric functions of the keypad are enabled and the Num Lock LED turns on See Reading the System Status Lights on page 20 for the location of the Num Lock LED While the numeric functions are enabled you can temporarily return a key to its normal function by pressing and the key For example to type the letter m press this operation displays the letter m To ...

Page 25: ...pper right corner of your screen The gauge closes in a few seconds or you can press Esc to close the gauge See Monitoring the Battery Charge on page 39 for more information on the battery gauge F8 Mute Mute Increases the audio volume F9 Volume down Volume down Decreases the audio volume F10 Volume up Volume up Increases the audio volume F11 Rest Rest Puts the computer into Suspend mode To resume n...

Page 26: ...y Setting window is displayed 2 Select Button you wish to reprogram from the drop down menus in the Key Setting window 3 Use the Browse button to locate the program you wish to assign to the SENS Keyboard button selected 4 Click on your program choice to select it 5 Click Open 6 Click OK to close window and complete programming the Sens Keyboard Internet E Mail Outlook Windows Calculator Internet ...

Page 27: ...uchpad gently The touchpad responds to light pressure Table 3 Using the Touchpad Action Process and Comment Click Tap Process Depress the touchpad left button and release or position the pointer over the object and Quickly tap the touchpad once with your finger This action is called clicking Comment This will cause a process to begin or select an object on the screen Touchpad Mouse Buttons Scroll ...

Page 28: ...e folder Click Hold Process Depress the left touchpad button and do not release Comment This is used to move drag objects to new locations See Drag Move on page 19 Right Click Process Position the pointer over the object Quickly press and release the right button once This action is called Right clicking Comment This is usually used to obtain information about an object or access a short cut menu ...

Page 29: ...rag the window using the touchpad Area or Multiple item selection The drag function may be used to select an area or multiple items in an area by clicking in one area and then dragging to create a selection window The items inside the window will be selected Cursor in Windows Title Bar 1 Click the Window Title Bar and Hold 1 2 Drag your finger to move the window 2 Matrix 3 Plus Windows XP English ...

Page 30: ...oll lock in certain software Drive Access Using the Disk Drives Blinking Green HDD is being accessed Blinking Amber FDD or CD ROM is being accessed E mail Alert The Light comes on when e mail arrives To use this function you must register an E mail Account in the Register E mail Account window To register an E mail account Select Start All Programs StartUp Internet Launcher Power Green System powe...

Page 31: ...the back of the computer 1 Contact your Internet Service Provider to obtain information or CD required to make the connection in your area 2 After the cable is connected create a Dialup connection by clicking Start Control Panel Network and Internet Connections 3 Click Set up or change your Internet connection Setup to start the connection wizard 4 Follow the instructions in provided in the Make N...

Page 32: ...Click OK to close Phone and Modem Options box Digital Phone Lines If you connect the modem to a digital phone line such as a company 4 wire system the modem may be damaged DOS support Windows XP Does not support pure DOS mode and the modem does not support a DOS box in Windows So you cannot use a communication application which runs under DOS Using the Modem on a PBX system If you use a Windows Co...

Page 33: ...he network using either a LAN cable or by establishing a wireless connection if factory option is installed Cable Connection Install the LAN cable by simply plugging the cable into the slot in the right side of the computer Your computer s LAN adapter is ready to use for most situations however if your system does not have a DHCP server or you wish to personally configure your LAN connection proce...

Page 34: ...lowing items box 5 Click Properties The TCP IP Properties window opens 6 Click Use the following IP address in the General tab 7 In the Use the following IP address box enter your IP address subnet mask and Default Gateway 8 In the Use the following DNS server addresses box Enter your Preferred DNS server and Alternate DNS server 9 Click OK when you finish the TCP IP set up Intel R Pro 100 VE Netw...

Page 35: ...stance of 20cm from the antenna at all times This device can not be co located with another transmitter and transmitting antenna The table below shows the Windows taskbar icons for the wireless LAN To display relative Signal Strength 1 Double Click the icon in the taskbar to display the Wireless Network Connection Status window This window also displays connection Status Speed Duration and Activit...

Page 36: ...Network Connection icon in the control panel will show your connection is Enabled You may proceed using the network as normal wired LAN connections Change Wireless Network Access Point as follows 1 Right Click the Wireless Network Connection icon 2 Click View Available Wireless Networks The Connect to Wireless Network window pops up 3 Select the new network from the available networks in the Avail...

Page 37: ...essive array of secondary storage devices listed below CD ROM drive Shipped with some computers is also an available option CD ROM R W drive Shipped with some computers is also an available option DVD ROM drive Shipped with some computers is also an available option DVD CD RW Combo drive Shipped with some computers is also an available option Optional secondary hard drive Available as an option fo...

Page 38: ...x Bay latch See Figure below for the location of the Flex Bay latch The computer in the figure is tilted on its side for clarity 2 Click Remove Swap A Device Change popup window stating Please wait until the system processes the device change appears then another popup window appears and says Please remove or swap your bay device s now and press OK 3 Tilt the computer up locate the smart bay latch...

Page 39: ...Bay Manager Utility Remove Install a Flex Bay Device Power Off Remove a Device 1 Turn the computer s power off 2 Close the LCD panel and turn the computer over so that the bottom of the unit faces up 3 Tilt the computer up locate the smart bay latch 4 Slide and hold the device latch toward the front of the computer 5 Slide the device out Install a Device 1 Turn the computer s power off 2 Carefully...

Page 40: ... floppy disk in your computer insert it into the floppy drive To remove a floppy disk press the floppy disk eject button on the front of the floppy drive To protect the data on your floppy disks follow the manufacturers guidelines Floppy Disk Eject Button Matrix 3 Plus Windows XP English fm Page 30 Wednesday March 27 2002 10 41 AM ...

Page 41: ...s harmful to the eyes Do not attempt to disassemble the CD DVD ROM drive Refer servicing to your authorized service center Do not touch the CD DVD lens doing so may damage the device CD DVD Precautions The tray may be stuck in which case straighten out a paper clip insert it into the Emergency Eject hole in the front of the CD DVD ROM and push it until the tray ejects A LED on the drive tray is on...

Page 42: ...indows XP supports 32 bit and 16 bit PC Cards Zoomed video Both PC Card slots and the video chip on your computer support zoomed video When you install a zoom video PC Card in the upper or lower slot data can be transferred directly from the PC Card to video and audio systems without going through the microprocessor Video conferencing and real time multimedia devices such as video cameras are supp...

Page 43: ...lowing procedures to remove PC Cards or you may lose data that is being stored to a card 1 Click icon on the taskbar 2 Select the card currently in use and click the Stop button The eject button for the card slot operates in two steps therefore to remove a PC Card 3 Push the eject button once to pop it outward then push the eject button again to eject the card 4 Pull the card out of the PC Card sl...

Page 44: ...close the drive tray The Windows Media Player button appears on the taskbar if not already there and the music begins to play If the disk does not play click Start All Programs Accessories Entertainment Windows Media Player CD LED On A LED on the drive tray is on when the computer is reading from a CD Do not remove a disc when this LED is on Removing the Audio Multimedia CD To remove the CD follow...

Page 45: ...ng the Wheel Volume Control Simply turn the wheel located on the left side of the computer Using the Keyboard Changing the volume with your keyboard Use to decrease the volume or to increase the volume Using the Volume Control Icon Double Click icon in the active program tray The Volume Control window pops up Use this window to adjust the volume You can pop up a simple volume slider by a single cl...

Page 46: ...ows XP It is also possible to make a slide show with each frame or picture To start the program Click Start All Programs Accessories Windows Movie Maker Please refer to the on line help manual to operate the Windows Movie Maker Matrix 3 Plus Windows XP English fm Page 36 Wednesday March 27 2002 10 41 AM ...

Page 47: ...e the battery is charging normally the battery charge light on the computer is red When the battery is fully charged the light changes to green When you use a new battery pack for the first time or use a battery after a long period of storage the initial battery life is shorter than normal Normal battery life resumes after a few discharge recharge cycles Follow these rules for charging your batter...

Page 48: ... your battery with a new one Keep the old battery out of the reach of children Dispose of the old battery promptly Make sure that you follow all local requirements when you dispose of the old battery Removing the Battery Your computer comes with the battery pack inserted in the computer To remove the battery from the computer 1 Turn the computer s power off 2 Close the LCD panel and turn the compu...

Page 49: ...evice 4 Align the tabs on the battery compartment cover with the slots on the battery compartment 5 Push the cover straight down until it snaps into place Monitoring the Battery Charge Battery life is affected by factors such as the power management settings in System Setup the applications you use and the brightness settings of the LCD Under normal usage the battery charge lasts approximately 3 h...

Page 50: ...by pressing While the battery gauge is being displayed all keys except are disabled The battery gauge is only displayed for a few seconds Power Source Indicates that the computer is powered by the AC adapter Indicates that the computer is powered by the battery Battery Level The top right section indicates the approximate amount of the primary battery charge remaining The Power Status icons shown ...

Page 51: ...tive Replace the battery with a new battery Battery Calibration Calibrating your battery once a month is one of the recommended methods of increasing your computer s battery life To calibrate the battery complete the following steps Calibration Notes You should start the battery calibration process with a fully charged battery battery status LED is green The power meter may not show 100 Before you...

Page 52: ... settings of other features BIOS Caution If you are not familiar with BIOS setup and what the parameters mean seek help from a person who is knowledgeable Incorrect settings may cause your system to Crash Starting System Setup To start System Setup turn on your computer and then press and hold until the System Setup screen appears Table 5 System Setup Menus To open the menu you need to use use the...

Page 53: ...key at the Main menu brings you to the Exit menu Scrolls backwards through the options for the highlighted field Scrolls forward through the options for the highlighted field Sets the parameters for the current menu to their default values Sets the parameters for the current menu to their previous values Executes commands or opens a submenu or or Matrix 3 Plus Windows XP English fm Page 43 Wednesd...

Page 54: ...llowing 1 At startup press F2 to open System Setup 2 Use to select the Advanced CMOS Setup menu 3 Highlight the 1st Boot Device option with keys 4 Press Shift Plus keys until the option moves up in the list to the desired position or press Minus key until the option moves down in the list to the desired position 5 Press Esc to return to the Exit menu 6 Press Enter or F10 to exit and save your chan...

Page 55: ...uthorized access to the computer The supervisor password enables full access to all System Setup fields The user password enables full access to only the Set User Password and Password on boot security fields and read access to all other System Setup fields The HDD Password controls access to the hard drive You may also enable the biometric security at boot The 3 security boot time options are The...

Page 56: ...assword As you type the password the cursor moves but your password does not appear on the screen Choose the type of password security that is appropriate for your work If you want to set a user password you must set a supervisor password first 3 Use to select Set Supervisor Password or Set User Password 4 Press Enter The Set Password dialog box appears 5 Press Enter after you have typed your pass...

Page 57: ...hased the Biometric Security option please refer to the manual provided for installation and use The factory optional fingerprint sensor provides unique security access to your computer You will no longer have to worry about losing or forgetting your password Since every person has a unique set of fingerprints only a biometrically enrolled person may have access to your computer Matrix 3 Plus Wind...

Page 58: ...mes This section discusses the basic schemes of power management when the computer is operating on battery power or using AC power Standby vs Hibernation Standby unlike hibernation mode does not store unsaved information on your hard disk it s stored only in the computer memory If there is an interruption in power the information is lost So before putting your computer on standby you should save y...

Page 59: ...e a substantial battery power therefore when in battery only mode select the shortest time practical a Hibernate Mode Power Management or Manual Method When hibernation is used your computer turns off and when you power up again everything is restored exactly as you left it including programs and documents you may not have saved or closed Everything in memory gets saved to the HDD and the monitor ...

Page 60: ...notebook computer It also gives you the benefit of getting right back to your work without waiting for the computer to restart Standby turns off your monitor and hard disks placing your entire system in a low power state When you return to your computer restores your desktop exactly as you left it It is recommended that you do not enter standby mode with less than 20 battery power 5 Click OK to se...

Page 61: ...e what to do Standby Hibernate Shut down assigned to the Power button and or Rest F11 key Also select the action Do nothing Standby Hibernate associated with closing the computer lid The Rest key is assigned to the Fn F11 key combination See Basic Power Management Schemes on page 48 for a better understanding of Standby and Hibernate modes 5 Click OK to set your power management options and close ...

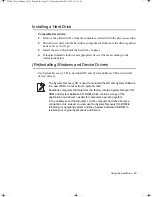
Page 62: ...or your operating system Removing the Hard Drive To prevent loss of data and damage to the disk do not remove the hard drive while the computer s power is on and do not drop or jar the hard drive To remove the hard drive from the computer 1 If you are installing a new hard drive backup the application and data files on the old hard drive before removing it from the computer 2 Turn the computer s p...

Page 63: ... OS and System Software CD to re install device drivers The System Recovery CD is used to re install the OS and System Software to a new HDD or recover from a system crash Notebook computers that ship from the factory include System Recover CD ROM and System Software CD ROM which contains a copy of the applications and drivers needed for computer s operating system In the unlikely event that progr...

Page 64: ...individual dots displayed on the entire screen In general the more pixels the LCD can display the better the image The number of colours the LCD can display is measured by how many bits the LCD uses to represent each pixel 16 bit colour can support 64 K 65 536 colours 32 bit colour can support 16 M 16 8 million colours All these video modes can be displayed on an external monitor However if you di...

Page 65: ...CD or external monitor 1 Click Start Control Panel Appearance and Themes 2 Click icon The Display Properties window appears 3 Click the Settings tab The Settings screen appears 4 To change the colour depth click the arrow next to the Colour quality palette and select the available colour depth you want 5 To change the resolution click and drag the slider under the Screen resolution until you selec...

Page 66: ...this monitor 6 You can drag the second monitor image to position where you want your extended screen space with respect to the primary monitor usually the LCD To confirm whether the system is set properly with Dual View mode 1 Open Display properties and click Settings tab 2 Place the cursor on the first monitor picture and click and hold over a second a number 1 will be shown on the first actual ...

Page 67: ...resolution of primary secondary monitors are separately changeable To reset the system to Single View mode 1 Start Display properties 2 Click Settings tab 3 Click the second monitor among two monitor pictures 4 Uncheck Extend my Windows desktop onto this monitor 5 Click OK Matrix 3 Plus Windows XP English fm Page 57 Wednesday March 27 2002 10 41 AM ...

Page 68: ...t port using an appropriate cable 2 Click Start Control Panel Appearance and Themes 3 Click Display Settings 4 Ensure Extend my Windows desktop onto this monitor box is unchecked 5 Click Advanced Display 6 Click the check box to the left of the text TV 7 Follow the screen prompts and the LCD screen display will be duplicated on the television If the TV symbol is grayed out then the system has not ...

Page 69: ... computer s memory to a maximum of 1 GB A CD ROM drive module CD Only or CD R W DVD CD RW Combo drive A DVD ROM drive module A Superdisk LS 120 drive Docking options that enable you to use your computer like a desktop computer Wireless LAN IrSTICK TM The options that are available may change periodically Contact your reseller for updated information on current and new options Memory Modules You ca...

Page 70: ...pheral devices Before handling a memory module discharge any static electricity by touching a grounded surface or using a grounding wrist strap Do not insert objects with conductive material such as metal screwdrivers or graphite pencils into the memory module compartment Be careful in handling the metal plate of the memory door Installing a Memory Module Handle a memory module carefully Hold them...

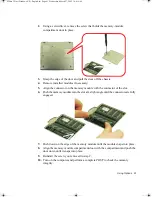
Page 71: ...Push the memory module into the slot at a slight angle until the connectors are fully engaged 7 Push down on the edge of the memory module until the module snaps into place 8 Align the memory module compartment door with the compartment and push the door down until it snaps into place 9 Reinstall the screw you removed in step 2 10 Turn on the computer and perform a complete POST to check the memor...

Page 72: ... options Wireless LAN The wireless LAN option allows easy connection to large or small office networks while also providing freedom from the constraints of cables and sockets To setup and use the Wireless LAN Please refer to the user manual provided with the option at the time of purchase Matrix 3 Plus Windows XP English fm Page 62 Wednesday March 27 2002 10 41 AM ...

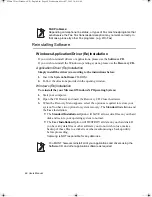
Page 73: ...n AntiVirus proceed as follows Click Start Programs Norton AntiVirus Norton AntiVirus 2002 Windows Help and Support Run Windows Help and Support to find problem that may be affecting your computer To run Windows Help and Support proceed as follows Click Start Help Reinstalling Software If for some reason your system crashes you may corrupt your HDD Windows Operating system and or some of your devi...

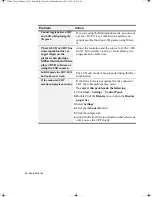
Page 74: ...n with the keyboard or peripheral devices Your computer may be in Suspend or Rest mode Tap the touchpad to resume from Suspend or press the power button to resume from rest PC Card does not work correctly Make sure that the PC Card is inserted left side up in the PC Card slot Check that the card is inserted fully into the slot If you are using a PC Card modem check the modem cable connections Your...

Page 75: ...when you switch the display to it Is the monitor properly connected to the computer Is the monitor s power cord connected to an AC wall outlet Check the brightness and contrast controls on the monitor Does the program appear on the LCD panel instead of the external monitor If so press Fn F5 to switch to the monitor Try turning the monitor off and on again Only the LCD Display works when system ret...

Page 76: ...d playing two programs at the same time In DOS mode the CRT LCD button does not work The LCD only mode is not supported using this Key combination If the connected CRT monitor display is not steady If the refresh rate is not optimal for the connected CRT then this problem may occur To correct this problem do the following 1 Click Start Settings Control Panel 2 Double Click the Display icon to open...

Page 77: ...ample of the phone number when using the dial command ATDT9 123 4567 Screen displays random or garbage characters during communications After your modem has connected to the on line service your screen may display garbage characters or after images in screen transitions This problem is caused by a mismatch of the terminal modes between communications service and communications programs You need to...

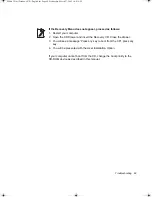
Page 78: ...ows XP Operating System 1 Start your computer 2 Open the CD Drawer and insert the Recovery CD Close the drawer 3 When the Recovery Menu appears select the option as required to restore your system You have two options for system recovery The Standard Installation and the User Installation The Standard Installation Option will SAVE all user data files on your hard disk and restore your operating sy...

Page 79: ...y CD Close the drawer 3 You will see a message Press any key to boot from the CD press any key 4 You will be presented with the User Installation Option If your computer cannot boot from the CD change the boot priority to the CD ROM device as described in this manual Matrix 3 Plus Windows XP English fm Page 69 Wednesday March 27 2002 10 41 AM ...

Page 80: ... storage 0 to 12 192 m Shock operating 10 G for 11 ms half sine Shock nonoperating 60 G for 11 ms half sine Lithium Ion Smart Battery Normal Weight 500g Nominal open circuit voltage 11 1 VDC Capacity typical 6450 mAhr 72 0whr Charging time approximate with computer turned off typical 3 0 hr Charging time approximate with computer turned on typical 7 0 hr Average battery life with power management ...

Page 81: ...sc CD ROM Compact disc read only memory cm Centimeters COM Communication as in communication port CMOS Complementary metal oxide semiconductor DC Direct current DMA Direct memory access DPMS Display power management signaling DRAM Dynamic random access memory DSTN Double layer super twist nematic ECP Extended capabilities port EPP Enhanced parallel port g gram G Gravity GB Gigabytes hr hour Hz Her...

Page 82: ...ble document format PC Personal computer PCI Peripheral component interconnect PCMCIA Personal Computer Memory Card International Association POST Power on self test PNP Plug and play PS 2 Personal System 2 RAM Random access memory ROM Read only memory SVGA Super video graphics array TFT Thin film transistor USB Universal serial bus V Volt VAC Voltage alternating current VCC Voltage collector curr...

Page 83: ...h BIOS which means that it has been recorded on a flash memory chip that can be updated if needed Boot To start your computer A cold boot resets the entire computer and runs through all computer self tests A warm boot clears out computer memory only Boot disk A disk containing operating system programs required to start your computer A boot disk can be a floppy disk hard drive or compact disc Byte...

Page 84: ...tly access this memory without using memory management software Disk The device used by the computer to store and retrieve information Disk can refer to a floppy disk hard disk or RAM disk Disk cache A software device that accumulates copies of recently used disk sectors in RAM The application program can then read these copies without accessing the disk This in turn speeds up the performance of t...

Page 85: ... the device needs the microprocessor s services The number of IRQs is limited by industry standards LCD liquid crystal display The LCD screen on your computer differs from the display screen of a desktop monitor Most desktop monitors use CRT cathode ray tube displays which work by moving an electron beam across phosphor dots on the back of the screen The phosphor dots light up to show the image LC...

Page 86: ...mory You can write to and read from RAM Information stored in RAM is temporary and is erased when the system is turned off Refresh rate The refresh rate is the rate at which the image on the LCD screen is rewritten to the screen A fast refresh rate helps keep the image from flickering Resolution The resolution is the sharpness or clarity of the image on your LCD screen Resolution is measured by th...

Page 87: ...nsistor circuit to control each pixel This technology provides the best resolution for an LCD screen A TFT LCD is also sometimes called an active matrix LCD Zoomed video Zoomed video technology enables zoom video PC Card to transfer data directly from the card to video and audio systems without going through the microprocessor This process improves video performance Video conferencing and real tim...

Reviews: