3.
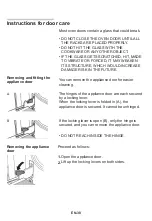
Close the appliance door until you feel resistance
at an angle of around 15° (in relation to the
closed appliance door)
1.
2.
Hold the appliance door at an angle.
Insert both hinges, left and right, into the
supports.
3.
Position the door so that the hinge grooves
engage on both sides.
4.
5.
Open the appliance door.
Fold in the locking levers on both sides.
6.
Close the appliance door.
4.
5.
6.
Grip the door on either side with both hands.
Close the appliance door a little further.
Lift the door upwards and at an angle to remove
it.
Do not disassemble the door.
• BE CAREFUL WHEN REMOVING AND LIFTING
THE DOOR.
• DO NOT LIFT THE DOOR BY THE HANDLE.
THE DOOR IS VERY HEAVY.
Fitting the appliance door
Proceed as follows:
EN-39
Summary of Contents for NX24BG45411V Series
Page 1: ...NX24BG45411V NX24BG35411V...
Page 27: ...EN 27...
Page 31: ...EN 31...
Page 33: ...EN 33 NX24BG45411V...
Page 36: ...EN 36 NX24BG45411V...
Page 41: ...G9 EN 41 120 130V...
Page 43: ...Cocina a gas NX24BG45411V NX24BG35411V...
Page 45: ...cocina cocina cocina cocina cocina las hornillas ES 3...
Page 47: ...cocina cocina ES 5 cocina cocina...
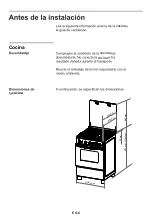
Page 48: ...Cocina cocina cocina cocina cocina ES 6 595 mm 900 mm With feet 20 mm 565 mm 4 6 mm 559mm 6...
Page 52: ...cocina cocina cocina ES 10...
Page 53: ...L cocina cocina cocina cocina cocina cocina cocina ES 11...
Page 54: ...Conexi n tipo 2 Proporcionado por la compa ia de gas ES 12...
Page 55: ...habitaci n pertinente y la parte superior de la cocina ES 13...
Page 62: ...Abra la puerta del horno con cuidado Abra la cubierta de vidrio ES 20...
Page 63: ...interruptor ES 21...
Page 68: ...Bot n de encendido Quemador de horno ES 26 NX24BG45411V...
Page 69: ...Rejilla de asado y horneado ES 27...
Page 72: ...Bot n de encendido Quemador de horno ES 30 NX24BG35411V 1 4 4...
Page 73: ...Rejilla de asado y horneado ES 31...
Page 75: ...Grill ES 33 NX24BG45411V...

