28
3. Disassembly and Reassembly
This document can not be used without Samsung’s authorization.
This document can not be used without Samsung’s authorization.
3-16 Replacing the Burner Broil
WARNING
ELECTRICAL SHOCK HAZARD
Disconnect power before servicing the range. Replace all panels before operating range. Failure to do so
can result in death or electrical shock.
CAUTION
When you work on the gas range, be careful when handling sheet metal parts. Sharp edges may be
present, and you can cut yourself if you are not careful.
Parts
Explanation Photo
Explanation
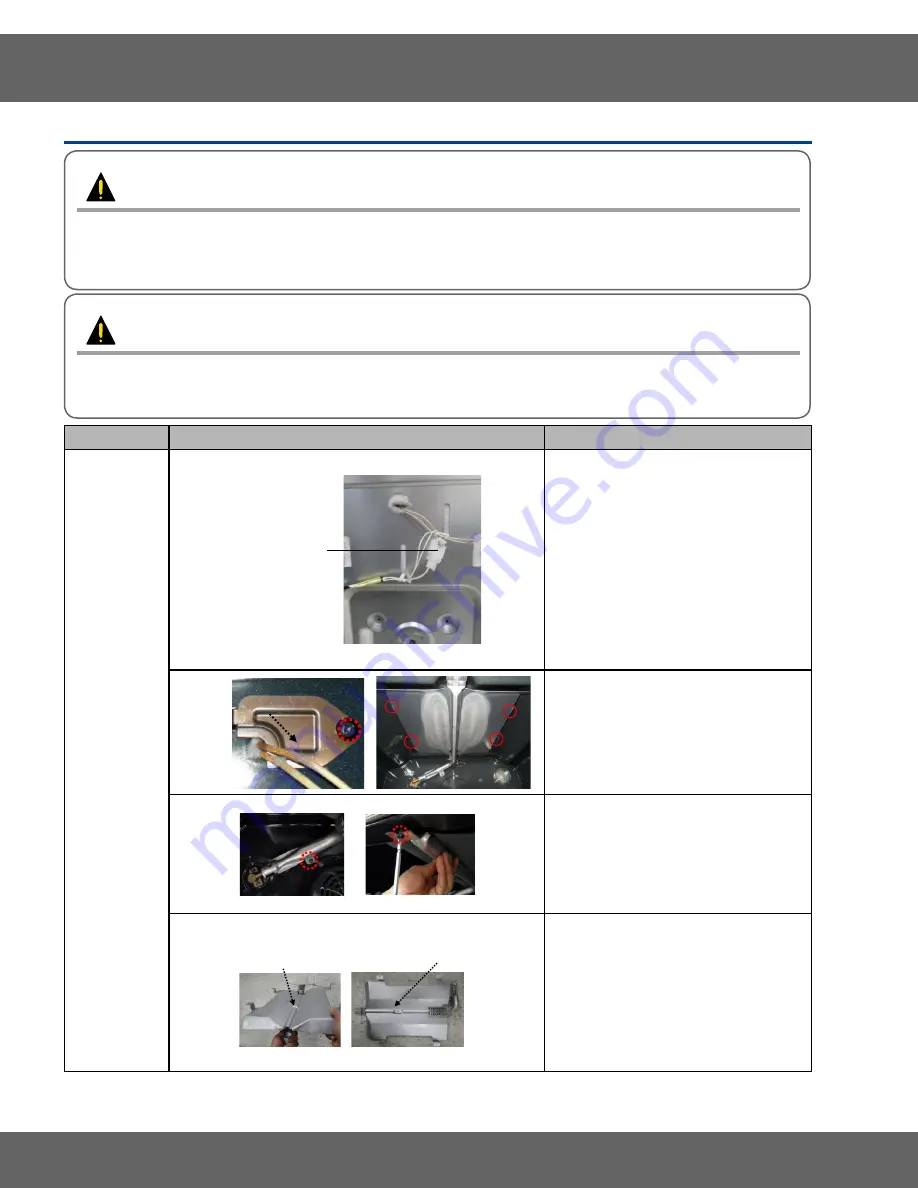
Burner Broil
CONNECTOR
1.
Turn off the electrical supply going
to the range.
2.
Shut off the gas shut-off valve in
the gas supply line to the range.
3.
Open the oven door and remove
the racks from inside the oven.
4.
Remove Cover-back main wire to
the rear of the oven.
5.
Disconnect the wires or the
connector of the HSI. (Identify and
mark the two wires going to HSI.)
BRACKET
HSI-WIRE
6.
Remove 1 screw of bracket HSI-
wire
7.
Remove 4 screws of bracket-broil
spreader to top of oven.
8.
Support the burner-broil with one
hand, remove 2 screw supporting
the burner-broil to the front and the
rear of the oven.
BRACKET
BROIL-SPREADER
BURNER BROIL
9.
Pull the upper ASSY-BURNER
BROIL SPREADER to disconnect it
from the holder nozzle-broil on the
rear wall of the oven.
10.
Carefully remove ASSY-BURNER
BROIL SPREADER.
11.
Separate the burner broil and
bracket-broil spreader.


