40
_ warranty and service
servICe
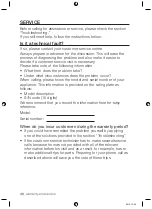
Before calling for assistance or service, please check the section
“Troubleshooting.”
If you still need help, follow the instructions below.
Is it a technical fault?
If so, please contact your customer service centre.
Always prepare in advance for the discussion. This will ease the
process of diagnosing the problem and also make it easier to
decide if a customer service visit is necessary.
Please take note of the following information.
•
What form does the problem take?
•
Under what circumstances does the problem occur?
When calling, please know the model and serial number of your
appliance. This information is provided on the rating plate as
follows:
•
Model description
•
S/N code (15 digits)
We recommend that you record the information here for easy
reference.
Model:
Serial number:
When do you incur costs even during the warranty period?
•
lf you could have remedied the problem yourself by applying
one of the solutions provided in the section “Troubleshooting”.
•
lf the customer service technician has to make several service
calls because he was not provided with all of the relevant
information before his visit and as a result, for example, has to
make additional trips for parts. Preparing for your phone call as
described above will save you the cost of these trips.
2016-12-20
Summary of Contents for NZ63M3NM1BB
Page 1: ...ENGLISH 2016 12 22 NZ63M3NM1BB ...
Page 2: ...2_ using this manual WARNING CAUTION CAUTION 2016 12 20 ...
Page 3: ...safety instructions _3 safety instructions WARNING 2016 12 20 ...
Page 4: ...WARNING 4_ safety instructions ...
Page 6: ...6_ safety instructions 2016 12 20 ...
Page 7: ...WARNING safety instructions _7 safeTy INsTruCTIoNs 2016 12 20 ...
Page 8: ...WARNING 8_ safety instructions 2016 12 20 ...
Page 9: ...safety instructions _9 safeTy INsTruCTIoNs 2016 12 20 ...
Page 10: ...over without warning 10_ safety instructions 2016 12 20 ...
Page 11: ...Caution signs for using CAUTION safety instructions _11 safeTy INsTruCTIoNs 2016 12 20 ...
Page 12: ...the lid Model which has lid only 12_ safety instructions 2016 12 20 ...
Page 16: ...Safety instructions for the installer WARNING 16_ installing the hob 2016 12 20 ...
Page 20: ...Install the two brackets Put into the hole 490 4 1 20_ installing the hob 2016 12 20 ...
Page 21: ...parts and features Cooking zones Control panel parTs aNd feaTures 2016 12 20 ...
Page 28: ...U Energy saving tips Right Wrong 28_ hob use 2016 12 20 ...
Page 42: ...note 2016 12 20 ...
Page 43: ...note 2016 12 20 ...
Page 45: ...NZ63M3NM1BB ...
Page 46: ......
Page 47: ......
Page 48: ......
Page 49: ......
Page 50: ......
Page 51: ......
Page 52: ......
Page 55: ......
Page 56: ......
Page 57: ......
Page 58: ......
Page 59: ......
Page 60: ......
Page 61: ......
Page 62: ......
Page 63: ......
Page 64: ......
Page 65: ......
Page 66: ......
Page 67: ......
Page 68: ......
Page 69: ......
Page 70: ......
Page 71: ......
Page 72: ......
Page 73: ......
Page 74: ......
Page 75: ......
Page 76: ......
Page 77: ......
Page 81: ......
Page 83: ......
Page 84: ... De quel problème s agit il Dans quelle circonstance ce problème est apparu ...
Page 85: ...220 240 V 400V 50 60 Hz NZ63M3NM1BB ...
Page 86: ......
Page 87: ......

