background image

English  19

Oper

ation

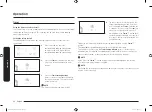
Switching the appliance off

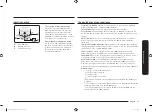
To completely switch off the appliance, use 
the 

On/Off

   button.

Press and hold the 

On/Off

   button for 

1 second.

NOTE

After switching off a single cooking zone or the entire cooking surface, the 
presence of residual heat will be indicated in the digital displays of the 
corresponding cooking zones in the form of an 

 (for “hot”).

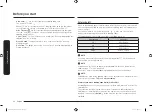
Quick stop

To switch off a cooking zone, press and hold 
the cooking zone button for 2 seconds.

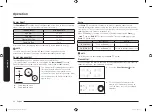
Using the child safety lock

You can use the child safety lock to safeguard against unintentionally turning on a 
cooking zone and activating the cooking surface. Also the control panel, with the 
exception of the 

On/Off

   button, can be locked in order to prevent the settings 

from being changed unintentionally, for example, by wiping over the panel with a 
cloth.

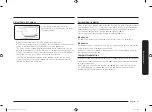
Switching the child safety lock On/Off

1. 

Press and hold the 

Lock

   button for 

approximately 3 seconds. 
An acoustic signal will sound as 
confirmation.

2. 

Touch any button. 

 will appear in the displays, 

indicating the child safety lock has 
been activated.

3. 

For switching the child safety lock off, 
press and hold the 

Lock

   button for 3 

seconds. An acoustic signal will sound 
as confirmation.

NZ84T9770EK_EU_DG68-00630B-00_EN.indd   19

2020-02-25     12:35:18

Summary of Contents for NZ84T9770EK

Page 1: ...Induction Hob User manual NZ84T9770EK NZ84T9770EK_EU_DG68 00630B 00_EN indd 1 2020 02 25 12 35 12 ...

Page 2: ...ation 28 Contents Using this manual 3 The following symbols are used in this User Manual 3 Model name serial number 3 Safety instructions 3 Disposing of the packaging material 7 Proper disposal of your old appliance 7 Correct Disposal of This Product Waste Electrical Electronic Equipment 7 Installing the hob 8 Safety instructions for the installer 8 Connecting to the mains power supply 8 Installin...

Page 3: ...rrent page Model Name Serial Number Safety instructions The safety aspects of this appliance comply with all accepted technical and safety standards However as manufacturers we also believe it is our responsibility to familiarize you with the following safety instructions WARNING This appliance is not intended for use by persons including children with reduced physical sensory or mental capabiliti...

Page 4: ...se as suitable or hob guards incorporated in the appliance The use of inappropriate guards can cause accidents This Appliance should be allowed to disconnection from the supply after installation The disconnection may be achieved by having the plug accessible or by incorporating a switch in the fixed wiring in accordance with the wiring rules If the supply cord is damaged it must be replaced by th...

Page 5: ... or if fractures cracks or splits appear switch off all cooking zones disconnect the hob from the mains supply and contact your local service centre If the hob cracks turn the appliance off to avoid the possibility of electric shock Do not use your hob until the glass surface has been replaced The surfaces are liable to get hot during use This appliance can be used by children aged from 8 years an...

Page 6: ...ppliance causing an malfunction Do not use the hob to heat aluminium foil products wrapped in aluminium foil or frozen foods packaged in aluminium cookware Liquid between the bottom of the pan and the hob can produce steam pressure Which may cause the pan to jump Always ensure that the hotplate and the base of the pan are kept dry The cooking zones will become hot when you cook Always keep small c...

Page 7: ...the purchase contract This product and its electronic accessories should not be mixed with other commercial wastes for disposal For information on Samsung s environmental commitments and product specific regulatory obligations e g REACH WEEE Batteries visit samsung com uk aboutsamsung samsungelectronics corporatecitizenship data_corner html Disposing of the packaging material WARNING All materials...

Page 8: ...unded only by qualified personnel Please observe this instruction The warranty will not cover any damage that may occur as a result of improper installation Technical data is provided at the end of this manual Safety instructions for the installer A device must be provided in the electrical installation that allows the appliance to be disconnected from the mains at all poles with a contact opening...

Page 9: ... terminals Installing into the countertop A A Serial number NOTE Make a note of the serial number on the appliance rating label prior to installation This number will be required in the case of requests for service and is no longer accessible after installation as it is on the original rating plate on the underside of the appliance NOTE Pay special attention to the minimum space and clearance requ...

Page 10: ... 50 mm Min 20 mm 02 Ø 6 08 Min 60 mm 03 90 09 Min 600 mm 04 750 1 mm 10 Min 60 mm 05 490 1 mm 11 Min 60 mm 06 R3 12 Min 50 mm 07 02 01 03 04 05 06 08 01 Min 40 mm 05 15 mm 02 520 mm 06 Min 60 mm 03 Min 40 mm 07 480 mm 04 25 mm 08 Min 50 mm NZ84T9770EK_EU_DG68 00630B 00_EN indd 10 2020 02 25 12 35 14 ...

Page 11: ...03 04 01 Min 550 mm 02 Min 35 mm 03 Min 65 mm 04 Min 100 mm 05 Min 5 mm 01 02 03 01 Min 20 mm 02 Min 2 mm 03 Min 20 mm Components Induction hob Bracket Spring Screws Magnetic Knob NZ84T9770EK_EU_DG68 00630B 00_EN indd 11 2020 02 25 12 35 15 ...

Page 12: ... cooking zone 2200 W with Power Boost 3200 W 05 Induction cooking zone 1200 W with Power Boost 2000 W 06 Control panel 07 Lighting Bar 08 Virtual Flame Technology Control panel 04 07 10 08 05 02 03 01 01 01 06 06 06 06 01 09 01 Cooking zone buttons 02 Magnetic knob Power level setting 03 Lock button 04 On Off button 05 Timer buttons and display 06 Cooking zone display 07 Keep warm button 08 Pause ...

Page 13: ...cooking zone incorporates an automatic pan detection system the system is calibrated in order to recognize pans of a diameter just slightly smaller than the cooking zone Pans must always be placed centrally on each cooking zone And you should use suitable cookware Digital displays to selected power level residual heat Stay Hot residual heat the child lock is activated message the touch sensor butt...

Page 14: ...s and troubleshooting Other reasons why a cooking zone will switch itself off All cooking zones will switch themselves off if liquid boils over and lands on the control panel The automatic shutoff will also be activated if you place a damp cloth on the control panel In both of these instances the appliance will need to be switched on again using the main On Off button after the liquid or the cloth...

Page 15: ...utomatically reduce to a lower power level When you have finished using the hob the cooling fan will continue to run until the hob s electronics has cooled down And the cooling fan switched itself off depending upon the temperature of the electronics Virtual flame technology Virtual flame technology creates the appearance of flames when you turn on an induction element Virtual flame technology is ...

Page 16: ...40 mm long side dimension oval fish kettle Initial cleaning Wipe the ceramic glass surface with a damp cloth and ceramic cooktop glass cleaner WARNING Do not use caustic or abrasive cleaners The surface could be damaged Cookware for induction cooking zones The induction hob can only be turned on when cookware with a magnetic base is placed on one of the cooking zones You can use the following suit...

Page 17: ... pans which have damaged bases with rough edges or burrs Permanent scratching can occur if these pans are slid across the surface When cold pan bases are normally bowed slightly inwards concave They should never be bowed outwards convex If you wish to use a special type of pan for example a pressure cooker a simmering pan or a wok please observe the manufacturer s instructions Energy saving tips N...

Page 18: ...ff button has been actuated to switch on your appliance a heat setting must be selected within approximately 20 seconds Otherwise the appliance will switch itself off for safety reasons Select cooking zone and power level setting 1 For selecting the cooking zone press the corresponding cooking zone button 2 Turn the magnetic knob to set the power level NOTE The default level is set to 15 when sele...

Page 19: ...afeguard against unintentionally turning on a cooking zone and activating the cooking surface Also the control panel with the exception of the On Off button can be locked in order to prevent the settings from being changed unintentionally for example by wiping over the panel with a cloth Switching the child safety lock On Off 1 Press and hold the Lock button for approximately 3 seconds An acoustic...

Page 20: ...ecting a cooking zone the display turns on but no timer settings is applied NOTE To change the settings quicker touch and hold any of the or buttons until the desired value is reached Timer Using the timer as a safety shutoff If a specific time is set for a cooking zone the cooking zone will shut itself off once this period of time has elapsed This function can be used for multiple cooking zones s...

Page 21: ...up timer For the count up timer to be used the appliance must be switched on but all the cooking zones must be not use timer as a safety shutoff 1 Press the Timer button will appear in the timer display 2 The count up timer function becomes active and the display numbers increase over time To cancel the timer settings press and hold the Timer button for 2 seconds 3 To stop the timer press the Time...

Page 22: ...el display of left side front rear will be changed together Power boost The Power Boost function makes additional power available to the each cooking zones example bring a large volume of water to the boil Cooking zones Max Boost time 220 mm 10 min 160 mm 10 min Front or Rear Flex 10 min Complete Flex 5 min After these times the cooking zones automatically return to power level NOTE In certain cir...

Page 23: ...egetables 3 5 Steaming Stewing Boiling Steaming and stewing of small amounts of vegetables boiling rice and milk dishes 1 2 Melting Melting butter dissolving gelatine melting chocolate NOTE The heat settings indicated in the table above are provided only as guidelines for your reference You will need to adjust the heat settings according to specific cookware and foods Sound on off 1 Press and hold...

Page 24: ...ouration with the use of a commercially available ceramic glass or stainless steel cleaner Light soiling 1 Wipe the ceramic glass surface with a damp cloth 2 Rub dry with a clean cloth Remnants of cleaning agent must not be left on the surface 3 Thoroughly clean the entire ceramic glass cooking surface once a week with a commercially available ceramic glass or stainless steel cleaner 4 Wipe the ce...

Page 25: ...g sugar comes into contact with a hot cooking zone and melts it should be cleaned off immediately with a kitchen scraper while it is still hot If allowed to cool it may damage the surface when removed Keep all items and materials that could melt for example plastics aluminium foil and oven foils away from the ceramic glass surface If something of this nature melts onto the hob it must be removed i...

Page 26: ...attempt any further repairs if the following instructions do not help in each specific case WARNING Repairs to the appliance are to be performed only by a qualified service technician Improperly effected repairs may result in considerable risk to the user If your appliance needs repair please contact your customer service centre Problem Possible cause Solution What should I do if the cooking zones...

Page 27: ...r phone call as described above will save you the cost of these trips What should I do if the cooking zone will not switch on or off This could be due to one of the following possibilities The control panel is partially covered by a damp cloth or liquid The child safety lock is on What should I do if the display is illuminated Check for the following The control panel is partially covered by a dam...

Page 28: ...ooking area Number of cooking zones and or areas 3 For circular cooking zones or area diameter of useful surface area per electric heated cooking zone Ø 16 0 cm 22 0 cm For non circular cooking zones or areas length and width of useful surface area per electric heated cooking zone or area L x W 43 5 x 22 5 cm Energy consumption per cooking zone or area calculated per kg EC electric cooking Ø 16 0 ...

Page 29: ...Memo NZ84T9770EK_EU_DG68 00630B 00_EN indd 29 2020 02 25 12 35 21 ...

Page 30: ...Memo NZ84T9770EK_EU_DG68 00630B 00_EN indd 30 2020 02 25 12 35 21 ...

Page 31: ...Memo NZ84T9770EK_EU_DG68 00630B 00_EN indd 31 2020 02 25 12 35 21 ...

Page 32: ...e www samsung com gr support GREECE 80111 SAMSUNG 80111 726 7864 only from land line 30 210 6897691 from mobile and land line www samsung com gr support LUXEMBURG 261 03 710 www samsung com be_fr support NETHERLANDS 088 90 90 100 www samsung com nl support NORWAY 21629099 www samsung com no support PORTUGAL 808 207 267 www samsung com pt support SPAIN 91 175 00 15 www samsung com es support SWEDEN...

Reviews: