11
•
The
[0]-[9]
dial buttons are used to directly choose a menu, or sub menu
options.
•
The
[ENTER]
button in the navigation button assembly is used when saving a
modification.
•
The
[MENU]
button in the navigation button assembly is used to to display
the IP Setup Main Menu.
•
The
[END]
button in the navigation button assembly is used when canceling
or editing the modification, or existing programming.
•
The
[CANCEL]
button in the navigation button assembly is used to go back to
the previous screen or to delete the last digit of a displayed option value.
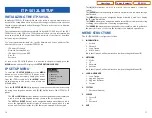
MENU STRUCTURE
The IP SETUP MENU is configured as follows:
1.
INFORMATION
1.
Version
2.
Network
3.
Load Option
4.
MAC Address
(Note that Option 3 will be indicated only when setting the Manual IP)
2.
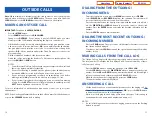
NETWORK
1.
Mode
2.
IP
3.
Netmask
4.
Gateway
(Note that Option 2 will be indicated only when setting the Manual IP)
3.
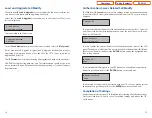
LOAD & UPGRADE
1.
Load Option
2.
Upgrade Program
3.
Upgrade Bootrom
4.
Format
4.
SYSTEM
1.
Password (Unused)
5.
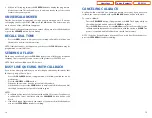
SERVER
1.
Server IP
2.
ID
3.
Password
6.
EXIT
ITP-5012L SETUP
INITIALIZING THE ITP-5012L
Initially the ITP-5012L IP keyset will need to be setup to operate within the users
network.The Setup Menu is also used to make changes to the keyset, in the event
that the system information should change. The option chosen via scroll button
will be highlighted.
The station numbers will be automatically set by the iDCS 100 Release 2, the iDCS
500 Release 2, or the OfficeServ 7200 system once the necessary information has
been entered into the IP keyset. Enter ID and password of the server, as described
below to register the phone.
See your system administrator for specific Network and Server addresses. The
addresses necessary to set up the ITP-5012L are:
•
IP Address of Station
•
Network Gateway Address
•
IP Address of System’s MCP
•
User ID
•
Password
As soon as the ITP-5012L IP phone is connected to the power supply, press the
MENU
button and the LCD displays the
SETUP OPTIONS SCREEN
.
IP SETUP MENU
To enter the
IP SETUP MENU
, press the
MENU
button as soon as the ITP-5012L IP phone is con-
nected to the power supply. Unplug the power
from the ITP. Press and hold the
MENU
button
while plugging in the power, then release the
MENU button.
Once the
IP SETUP MENU
is displayed, you can move to each menu in the Set Up
by using the navigation buttons and
[1]-[9]
dial buttons of the ITP-5012L IP
phone.
•
The
UP
and
DOWN
directions buttons in the navigation button assembly are
used to move the highlighted bar up or down to the desired option.
•
The
LEFT
and
RIGHT
buttons in the navigation button assembly are used to
move the highlighted bar left or right, to the desired option, move to a sub
menu and if a menu is at the last line, that menu option will be executed.
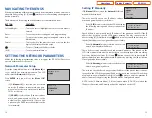
Setup (1/6)
1.Information
2.Network
3.Load & Upgrade
4.System
5.Server
6.Exit
10
Home Page
ITP-5012L
Table of Contents

