background image

89

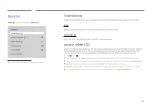
Screen Lamp Schedule

Screen Lamp Schedule

Enable or disable the lamp schedule.


Off

 / 

On

Schedule1, Schedule2

Time

The panel brightness will change to the brightness set in 

Lamp

 at a specified time.

Lamp

Adjust the panel brightness. A value closer to 100 makes the panel brighter.


0

 ~ 

100

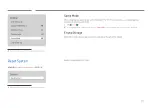
No Signal Power Off

Save power by turning the product off when no signal is received from any source.


"

This function does not operate if the display is in the standby mode.


"

The product will automatically power off at a specified time. The time can be changed as required.

Auto Power Off

Choose how long the display will wait before turning off after no user interaction is detected.

Eco Solution

Brightness Limit

Power Saving Mode

Eco Sensor

Screen Lamp Schedule

No Signal Power Off

Auto Power Off

Minimum Backlight

On

Off

Off

Off

15 minutes

Off (Recommended)

0


"

The displayed image may differ depending on the model.

Summary of Contents for OM55N-DS

Page 1: ...out the authorization of Samsung is prohibited Trademarks otherthan Samsung are property of theirrespective owners User Manual OM55N S OM55N DS The color and the appearance may differ depending on the...

Page 2: ...Using an HDMI Cable 25 Connection Using an DP Cable 26 Connection Using an HDMI DVI Cable 26 Connecting an External Monitor 27 Connecting to a Video Device 28 Connection Using an HDMI Cable 28 Connect...

Page 3: ...e 67 Color Space Settings 67 Input Signal Plus 67 Motion Lighting 67 Picture Options 68 Color Tone 68 Digital Clean View 68 HDMI Black Level 68 Film Mode 68 Auto Motion Plus Settings 68 Local Dimming...

Page 4: ...5 Power Control 86 Auto Power On 86 Max Power Saving 86 Standby Control 86 Remote Configuration 87 Power Button 87 Eco Solution 88 Brightness Limit 88 Power Saving Mode 88 Eco Sensor 88 Screen Lamp Sc...

Page 5: ...Testing the Product 99 Checking the Resolution and Frequency 99 Check the followings 100 Specifications General 106 Preset Timing Modes 108 Appendix Responsibility for the Pay Service Cost to Custome...

Page 6: ...IDE REFER ALL SERVICING TO QUALIFIED PERSONNEL This symbol indicates that high voltage is present inside It is dangerous to make any kind of contact with any internal part of this product AC voltage R...

Page 7: ...fire may result from a damaged cable Do not connect multiple products to a single power socket Overheated power sockets may cause a fire Insert the power plug all the way in so it is not loose An uns...

Page 8: ...plugged to completely cut off power to the product Note that the product is not completely powered down by using only the power button on the remote Do not disconnect the power cable while the product...

Page 9: ...stall the wall mount hanger Installation by an unqualified person can result in an injury Only use approved cabinets If the product is installed in an unusual location the surrounding environment may...

Page 10: ...ply an impact to the product The screen display may be damaged An electric shock or fire may result Do not insert metallic objects chopsticks coins hairpins etc or objects that burn easily paper match...

Page 11: ...Insert each battery so that its polarity is correct If the polarity is not correct the battery may rupture or the internal fluid may leak causing contamination and damage to the surroundings fire or...

Page 12: ...t When using headphones or earphones do not turn the volume too high or use them for a long time Damage to your hearing may result Cleaning Warning Do not spraywater or cleaner directly on the product...

Page 13: ...rs the product Due to the characteristics of high glossy products using a UV humidifier nearby may create white colored stains on the product Removing a sticker attached on the screen may leave residu...

Page 14: ...nal ambient light sensor The warrantyforadhesiveness of the double sided tape applies to first time use only The external ambient light sensoris marked with the label on the sensor cable Checking the...

Page 15: ...an audio device via an audio cable IR IN Connects to an external IR cable that receives signals from the remote control AMBIENTSENSOR IN Used to supply power to the external sensor board and to recei...

Page 16: ...sensor Setting up Device ID OMN DS model has separate remote sensors on the front and back sides Depending on the distance from the remote control or other surrounding conditions it is possible both f...

Page 17: ...in the images Supported models OMN S To lock an anti theft locking device 1 Fix the cable of your anti theft locking device to a heavy object such as a desk 2 Put one end of the cable through the loop...

Page 18: ...ified wall mount If the product temperature increases due to high outside temperature or the environment in which the product is installed the luminance decreases for product overheating mitigation an...

Page 19: ...A temperature is kept below 30 C A B OM55N DS Contact Samsung Customer Service Center for further details Do not install this product near machinery that works with oil e g gas stations Oil mist may...

Page 20: ...into the power IN rubber and connect the power cord Connect cables e g external IR cable power cord HDMI cable and organize them as shown in the image Place the top cover Securely position the externa...

Page 21: ...ns before installing on the ceiling orwith the stand Precautions forenclosure unit installation If you want to make additional enclosure surrounding OMN DS product refer to the following guides There...

Page 22: ...ded Do not use screws that are longer than the standard length or do not comply with the VESA standard screw specifications Screws that are too long may cause damage to the inside of the product Forwa...

Page 23: ...etc Poweron the product Change the input source Display orhide the on screen menu A shortcut button to Home screen MagicInfo MagicINFO Lite orURLLauncher Mute the sound Unmuting the sound Press MUTE...

Page 24: ...used functions by pressing it while a content is playing It sets safe lock function Press the SET button and entera device ID using numeric buttons Control the product using the remote control Cancel...

Page 25: ...connection may damage the product Check the types of ports at the back of the product you want to connect We recommend using authorized cables for HDMI or DP cable connections Connecting to a PC Do n...

Page 26: ...ESA compliant Make sure to use a DP cable that is VESA compliant To use the optimal resolution 3840 x 2160 60Hz when the input source is DisplayPort using a DP cable shorter than 5m is recommended Dis...

Page 27: ...nt products Use a cable shorter than 10 feet 3m to get the best UHD content viewing quality Maximum loopouts Up to 4 are supported if HDCP 2 2 is supported up to 7 if HDCP1 4 is supported and up to 9...

Page 28: ...h speed HDMI cable or one with ethernet is recommended This product does not support the ethernet function via HDMI Connection Using an HDMI Cable Connecting parts may differ in different products HDM...

Page 29: ...t products Make sure to connect the same color connectors together white to white red to red etc AUDIO OUT Connecting the LAN Cable Connecting parts may differ in different products LAN IN LAN OUT Use...

Page 30: ...by using the SOURCE button on the remote control The screen may not display correctly if an incorrect source is selected for the source device you want to convert to Edit SOURCE u Edit ENTER E Edit th...

Page 31: ...ttings General Hide Tabs and Toolbar automatically If the browser tabs menu or toolbar are not used for a while they will automatically disappear To make them appear again move the pointer or focus to...

Page 32: ...iveX is not supported Only a limited number of fonts are supported Certain symbols and characters may not be displayed properly The response to remote commands and the resulting on screen display may...

Page 33: ...emote PC or a cloud server Only PCs or Cloud Servers running on macOS Windows 7 Pro or newer are supported Office 365 Provides access to Office 365 features from Microsoft VMware Horizon Provides acce...

Page 34: ...m only shielded type Pin assignment 1 2 3 4 5 6 7 8 9 5 4 3 2 1 9 8 7 6 Male type Female type Pin Signal 1 Detect data carrier 2 Received data 3 Transmitted data 4 Prepare data terminal 5 Signal grou...

Page 35: ...P1 P1 P1 P2 P2 Male type Rx 3 1 Tx STEREO Tx 2 2 Rx PLUG Gnd 5 3 Gnd 3 5 LAN Cable Pin assignment 1 2 3 4 5 6 7 8 Pin No Standard Color Signal 1 White and orange TX 2 Orange TX 3 White and green RX 4...

Page 36: ...ector LAN IN Direct LAN cable PC to HUB HUB P1 P1 P2 P2 Signal P1 P2 Signal TX 1 1 TX TX 2 2 TX RX 3 3 RX RX 6 6 RX Cross LAN cable PC to LFD P1 P2 Signal P1 P2 Signal TX 1 3 RX TX 2 6 RX RX 3 1 TX RX...

Page 37: ...itor1 Monitor 2 Monitor 3 Monitor 4 PC Connection 2 LAN IN LAN IN RJ45 LAN IN 5 4 3 2 1 Monitor 2 Monitor1 PC Monitor 3 Connection 3 RS232C OUT RS232C IN RS232C OUT RS232C IN RS232C OUT RS232C IN RS23...

Page 38: ...y Lock 0x5D 0 1 7 Video Wall On 0x84 0 1 8 Video Wall User Control 0x89 All communications take place in hexadecimals The checksum is calculated by adding up all values except the header If a checksum...

Page 39: ...length Ack Nak r CMD Val1 Checksum 0xAA 0xFF 3 N 0x11 ERR ERR A code showing what error has occurred Volume control Function The volume of a product can be adjusted using a PC Viewing volume state Ge...

Page 40: ...0C Input source 0x20 MagicInfo 0x1F DVI_video 0x21 HDMI1 0x22 HDMI1_PC 0x23 HDMI2 0x24 HDMI2_PC 0x25 DisplayPort DVI_video HDMI1_PC and HDMI2_PC cannot be used with the Set command They only respond t...

Page 41: ...de can be activated on a product using a PC This control is only available on a product whose Video Wall is enabled Viewing video wall mode Get Video Wall Mode Header Command ID Data length Checksum 0...

Page 42: ...ck Safety Lock Safety lock code to be set on a product Nak Header Command ID Data length Ack Nak r CMD Val1 Checksum 0xAA 0xFF 3 N 0x5D ERR ERR A code showing what error has occurred Video Wall On Fun...

Page 43: ...a length Val1 Val2 Checksum 0xAA 0x89 2 Wall_Div Wall_SNo Wall_SNo Product Number code assigned to the product 10x10VideoWall Model 1 100 Set Number Data 1 0x01 2 0x02 99 0x63 100 0x64 Ack Header Comm...

Page 44: ...5A 0x5B 0x5C 0x5D 0x5E 0x5F 6 0x61 0x62 0x63 0x64 0x65 0x66 0x67 0x68 0x69 0x6A 0x6B 0x6C 0x6D 0x6E 0x6F 7 0x71 0x72 0x73 0x74 0x75 0x76 0x77 0x78 0x79 0x7A 0x7B 0x7C 0x7D 0x7E N A 8 0x81 0x82 0x83 0x...

Page 45: ...e License Agreement window displayed select I accept the terms in the license agreement and click Next 5 In the displayed Customer Information window fill out all the information fields and click Next...

Page 46: ...screen To view whether the server is connected when a Network Channel is running press INFO on the remote control 1 Select Network Channel from the Player screen The No channel message appears if no...

Page 47: ...option for Content Orientation is not available for contents with a resolution higher than 3840 x 2160 Content Size forvideos with a resolution higher than 3840 x 2160 supports Full Screen only Availa...

Page 48: ...esolution higher than 3840 x 2160 are not supported Sound output restrictions More than one sound output cannot be used Playback priority network BGM local BGM video file in the main frame selected by...

Page 49: ...160 30 3840 x 2160 60 60 Dolby Digital AC3 LPCM ADPCM IMA MS AAC HE AAC WMA DD MPEG MP3 AC 4 G 711 A Law Law OPUS HEVC H 265 Main Main10 60 80 Motion JPEG 3840 x 2160 30 80 MVC 1920 x 1080 60 20 MPEG4...

Page 50: ...supported up to Level 6 1 VC1 AP L4 is not supported GMC 2 or above is not supported When a single video file is playing Seamless mode is not supported under the following conditions Incompatible code...

Page 51: ...nsion pdf Functions not supported Content less than 1 pixel not supported because of performance degradation issue Masked Image Tiled Image content not supported Content with Rotated Text not supporte...

Page 52: ...ault contentwill be playedwhen there is no program scheduled You can change the default content from the Options menu Sunday January14 08 45 AM The displayed image may differ depending on the model Yo...

Page 53: ...und on the external storage device Export this device s settings to the external storage device message appears 3 Select Export to export the settings When a duplicate file is found on the external st...

Page 54: ...control Device ID Auto Set This feature automatically allots an ID number to a device connected via an RS232C cable This function is only available on the first device within an RS 232C daisy chain PC...

Page 55: ...odels may not support the MagicInfo function Video Wall You can activate or deactivate Video Wall To organize a video wall select On Off On Horizontal x Vertical This feature automatically splits a vi...

Page 56: ...oduct to another desired number Press the E button Screen Position allows you to split the screen into a maximum of 225 views 15 x 15 The Screen Position option is only enabled when Video Wall is set...

Page 57: ...57 Network Status HOME Network Status ENTER E Network Status The displayed image may differ depending on the model Check the current network and Internet connection...

Page 58: ...ture cannot be guaranteed if used with a battery powered USB device which can take longer to be recognized Setup Select Off Once Everyday Mon Fri Mon Sat Sat Sun or Manual If you select Manual you can...

Page 59: ...Timerwill be disabled during a period specified as a holiday Add Holiday Specify the period you want to add as a holiday Select the start and end dates of the holiday you want to add using the u d bu...

Page 60: ...use this feature Off On Set whether or not to use Ticker Message Enter a message to display on the screen Time Set the Start Time and End Time to display a Message Font Options Specify the text font a...

Page 61: ...ffer depending on the model For details on how to use the URL Launcher feature contact the dealer the product was purchased from This function may not be supported depending on the model To use the UR...

Page 62: ...ct the dealer the product was purchased from This function may not be supported depending on the model Install Web App Enter URL to install the web application Install from USB Device Install the web...

Page 63: ...differ depending on the model Your product has several options for adjusting picture quality You can adjust and store settings for each external device you have connected to an input on the product Lo...

Page 64: ...R E Picture ColorTemperature 10000 K The displayed image may differ depending on the model It sets color temperature The value and temperature increase simultaneously so the ratio of blue color rises...

Page 65: ...pending on the model Configure advanced picture settings to create your preferred picture Picture Enhancer Displays enhanced color and sharpness Off On Color Adjust the color saturation levels Color s...

Page 66: ...e luminosity levels in twenty sections for precise white balance optimization Off On Interval Select interval to adjust Red Adjust the red level Green Adjust the green level Blue Adjust the blue level...

Page 67: ...Plus is set to Off up to the 1920 x 1080 60 Hz resolution is supported The screen may blink when HDMI2 Input Signal Plus On Off from the DP source Supported Resolutions forUHD Input Signals Check the...

Page 68: ...nd stored for each external device connected to an input on the product Digital Clean View Reduce picture noise to avoid distractions such as flickering Auto Off HDMI Black Level Adjust the black leve...

Page 69: ...Off Off Auto Off Auto High On The displayed image may differ depending on the model Local Dimming Adjust brightness levels of individual on screen areas for optimum contrast Off Low Standard High Dyn...

Page 70: ...ture Settings ENTER E Picture ApplyPicture Settings All Sources The displayed image may differ depending on the model Apply the picture settings to all external devices connected to the device or to t...

Page 71: ...e resolution to suit the user s preferences 4 3 Sets the picture to basic 4 3 mode Do not set your product to 4 3 format for a long time The borders displayed on the left and right or top and bottom o...

Page 72: ...72 Reset Picture MENU m Picture Reset Picture ENTER E Picture Reset Picture The displayed image may differ depending on the model Restore all picture settings to the factory default...

Page 73: ...ndscape mode Portrait Display the menu in portrait mode on the right side of the product screen Source Content Orientation Rotate the product screen orientation This feature is not available for input...

Page 74: ...Start Time to End Time Mode Period Time Start Time and End Time are enabled only when Timer is set to Repeat or Interval Mode Select a screen protective pattern to display Pixel Pixels on the screen...

Page 75: ...display the source OSD when the input source changes Off On No Signal Message Select whether to display the no signal OSD when no signal is detected The message No Cable Connected will appear if no so...

Page 76: ...uage setting will only be applied to the onscreen menu display It will not be applied to other functions on your PC Reset OnScreen Display MENU m OnScreen Display Reset OnScreen Display ENTER E OnScre...

Page 77: ...U m Network Network Status ENTER E You can check the current network and Internet status Open Network Settings MENU m Network Open Network Settings ENTER E Configure network settings to connect to an...

Page 78: ...LAN cable See the diagram below Note that the wall outlet is attached to a modem or router elsewhere in your house The LAN Port on the Wall LAN Cable LAN LAN IN If you have a Dynamic Network you shoul...

Page 79: ...ts 2 The network test screen appears and verifies the network connection When the connection has been verified the Success Your device is connected to the Internet If you have any problems using onlin...

Page 80: ...o set up manually 1 Select Open Network Settings The Open Network Settings session starts 2 The network test screen appears and the verification process starts Press Cancel The verification process st...

Page 81: ...administrator to find the correct port number and then change the port number For the MagicInfo Server user guide visit the following website http displaysolutions samsung com Support Resources MagicI...

Page 82: ...09 Voice Guide Settings Voice Guide Switch Voice Guide on or off The language used for Voice Guide will be the same as the current menu language Off On Volume Speed and Pitch are enabled only when Vo...

Page 83: ...ion is selected Off On Enlarge Enlarge the size of the Menu area Off On Accessibility Voice Guide Settings High Contrast Enlarge Off The displayed image may differ depending on the model Go through th...

Page 84: ...Press E when done You can set the Date and Time directly by pressing the number buttons on the remote control NTP Settings Set up the server URL and time zone to use the network time DST Switches the...

Page 85: ...rce when a primary input source is activated The Primary Source Recovery function is disabled if Primary Source is set to All Primary Source Select a primary source to switch to when no signals are re...

Page 86: ...When no signal is detected it determines whether or not to enter sleep mode Auto The display stays off to save energy until working signals are detected even if there is an external device connected...

Page 87: ...Remote Configuration This feature keeps the network power on when the product turns off Off On PowerButton The power button on the remote control can be set to turn on the power or turn on or off the...

Page 88: ...ith energy standards Minimum Backlight Set the minimum brightness for the signage screen This function only works if its value is lower than the value set in the Picture menu s Backlight setting If Ec...

Page 89: ...n no signal is received from any source This function does not operate if the display is in the standby mode The product will automatically power off at a specified time The time can be changed as req...

Page 90: ...r MENU m System External Device Manager ENTER E External Device Manager Device Connect Manager The displayed image may differ depending on the model Manage external devices connected to your signage D...

Page 91: ...t depending on the setting MagicInfo URL Launcher Change PIN MENU m System Change PIN ENTER E System Change PIN The displayed image may differ depending on the model Change your 4 digit Personal Ident...

Page 92: ...eryour 4 digit PIN number The default PIN number is 0 0 0 0 If you want to change the PIN number use the Change PIN function Change the PIN to keep your device secure Turn Safety Lock On on or off Saf...

Page 93: ...On for five seconds Mobile Connection Lock Restrict other devices on your network such as smart phones and tablets to prevent them from sharing content on the product Off On Screen Mirroring Standby T...

Page 94: ...all connected Samsung devices that support Anynet with your Samsung product remote control The Anynet system can be used only with Samsung devices that have the Anynet feature To be sure your Samsung...

Page 95: ...t to exit Anynet Press the SOURCE button on the product remote control and select a non Anynet device The message Disconnecting Anynet device appears on the screen You cannot use the remote control wh...

Page 96: ...ternal USB device The file name of the custom logo you want to download must be saved as samsung in all small letters When there are multiple numbers of external USB connections the product will attem...

Page 97: ...n enjoy a more realistic gaming experience by selecting game mode Off On If you connect other external devices while Game Mode is on the screen may not be in good condition Empty Storage Delete files...

Page 98: ...sion already installed in the product Updating via USB Device Download the update package from Samsung s website to a USB storage device and then connect the device to the product to update the produc...

Page 99: ...remains blank while the power indicator blinks even when the product is correctly connected to a PC perform product testing 1 Power off both the PC and product 2 Disconnect all the cables from the pr...

Page 100: ...ttings Screen issue The powerindicatoris off The screenwill not switch on Make sure that the power cord is connected No Signal is displayed on the screen Check that products including source device ar...

Page 101: ...uctwill turn off automatically If a PC is connected to the product check the power status of the PC Make sure the power cable is connected properly to the product and power outlet If the signal from a...

Page 102: ...n cannot be displayed in full screen A scaled SD 4 3 content file can cause black bars on both sides of an HD channel screen A video with an aspect ratio different from the product can cause a black b...

Page 103: ...HDMI If a DVI HDMI cable is used a separate audio cable is required If the product has a headphone port make sure nothing is connected to it Reconnect the power cable to the device and then reboot the...

Page 104: ...connection and connect it again if required Use a standard cable Small particles are found on the edges of the product The particles are part of the product design The product is not defective When I...

Page 105: ...rn off the HDMI CEC features on all the external devices External devices include Blu ray and DVD players Operating an external device when its HDMI CEC feature is enabled may automatically stop other...

Page 106: ...For installing the enclosure keep the internal temperature at 40 C or below Humidity 10 80 non condensing Storage Temperature 4 F 113 F 20 C 45 C Humidity 5 95 non condensing Applicable before the pro...

Page 107: ...cturing of this product approximately1 pixel per million 1ppm may appear brighter or darker on the panel This does not affect product performance This product can be set to only one resolution for eac...

Page 108: ...00 VESA 800 x 600 35 156 56 250 36 000 VESA 800 x 600 37 879 60 317 40 000 VESA 800 x 600 48 077 72 188 50 000 VESA 800 x 600 46 875 75 000 49 500 VESA 1024 x 768 48 363 60 004 65 000 VESA 1024 x 768...

Page 109: ...tomer requests software installation and setup for the product If a service technician removes cleans dusts or foreign materials inside of the product If customer requests an installation additionally...

Page 110: ...information is a guide to prevent afterimage burn in Viewing a fixed screen for an extended period of time may cause afterimage burn in This problem is not included in warranty Recommended prevention...

Page 111: ...ation on the Open Source Licence Notice contact Samsung Open Source http opensource samsung com THIS PRODUCT IS SOLD WITH A LIMITED LICENCE AND IS AUTHORISED TO BE USED ONLY IN CONNECTION WITH HEVC CO...

Reviews: