background image

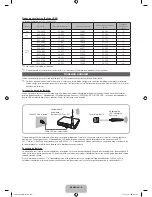
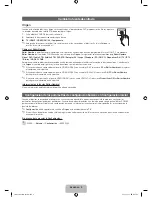
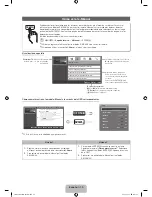
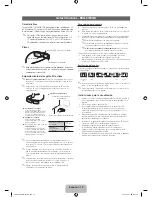
Instalación del montaje de pared (opcional)

Montaje en pared o techo

Si monta este producto en una pared, debe montarse sólo como lo recomienda el fabricante. A menos que se 

instale correctamente, el producto puede deslizarse o caerse, provocando lesiones graves a niños o adultos, y daños 

importantes en el producto. 

Instalación del kit de montaje de pared

El kit de montaje de pared (se vende por separado) le permite instalar el televisor en una pared. Si desea más información sobre la 

instalación del montaje de pared, consulte las instrucciones que se facilitan con dichos elementos. Si necesita ayuda con la instalación del 

soporte de pared, póngase en contacto con un técnico. Samsung Electronics no se hace responsable de los daños causados al producto 

o al usuario si éste ha optado por instalar el montaje de pared por su cuenta.
Para solicitar el montaje de pared, comuníquese con el Centro de Atención al Cliente de Samsung.

Especificaciones del kit de montaje de pared (VESA) 

Instale el montaje de pared en una pared sólida, perpendicular al suelo. Antes de conectar el montaje de pared a superficies distintas de 

una placa de yeso, comuníquese con su distribuidor más cercano para obtener información adicional. Si instala el televisor en el techo o 

en una pared inclinada, puede caerse y causar graves lesiones personales.


NOTA

• 

Las dimensiones estándar de los kits de montaje de pared se muestran en la tabla que sigue. 

• 

El kit de montaje de pared Samsung, también se distribuye un manual de instalación detallado y todas las piezas necesarias para 

el montaje.

• 

No use tornillos que no cumplan las especificaciones de tornillos estándar VESA. 

• 

No use tornillos con una longitud superior a la longitud estándar o que no cumplan con especificaciones de tornillos estándar 

VESA. Los tornillos que sean demasiado largos pueden causar daños en el interior del televisor.

• 

Para montajes de pared que no cumplen las especificaciones de tornillos estándar VESA, la longitud de éstos puede variar 

dependiendo de las especificaciones del montaje de pared. 

• 

No apriete excesivamente los tornillos, ya que podría dañar el producto o provocar su caída con riesgo de causar lesiones 

personales. Samsung no se hace responsable de este tipo de accidentes.

• 

Samsung no se hace responsable de daños o lesiones personales cuando se usa un montaje de pared que no cumple las 

especificaciones VESA o si el cliente no sigue las instrucciones de instalación del producto.

• 

No monte el televisor con una inclinación de más de 15 grados.

• 

Siempre son necesarias dos personas para montar el televisor en la pared.

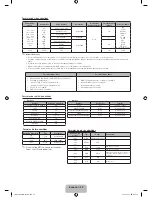
Familia de producto

Tamaño del 

televisor en 

pulgadas

Especificaciones VESA (A * B) 

en milímetros

Tornillo estándar

Cantidad

TV PDP

43~51

400 X 400

M8

4

60~64

600 X 400


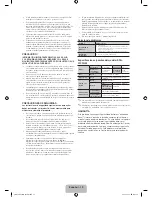
Retire los tornillos de los orificios de montaje antes de instalar el montaje de pared.

No instale el equipo de montaje de pared mientras el televisor está encendido. Se podría producir una descarga 

eléctrica con riesgo de causar lesiones personales.

Español - 19

2_BN68-04800B-05SPA.indd   19

2013-07-29     11:06:16

Summary of Contents for PL43F4900

Page 1: ...G 726 7864 www samsung com cl BOLIVIA 800 10 7260 www samsung com COLOMBIA 01 8000 112 112 Bogotá 600 12 72 www samsung com co COSTA RICA 0 800 507 7267 www samsung com latin Spanish www samsung com latin_en English DOMINICA 1 800 751 2676 www samsung com latin Spanish www samsung com latin_en English ECUADOR 1 800 10 7267 www samsung com latin Spanish www samsung com latin_en English EL SALVADOR ...

Page 2: ...in particular if there are any unusual sounds or smells coming from it unplug it immediately and contact an authorized dealer or service center y Be sure to pull the power plug out of the outlet if the TV is to remain unused or if you are to leave the house for an extended period of time especially when children elderly or disabled people will be left alone in the house Accumulated dust can cause ...

Page 3: ... Playing a DVD or a game console may have a similar effect Damage caused by the above effect is not covered by the warranty After images on the Screen Displaying still images from Video games and PC s for longer than a certain period of time may produce partial after images To prevent this effect reduce the brightness and contrast when displaying still images for a long time Warranty Warranty does...

Page 4: ...ry depending on the model Check that there are no accessories hidden behind or under packing materials after you open the box Remote Control Batteries AAA x 2 Owner s Instructions Warranty Card Regulatory Guide Power Cord 3D Glasses Input Cables Sold Separately To purchase an HDMI cable contact www SamsungParts com HDMI HDMI DVI Component Composite AV Coaxial RF Make sure you have the correct cabl...

Page 5: ...ection you must use the HDMI IN 2 DVI jack If you connect a device to the HDMI IN 2 DVI port using an HDMI to DVI cable the audio will not work DVI does not transmit audio You must add a separate audio connection For PCs with DVI video out jacks use an HDMI to DVI cable to connect the DVI out on the PC to the HDMI IN 2 DVI jack on the TV Use the PC s speakers for audio COMPONENT AVIN AUDIO VIDEO D...

Page 6: ...u can connect your TV to your LAN through a standard wireless router or modem To connect wirelessly you must first attach a Samsung Wireless LAN Adapter WIS09ABGNX WIS12ABGNX sold separately to the USB port on the side of your TV See the illustration below Samsung s Wireless LAN adapter is sold separately and is offered by select retailers E commerce sites and Samsungparts com Samsung s Wireless L...

Page 7: ...e station For example to select channel 54 3 press 54 then press and 3 Return to the previous channel Press to directly access to channels Turns the TV on and off Use these buttons in a specific feature E MANUAL Displays the e Manual X Turns the 3D image on or off Turns the Sports mode On Cut off the sound temporarily Not available Displays the channel list on the screen Displays information on th...

Page 8: ...ogether If you have connected a PC to the HDMI IN 2 DVI port with an HDMI cable select PC under Edit Name to enter a device name If you have connected a PC to the HDMI IN 2 DVI port with an HDMI to DVI cable select DVI PC under Edit Name to enter a device name If you connected an AV device to the HDMI IN 2 DVI port with an HDMI to DVI cable select DVI Devices under Edit Name to enter a device name...

Page 9: ...d configuration of the picture its brightness its contrast and so on There are also functions that let you control the TV s sound channel configuration energy use and a host of other features To access the main on screen menu press the MENU m button on your remote To access Tools menus press the TOOLS button Tools menus are available when the TOOLS menu Icon is displayed on the bottom right of the...

Page 10: ...er Select a category or sub menu e Exit Exit the e Manual How to toggle between an e Manual topic and the corresponding OSD menu s E MANUAL Try Now a Try Now b Home Zoom Index L Page e Exit Basic Features Changing the Preset Picture Mode 1 1 Picture Picture Mode Standard Cell Light 10 Contrast 95 Brightness 45 Sharpness 50 Color 50 Tint G R G50 R50 Changing the Preset Picture Mode Picture Mode t O...

Page 11: ...de When you are viewing an e Manual instruction page press the Yellow Zoom to magnify the screen You can scroll through the magnified screen by using the u or d buttons To return the screen to normal size press the RETURN button U Move R Return Changing the Preset Picture Mode Picture Mode t O MENUm Picture Picture Mode ENTERE Picture modes apply preset adjustments to the picture Select a mode usi...

Page 12: ...airing steps 1 Turn on the TV and then move the glasses within 19 5 inches of the TV 2 Press the power button on the 3D glasses briefly The 3D glasses will power on and pairing will start 3 The message 3D glasses are connected to TV will be displayed on the TV screen when the pairing is successfully completed If pairing fails the 3D glasses will power off If the first attempt to pair fails power t...

Page 13: ...battery out of the reach of children so that they do not accidently swallow the battery If your child has swallowed the battery consult your doctor immediately When cleaning the product do not spray water or cleaner directly onto the surface of the product Spraying water or cleaner directly onto the glasses may result in fire or electric shock damage to the product s surface or cause the indicator...

Page 14: ...y damage which may result 5 The warranty does not apply to any product that has been damaged or rendered defective as a result of any of the following excluded reasons namely as a result of accident misuse or abuse through the failure to use this product for its normal purposes by the use of parts not manufactured or sold by Samsung by modification without the written permission of Samsung by dama...

Page 15: ...Light Contrast Brightness Sharpness Color Tint G R and so on Unwanted Powering Off If your Samsung TV appears to turn off by itself there may be an issue with either your Timer settings or your Eco friendly No Signal Power Off feature First make sure the Sleep Timer is not accidentally set The sleep timer turns the TV off after a certain period of time Sleep Timer User Menu System Time Sleep Timer...

Page 16: ... menu go to MENU System Eco Solution Energy Saving Try resetting the picture to the default picture settings go to MENU Picture Reset Picture There is a dotted line on the edge of the screen If the picture size is set to Screen Fit change it to 16 9 Change the cable satellite box resolution The picture is black and white If you are using an AV composite input connect the video cable yellow to the ...

Page 17: ...hannels to the channel list There are 3 options STD HRC and IRC Most cable systems use STD Verify the antenna is positioned correctly No Caption on digital channels Check the Caption Setup menu Try changing Caption Mode Service1 to CC1 Some channels may not have caption data The picture is distorted macroblock error small block dots pixelization The compression of video contents may cause picture ...

Page 18: ...V This smell is normal and will dissipate over time TV Signal Information is unavailable in the Self Diagnosis Test menu This function is only available for digital channels the TV receives from an Antenna RF Coax connection TV is tilted to the right or left side Remove the stand base from the TV and reassemble it The Broadcasting menu is greyed out unavailable The Broadcasting menu is only availa...

Page 19: ...he table below Samsung wall mount kits contain a detailed installation manual and all parts necessary for assembly are provided Do not use screws that do not comply with the VESA standard screw specifications Do not use screws that are longer than the standard length or do not comply with the VESA standard screw specifications Screws that are too long may cause damage to the inside of the TV set F...

Page 20: ...to the wall Make sure the screws are firmly fixed into the wall 2 Remove the screws from the centre back of the TV put the screws into the clamps and then fasten the screws onto the TV again 3 Connect the clamps fixed onto the TV and the clamps fixed onto the wall with a strong string and then tie the string tightly Verify all connections are properly secured Periodically check connections for any...

Page 21: ...Dolby and the double D symbol are trademarks of Dolby Laboratories Manufactured under a license from U S Patent No s 5 956 674 5 974 380 5 978 762 6 487 535 6 226 616 7 212 872 7 003 467 7 272 567 7 668 723 7 392 195 7 930 184 7 333 929 and 7 548 853 DTS the Symbol and DTS and the Symbol together are registered trademarks DTS Premium Sound 5 1 is a trademark of DTS Inc 2012 DTS Inc All Rights Rese...

Page 22: ... 39 7 x 24 3 x 2 1 inches 1009 7 x 617 5 x 55 7 mm 39 7 x 27 2 x 12 0 inches 1009 7 x 692 3 x 305 0 mm 46 6 x 27 6 x 2 1 inches 1185 2 x 702 1 x 55 7 mm 46 6 x 30 5 x 12 0 inches 1185 2 x 776 5 x 305 0 mm Weight Without Stand With Stand 29 9lbs 13 6kg 39 6lbs 18 0kg 39 0lbs 17 7kg 48 7lbs 22 1kg Design and specifications are subject to change without prior notice This device is a Class B digital a...

Page 23: ...ted Frame rate Below 1280 x 720 60 frame max Above 1280 x 720 30 frame max VC1 AP L4 is not supported GMC 2 or higher is not supported WMA 10 Pro supports up to 5 1 channel and M2 profile WMA lossless audio is not supported Vorbis supports up to 2ch DD supports up to 5 1 channel Supported Subtitle Formats External Name File extension MPEG 4 timed text ttxt SAMI smi SubRip srt SubViewer sub Micro D...

Page 24: ...os o desprende olores desde el interior desenchúfelo inmediatamente y póngase en contacto con el distribuidor autorizado o el centro de servicio técnico Asegúrese de desconectar el enchufe de alimentación de la toma de corriente si la TV ha dejado de utilizarse o desea salir de casa durante un largo período de tiempo especialmente cuando sea necesario dejar solos en casa a niños ancianos o persona...

Page 25: ...a derecha arriba o abajo de la pantalla Reproducir un DVD o el uso de una consola pueden tener el mismo efecto La garantía no cubre los daños causados por dichos efectos Imágenes fantasma en la pantalla Visualizar imágenes fijas de videojuegos y computadora por un período superior al determinado puede producir imágenes fantasma parciales Para evitar este efecto reduzca el brillo y el contraste cua...

Page 26: ...delo Verifique que no haya ningún accesorio oculto detrás o debajo de los materiales de embalaje después de abrir la caja Control remoto y pilas AAA x 2 Manual del usuario Tarjeta de garantía Guía regulatoria Cable de alimentación Anteojos 3D Cables de entrada vendidos en forma separada Para comprar el cable HDMI comuníquese con www SamsungParts com HDMI HDMI DVI Componente Cable mixto AV Cable co...

Page 27: ...zarse la entrada HDMI IN 2 DVI Si conecta un dispositivo al puerto HDMI IN 2 DVI por medio de un cable HDMI a DVI el audio no funcionará DVI no transmite el audio Debe agregar una conexión de audio separada En las PC con tomas de salida de video DVI use un cable HDMI a DVI para conectar la salida DVI de la PC a la toma HDMI IN 2 DVI del televisor Use los altavoces del PC para el audio COMPONENT AV...

Page 28: ...arlo de manera inalámbrica primero debe conectar un Adaptador de LAN inalámbrica de Samsung WIS09ABGNX WIS12ABGNX se venden por separado al puerto USB en la parte lateral de su televisor Vea las ilustraciones a continuación El adaptador de LAN inalámbrica de Samsung se vende por separado y se ofrece a través de minoristas selectos sitios de comercio electrónico y Samsungparts com El adaptador de L...

Page 29: ...misma emisora Por ejemplo para seleccionar el canal 54 3 pulse 54 luego pulse y 3 Volver al canal anterior Pulse para acceder directamente a los canales Enciende y apaga el televisor Utilice estos botones en una función específica E MANUAL Muestra el e Manual X Enciende y apaga la imagen 3D Habilita Sports mode On Cortar el sonido temporalmente No disponible Muestra la lista de canales en la panta...

Page 30: ...I seleccione PC en Editar Nombre para ingresar el nombre de un dispositivo Si ha conectado una computadora al puerto HDMI IN 2 DVI con un cable HDMI a DVI seleccione DVI PC en Editar Nombre para ingresar el nombre de un dispositivo Si conectó un dispositivo AV al puerto HDMI IN 2 DVI con un cable HDMI a DVI seleccione Dispositivos DVI en Editar Nombre para ingresar el nombre de un dispositivo Info...

Page 31: ...el tamaño y la configuración de la imagen su brillo su contraste etc También cuenta con funciones que le permiten controlar el sonido la configuración de canales el uso de la energía y una cantidad de otras funciones del televisor Para acceder al menú principal en pantalla pulse el botón MENU m en su control remoto Para acceder a los menús Herramientas pulse el botón TOOLS Los menús Herramientas e...

Page 32: ...estra la pantalla del índice E Entrar Seleccionar una categoría o submenú e Salir Sale del e Manual Cómo conmutar entre un tema del e Manual y los menús de la OSD correspondientes E MANUAL Int Ahora a Int Ahora b Inicio Zoom Índice L Página e Salir Funcionesbásicas Cambiodelmodopreestablecidodelaimagen 1 1 Imagen Modo de Imagen Normal Luz de la celda 10 Contraste 95 Brillo 45 Definición 50 Color 50...

Page 33: ... en el e Manual pulse el botón Amarillo Zoom para ampliar la pantalla Puede desplazarse a través de la pantalla ampliada utilizando los botones u o d Para regresar la pantalla a su tamaño normal pulse el botón RETURN U Mover R Regresar Cambio del modo preestablecido de la imagen Modo de Imagen t O MENUm Imagen Modo de Imagen ENTERE Los modos de Imagen aplican ajustes preestablecidos a la imagen Se...

Page 34: ...didas se acorta la vida de la pila Pasos del emparejamiento 1 Encienda el televisor y acerque las gafas a 50 cm 19 5 pulgadas del televisor 2 Pulse brevemente el botón de encendido de las gafas 3D Las gafas 3D se activan y se inicia el emparejamiento 3 Se muestra el mensaje Gafas 3D conectadas al televisor en la pantalla del televisor una vez completado satisfactoriamente el emparejamiento Si fall...

Page 35: ...taminación por fugas del líquido interno de la pila Mantenga la pila usada fuera del alcance de los niños ya que accidentalmente se la podrían tragar Si un niño se traga una pila consulte a su médico inmediatamente Para limpiar el producto no rocíe agua ni agentes limpiadores directamente sobre la superficie Si rocía agua o un limpiador directamente sobre las gafas podría provocar un incendio o un...

Page 36: ...uoso como consecuencia de las siguientes razones de exclusión a saber accidente mal uso o abuso la no utilización de este producto con las finalidades normales para las que ha sido ideado utilización de piezas que Samsung no haya fabricado o vendido cambios realizados sin permiso por escrito de Samsung daños derivados del transporte negligencia sobrecarga o fallo de energía daños derivados de rayo...

Page 37: ... Luz de la celda Contraste Brillo Definición Color Tinte V R etcétera Apagado no deseado Si su televisor Samsung se apaga por sí mismo puede haber un problema con su configuración de Temporizador o la función ecológica Apagado por no señal Primero asegúrese de que su Temporizador no se haya configurado accidentalmente El temporizador apaga el televisor después de un período determinado Temporizado...

Page 38: ... energía en el menú del televisor vaya a MENU Sistema Solución Eco Ahorro de energía Intente reiniciar la imagen para ver la configuración de imagen predeterminada vaya a MENU Imagen Restablezca imagen Hay una línea de puntos en el borde de la pantalla Si el tamaño de la imagen está establecido en Ajuste pantalla cámbielo a 16 9 Cambie la resolución del receptor de cable satélite La imagen se ve s...

Page 39: ...res opciones STD HRC e IRC La mayoría de los sistemas de cable usan STD Compruebe la posición correcta de la antena No hay subtítulos en los canales digitales Compruebe el menú de configuración de los Subtítulo Intente cambiar el Servicio1 del Modo de Subtítulo a CC1 Algunos canales no tienen datos de subtítulos La imagen se ve distorsionada error de macrobloques microbloques puntos pixelización L...

Page 40: ...e del televisor Este olor es normal y desaparece con el tiempo La Información de señal del televisor no está disponible en el menú de Prueba Autodiagnóstico Esta función sólo está disponible en los canales digitales que el televisor recibe de la conexión de Antena RF Coaxial El televisor está inclinado a la derecha o a la izquierda Retire la base del soporte del televisor y vuelva a montarla El me...

Page 41: ...kit de montaje de pared Samsung también se distribuye un manual de instalación detallado y todas las piezas necesarias para el montaje No use tornillos que no cumplan las especificaciones de tornillos estándar VESA No use tornillos con una longitud superior a la longitud estándar o que no cumplan con especificaciones de tornillos estándar VESA Los tornillos que sean demasiado largos pueden causar ...

Page 42: ... la pared con los tornillos Asegúrese de que los tornillos estén bien fijados en la pared 2 Quite los tornillos de la parte central posterior del televisor colóquelos en las grapas y luego vuelva a ajustar los tornillos en el televisor 3 Conecte las grapas unidas al televisor y las grapas unidas a la pared con una cadena fuerte y ténsela firmemente Verifique que todas las conexiones estén bien ase...

Page 43: ...solventes ni agentes limpiadores Licencia Fabricado bajo licencia de Dolby Laboratories Dolby y el símbolo de doble D son marcas comerciales de Dolby Laboratories Manufactured under a license from U S Patent No s 5 956 674 5 974 380 5 978 762 6 487 535 6 226 616 7 212 872 7 003 467 7 272 567 7 668 723 7 392 195 7 930 184 7 333 929 and 7 548 853 DTS the Symbol and DTS and the Symbol together are re...

Page 44: ...erpo principal Con el soporte 39 7 x 24 3 x 2 1 pulgadas 1009 7 x 617 5 x 55 7 mm 39 7 x 27 2 x 12 0 pulgadas 1009 7 x 692 3 x 305 0 mm 46 6 x 27 6 x 2 1 pulgadas 1185 2 x 702 1 x 55 7 mm 46 6 x 30 5 x 12 0 pulgadas 1185 2 x 776 5 x 305 0 mm Peso Sin el soporte Con el soporte 29 9lbs 13 6kg 39 6lbs 18 0kg 39 0lbs 17 7kg 48 7lbs 22 1kg El diseño y las especificaciones pueden cambiar sin previo avis...

Page 45: ...SO RS no se admiten Velocidad de transferencia Inferior a 1280 x 720 60 fotogramas máx Superior a 1280 x 720 30 fotogramas máx VC1 AP L4 no se admite GMC 2 o superior no se admite WMA 10 Pro admite hasta 5 1 canales y el perfil M2 El audio WMA Lossless no se admite Vorbis admite hasta 2 canales DD admite hasta 5 1 canales Formatos de subtítulo admitidos Externos Nombre Extensión del archivo Texto ...

Reviews: