Using USB memory device
68
2. Menu Overview and Basic Setup
25
Scanning to a USB memory device
Accessing menus may differ from model to model (see "Menu overview" on
page 31 or "Control panel overview" on page 24).
You can scan a document and save the scanned image onto a USB memory
device.
Scanning
1
Insert a USB memory device into the USB memory port on your machine.
2
Place a single document face down on the document glass, or load the
documents face up into the document feeder (see "Loading originals" on
page 49).
3
Select (
Scan
) >
USB
>
Next
>
Start
on the touch screen.
The machine begins scanning.
After scanning is complete, you can remove the USB memory device from the
machine.
Customizing Scan to USB
You can specify image size, file format, or color mode for each scanning to USB
job.
1
Select (
Direct USB
) >
Scan to USB
>
(
Options
) on the touch
screen.
2
Select the setting option you want appears.
•
Original Size:
Sets the image size.
•
Original Type:
Sets the original document’s.
•
Resolution:
Sets the image resolution.
Summary of Contents for ProXpress C267x series
Page 80: ...Redistributing toner 80 3 Maintenance ...
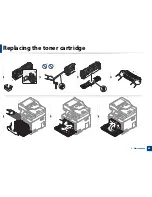
Page 82: ...Replacing the toner cartridge 82 3 Maintenance ...
Page 83: ...Replacing the toner cartridge 83 3 Maintenance ...
Page 85: ...Replacing the waste toner container 85 3 Maintenance 1 2 1 2 1 2 ...
Page 89: ...Installing accessories 89 3 Maintenance 1 2 1 2 ...
Page 94: ...Cleaning the machine 94 3 Maintenance ...
Page 145: ...Regulatory information 145 5 Appendix 26 China only ...


