background image

English - 0

PC Display

Setting Up Your PC Software (Based on Windows XP)

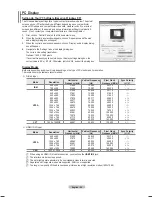
The Windows display-settings for a typical computer are shown below. The actual 

screens on your PC will probably be different, depending upon your particular 

version of Windows and your particular video card. However, even if your actual 

screens look different, the same basic set-up information will apply in almost all 

cases. (If not, contact your computer manufacturer or Samsung Dealer.)

1. 

First, click on ‘Control Panel’ on the Windows start menu.

When the control panel window appears, click on ‘Appearance and Themes’ 

and a display dialog-box will appear.

3. 

When the control panel window appears, click on ‘Display’ and a display dialog-

box will appear.

4. 

Navigate to the ‘Settings’ tab on the display dialog-box.

The correct size setting (resolution)
Optimum: 1920 X 1080 pixels
If a vertical-frequency option exists on your display settings dialog box, the 

correct value is ‘60’ or ‘60 Hz’. Otherwise, just click ‘OK’ and exit the dialog box.

Display Modes

Both screen position and size will vary depending on the type of PC monitor and its resolution. 

The resolutions in the table are recommended.

D-Sub Input

Mode

Resolution

Horizontal 

Frequency (kHz)

Vertical Frequency 

(Hz)

Pixel Clock 

Frequency (MHz)

Sync Polarity 

(H / V)

IBM

640 x 350

720 x 400

31.469

31.469

70.086

70.087

25.175

28.322

+ / -

- / +

VESA

640 x 480

640 x 480

640 x 480

800 x 600

800 x 600

800 x 600

1024 x 768

1024 x 768

1024 x 768

1280 x 1024

1280 x 1024

1360 x 768

1600 x 1200

31.469 

37.861 

37.500 

37.879 

48.077 

46.875 

48.363 

56.476 

60.023 

63.981 

79.976 

47.712 

75.000 

59.940 

72.809 

75.000 

60.317 

72.188 

75.000 

60.004 

70.069 

75.029 

60.020 

75.025 

60.015 

60.000 

25.175 

31.500 

31.500 

40.000 

50.000 

49.500 

65.000 

75.000 

78.750 

108.000 

135.000 

85.500 

162.000 

- / -

- / -

- / -

+ / +

+ / +

+ / +

- / -

- / -

+ / +

+ / +

+ / +

+ / +

+ / +

CVT

1920 x 1080RB

66.587

59.934

138.500

+ / -

HDMI / DVI Input

Mode

Resolution

Horizontal 

Frequency (kHz)

Vertical Frequency 

(Hz)

Pixel Clock 

Frequency (MHz)

Sync Polarity 

(H / V)

VESA

640 x 480

800 x 600

1024 x 768

1280 x 1024

1360 x 768

1600 x 1200

31.469 

37.879 

48.363 

63.981 

47.712 

75.000 

59.940 

60.317 

60.004 

60.020 

60.015 

60.000 

25.175 

40.000 

65.000 

108.000 

85.500 

162.000 

- / -

+ / +

- / -

+ / +

+ / +

+ / +

CEA

1920 x 1080p

67.500 

60.000

148.500 

+ / +

When using an HDMI / DVI cable connection, you must use the 

HDMI IN 

 jack.

The interlace mode is not supported.

The set might operate abnormally if a non-standard video format is selected.

Separate and Composite modes are supported. SOG is not supported.

Too long or low quality VGA cable can cause picture noise at high resolution modes (1920x1080).

N
N
N
N
N

BN68-01757D-Eng_.indb   20

2008-08-20   오후 7:18:25

Summary of Contents for PS50A756T1M

Page 1: ...register Model Serial No BN68 01757D 00 Contact SAMSUNG WORLD WIDE If you have any questions or comments relating to Samsung products please contact the SAMSUNG customer care centre Plasma TV user man...

Page 2: ...eriod of time may leave traces of borders displayed on the left right and centre of the screen caused by the difference of light emission on the screen Playing a DVD or a game console may cause simila...

Page 3: ...de Show 36 Using and Sorting the Music List 38 Playing a Music 39 Using and Sorting the Movie List 40 Playing a Movie File 41 Deleting the Photo Music Movie File 42 Picture Music Settings Using WISELI...

Page 4: ...e wall close the cover 1 on the stand base connection part using two screws for hiding Warning Firmly secure the stand to the TV before moving it as the stand may fall and could cause serious injury T...

Page 5: ...enu use the buttons as you would use the and buttons on the remote control 4 C P Press to change channels In the on screen menu use the C P buttons as you would use the and buttons on the remote contr...

Page 6: ...O OUT OPTICAL Connect to a Digital Audio Component 7 AUDIO OUT AUDIO R L Connect RCA audio signals from the TV to an external source such as Audio equipment 8 SERVICE Connector for service 9 HDMI IN 1...

Page 7: ...is now updated Insert the CI Card in the direction marked on it 2 HDMI IN 4 Connect to the HDMI jack of a device with HDMI output 3 WISELINK PRO Connect a USB mass storage device to view and play pho...

Page 8: ...t button set to On will reduce the battery usage time Previous channel Next channel Previous channel Displays the main on screen menu This function enables you to view and play photo JPEG audio files...

Page 9: ...2 Press the POWERP button on your set You also can press the POWERP button or the TV button on the remote control to turn the TV on The programme that you were watching last is reselected automaticall...

Page 10: ...sponding page Anynet HDMI CEC see page 53 Picture Size see page 17 Picture Mode see page 15 Sound Mode see page 21 Sleep Timer see page 26 SRS TS XT see page 21 Energy Saving see page 25 Dual l ll see...

Page 11: ...l Digital channels Analogue Analogue channels The channel search will start and end automatically Press the ENTERE button at any time to interrupt the memorization process After all the available chan...

Page 12: ...also select the channel number directly by pressing the number 0 9 buttons If there is abnormal sound or no sound reselect the sound standard required Search When you do not know the channel numbers...

Page 13: ...can improve the reception a low noise preamplifier boosts the incoming signal While viewing an Analogue channel this function can be selected Using the Full Mini Guide ENTER Select a programme by pres...

Page 14: ...ed Channels or Favourite menu in the same manner Add to Favourite Delete to Favourite You can set channels you watch frequently as favourites The symbol will be displayed and the channel will be set a...

Page 15: ...OOLS button to use the option menu Change Info Select to change a viewing reservation Cancel Schedules Select to cancel a viewing reservation Information Select to view a viewing reservation You can a...

Page 16: ...urces Native Native Colour Space offers deep and rich colour tone Custom Adjusts the colour range to suit your preference Customizing the Colour Space Colour Red Green Blue Yellow Cyan Magenta Adjusts...

Page 17: ...an function with HDMI 720p input 1 line will be cut at the top bottom left and right as in the overscan function When Double mode has been set in PIP the Picture Size cannot be set Screen Mode 16 9 Wi...

Page 18: ...tting allows you to program the time between movement of the picture in minutes Pixel Shift Using this function you can minutely move pixels on the PDP in horizontal or vertical direction to minimize...

Page 19: ...T N N T Setting up the TV with your PC Preset Press the SOURCE button to select PC mode Auto Adjustment Auto Adjustment allows the PC screen of set to self adjust to the incoming PC video signal The...

Page 20: ...put Mode Resolution Horizontal Frequency kHz Vertical Frequency Hz Pixel Clock Frequency MHz Sync Polarity H V IBM 640 x 350 720 x 400 31 469 31 469 70 086 70 087 25 175 28 322 VESA 640 x 480 640 x 48...

Page 21: ...ge You can change the default value for audio languages Displays the language information for the incoming stream While viewing a digital channel this function can be selected You can only select the...

Page 22: ...sed to listen to the sound of the sub picture Press the TOOLS button to display Tools menu You can also set the sound of the sub picture by selecting Tools PIP Sound Select Sound Reset Reset All Reset...

Page 23: ...gs Before the setup screen appears the PIN number input screen appears Enter your 4 digit PIN number The default PIN number of a new TV set is 0 0 0 0 You can change the PIN by selecting Change PIN fr...

Page 24: ...ording to the situation Use it for saving power or when the LED dazzles your eyes Off The blue LED is always off In Standby The blue LED lights while in Standby mode and it turns off when your TV is t...

Page 25: ...nal Standby Mode Upgrade To continue software upgrade with master power on Select On by pressing the or button 45 minutes after entering standby mode a manual upgrade is automatically conducted Since...

Page 26: ...ff Time Set the hour minute and Activate Inactivate To activate timer with the setting you ve chosen set to Activate Volume Set the required volume level Contents When the On Timer is active you can t...

Page 27: ...ver has failed turn the external modem off turn it on again after at least 10 seconds and then try again For the connections between the external modem and the Sharer Router refer to the owner s manua...

Page 28: ...rminal of the TV You must use the Samsung Wireless LAN Adapter for InfoLive WIS 08BG to use a wireless network The Samsung Wireless LAN Adapter for InfoLive is sold separately Contact a Samsung Electr...

Page 29: ...ect to a wireless network Your TV may fail to locate an AP that is configured as a private SSID type In this case please change the AP settings and try again If your Internet service provider has regi...

Page 30: ...you set the Network manually 5 Select Network Test to check the network connectivity Wireless Network Setup Auto Setup The menu is activated only if the Samsung Wireless LAN Adapter for InfoLive is c...

Page 31: ...Satellite STB PVR STB AV Receiver Game Camcorder PC TV IPTV Blu Ray HD DVD DMA Name the device connected to the input jacks to make your input source selection easier When a PC with a resolution of 1...

Page 32: ...rts MP3 and JPEG files while a PTP device supports JPEG files only The sequential JPEG format is supported The higher the resolution of the image the longer it takes to display on the screen The maxim...

Page 33: ...the USB Memory Device DLNA device connected to TV The selected USB device name appears at the bottom left of the screen 4 Press the or button to select an icon Photo Music Movie Setup then press the E...

Page 34: ...ct button Selects file from the file list Selected files are marked with a symbol c Press the yellow button again to cancel a file selection Jump button Jumps to the previous sorting group Jumps to th...

Page 35: ...tern Unclassified Folder It sorts photos by folder If there are many folders in USB the photos files are shown in order in each folder The photo file in the Root folder is shown first and the others a...

Page 36: ...tart slide show SlideShow Control Buttons ENTERE Play Pauses the Slide Show Exit Slide Show and return to the photo list Play the Slide Show TOOLS Run various functions from the Photo menus Pause the...

Page 37: ...y one or in a Slide Show If you set Background Music to On a screen appears immediately where you can set the Background Music To use this feature there must be music and photo files stored on the USB...

Page 38: ...It sorts music files by preference Favourites You can change the music files preferences Changing the Favourites Settings Select the desired music file in the Music list then press the Green button re...

Page 39: ...usic menus Pause the music file Music function information icon When all music files in the folder or the selected file are repeated Repeat Mode is On When all music files in the folder or the selecte...

Page 40: ...first and the others are shown in alphabetical order by name Preference It sorts movies by preference favourites You can change the movie preferences Changing the Favourites Settings Select the desire...

Page 41: ...G2 VOB 1920x1088 vob MPEG2 VRO 1920x1088 others ts TS MPEG2 Transport Stream 1920x1088 H 264 Transport Stream 1920x1088 Video Play Control Buttons ENTERE Play Pauses the movie file Play the movie file...

Page 42: ...Size Fit Play video at the TV screen size Original Play video at the original size Information The movie file information is displayed Remove Safely You can remove the device safely from the TV N N N...

Page 43: ...splay the WISELINK Pro menu 2 Press the or button to select Setup then press the ENTERE button 3 Press the or button to select the desired option 4 Press the or button to select the option then press...

Page 44: ...is complete set up the network on the TV A Wireless Internet connection does not support DLNA Three parts subnet address before the TV and PC IP addresses should be same The last part host address sh...

Page 45: ...lied with the product Alternatively you can download the file from www samsung com 2 Install the SAMSUNG PC Share Manager as shown in the figures below 3 When the installation is complete the PC Share...

Page 46: ...y Shows information on the selected file or folder Method 1 Select a file or folder and select the File menu and then select the Property sub menu Method 2 Select a file or folder right click over the...

Page 47: ...nshare Folder Method 2 Select a folder from the Shared Folder pane right click over the selected folder and then select Unshare Folder from the pop up menu Method 3 Locate the mouse pointer over a fol...

Page 48: ...change the access permissions by using the Allow Accept Deny button To delete an item select the item and select Delete Item Server Server You can run or stop using your PC as a server Start Server at...

Page 49: ...Information Rotating the Photo file Viewing a Slide Show During a Slide Show option menu Play Pause Slide Show Speed Zoom Rotate Music Music List option menu Sorting Music List Viewing the Information...

Page 50: ...ing page You can control the volume of the played content CONTENT Exit Content Library mode If you press the Volume or MUTE button no OSD is displayed but the function operates accordingly CONTENTS LI...

Page 51: ...ontents and all issues related to them are reserved by Practical Pictures Children Story Song Play This is educational and interactive content that children can watch repeatedly Enjoy existing stories...

Page 52: ...contents will be provided via the Samsung com website with or without charge Downloading Content 1 Visit the www samsung com website and open the Content Library page Enter the product number UDN Uniq...

Page 53: ...the Digital Audio Input on the Home Theater When following the connection above the Optical jack only outputs 2 channel audio You will only hear sound from the Home Theater s Front Left and Right spe...

Page 54: ...Setup menu the Device List menu appears 3 Press the or button to select to a particular device and press the ENTERE button It is switched to the selected device Switching to the selected devices may t...

Page 55: ...ogramme P button Audio Device When Receiver is activated VOL button MUTE button The Anynet function only works when the active source on the TV remote control is set to TV The button works only while...

Page 56: ...k in certain situations Searching channels Operating WISELINK Pro Plug Play etc When connecting or removing the HDMI 1 3 cable please make sure to search devices again or turn your TV off and on again...

Page 57: ...MSUNG OR THE CONTENT PROVIDER OR THROUGH TERMINATION OF THE AGREEMENT BETWEEN THEM UNDER NO CIRCUMSTANCES INCLUDING NEGLIGENCE SHALL SAMSUNG OR THE CONTENT PROVIDER BE HELD LIABLE WHETHER IN CONTRACT...

Page 58: ...e and press the ENTERE button Set up the Region 3 Press the Yellow button Press the or button to select the initial letter A Z of the location you want then press the ENTERE button 4 Press the button...

Page 59: ...ou can check the stock symbols by newspaper or Internet 4 Press the ENTERE button to set a favourite stock The selected stock is set as a Favorite Stock To delete your favourite stocks Press the Green...

Page 60: ...ard or Large through InfoLink service Background Colour You can select the Background Colours black blue red grean gray of InfoLink service The colour is applied to each service option and setup windo...

Page 61: ...the teletext service Press it twice to overlap the teletext with the current broadcasting screen 7 1 sub page Used to display the available sub page 8 2 page up Used to display the next teletext page...

Page 62: ...80 1400 800 4 We provided the standard dimensions for wall mount kits as shown in the table above When purchasing our wall mount kit a detailed installation manual and all parts necessary for assembl...

Page 63: ...button to save When Position1 is selected the message Current position saved as Position1 is displayed 5 Press the ENTERE button The saved Position appears on the left side of the OSD Moving to the r...

Page 64: ...been firmly installed onto the wall You may need additional material such as an anchor depending on the type of wall Since the necessary clamps screws and string are not supplied please purchase thes...

Page 65: ...sound Check the direction location and connections of your aerial This interference often occurs due to the use of an indoor aerial Remote control malfunctions Replace the remote control batteries Cle...

Page 66: ...h stand 1240 x 766 x 96 mm 1240 x 830 x 315 mm 1531 x 932 x 99 mm 1531 x 1005 x 418 mm Weight Body With stand 39 kg 44 kg 67 kg 84 kg Environmental Considerations Operating Temperature Operating Humid...

Page 67: ...en access to the Service should assist them in setting up any relevant accounts and supervise their access to the Service By allowing your child access to the Service they will be able to access all o...

Page 68: ...lobal nature of the Internet you agree to comply with all local laws and rules regarding online conduct and acceptable Content Specifically you agree to comply with all applicable laws regarding the t...

Page 69: ...limitation Yahoo Shopping are subject to confirmation by and the terms and conditions of business of the relevant Merchant 15 LINKS The Service may provide or third parties may provide links to other...

Page 70: ...ch information 21 NOTICE Notices to you may be made via either email or regular mail The Service may also provide notices of changes to the TOS or other matters by displaying notices or links to notic...

Page 71: ...To avoid electric shock never touch the inside of this apparatus Only a qualified technician should open this apparatus Make sure to plug the power cord in until it is firmly inserted When removing t...

Page 72: ...roduct is warranted for a period of twelve 12 months from the original date of purchase against defective materials and workmanship In the event that warranty service is required you should return the...

Page 73: ...English 73 This page is intentionally left blank...

Page 74: ...English 74 This page is intentionally left blank...

Page 75: ...English 75 This page is intentionally left blank...

Page 76: ...r human health from uncontrolled waste disposal please separate this from other types of wastes and recycle it responsibly to promote the sustainable reuse of material resources Household users should...

Reviews: