background image

88

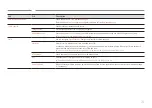
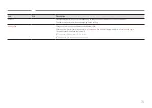
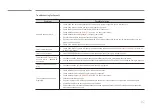
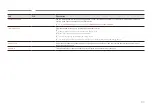
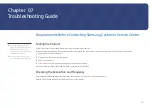
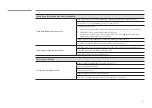
Check the followings.

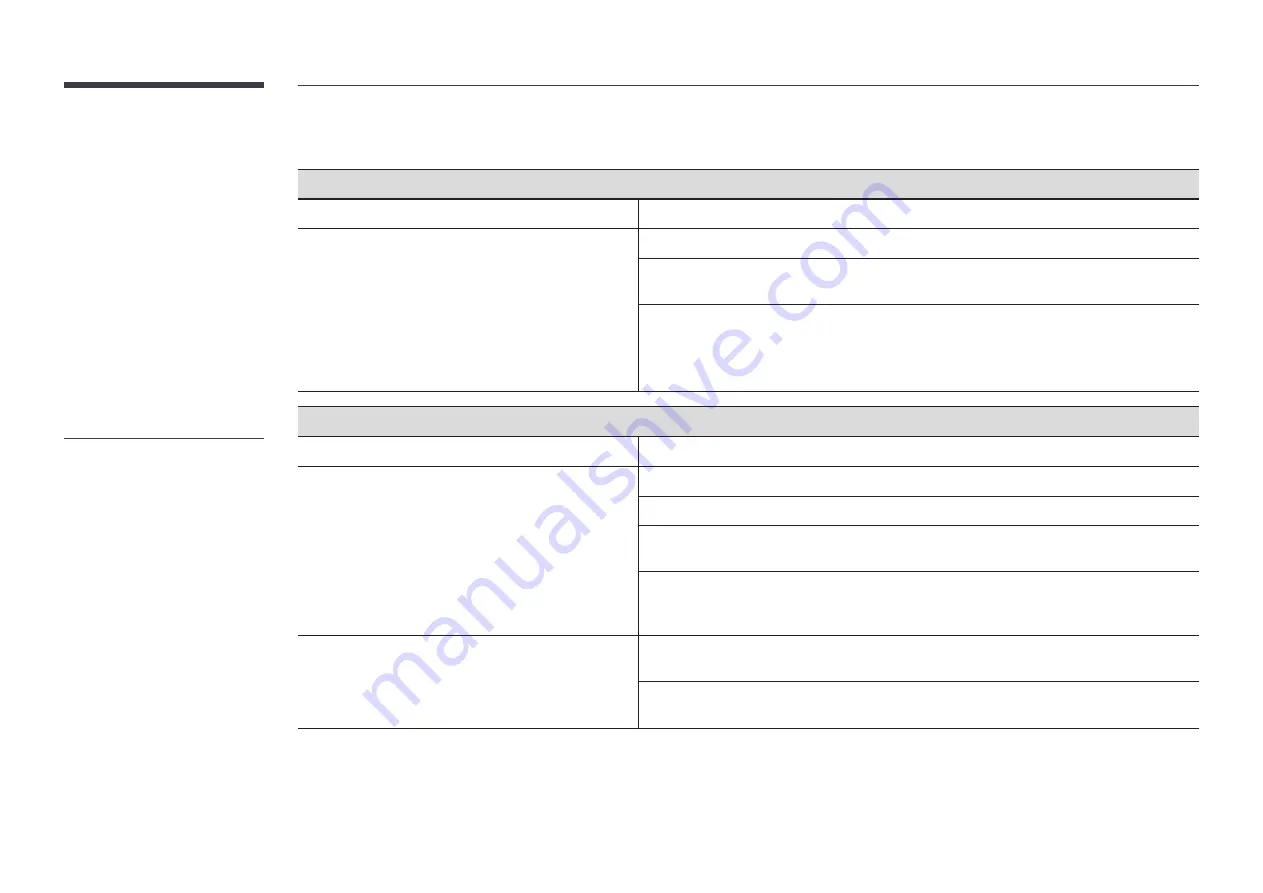
Installation issue (PC mode)

The screen keeps switching on and off.

Check that the cable between the product and the PC is connected correctly.

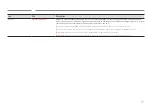
Blank spaces are found on all four sides of the screen when 
an HDMI cable is connected to the product and PC.

The blank spaces found on the screen have nothing to do with the product.

Blank spaces on the screen are caused by the PC or graphics card. To resolve the problem, 

adjust the screen size in the HDMI or DVI settings for the graphics card.

If the graphics card settings menu does not have an option to adjust the screen size, update the 

graphics card driver to the latest version.
(Please contact the graphics card or computer manufacturer for further details about how to 

adjust the screen settings.)

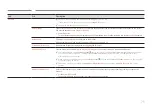
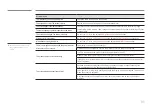
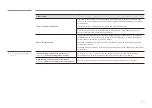
Screen issue

The power indicator is off. The screen will not switch on.

Make sure that the power cord is connected.

No Signal

 is displayed on the screen.

Check that products (including source device) are connected correctly with a cable.

Check that the source device connected to the product is powered on.

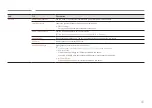
Depending on the type of external device, the screen may not display properly. In this case, 

connect it with the 

HDMI Hot Plug

 function turned 

On

.

It is recommended to use the 2.0 gender for the USB Type-C adapter (gender type). In this case, 

pull out the gender and then connect it again.When the problem persists, contact the gender 

manufacturer.

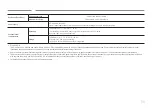
Not Optimum Mode

 is displayed.

This message is displayed when a signal from the graphics card exceeds the product's 

maximum resolution and frequency.

Refer to the Standard Signal Mode Table and set the maximum resolution and frequency 

according to the product specifications.


"

The power indicator may not be 
supported depending on the 
model.

Summary of Contents for QH50B

Page 1: ...ywithout the authorization of Samsung is prohibited Trademarks otherthan Samsung are property of theirrespective owners QH43B QH50B QH55B QH65B QH75B The color and the appearance may differ depending...

Page 2: ...0 Wall Mount Kit Specifications VESA 21 Connecting and Using a Source Device Before Connecting 22 Pre connection Checkpoints 22 Connecting to a PC 22 Connection Using an HDMI Cable 22 Connection Using...

Page 3: ...r 57 Menu Picture 58 OnScreen Display 62 Sound 64 Network 66 Network Settings Wired 67 Network Settings Wireless 69 Use WPS 71 System 73 Support 85 Troubleshooting Guide Requirements Before Contacting...

Page 4: ...IDE REFER ALL SERVICING TO QUALIFIED PERSONNEL This symbol indicates that high voltage is present inside It is dangerous to make any kind of contact with any internal part of this product AC voltage R...

Page 5: ...fire may result from a damaged cable Do not connect multiple products to a single power socket Overheated power sockets may cause a fire Insert the power plug all the way in so it is not loose An uns...

Page 6: ...wered down by using only the power button on the remote Do not disconnect the power cable while the product is being used The product may become damaged by an electric shock Installation Warning Befor...

Page 7: ...installed in an unusual location the surrounding environment may cause a serious quality problem Therefore be sure to contact Samsung Customer Service Center before installation Places where many fine...

Page 8: ...ly an impact to the product The screen display may be damaged An electric shock or fire may result Do not insert metallic objects chopsticks coins hairpins etc or objects that burn easily paper matche...

Page 9: ...duct An electric shock or fire may result Caution Insert each battery so that its polarity is correct If the polarity is not correct the battery may rupture or the internal fluid may leak causing cont...

Page 10: ...quid Do not watch the product screen too closely and continuously for a long time Your eyesight may deteriorate Do not lift or move the product when it is in operation Do not touch the screen when the...

Page 11: ...damaged or the markings may be erased Be sure to use a soft and dry cloth such as superfine fibers or cotton flannels because the surface of the product and the screen display are vulnerable to scratc...

Page 12: ...rs the product Due to the characteristics of high glossy products using a UV humidifier nearby may create white colored stains on the product Removing a sticker attached on the screen may leave residu...

Page 13: ...the product To install a stand you can purchase one separately The RS232C adaptercan be used to connect to anothermonitorusing the D SUB 9 pin type RS232C cable Checking the Components Quick Setup Gu...

Page 14: ...at the sensor on the front of the product to perform the corresponding function Using other display devices in the same space as the remote control of this product can cause the other display devices...

Page 15: ...duct accept a maximum constant current of 0 5A If the maximum value is exceeded USB ports may not work Outputs sound to an audio device via an audio cable HDMI 3 ARC Connects to a source device using...

Page 16: ...sor to Power Off and then press and hold the power button to turn off the product Source Select the connected input source With the control menu screen displayed briefly press the power button to move...

Page 17: ...enter a PIN enter a Date etc Poweron the product Change the input source Display orhide the on screen menu A shortcut button to Home screen MagicInfo Mute the sound Unmuting the sound Press MUTE again...

Page 18: ...e Return to the previous menu Quickly select frequently used functions by pressing it while a content is playing It sets safe lock function Press the SET button and entera device ID using numeric butt...

Page 19: ...positioned as shown in the images below 15 A B A B Do not use this model installed on a ceiling floor or table Ventilation Contact Samsung Customer Service Center for further details Installation on...

Page 20: ...nt type Installing the Wall Mount The wall mount kit sold separately allows you to mount the product on the wall The provided image is only for reference For detailed information on installing the wal...

Page 21: ...depending on the wall mount specifications Do not fasten the screws too firmly This may damage the product or cause the product to fall leading to personal injury Samsung is not liable for these kind...

Page 22: ...connection may damage the product Check the types of ports at the back of the product you want to connect We recommend using authorized cables for HDMI cable connections Connecting to a PC Do not con...

Page 23: ...DIO IN port After connecting a computer to the product with an HDMI DVI cable make sure to configure the settings as shown below to enable the video and audio from the computer Menu Sound set HDMI Sou...

Page 24: ...I cable or one with ethernet is recommended This product does not support the ethernet function via HDMI Connection Using an HDMI Cable Connecting parts may differ in different products HDMI 3 ARC HDM...

Page 25: ...igure the settings as shown below Menu System General set HDMI Hot Plug to Off HDMI 3 ARC Connecting to an Audio System Connecting parts may differ in different products Make sure to connect the same...

Page 26: ...d by using the SOURCE button on the remote control The screen may not display correctly if an incorrect source is selected for the source device you want to convert to Edit SOURCE u Edit ENTER E Edit...

Page 27: ...is set to Custom Advanced Settings General Hide Tabs and Toolbar automatically If the browser tabs menu or toolbar are not used for a while they will automatically disappear To make them appear again...

Page 28: ...k of flash videos E commerce for online purchases is not supported ActiveX is not supported Only a limited number of fonts are supported Certain symbols and characters may not be displayed properly Th...

Page 29: ...n Connect to Your Mac via Remote Login Samsung DeX Connect to your Samsung mobile device from your device Microsoft 365 Collaborate with online versions of Microsoft 365 VMware Horizon Provides access...

Page 30: ...m only shielded type Pin assignment 1 2 3 4 5 6 7 8 9 5 4 3 2 1 9 8 7 6 Male type Female type Pin Signal 1 Detect data carrier 2 Received data 3 Transmitted data 4 Prepare data terminal 5 Signal grou...

Page 31: ...P1 P1 P1 P2 P2 Male type Rx 3 1 Tx STEREO Tx 2 2 Rx PLUG Gnd 5 3 Gnd 3 5 LAN Cable Pin assignment 1 2 3 4 5 6 7 8 Pin No Standard Color Signal 1 White and orange TX 2 Orange TX 3 White and green RX 4...

Page 32: ...nector RJ45 Direct LAN cable PC to HUB HUB P1 P1 P2 P2 Signal P1 P2 Signal TX 1 1 TX TX 2 2 TX RX 3 3 RX RX 6 6 RX Cross LAN cable PC to LFD P1 P2 Signal P1 P2 Signal TX 1 3 RX TX 2 6 RX RX 3 1 TX RX...

Page 33: ...odel Connection 1 RS232C IN RS232C RS232C IN RS232C RS232C IN RS232C RS232C IN RS232C Monitor1 Monitor 2 Monitor 3 Monitor 4 PC Connection 2 5 4 3 2 1 LAN LAN LAN Monitor 2 Monitor1 PC Monitor 3 Conne...

Page 34: ...y Lock 0x5D 0 1 7 Video Wall On 0x84 0 1 8 Video Wall User Control 0x89 All communications take place in hexadecimals The checksum is calculated by adding up all values except the header If a checksum...

Page 35: ...length Ack Nak r CMD Val1 Checksum 0xAA 0xFF 3 N 0x11 ERR ERR A code showing what error has occurred Volume control Function The volume of a product can be adjusted using a PC Viewing volume state Ge...

Page 36: ...0C Input source 0x20 MagicInfo 0x1F DVI_video 0x21 HDMI1 0x22 HDMI1_PC 0x23 HDMI2 0x24 HDMI2_PC 0x25 DisplayPort DVI_video HDMI1_PC and HDMI2_PC cannot be used with the Set command They only respond t...

Page 37: ...de can be activated on a product using a PC This control is only available on a product whose Video Wall is enabled Viewing video wall mode Get Video Wall Mode Header Command ID Data length Checksum 0...

Page 38: ...e set on a product Nak Header Command ID Data length Ack Nak r CMD Val1 Checksum 0xAA 0xFF 3 N 0x5D ERR ERR A code showing what error has occurred Video Wall On Function Turn Video Wall on or off on t...

Page 39: ...Set Video Wall Header Command ID Data length Val1 Val2 Checksum 0xAA 0x89 2 Wall_Div Wall_SNo Wall_SNo Product Number code assigned to the product 10x10VideoWall Model 1 100 Set Number Data 1 0x01 2 0...

Page 40: ...5A 0x5B 0x5C 0x5D 0x5E 0x5F 6 0x61 0x62 0x63 0x64 0x65 0x66 0x67 0x68 0x69 0x6A 0x6B 0x6C 0x6D 0x6E 0x6F 7 0x71 0x72 0x73 0x74 0x75 0x76 0x77 0x78 0x79 0x7A 0x7B 0x7C 0x7D 0x7E N A 8 0x81 0x82 0x83 0x...

Page 41: ...e License Agreement window displayed select I accept the terms in the license agreement and click Next 5 In the displayed Customer Information window fill out all the information fields and click Next...

Page 42: ...d when a Network Channel is running press INFO on the remote control 1 Select Network Channel from the Player screen The No channel message appears if no channel has been registered in Network Channel...

Page 43: ...rientation is not available for contents with a resolution higher than 3840 x 2160 Content Size forvideos with a resolution higher than 3840 x 2160 supports Full Screen only Available menu Press the T...

Page 44: ...a time LFD LFD files are not supported Contents with a resolution higher than 3840 x 2160 are not supported Sound output restrictions More than one sound output cannot be used Playback priority networ...

Page 45: ...Digital LPCM ADPCM IMA MS AAC HE AAC WMA Dolby Digital MPEG MP3 AC 4 G 711 A Law Law OPUS HEVC H 265 Main Main10 100 Motion JPEG 30 80 MVC 1920 x 1080 60 20 MPEG4 SP ASP Window Media Video v9 VC1 MPEG...

Page 46: ...s supported up to Level 6 1 VC1 AP L4 is not supported GMC 2 or above is not supported When a single video file is playing Seamless mode is not supported under the following conditions Incompatible co...

Page 47: ...nsion pdf Functions not supported Content less than 1 pixel not supported because of performance degradation issue Masked Image Tiled Image content not supported Content with Rotated Text not supporte...

Page 48: ...is downloaded from server 1 Connect to MagicInfo server 2 Schedule content on network channels 3 Deploycreated network channels to this device Wednesday January13 12 00 AM The displayed image may diff...

Page 49: ...yed image may differ depending on the model Enteryour 6 digit PIN number The default PIN number is 0 0 0 0 0 0 If you want to change the PIN number use the Change PIN function Select an item to run in...

Page 50: ...d on the external storage device Export this device s settings to the external storage device message appears 3 Select Export to export the settings When a duplicate file is found on the external stor...

Page 51: ...is feature automatically allots an ID number to a device connected via an RS232C cable This function is only available on the first device within an RS 232C daisy chain This function may not be suppor...

Page 52: ...icInfo function This function may not be supported depending on the model Video Wall You can activate or deactivate Video Wall To organize a video wall select On Off On Horizontal x Vertical This feat...

Page 53: ...oduct to another desired number Press the E button Screen Position allows you to split the screen into a maximum of 225 views 15 x 15 The Screen Position option is only enabled when Video Wall is set...

Page 54: ...54 Network Status HOME Network Status ENTER E Network Status The displayed image may differ depending on the model Check the current network and Internet connection...

Page 55: ...ture cannot be guaranteed if used with a battery powered USB device which can take longer to be recognized Setup Select Off Once Everyday Mon Fri Mon Sat Sat Sun or Manual If you select Manual you can...

Page 56: ...t Timerwill be disabled during a period specified as a holiday Add Holiday Specify the period you want to add as a holiday Select the start and end dates of the holiday you want to add using the u d b...

Page 57: ...use this feature Off On Set whether or not to use Ticker Message Enter a message to display on the screen Time Set the Start Time and End Time to display a Message Font Options Specify the text font a...

Page 58: ...duces power consumption Color Temperature It sets color temperature The value and temperature increase simultaneously so the ratio of blue color rises Range 2800K 16000K Enabled when Color Tone is set...

Page 59: ...d BT 1886 may change depending on the input video settings For models with the HDR Mode support the Gamma settings HLG ST 2084 and BT 1886 may change depending on the input video and HDR Mode settings...

Page 60: ...r Tone Select the color tone that best suits yourviewing preferences Settings can be adjusted and stored for each external device connected to an input on the product Available options may vary depend...

Page 61: ...isplayed on the left and right or top and bottom of the screen may cause image retention screen burn which is not covered by the warranty Fit to Screen Adjusts the picture position When selected the f...

Page 62: ...ility of screen burn this unit is equipped with Screen Burn Protection screen burn prevention technology Screen Burn Protection moves the picture slightly on the screen Pixel Shift Minimize image rete...

Page 63: ...ed MDC Message Select whether to display the MDC OSD when the product is controlled by the MDC Rotation Message Receive a warning message when the display device is rotated to an inappropriate angle L...

Page 64: ...Adjust the equalizer to customize the volume and pitch and enhance the richness of the sound output Available only when Sound Mode is set to Standard This function is disabled when Sound Output is se...

Page 65: ...er in different products To select the Receiver HDMI option set Anynet HDMI CEC to On while the product is connected to the AV Receiver s HDMI ARC port If there is no video signal both the products sp...

Page 66: ...tion Network Status You can check the current network and Internet status Open Network Settings Configure network settings to connect to an available network Network Type Network Type menu may not be...

Page 67: ...a LAN cable See the diagram below Note that the wall outlet is attached to a modem or router elsewhere in your house The LAN Port on the Wall LAN Cable LAN RJ45 LAN IN If you have a Dynamic Network yo...

Page 68: ...ion Values To view the Network connection values on most Windows computers follow these steps 1 Right click the Network icon on the bottom right of the screen 2 In the pop up menu that appears click S...

Page 69: ...d security code called an Access or Security key The Security key is based on a Pass Phrase typically a word or a series of letters and numbers of a specified length you were asked to enterwhen you se...

Page 70: ...ound after retrying select the Stop button The Add Network button appears 4 If the Enter the password for AP Name screen appears go to step 5 If you select a wireless router that does not have securit...

Page 71: ...Settings page 2 Select Use WPS press E 3 Press the WPS or PBC button on yourwireless routerwithin the next two minutes Your product automatically acquires all the network setting values it needs and c...

Page 72: ...option to block HTTPS communication if the domain name of the MagicINFO Server URL is different from the domain name of the MagicINFO Server certificate MagicInfo Mode Select the appropriate MagicInf...

Page 73: ...e Voice Guide Pitch Tune the pitch of the Voice Guide Background Sound Volume Adjust background sound volume during voice guidance High Contrast Set the background and font to high contrast colors in...

Page 74: ...gure various time related settings Clock Set Select Clock Set Select Date or Time and then press E Use the number buttons to enter numbers or press the up and down arrow buttons Use the left and right...

Page 75: ...abled if Primary Source is set to All Default Input Select the default input to switch to when the new input is disconnected The Last Input option only includes external inputs connected via cables Au...

Page 76: ...et in Lamp at a specified time Lamp Adjust the panel brightness A value closer to 100 makes the panel brighter No Signal Power Off Save power by turning the product off when no signal is received from...

Page 77: ...ard Keyboard Type Set the type of your keyboard Mouse Settings Configure the connected mouse settings Primary Button Select the button you want to use as the primary button to click and select Pointer...

Page 78: ...n may be different depending on the setting Change PIN Change your 6 digit Personal Identification Number PIN Choose any 6 digits foryour PIN and enter it in Enter a new PIN Reenter the same 6 digits...

Page 79: ...rom being monitored by MagicINFO Server USB Auto Play Lock Select whether to automatically play MagicInfo or MagicInfo Lite content saved on a connected USB device Your content should be a Published C...

Page 80: ...onnected to MagicINFO or RM server Network Lock Block external network access You can register networks on the server to allow access USB Lock Block connection to external USB ports Certificate Manage...

Page 81: ...be sure your Samsung device has this feature check if there is an Anynet logo on it You can only control Anynet devices using the product remote control not the buttons on the product The product remo...

Page 82: ...t to exit Anynet Press the SOURCE button on the product remote control and select a non Anynet device The message Disconnecting Anynet device appears on the screen You cannot use the remote control wh...

Page 83: ...Time Download Logo File You can download a custom logo into the product from an external USB device The file name of the custom logo you want to download must be saved as samsung in all small letters...

Page 84: ...ition DICOM Simulation Mode Adjust the display mode to output a picture close to the GSDF standard of DICOM Part 14 This device cannot be used as a medical diagnostic device even if the DICOM Simulati...

Page 85: ...the software to the latest version Current version This is the software version already installed in the product Updating via USB Device Download the update package from Samsung s website to a USB sto...

Page 86: ...for MagicInfo and other services Make sure that the product is connected to the network Menu items may vary depending on the model The availability may vary depending on the region This feature is ena...

Page 87: ...If the screen remains blank while the power indicator blinks even when the product is correctly connected to a PC perform product testing 1 Power off both the PC and product 2 Disconnect all the cabl...

Page 88: ...n issue The powerindicatoris off The screenwill not switch on Make sure that the power cord is connected No Signal is displayed on the screen Check that products including source device are connected...

Page 89: ...ite Balance settings There is no image on the screen and the powerindicator blinks every0 5 to1 second The display is turned off to save energy Press any key on the keyboard or move the mouse to retur...

Page 90: ...n is used or if the signal is not stable To resolve the issue change the PC resolution to the recommended resolution The screen cannot be displayed in full screen A scaled SD 4 3 content file can caus...

Page 91: ...on of yourvideo output device to HDMI If the product has a headphone port make sure nothing is connected to it Reconnect the power cable to the device and then reboot the device There is static coming...

Page 92: ...When I tryto change the PC resolution a message The defined resolution is not currentlysupported appears The message The defined resolution is not currently supported appears if the input source resol...

Page 93: ...off the HDMI CEC features on all the external devices External devices include Blu ray and DVD players Operating an external device when its HDMI CEC feature is enabled may automatically stop other ex...

Page 94: ...125 7 cm 55 CLASS 54 6 inches 138 7 cm Displayarea 941 184 mm H x 529 416 mm V 1095 84 mm H x 616 41 mm V 1209 6 mm H x 680 4 mm V Model Name QH65B QH75B Panel Size 65 CLASS 64 5 inches 163 9 cm 75 CL...

Page 95: ...with any Plug and Play compatible systems Two way data exchange between the monitor and PC system optimizes the monitor settings Monitor installation takes place automatically However you can customiz...

Page 96: ...83 500 O O O VESA DMT 1280 x 1024 63 981 60 020 108 000 O O O VESA DMT 1280 x 1024 79 976 75 025 135 000 O O O VESA DMT 1366 x 768 47 712 59 790 85 500 O O O VESA DMT 1440 x 900 55 935 59 887 106 500...

Page 97: ...tomer requests software installation and setup for the product If a service technician removes cleans dusts or foreign materials inside of the product If customer requests an installation additionally...

Page 98: ...nformation is a guide to prevent afterimage burn in Viewing a fixed screen for an extended period of time may cause afterimage burn in This problem is not included in warranty Recommended prevention p...

Page 99: ...ation on the Open Source License Notice contact Samsung Open Source http opensource samsung com THIS PRODUCT IS SOLD WITH A LIMITED LICENCE AND IS AUTHORISED TO BE USED ONLY IN CONNECTION WITH HEVC CO...

Reviews: