2-14
English
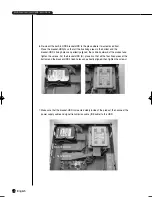
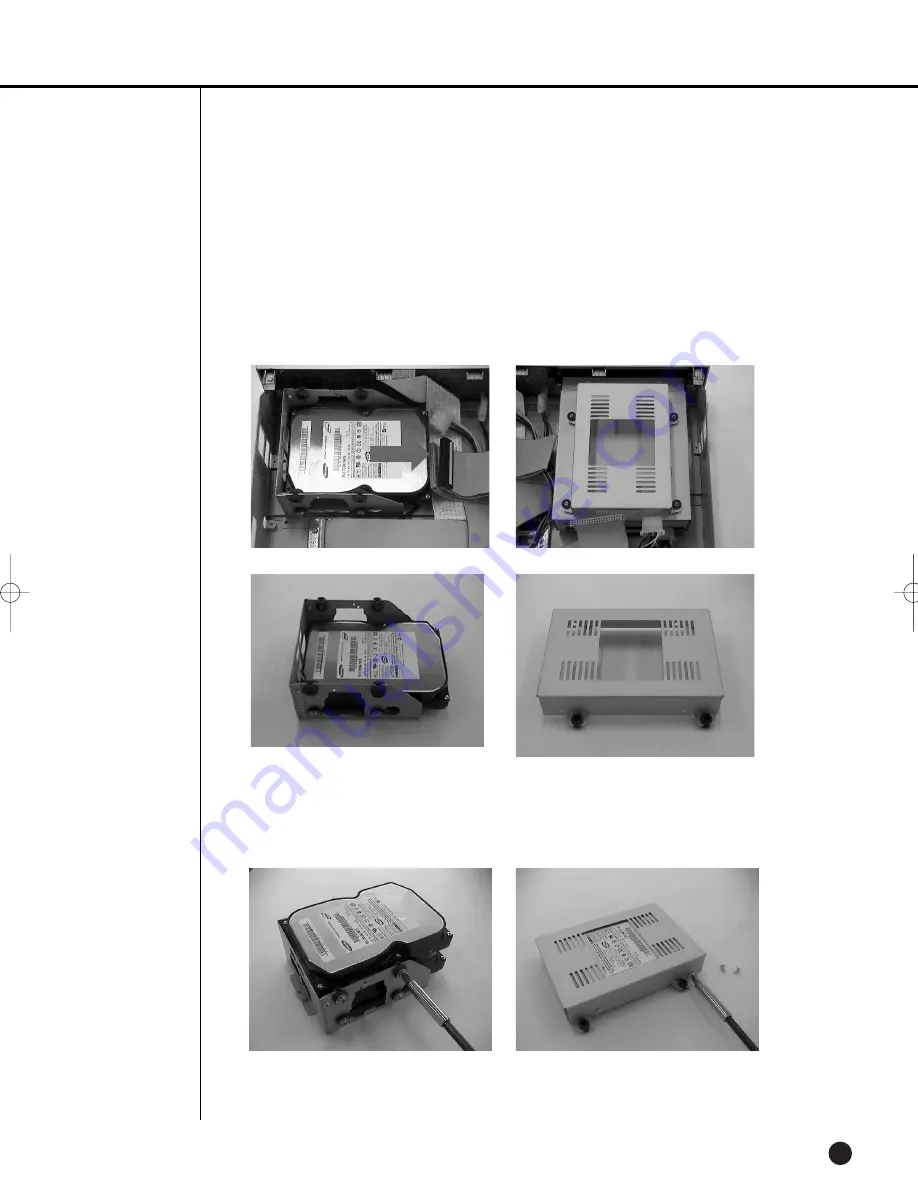
4. Remove the bracket-HDD (A) from the product by disconnecting the power supply cable,
signal transmission cable (IDE cable), and fan cable then pulling it toward the center of the
product to disconnect its fixed part from the bottom. Remove the bracket-HDD (B) by lifting it
up after removing the screws.
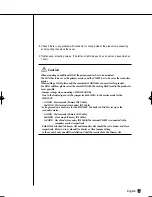
5. Mount the HDD to the bracket-HDD with the (A)SCREW-SPECIAL (BWH,6-32UNC,L10.5)
and (B)SCREW-TAPTITE (BH,+,S,M3,L6,ZPC) (4 spots) that was provided as an accessory.
(The screws have to be tightened so that it doesn’t vibrate loose.)
SHR-2040/2041/2042-ENG-1013 10/19/07 10:23 AM Page 2-14
Summary of Contents for Real Time SHR-2041
Page 1: ...Real Time DVR SHR 2040 2041 2042 User s Manual English ...
Page 7: ...Chapter 1 Overview ...
Page 16: ......
Page 17: ...Chapter 2 Installation ...
Page 36: ......
Page 37: ...Chapter 3 Connecting with other device ...
Page 38: ...English 1Connecting the Video Audio and Monitor 3 1 SHR 2040 2041 2042 USER S MANUAL SHR 2040 ...
Page 39: ...English 3 2 SHR 2041 2042 ...
Page 44: ...English SHR 2040 2041 2042 USER S MANUAL 3 7 ALARM IN OUT Connection ...
Page 46: ......
Page 47: ...Chapter 4 Live ...
Page 56: ......
Page 57: ...Chapter 5 Menu Setup ...
Page 92: ......
Page 93: ...Chapter 6 PTZ Camera Control ...
Page 102: ......
Page 103: ...Chapter 7 Recording ...
Page 107: ...Chapter 8 Search and Play ...
Page 118: ......
Page 119: ...Chapter 9 Smart Viewer ...
Page 182: ......
Page 183: ...Appendix ...
Page 187: ...10 4 English 2Outline Drawings SHR 2040 SHR 2041 ...
Page 188: ...SHR 2040 2041 2042 USER S MANUAL 10 5 English SHR 2042 ...


