background image

20_


setting up

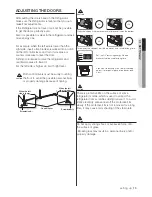
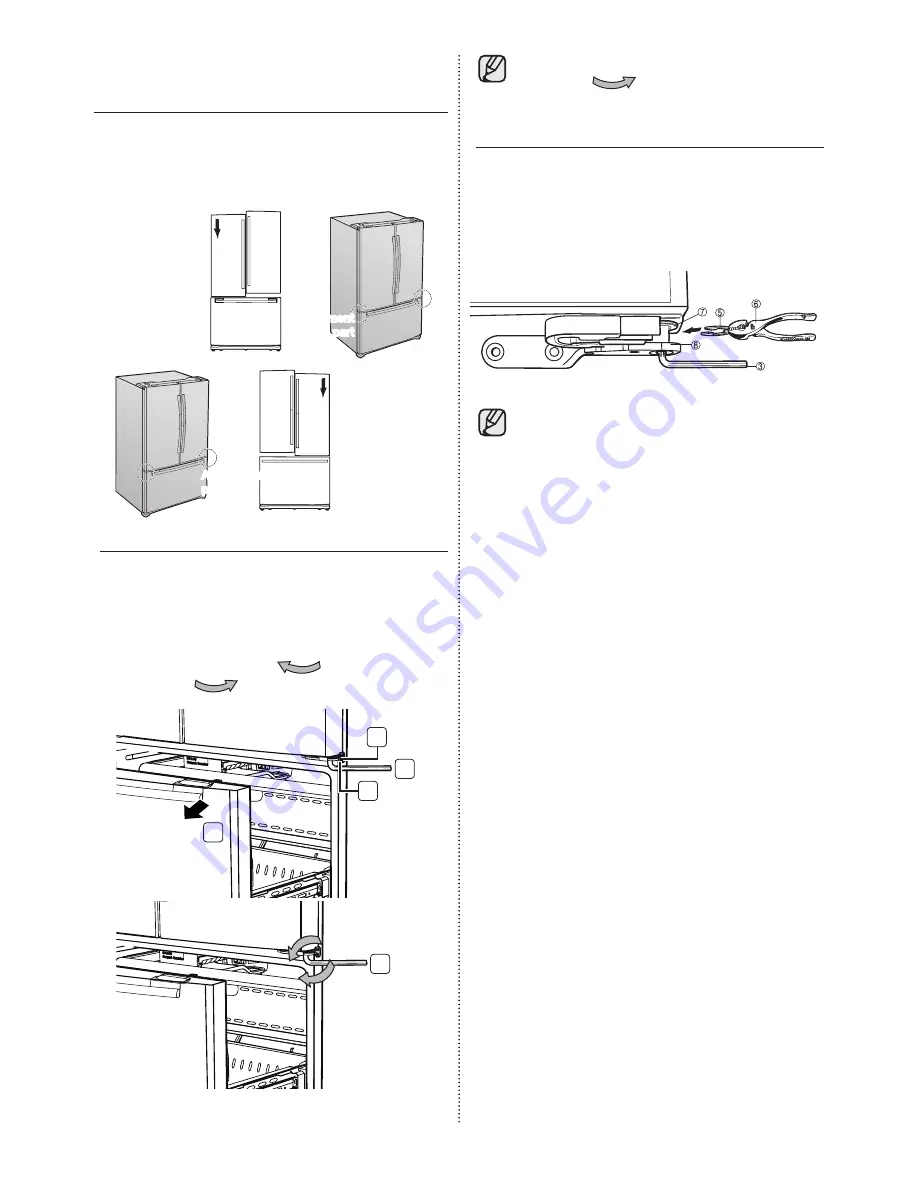
When you turn the hex wrench counter-
clockwise ( 

 ), the door will move up.

Only the left-door height is adjustable for 
Swing-Type.

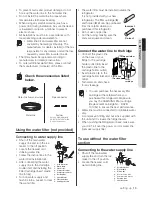
1. 

After adjusting the doors, please insert the 
supplied fastener ( 

5

 ) using Pliers ( 

6

 ) in the gap 

between the hinge-grommet ( 

7

 ) and the middle 

hinge ( 

8

 ). The number of fasteners you’ll need to 

insert depends on the gap.

2 fastener are enclosed with the refrigerator.
The thickness of each fastener is 1.0mm.

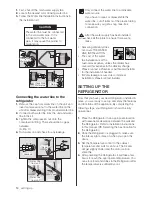
MAKING MINOR ADJUSTMENTS 
BETWEEN DOORS

Remember, a level Refrigerator is necessary for 
getting the doors perfectly even. If you need 
help, review the previous section on leveling the 
Refrigerator.

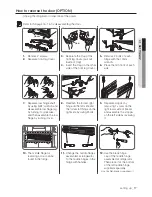
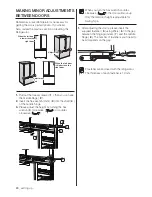
1. 

Pull out the freezer drawer ( 

1

 ), then you can see 

the middle hinge ( 

2

 ) .

2. 

Insert the hex wrench (4mm) ( 

3

 ) into the shaft ( 

4

 ) 

of the middle hinge.

3. 

Please adjust the height by turning the hex 
wrench ( 

3

 ) clockwise ( 

 ) or counter-

clockwise ( 

 ).

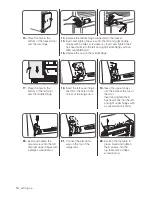
When the left door 

is lower than the 

right door.

Adjustment 

part

When the left door 
is higher than the 
right door.

Adjustment 
part


2


3


4


1


3

Summary of Contents for RF62QEPN

Page 1: ...rator user manual imagine the possibilities Thank you for purchasing a Samsung product To receive a more complete service please register your product at www samsung com register Free Standing Appliance DA68 01868S 19 ...

Page 2: ...ccur It is your responsibility to use common sense caution and care when installing maintaining and operating your appliance Because these following operating instructions cover various models the characteristics of your freezer may differ slightly from those described in this manual Important safety symbols and precautions WARNING Hazards or unsafe practices that may result in severe personal inj...

Page 3: ...n order to avoid the creation of a flammable gas air mixture if a leak in the refrigerating circuit occurs the size of the room in which the appliance may be sited depends on the amount of refrigerant used Never start up an appliance showing any signs of damage If in doubt consult your dealer The room where the refrigerator will be sited must be 1m in size for every 8g of R600a refrigerant inside ...

Page 4: ...nd Do not bend the power cord excessively or place heavy articles on it Do not use aerosols near the refrigerator Aerosols used near the refrigerator may cause an explosion or fire This refrigerator must be properly installed and located in accordance with the manual before it is used Connect the power plug in proper position with the cord hanging down If you connect the power plug upside down wir...

Page 5: ...ticles on the top of the appliance When you open or close the door the articles may fall and cause personal injury and or material damage Do not put items filled with water on the refrigerator If spilled there is a risk of fire or electric shock Do not let children hang on the door Failure to do so may cause serious personal injury Do not leave the doors of the refrigerator open while the refriger...

Page 6: ...celerate the defrosting process other than those recommended by the manufacturer Do not damage the refrigerant circuit This product is intended only for the storage of food in a domestic environment Bottles should be stored tightly together so that they do not fall out If a gas leak is detected avoid any naked flames or potential sources of ignition and air the room in which the appliance is stand...

Page 7: ...SING To get best performance of product Do not place foods too closely in front of the vents at the rear of the appliance as it can obstruct free air circulation in the refrigerator compartment Wrap the food up properly or place it in airtight containers before put it into the refrigerator Do not place carbonated or fizzy drinks in the freezer compartment Do not put bottles or glass containers in ...

Page 8: ...er pressure of 138 862kpa 1 4 8 8kgf cm3 is required CAUTION SIGNS FOR CLEANING AND MAINTENANCE Do not directly spray water inside or outside the refrigerator There is a risk of fire or electric shock Do not spray inflammable gas near the refrigerator There is a risk of explosion or fire Do not spray cleaning products directly on the display Printed letters on the display may come off Remove any f...

Page 9: ... a natural gas with high environmental compatibility that is however also combustible When transporting and installing the appliance care should be taken to ensure that no parts of the refrigerating circuit are damaged When disposing of this product or other refrigerators remove the door door seals door latch so that small children or animals cannot become trapped inside Leave the shelves in place...

Page 10: ...e defrosting the appliance please wrap the frozen food in several layers of newspaper Any increase in temperature of frozen food during defrosting can shorten its storage life Saving Energy Tips Install the appliance in a cool dry room with adequate ventilation Ensure that it is not exposed to direct sunlight and never put it near a direct source of heat radiator for example Never block any vents ...

Page 11: ...or Do not cover air vent openings Allow clearance to the right left back and top when installing This will help reduce power consumption and keep your energy bills lower SETTING UP YOUR FREEZER 12 OPERATING YOUR SAMSUNG REFRIGERATOR 21 TROUBLESHOOTING 25 contents ...

Page 12: ...age be sure the front leveling legs are in the up position above the floor Refer to Adjusting the doors in the manual on page 19 FLOORING For proper installation this refrigerator must be placed on a level surface of hard material that is the same height as the rest of the flooring This surface should be strong enough to support a fully loaded refrigerator or approximately 106kg To protect the fin...

Page 13: ...where temperatures fall below freezing When using any electrical device such as a power drill during installation be sure the device is insulated or wired in a manner to prevent electric shock All installations must be in a accordance with local plumbing code requirements Water line Kit and water filter are not covered by Samsung s Warranty The manufacturer or dealer installer of them is responsib...

Page 14: ...n for the Refrigerator 2 Once the Refrigerator is plugged in make sure the interior light comes on when you open the doors 3 Set the Temperature control to the coldest temperature and wait for an hour The Freezer will get slightly chilled and the motor will run smoothly 4 After powering the Refrigerator it will take a few hours to reach the appropriate temperature You can store food and drinks in ...

Page 15: ...per door seal Required Tools Not provided Disassembling the fridge door Be careful not to drop and scratch the fridge door while removing the fridge door 1 Remove the 3 screws holding down the top table and remove it 2 Disconnect electric wire on the top of the refrigerator 3 Remove the 3 hex bolts that hold the hinge on the top of the refrigerator with the 10mm socket wrench 4 Remove the screw th...

Page 16: ...RAWER TYPE 3 After opening the Freezer door lift the drawer box 4 Remove 4 hex head bolts from both sides with a socket wrench 10mm 5 Lift up the freezer door from the rails Be careful not to drop and scratch the freezer door SWING TYPE 3 Remove the Middle Hinge connected to the Freezer 4 Lift up the freezer door from the hinge Be careful not to drop and scratch the freezer door Reassembleing the ...

Page 17: ...ge leg by turning it colockwise and then assemble the low hinge by turning it over 8 Reattach the former right hinge on the left side and the former left hinge on the right side by using 2bolts 9 Separate stopper by removing 1 screw on the right lower side of freezer and assemble the stopper on the left side by reversing it 10 The middle hinge for reversing a door can be found in the fridge 11 Cha...

Page 18: ...he hole in the bottom of the left door over the middle hinge 18 Insert the left upper hinge shaft into the hole on the corner of the fridge door 19 Insert the upper hinges into the holes at the top of the door Insert and tighten the 3 hex head bolts into the left and right upper hinges with a socket wrench 10mm 20 Insert and tighten the ground screw into the left and right upper hinges with a phil...

Page 19: ... or property damage because of tipping Clean the ice box if there are some small pieces of ice on the bottom Throw away the coherent ice if the ice maker is not used for long time Set Ice Off for saving energy if the ice maker will not be used for long time If you want to buy and use a tool of shoveling ice put it into special place of ice box or take it out YES NO NO YES CAUTION There is protecti...

Page 20: ... The thickness of each fastener is 1 0mm MAKING MINOR ADJUSTMENTS BETWEEN DOORS Remember a level Refrigerator is necessary for getting the doors perfectly even If you need help review the previous section on leveling the Refrigerator 1 Pull out the freezer drawer 1 then you can see the middle hinge 2 2 Insert the hex wrench 4mm 3 into the shaft 4 of the middle hinge 3 Please adjust the height by t...

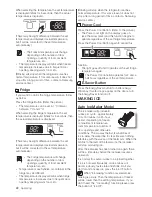
Page 21: ...ure Press the Power Freeze Button again to cancel this function The light goes off and it operates at the set freezer temperature again The Power Freeze function operates for 72 hours regardless of the set temperature When you use this function the energy consumption will increase This function must be activated before putting large amount of food stuff in the freezer compartment at least 48 hours...

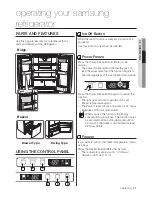
Page 22: ...e Ice Off button When Ice making function is selected ice making is priority Then the temperature of freezer will be lower than the setting temperature If you don t need the Ice making function please press the button of Ice Off When selecting the temperature the set temperature is displayed initially for 5 seconds then the actual temperature is displayed There may be slight difference between the...

Page 23: ... To replace Place the bin into the rail assembly When replacing place the drawer bin holder into the hole of the rail Twist Ice Maker Model 1 Pull out the Ice cube trays 2 Fill trays up to the water level mark arrow 3 Put the Ice cube trays back in position And close the freezer door 4 Once the water has become frozen turn the dials on the Ice cube trays to empty Ice cubes into the storage bin REM...

Page 24: ...R LIGHTS Changing the LED Type Lighting Do not disassemble or replace the LED type Lighting To change the LED Type Lighting contact Samsung service center or your authorized Samsung dealer Drawer Type To remove the drawer Pull the drawer out fully Tilt up the rear of the bin and lift it out to remove To relocate the drawer Place the bin into the rail assembly Do not allow children to play with the...

Page 25: ...n ice is made in the ice container After the ice is made the container inverts and the ice falls into the storage compartment and water flows through the water valve These operations cause noise at regular intervals but that noise is normal The front corners and horizontal hinged section of the appliance are hot and condensation is occurring Some heat is normal as anti condensators are installed i...

Page 26: ...recycling Business users should contact their supplier and check the terms and conditions of the purchase contract This product and its electronic accessories should not be mixed with other commercial wastes for disposal Ambient Room Temperature Limits This fridge freezer is designed to operate in ambient temperatures specified by its temperature class marked on the rating plate NOTE Internal temp...

Reviews: