background image


1


2

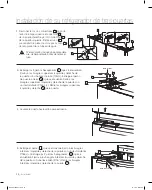
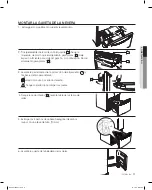
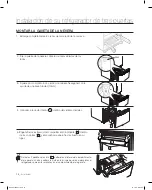
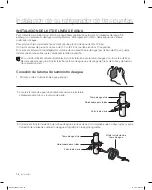
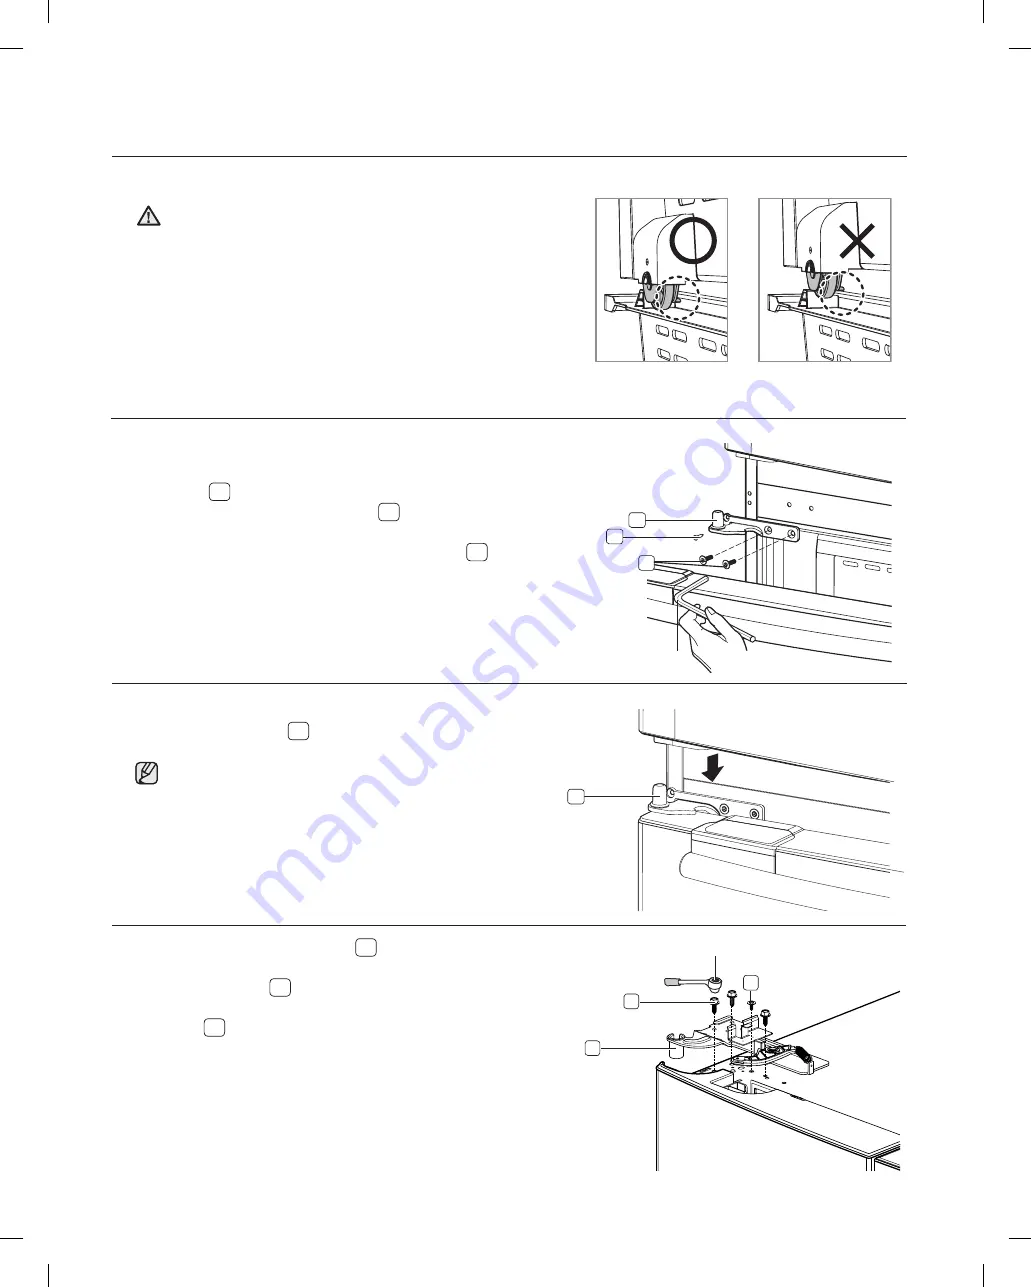
Montar las puertas del refrigerador

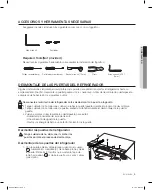
1.   Vuelva a colocar las bisagras inferiores derecha e 

izquierda ( 

1

)de las puertas. Con un destornillador de 

cabeza Phillips, ponga un tornillo ( 

2

)en las bisagras 

inferiores izquierda y derecha de las puertas, y apriete. 
Introduzca dos tornillos de cabeza hexagonal ( 

3

)en 

las bisagras inferiores derecha e izquierda y apriete con 
una llave allen de 3/16”.

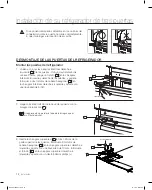
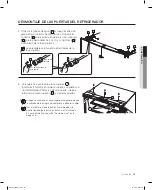
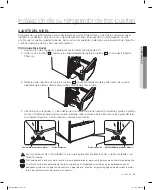
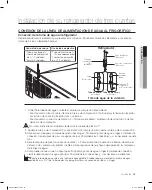
DESMONTAJE DE LAS PUERTAS DEL REFRIGERADOR

Llave Allen


3


5


6


4

Socket wrench

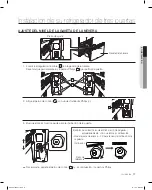
3.  Inserte las bisagras superiores ( 

4

)en los orificios de la 

parte superior de las puertas. Introduzca 3 tornillos de 
cabeza hexagonal ( 

5

)en las bisagras superiores derecha e 

izquierda y apriete con una llave allen de 10 mm. Introduzca 
el tornillo ( 

6

) en las bisagras superiores derecha e 

izquierda y apriete con un destornillador phillips (+).


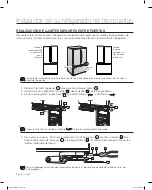
1

2.   Haga coincidir el orificio de la base de la puerta con la 

bisagra de la misma ( 

1

).

Asegúrese de no perder la tapa de la bisagra que es 

muy fácil de quitar.

PRECAUCIÓN

Si se ponen demasiados alimentos en los cajones del 

congelador quizás la puerta no cierre completamente, 

lo que daría lugar a la creación de escarcha.

12_


Instalación

Instalación de su refrigerador de tres puertas

DA68-01926A-11.indb   12

13. 12. 2.   �� 5:25

Summary of Contents for RFG293HA

Page 1: ...agine the possibilities Thank you for purchasing this Samsung product To receive more complete service or accessory parts please register your product at or contact www samsung com register 1 800 SAMSUNG 726 7864 RFG293HA English DA68 01926A 11 indb 1 13 12 2 5 25 ...

Page 2: ... pantry provide enough space for larger items like a pizza box etc The wide freezer drawer also provides enough space for 2 3 turkeys Secure Auto Close The Secure Auto Close feature automatically closes a door that is slightly open Compact Ice Maker The ice maker can dispense cubed ice Digital Display and Temperature Control Slim Water Filtration System A slim water filter is placed between the cr...

Page 3: ...iance is not intended for use by persons including children with reduced physical sensory or mental capabilities or those who lack experience and knowledge unless they have been given supervision or instruction concerning the use of the appliance by a person responsible for their safety Because the following instructions cover various models the characteristics of your refrigerator may differ slig...

Page 4: ...e or repair any part of the appliance Power leakages can cause severe electric shock Never use gas pipes telephone lines or other potential lightning attractors as an electrical ground Improper use of the grounding plug can result in a risk of electric shock If it is necessary to use an extension cord use only a 3 wire extension cord that has a 3 blade grounding plug and a 3 slot receptacle that w...

Page 5: ...e strict temperature controls must not be stored in the refrigerator Do not place or use an electrical appliance inside the refrigerator unless it is of a type recommended by the manufacturer Do not use mechanical devices or any other means to accelerate the defrosting process other than those recommended by the manufacturer Do not damage the refrigerant circuit Do not disassemble or repair the re...

Page 6: ...erator There is a risk of fire or electric shock Remove any foreign matter or dust from the power plug pins Do not use a wet or damp cloth when cleaning the plug Otherwise there is a risk of fire or electric shock Unplug the refrigerator before cleaning or making repairs CAUTION SEVERE WARNING SIGNS FOR DISPOSAL Risk of child entrapment Before you throw away your old refrigerator or freezer Take o...

Page 7: ...16 Making minor adjustments between doors 17 Adjusting the freezer drawer level 18 Installing a water line kit 19 Connecting the water supply line to the refrigerator 20 Completing the set up 21 Using the control panel display 26 Parts and features 27 Storing food in the fridge 27 Storing food in the freezer drawer 28 Using the Cool Select Pantry PLUS 29 Removing the refrigerator accessories 30 Us...

Page 8: ...m B A C E D B A C E D Allow clearance to the right left back and top when installing This will help reduce power consumption and keep your energy bills lower Do not install the refrigerator where the temperature will go below 50ºF 10ºC Do not locate the refrigerator where it may become wet CAUTION When moving your refrigerator To prevent floor damage be sure the front adjusting legs are in the up ...

Page 9: ...tinue below Before removing the door drawer make sure you read following items WARNING Disconnect power to the refrigerator before removing the door or drawer Be careful not to drop damage or scratch the door drawer while removing them Be careful not to get injured while removing the door drawer Reattach the door drawer properly to avoid Moisture from air leakage Uneven door alignment Wasting ener...

Page 10: ...screwdriver Remove the 2 hex head bolts 11 attached to the lower left and right door hinges with an allen wrench 3 16 Remove the lower left and right door hinges 12 12 10 Allen wrench 11 2 Disconnect two connectors 3 at each side of the top cap the one connector 7 on right side door and the other connector 4 on left side door Remove the tube 5 with pressing the dark gray color part 6 of the water ...

Page 11: ...ightly pull the left support guard 2 to the left allowing the pizza pocket 1 just enough room to slip off the hook Then pull the pizza pocket 1 forward 3 Lift up the bottom of the support guard 2 and pull it inward to remove it 5 Remove 4 hex head bolts from both sides with a socket wrench 10mm CAUTION Do it again for right side Be careful not to break the parts 2 2 1 Setting Up _11 DA68 01926A 11...

Page 12: ...ps screwdriver 5 6 4 Socket wrench 1 2 Assemble the refrigerator doors 1 Reattach the lower left and right door hinges 1 With a Philips head screwdriver insert the screw 2 into the lower left and right door hinges and then tighten Insert the 2 hex head bolts 3 into the lower left and right door hinges and then tighten with an allen wrench 3 16 REATTACHING THE REFRIGERATOR DOORS Allen wrench 3 CAUT...

Page 13: ... by the hinge cover After assembling close the door and check to see whether the door has gaps between gaskets or is tilted If they are please refer to Adjusting the level on page 15 1 2 3 3 7 4 5 4 Connect the water line 5 and then insert a clip on the coupler with pulling tube Connect the one connector 4 on left side door the other connector 7 on right side door and two connectors 3 at each side...

Page 14: ...pletely with a socket wrench 10mm Slot 4 Insert the lower basket 1 into the rail system 1 2 Attach the freezer door front onto the open slots on the sides Slot Remove 2 pieces of tape 4 attached to the side of the drawer bin Reattach the tape in the same position when moving the refrigerator to prevent scratching the drawer bin 4 2 3 14_ Setting Up Setting up your French Door Refrigerator DA68 019...

Page 15: ...hing the floor to avoid possible personal injury or property damage because of tipping If the right side is lower perform the same procedure but with the right control lever It is difficult to remove the cover leg front from the refrigerator so we do not recommend making small adjustments wIth the control lever Instead refer to the next page for the best way to make minor adjustments to the doors ...

Page 16: ...e freezer drawer 1 to expose the lower hinge 2 2 Insert the supplied allen wrench 3 16 3 into the shaft 4 of the lower hinge 3 Please adjust the height by turning the hex wrench 3 clockwise or counter clockwise When you turn the hex wrench counter clockwise the door will move up 2 3 4 3 1 7 8 3 6 5 MAKING MINOR ADJUSTMENTS BETWEEN DOORS Remember a leveled refrigerator is necessary for getting the ...

Page 17: ... tighten the controller screw 3 and then the philips screws 3 Find the best level to align the door slope Freezer Drawer Adjustment part Example The slope is about 0 08inch 2mm as shown below Rotate the height adjuster to 2 0 to reduce the door slope 2 3 Slope Reference plane 1 ADJUSTING THE FREEZER DRAWER LEVEL Setting up your French Door Refrigerator Setting Up _17 DA68 01926A 11 indb 17 13 12 2...

Page 18: ...e for the low pressure Water line installation kits are available at extra cost from your dealer We recommend using a water line installation kit that contains copper tubing and compression nut 1 First shut off the main water supply Connecting to the water supply line Pipe clamp Cold water line Shut off valve 2 Locate the nearest cold water drinking line and install the pipe clamp and shut off val...

Page 19: ...n fitting Do not over tighten the compression nut 3 Turn the water on and check for any leakage If you see water drops or leakage in the connection areas turn off the main water supply Check the connections and tighten more if necessary 4 Let the ice maker make ice for 1 to 2 days Over that period of time throw out the first 1 or 2 buckets of ice the ice maker makes to ensure all impurities have b...

Page 20: ...he Temperature control to the coldest temperature and wait for an hour The freezer will get slightly chilled and the motor will run smoothly Reset the refrigerator and freezer to the temperatures you want 4 After you plug the refrigerator in it will take a few hours to reach the appropriate temperature You can store food and drinks in the refrigerator after the temperature is sufficiently cool If ...

Page 21: ... Off light is ON or OFF If the Ice Off light is ON press the Ice Off button 2 Allow your refrigerator to operate and cool down for 24 hours or 1 full day Waiting 24hours will allow your ice maker to cool properly 3 After 24 hours or one full day press the Ice Off button again If ice doesn t come out press the test button located on the right side of ice maker Do not press the test button continuou...

Page 22: ...he fridge decreases for about two and a half hours To turn off Power Cool before the 2 1 2 hours are up just press the button again to cancel the Power Cool mode If you select the Power Cool mode you may hear a little of noise because of the continuous operation of compressor Freezer Button Press the Freezer button 3 repeatedly until the desired temperature is shown in the display A Whenever you p...

Page 23: ...continues you may need to reset the refrigerator Try unplugging the appliance waiting for around 10 minutes and then plugging the power cord back in E Saver Button Press the E Saver Button 6 for better energy efficiency If E Saver mode is ON the button will light up blue If condensation occurs on the doors wipe up the water drops and turn the E Saving function off Cooling Off Mode This function is...

Page 24: ...ths The Filter Indicator will be Red after the filter has filtered 300 gallons of water or 6 months Depending on the condition of your water and region the amount of time a filter lasts can vary In some areas you may need to change the fileter every two months How to change the water filter 1 Turn the water filter 1 about 1 4 turn counter clockwise 2 Pull the water filter 1 from the case filter 2 ...

Page 25: ...out 3 seconds to reset the water filter The indicator color changes to blue from red 6 If you turned off the water supply turn it back on For a replacement water filter you can visit your local home improvement center or visit Samsung s authorized Parts distributor on line at www samsungparts com Be sure the replacement water filter has the SAMSUNG logo on the box and on the water filter Operating...

Page 26: ... of the door If you close one door with a lot of force the other door may open When the door opens the interlock switch automatically turns off the auger motor in the ice maker for safety reasons When the interior or exterior LED lamp has gone out please contact your service agents Door Closer Dairy Compartment Door Bins Cool Select PantryPLUS Light Vertical Hinged Section Vegetable Fruit Drawers ...

Page 27: ... 5 COOL SELECT PANTRY PLUS Designed to be crack resistant the shelves can be used to store all types of food and drinks Circular marks on the glass surface are a normal phenomenon and can usually be wiped clean with a damp cloth 3 TEMPERED GLASS SHELVES Use to preserve the freshness of your stored vegetables and fruits These drawers can control the level of humidity for items that must retain mois...

Page 28: ...ons are located on the right side of the Pantry Press the Temp button repeatedly until the mode you want is lit Each time you press the Temp button you select a different mode in this order Fresh mode 38 F Chilled mode 34 F Deli mode 41 F Initially the Fresh mode is set The refrigerator will adjust the temperature in the Pantry to the temperature you selected automatically The Pantry temperature m...

Page 29: ... Slide it in above the desired location and push down until it stops Dust removal method Remove the guard and wash in water Do not adjust a bin full of foods Remove the food first CAUTION Injury may occur if the door bins are not firmly assembled Do not allow children to play with bins Sharp corners of the bins may cause injury 3 Vegetable Fruit Drawers To remove Pull the drawer out to full extens...

Page 30: ...all the way and are securely sealed When the refrigerator door is only partially open it will automatically close But the door will stay open when opened more than the auto close range and you must close it manually USING THE DOORS 4 Cool Select PantryPLUS To remove the pantry Pull the pantry out to full extension Tilt up the front side of the Pantry and pull straight out To relocate the pantry Pu...

Page 31: ... 2 and pull it inward to remove it To replace Hook the ends of the tilting pocket 1 onto the support guards 2 and push down until they are locked into place 2 2 1 2 1 4 Freezer Drawer To remove the freezer drawer Pull the freezer drawer out fully Tilt up the rear of the bin and lift it out to remove To relocate the freezer drawer Place the bin into the rail assembly You can scratch the side of the...

Page 32: ...ys Not recommended Check date code Keep covered Frozen Yogurt n a 2 Months EGGS Eggs uncooked 3 4 Weeks Not recommended Check date code Store eggs in coldest part of refrigerator and in their original container Eggs cooked 1 Week Not recommended Store in covered container Leftover egg dishes 3 4 Days Not recommended Store in covered container FRESH FRUITS Apples I Month Not recommended If storing ...

Page 33: ...teak 2 4 Days 6 9 Months Poultry 1 day 12 Months Lunch meat 3 5 Days 1 month Cooked Meat 2 3 Days 2 3 Months Check date code for use Store in coldest part of refrigerator in original packaging Place package in moisture and vapor proof container for freezing Poultry 2 3 Days 4 5 months Ham 1 2 Weeks 1 2 Months Sources American Meat Institute Foundation 1994 Yellow pages answers to predictable quest...

Page 34: ...year CAUTION Do not use benzene thinner or bleach for cleaning They may damage the surface of the appliance and may cause a fire Cleaning the rear side of the refrigerator To keep cords and exposed parts free of dust and dirt accumulation vacuum the rear side of the appliance once or twice a year CAUTION Do not remove the back cover 1 It may cause an electric shock Cleaning the Rubber door seals I...

Page 35: ...ing through the refrigerator There is a bad smell in the refrigerator Check for spoiled food Foods with strong odors for example fish should be tightly covered Clean out your freezer periodically and throw away any spoiled or suspicious food Frost forms on the walls of the freezer Is the air vent blocked Remove any obstructions so air can circulate freely Allow sufficient space between the stored ...

Page 36: ...rvice repair cannot be completed it may be necessary to remove repair and return the product If in home service is unavailable Samsung may elect at our option to provide for transportation of our choice to and from a Samsung authorized service center Otherwise transportation to and from the Samsung authorized service center is the responsibility of the purchaser This limited warranty covers manufa...

Page 37: ...OF THE USE MISUSE OR INABILITY TO USE THIS PRODUCT SOLD BY SAMSUNG NOT CAUSED DIRECTLY BY THE NEGLIGENCE OF SAMSUNG THIS LIMITED WARRANTY SHALL NOT EXTEND TO ANYONE OTHER THAN THE ORIGINAL PURCHASER OF THIS PRODUCT IS NONTRANSFERABLE AND STATES YOUR EXCLUSIVE REMEDY Some states do not allow limitations on how long an implied warranty lasts or the exclusion or limitation of incidental or consequent...

Page 38: ...1 800 SAMSUNG 726 7864 www samsung com Samsung Electronics America Inc 85 Challenger Road Ridgefield Park NJ 07660 CANADA 1 800 SAMSUNG 726 7864 www samsung com ca English www samsung com ca_fr French Samsung Electronics Canada Inc Customer Service 55 Standish Court Mississauga Ontario L5R 4B2 Canada In an effort to promote recycling this user manual is printed on recycled paper DA68 01926A 11 ind...

Page 39: ...de usuario imagine las posibilidades Gracias por adquirir este producto Samsung Para recibir un servicio más completo o accesorios registre su producto o comuníquese con www samsung com register 1 800 SAMSUNG 726 7864 RFG293HA SPANISH DA68 01926A 11 indb 1 13 12 2 5 25 ...

Page 40: ...roporcionan suficiente espacio para artículos más grandes como cajas de pizza etc La gaveta ancha la nevera proporciona asimismo espacio suficiente para 2 ó 3 pavos Cierre automático de seguridad La función Secure Auto Close cierra automáticamente una puerta ligeramente abierta Máquina de hielo compacta La máquina de hielo puede dispensar cubitos o hielo picado Pantalla de visualización y control ...

Page 41: ... ser utilizado por personas incluidos niños con sus capacidades físicas sensoriales o mentales mermadas o con falta de experiencia o conocimiento a menos que sea bajo la supervisión de una persona responsable o tras haber recibido las instrucciones necesarias Debido a que las siguientes instrucciones cubren varios modelos las características de su frigorífico podrían variar ligeramente con respect...

Page 42: ...No use nunca conductos de gas líneas de teléfono u otros captadores potenciales de rayos como mecanismo de puesta a tierra Un uso incorrecto del tomacorriente de puesta a tierra puede suponer un riesgo de choque eléctrico Si fuese necesario usar una alargadera use únicamente una de 3 cables que disponga de un conector de 3 clavijas con toma de tierra y una toma eléctrica de 3 ranuras que acepte el...

Page 43: ...ños deben contar con supervisión adulta para asegurar que no juegan con el electrodoméstico Las botellas deben almacenarse unas junto a otras para evitar posibles caídas Este producto ha sido diseñado exclusivamente para el almacenamiento de comida en un entorno doméstico Si detecta una fuga de gas evite las llamas abiertas o fuentes potenciales de ignición y airee durante varios minutos la estanc...

Page 44: ...rador o heladera Desmonte las puertas Deje colocadas las estanterías para que los niños no puedan introducirse fácilmente en el interior Deseche el material de embalaje de este producto en un modo respetuoso con el medio ambiente Deje colocadas las estanterías para que los niños no puedan introducirse fácilmente en el interior Asegúrese de que ninguno de los conductos situados en la parte posterio...

Page 45: ...ntre puertas 17 Ajuste del nivel de la gaveta de la nevera 18 Instalación del kit de línea de agua 19 Conexión de la línea de alimentación de agua al frigorífico 20 Preparación 21 Uso del panel de control 26 Partes y funciones 27 Almacenaje de alimentos en el refrigerador 27 Almacenaje de alimentos en la gaveta de la nevera 28 Uso del Cool select pantryPLUS 29 Desmontaje de los accesorios del refr...

Page 46: ...perficie debe ser lo suficientemente resistente como para soportar el peso de un refrigerador completamente cargado Para proteger el acabado del suelo corte una sección grande de cartón y colóquela debajo del frigorífico mientras esté trabajando con él Para mover el frigorífico tire y empuje con el frigorífico recto No lo mueva de un lado a otro PRE CAUCIÓN Al desplazar el refrigerador Para evitar...

Page 47: ...rta gaveta durante el proceso de desmontaje Tenga cuidado de no dejar caer la puerta arañarla ni dañarla durante el desmontaje de la puerta gaveta Vuelva a montar correctamente la puerta gaveta para evitar Humedad procedente del escape de aire Una alineación desigual de la puerta Gastos de energía debido a un sellado incorrecto de la puerta ADVERTENCIA Desconecte el suministro del refrigerador ant...

Page 48: ...erecha de la puerta con un destornillador Philips Extraiga los 2 pernos hexagonales 11 que se encuentran fijados a las bisagras inferiores izquierda y derecha de la puerta con una llave Allen 3 16 Retire las bisagras inferiores izquierda y derecha de la puerta 12 Allen wrench 11 2 Desconecte los dos conectores 3 a cada lado de la tapa superior el conector 7 de la puerta derecha y el otro conector ...

Page 49: ...izquierda de modo que el alojamiento para pizzas 1 deje espacio suficiente para soltar el gancho A continuación tire del alojamiento para pizzas 1 3 Levante la parte inferior de la protección del alojamiento 2 y tire hacia dentro para retirarlo 5 Extraiga los 4 pernos de cabeza hexagonal de ambos lados con una llave de tubo 10mm PRECAUCIÓN Hazlo otra vez por el lado derecho Tenga cuidado de no rom...

Page 50: ... orificios de la parte superior de las puertas Introduzca 3 tornillos de cabeza hexagonal 5 en las bisagras superiores derecha e izquierda y apriete con una llave allen de 10 mm Introduzca el tornillo 6 en las bisagras superiores derecha e izquierda y apriete con un destornillador phillips 1 2 Haga coincidir el orificio de la base de la puerta con la bisagra de la misma 1 Asegúrese de no perder la...

Page 51: ... puerta tiene holgura entre las juntas o está inclinada En caso afirmativo consulte Ajuste de nivel en la página 15 3 3 7 4 Tubo del dispensador de la puerta Tubo de la carcasa Clip rojo 1 4 Clip rojo 1 4 Tubo del dispensador de la puerta Tubo de la carcasa Clip rojo 1 4 Clip rojo 1 4 5 4 Conecte la tubería de agua 5 y luego inserte una grapa en el acoplador tirando del tubo Conecte el conector 4 ...

Page 52: ...Apriete por completo los 4 pernos de cabeza hexagonal con la ayuda de una llave tubular 10mm Slot 4 Introduzca la cesta inferior 1 dentro del sistema de rieles 1 2 Fije la puerta de la nevera sobre las ranuras abiertas de los lados Slot Retire los 2 pedazos de cinta 4 adheridos al lateral del compartimento de la gaveta Vuelva a adherir la cinta en la misma posición al desplazar el refrigerador par...

Page 53: ... Retire la parte delantera de la pierna cubierta 2 por el levantamiento de la parte inferior de la parte delantera de la pierna cubierta hacia arriba y tirando de él hacia fuera 4 Introduzca un screwdriver plano dentro de una ranura del pie de nivelación izquierdo y gírelo en sentido horario u antihorario para nivelar la puerta izquierda Gire la palanca en la dirección de las agujas del reloj para...

Page 54: ...a llave Allen en sentido antihorario la puerta se desplazará hacia arriba 2 3 4 3 1 REALIZACIÓN DE AJUSTES MENORES ENTRE PUERTAS Recuerde que es necesario que el refrigerador esté nivelado para lograr que las puertas estén igualadas de forma uniforme Si necesita ayuda revise las secciones anteriores relativas a la nivelación del refrigerador Cuando la puerta izquierda esté más alta que la derecha ...

Page 55: ...ivel de ajuste para la inclinación de la puerta Tras el ajuste apriete el perno de control 3 y a continuación los pernos Philips Pieza de ajuste Ejemplo La inclinación es de es de 2 mm 0 08 pulgadas aproximadamente como se indica a continuación Gire el ajuste de altura a 2 0 para reducir la inclinación de la puerta 3 Inclinación Plano de referencia 2 1 Gaveta de la nevera Instalación de su refrige...

Page 56: ...ibles kits de instalación para la toma de agua por un coste adicional Recomendamos usar un kit de instalación de toma de agua que disponga de tubos de cobre y de tuercas de compresión de Conexión de la toma de suministro de agua 1 Primero corte el suministro de agua principal Abrazadera para tubos Toma de agua fría Válvula de cierre 2 Localice la toma de agua fría potable más cercana e instale la ...

Page 57: ...o de agua y compruebe que no haya fugas Si observa gotas de agua o fugas en el área de conexión cierre la llave de paso de agua principal Compruebe las conexiones y si es necesario apriete más 4 Deje la máquina de hielo funcionando durante 1 o 2 días Durante este período de tiempo deseche el primero o dos primeros recipientes de hielo para asegurarse de que hayan desaparecido las impurezas de la l...

Page 58: ...a más baja y espere una hora El congelador se enfriará ligeramente y el motor funcionará con suavidad Seleccione las temperaturas que usted desee para el refrigerador y el congelador 4 Tras enchufar el frigorífico se necesitarán varias horas para alcanzar la temperatura apropiada Puede guardar alimentos y bebidas en el frigorífico cuando se haya enfriado lo suficiente Si hay condensación o gotas d...

Page 59: ...ff está encendido pulse el botón Ice Off 2 Deje el frigorífico en funcionamiento en funcionamiento y enfriando durante 24 horas o 1 día completo Espere 24 horas para que la máquina de hielo se enfríe correctamente 3 Después de 24 horas o un día completo pulse de nuevo el botón Ice Off Si no sale hielo pulse el botón de prueba situado en el lado derecho de la máquina de hielo No pulse el botón de p...

Page 60: ...el interior del refrigerador durante aproximadamente dos horas y media Para apagar el modo de Power Cool antes de transcurridas las 2 horas pulse de nuevo el botón para cancelar el modo Power Cool Si selecciona el modo Power Cool quizás oiga un ruido que se debe al funcionamiento continuo del compresor Botón Freezer Heladera Pulse el botón Freezer 3 repetidamente hasta que se muestren las temperat...

Page 61: ...padear Si continúa el parpadeo quizás debe resetear el frigorífico Desenchufe el aparato espere unos 10 minutos y enchufe el frigorífico de nuevo El Botón E Saver Presione el botón E Saver 6 para mejorar la eficiencia energética Si el modo E Saver és ON el botón se iluminará en azul Si se produce la condensación en las puertas limpiar las gotas de agua y gire la función de E Saver Modo de enfriami...

Page 62: ... cambiará a color rojo cuando el filtro haya filtrado 1130 litros de agua o tras seis meses Dependiendo del estado del agua de su zona puede variar la duración del filtro En algunas áreas puede ser necesario cambia el filtro cada dos meses Cómo cambiar el filtro de agua 1 Cierre la llave de paso del agua A continuación gire el filtro de agua 1 aproximadamente de vuelta en el sentido opuesto a las ...

Page 63: ...os para resetear el filtro de agua El color del indicador cambia de azul a rojo 6 Si ha cerrado la llave de paso vuelva a abrirla Para obtener un recambio del filtro de agua puede visitar su comercio local o visitar online el distribuidor autorizado de repuestos de Samsung en la dirección www samsungparts com Asegúrese de que el filtro de recambio tenga el logotipo de SAMSUNG en la caja y en el pr...

Page 64: ...apaga automáticamente el motor del tornillo sin fin de la máquina de hielo por motivos de seguridad Cuando no se iluminen los LED interiores o exteriores póngase en contacto con un servicio técnico Cierre automático de puerta Compartimento para lácteos Compartimentos de puerta Cool Select PantryPLUS Luz Sección con bisagras vertical Gaveta para fruta y verdura Compartimento inclinble Máquina de hi...

Page 65: ...rficie de cristal representan un fenómeno normal que puede limpiarse a menudo con un paño húmedo 3 BALDAS DE CRISTAL TEMPLADO Se utiliza para conservar frescas las verduras y frutas Estos cajones pueden controlar el nivel de humedad para alimentos que deben retener la humedad Siempre que sea posible guarde las verduras y las frutas separadas 4 GAVETAS PARA FRUTA Y VERDURA ALMACENAJE DE ALIMENTOS E...

Page 66: ...jas uvas calabacines maíz Refrigerados chuletas quesos duros surtidos de embutidos bacon perritos calientes USO DEL COOL SELECT PANTRYPLUS The Cool Select PantryPLUS is a full width drawer with an adjustable temperature control This pantry can be used for large party trays deli items pizzas beverages or miscellaneous items There is a temperature sensor which can adjust the amount of cold air allow...

Page 67: ...ontal de la balda y guíe sus ganchos sobre las ranuras a la altura deseada A continuación haga descender la parte frontal de la balda de tal forma que los ganchos puedan entrar en las ranuras correspondientes PRECAUCIÓN PRECAUCIÓN Las baldas de cristal templado son pesadas Ponga especial atención al desmontarlas PRECAUCIÓN Para evitar que las estanterías caigan una vez colocadas asegúrese de que l...

Page 68: ... la gaveta Incline hacia arriba la cara frontal del compartimento y extráigalo directamente hacia fuera Para volver a co locar el compartimento empuje los rieles hacia la parte posterior del refrigerador Coloque la gaveta dentro de los rieles y deslice el compartimento hasta su lugar Para retirar la división tire por completo del compartimento en toda su extensión y levante la cara frontal de la d...

Page 69: ...mpartimento si lo gira a izquierda o derecha al armarlo o desarmarlo No permita que bebés ni niños entren en el cajón del congelador Pueden dañar el refrigerador y lesionarse gravemente No se siente en la puerta del congelador No permita que los niños trepen al cajón del congelador No retire el divisor Si un niño queda atrapado dentro se puede lesionar o morir asfixiado 2 2 1 2 1 2 Depósito de hie...

Page 70: ...recomendado Salsa Dip abierta 1 semanas No recomendado Yogur 10 14 días No recomendado Chequee la fecha Manténgalo tapado Yogur congelado n a 2 meses HUEVOS Huevos frescos 3 4 semanas No recomendado Chequee la fecha Guarde los huevos en la parte más fría del refrigerador y dentro de su envase original Huevos cocinados 1 semanas No recomendado Guarde en envase con tapa Sobras de platos con huevo 3 ...

Page 71: ...6 12 meses Bacón 1 2 semanas 1 2 meses Salchicha 1 2 días 1 2 meses Bistec 2 4 días 6 9 meses Aves 1 día 12 meses Charcutería 3 5 días 1 meses Cocinada Carne 2 3 días 2 3 meses Chequee la fecha para usarla Guárdela en la parte más fría del refrigerador en su envase original Introducir en un recipiente con protección contra la humedad y el vapor para congelar Aves 2 3 días 4 5 meses Jamón 1 2 seman...

Page 72: ...fico saque brillo al exterior una vez al año No utilice benceno disolvente o lejía para la limpieza Pueden dañar la superficie del aparato y causar un incendio Las letras impresas en la pantalla de visualización podrían borrarse si el limpiador de acero inoxidable es aplicado directamente sobre la zona donde se encuentran dichas letras Limpieza de los sellos de goma de la puerta Si los sellos de g...

Page 73: ...r para evitar dicho fenómeno Está entreabierta la puerta del refrigerador Puede producirse condensación cuando la puerta permanece abierta durante un período de tiempo prolongado La máquina de hielo no está elaborando cubitos Ha esperado las 12 horas posteriores a la instalación de la toma de abastecimiento de agua antes de elaborar hielo Está conectada la toma de agua y la válvula de corte abiert...

Page 74: ...ía de mano de obra sujeta a disponibilidad dentro de los estados contiguos de los EE UU La prestación de servicios in situ no está disponible en todas las zonas Para recibir prestación de servicios in situ el producto debe estar despejado y ser accesible al nivel del piso por parte del personal de servicio Si durante la prestación de servicios in situ no pudiera completarse la reparación podría se...

Page 75: ...ENDIDO POR SAMSUNG Y QUE HA OCASIONADO EL SUPUESTO DAÑO SIN LIMITAR LO INDICADO ANTERIORMENTE EL COMPRADOR ASUME TODO EL RIESGO Y RESPONSABILIDAD DE CUALQUIER PÉRDIDA DAÑO O LESIÓN PERSONAL Y A SU PROPIEDAD ASÍ COMO A TERCEROS Y SUS PROPIEDADES OCASIONADAS POR EL USO ABUSO O INCAPACIDAD DE USO DE ESTE PRODUCTO VENDIDO POR SAMSUNG Y NO PROVOCADAS DIRECTAMENTE POR LA NEGLIGENCIA DE SAMSUNG ESTA GARA...

Page 76: ... Road Ridgefield Park NJ 07660 CANADÁ 1 800 SAMSUNG 726 7864 www samsung com ca inglés www samsung com ca_fr francés Samsung Electronics Canada Inc Customer Service 55 Standish Court Mississauga Ontario L5R 4B2 Canadá Como esfuerzo por ayudar al medio ambiente este manual de usuario fue impreso en papel reciclado DA68 01926A 11 DA68 01926A 11 indb 38 13 12 2 5 25 ...

Reviews: