background image

23

REMOVING THE REFRIGERATOR  DOORS

1) With the door closed, remove the upper hinge cover (

) along the arrow (

) using a screwdriver,

and then disconnect the wires (

).

2) Remove hinge screws (

) and ground screw (

) counter-clockwise, and take off the upper hinge (

)

along the arrow (

). Take care when removing the door to ensure that it does not fall on you.

3) Remove the door from the lower hinge (

) by carefully lifting the door (

).

Removing the Freezer Door

NOTE

NOTE

Be careful not to pinch the water tubing and the wire harness at the bottom of the door.

• Lift the door straight up.
• Be careful not to pinch the water tubing and wire harness on the door.
• Place doors on a protected surface.

INST

ALLA

TION INSTRUCTIONS

DA68-01365B  REV(0.9)  5/3/06 10:10 PM  Page 23

Summary of Contents for RS2511 series

Page 1: ...RS 22 REATTACHING THE REFRIGERATOR DOORS 23 ADJUSTING THE HEIGHT BETWEEN THE DOORS 28 CHECKING THE WATER DISPENSER LINE 30 INSTALLING THE WATER DISPENSER LINE 31 BEFORE YOU CALL FOR SERVICE 34 CONSUMER SUPPORT 36 WARRANTY 36 REFRIGERATOR RS2531 RS2631 RS2521 RS2621 RS2511 RS2611 RS2523 RS2623 RS2524 RS2624 RS2525 RS2625 OWNER S MANUALAND INSTALLATION In the U S A for questions about features opera...

Page 2: ...bend the power cord excessively or place heavy articles on it This constitutes a fire hazard If the power cord is dam aged have it replaced immediately by the manufacturer or its service agent Do not insert the power plug with wet hands You may receive an electric shock Do not put a container filled with water on the refrigera tor If spilled there is a risk of fire or electric shock Do not install...

Page 3: ...loose do not insert the power plug There is a risk of electric shock or fire Do not disconnect the power cord by pulling on it Damage to the cord may cause a short circuit fire and or electric shock If the power cord is damaged it must be replaced by the manufacturer a certified service agent or qualified service personnel Do not store articles on the top of the appliance When you open or close th...

Page 4: ...city source If you have any questions contact your SAMSUNG service center Place the refrigerator in an appropriate location with reasonable clearance between the wall and the refrigerator refer to installation instructions in this manual Set the temperature control to the coldest temperature and wait for an hour The freezer should get slightly chilled and the motor should run smoothly Once the ref...

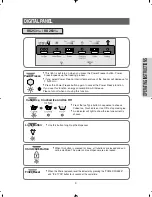
Page 5: ...old and coldest CHILD LOCK BUTTON When this button is pressed for 3sec all functions are locked and can not be modified The water and ice dispenser are locked FRIDGE TEMP BUTTON To set the fridge temperature press the button repeatedly to change the set temperature in sequence between cool and coolest LIGHT BUTTON Use this button to light up the dispenser FILTER RESET When the filter is replaced r...

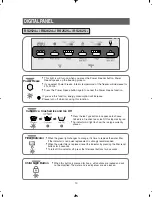
Page 6: ...e in sequence between cold and coldest CHILD LOCK BUTTON When this button is pressed for 3sec all functions are locked and can not be modified The water and ice dispenser are locked FRIDGE TEMP BUTTON To set the fridge temperature press the button repeatedly to change the set temperature in sequence between cool and coolest FILTER RESET BUTTON When the water filter is replaced reset the indicator ...

Page 7: ...e freezer temperature press the button repeatedly to change the set temperature in sequence between cold and coldest FRIDGE TEMP BUTTON To set the fridge temperature press the button repeatedly to change the set temperature in sequence between cool and coolest LIGHT BUTTON Use this button to light up the dispenser RS2521 RS2621 RS2523 RS2623 ...

Page 8: ...mperature press the button repeatedly to change the set temperature in sequence between cold and coldest FRIDGE TEMP BUTTON To set the fridge temperature press the button repeatedly to change the set temperature in sequence between cool and coolest LIGHT BUTTON Use this button to light up the dispenser RS2511 RS2611 ...

Page 9: ...en not using this function Press the Ice Type button in sequence to choose Cubed Ice Crushed Ice or Ice Off to stop making ice An indicator will light to show the ice type currently chosen Cubed Ice Crushed Ice and Ice Off Use this button to light up the dispenser Light Button When the filter is replaced reset the indicator by pressing the POWER FREEZE and ICE TYPE button for 3 second at the same ...

Page 10: ...e to choose Cubed Ice Crushed Ice or Ice Off to stop making ice An indicator will light to show the ice type currently chosen Cubed Ice Crushed Ice and Ice Off When the green light changes to orange it is time to replace the water filter If the indicator is red quick replacement is strongly recommended When the water filter is replaced reset the indicator by pressing the filter reset buttons for 3...

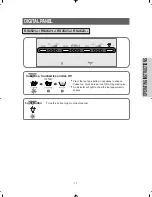
Page 11: ... button in sequence to choose Cubed Ice Crushed Ice or Ice Off to stop making ice An indicator will light to show the ice type currently chosen Cubed Ice Crushed Ice and Ice Off Use this button to light up the dispenser Light Button RS2521 RS2621 RS2523 RS2623 ...

Page 12: ...11 Press the Ice Type button in sequence to choose Cubed Ice or Ice Off to stop making ice An indicator will light to show the ice type currently chosen Cubed Ice and Ice Off Use this button to light up the dispenser Light Button ...

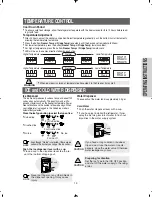
Page 13: ...hut off the water supply to the refrig erator TEMPERATURE CONTROL When ice cream is stored at temperature above step 2 in the Freezer it may melt WARNING No ice For Cubed ice For Crushed ice For ice off NOTE Never put fingers or any other objects in the dispenser opening It may cause injury NOTE Step 1 Step 2 Step 3 Step 4 Step 5 Normal Higher Temperature Lower Temperature Step 1 Step 2 Step 3 Ste...

Page 14: ...se items such as shelves and drawers by taping them securely in place to prevent damage When using a hand truck to move the refrigerator do not rest the front or back of the refrigerator against the hand truck This could damage the refrigerator Handle only from the sides of the refrigerator Be sure the refrigerator stays in an upright position during moving Freezer Because these following operatin...

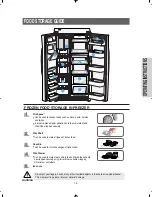
Page 15: ...be used to store all types of frozen food Door Bin Can be used for small packages of frozen food Wire Drawer Can be used to store meat and dry foods Stored food should be wrapped securely using foil or other suitable wrapping materials or containers Ice chute WARNING Do not put your fingers hands or any other insuitable objects in the chute or ice maker bucket This may result in personal injury or...

Page 16: ... want to minimize the evaporative humidity of vegetables and fruits put the Optimized humidity control on High In case you want to reduce the time that put the temperature down in the drawer put the Optimized humidity control on Low Dairy Compartment Can be used to store butter margarine Gallon Door Bins Can be used to store foods in small packages such as milk and yogurt Egg Container Put eggs in...

Page 17: ...E REFRIGERATOR ACCESSORIES Spill Proof Glass Shelf Pull the shelf out as far as it will go Then lift it up and gently remove it Vegetable Fruit Drawer Remove the drawer by holding the handle pulling the drawer out and then lifting up the back side of the drawer bottom smoothly with the other hand Deli Bin Remove the drawer by holding the handle pulling the drawer out and then lifting up the back s...

Page 18: ...ing The exterior part of refrigerator should be polished once or twice a year Rear Use a vacuum cleaner to remove dust once or twice a year Ice and water dispenser on some model Before cleaning lock the dispensor by pressing the button Child lock Use a damp cloth to clean the ice and water dispenser Then wipe it out with a dry cloth To keep drainage grid dry do not touch ice and water dispenser Ru...

Page 19: ... cartridge It is recommended that you replace the cartridge when the light changes to red or every six months see Install the water filter section for more informmation Using the dispenser without the water filter You cannot use the water and ice dispenser without a water filter cartridge Ordering replacement filters To order more water filter cartridges call 1 800 SAMSUNG and ask for accessory Pa...

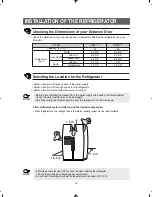
Page 20: ...rigerator Select a location without direct exposure to sunlight Before disassembling the freezer door the water supply line needs to be disconnected If not the water supply line can be damaged See Separating the water supply line from the refrigerator on the next page Selecting the Location for the Refrigerator Allow sufficient space to circulate the air at the internal cooling system When refrige...

Page 21: ...handle in the right direction Match the Handle Locking Tabs on the door and the hook of the handle in upper and lower both side at the same time Check the right locking by pulling it up and down If the locking is correct the handle won t be removed WARNING Don t detach the door handle from the refrigerator If you detach the door handle it can be damaged I N STALLATI O N I N STRUCTI O NS ...

Page 22: ...ng the coupler and pulling the water tube away Take hold of FRONT LEG COVER and lift it up FRONT LEG COVER Removing the Front Leg Cover Separating the Water Supply Line from the Refrigerator NOTE Be careful not to cut the water tube when separating it from the coupler ...

Page 23: ...ong the arrow Take care when removing the door to ensure that it does not fall on you 3 Remove the door from the lower hinge by carefully lifting the door Removing the Freezer Door NOTE NOTE Be careful not to pinch the water tubing and the wire harness at the bottom of the door Lift the door straight up Be careful not to pinch the water tubing and wire harness on the door Place doors on a protecte...

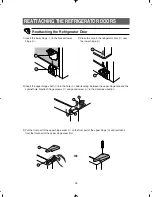
Page 24: ...he lower hinge from the bracket by lifting the lower hinge in the direction of the arrow 1 With the door closed remove the upper hinge cover along the arrow using a screwdriver 2 Remove hinge screws and take off the upper hinge in the direction of the arrow Take care when removing the door to ensure that it does not fall on you Removing the Refrigerator Door ...

Page 25: ...hose down 2 Insert the upper hinge shaft into the hole After leveling between the upper hinge hole and the hole of the cabinet reattach hinge screws and ground screw in a clockwise direction 3 Connect the wires 4 Put the front part of the upper hinge cover on the front part of the upper hinge and reattach from the front part of the upper hinge cover first 7 8 I N STALLATI O N I N STRUCTI O NS ...

Page 26: ...ator door over the lower hinge 3 Insert the upper hinge shaft into the hole After leveling between the upper hinge hole and the cabinet hole Reattach hinge screws and gound screw in the clockwise direction 4 Put the front part of the upper hinge cover on the front part of the upper hinge and reattach it from the front part of the upper hinge cover first 9 ...

Page 27: ...G COVER While pressing the front face of coupler insert the water line in the coupler Carefully place front cover and push to snap it into position Reattaching the Water Supply Line Reattaching the Front Leg Cover I N STALLATI O N I N STRUCTI O NS ...

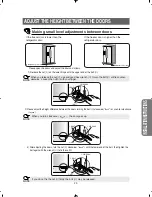
Page 28: ...r turn it clockwise and level the refrigerator Case 2 Freezer door is higher than the refrigerator door Insert a flat blade screwdriver into a slot of the control lever turn it clockwise and level the refrigerator Do not make small adjustments with the control lever Please refer to the next page DIFFERANCE OF HEIGHT DIFFERANCE OF HEIGHT DRIVER DRIVER CONTROL LEVER CONTROL LEVER Please level the re...

Page 29: ...ut firmly the bolt may be released 2 Please adjust the height difference between the doors turning the bolt clockwise or counter clockwise When you turn clockwise the door goes up Adjustment location Adjustment location WRENCH NUT BOLT NUT BOLT WRENCH WRENCH BOLT Please open the doors and adjust the doors as follows 1 Release the nut on the lower hinge until the upper end of the bolt When you rele...

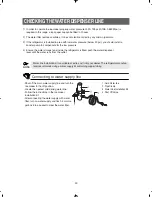
Page 30: ...erator is filled push the water dispenser lever until the water runs from the outlet NOTE Water line installation kit is available at extra cost from your dealer The refrigerator manufac turer recommends using a water supply kit containing copper tubing Shut off the main water supply line and turn the Ice maker to the off position Locate the nearest cold drinkig water line Follow the instructions ...

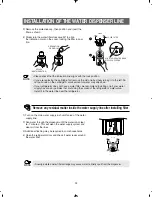
Page 31: ...plastic tubing 2 Tighten the compression nut onto 1 4 comprression fitting Water line must be connected to drinkable water only Cut off 1 4 inch of the provided plastic tubing squarely to prevent leaks when reconnect NOTE Do not overtighten the compression nut NOTE Using Copper Tubing Slip the compression nut and ferrule on copper tubing as shown Using Plastic Tubing Insert the molded end of the p...

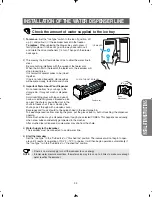
Page 32: ...ter clockwise 90º to align the indication mark on the cover locking the filter in posi tion WATER ICE A newly installed water filter cartridge may cause water to briefly spurt from the dispenser NOTE SEPARATION OF RED CAP STICKER MONTH INDICATION COVER FILTER ALIGN THE INDICATION MARK WITH LOCK POSITION Please check that the indication line aligns with the lock position If you are replacing the ca...

Page 33: ...e can jam the chute or cause the door in the chute to freeze shut If ice is blocking the chute poke it through with a wooden spoon Beverages and foods should not be quick chilled in the ice storage bin To keep dispensed ice from missing the glass put the glass close to but not touching the dispenser opening Some crushed ice may be dispensed even though you selected CUBES This happens occasionally ...

Page 34: ...ator That makes refriger ator s temperature low quickly and save the power consumption Condensation can occur when you leave the door open for a long time Did you stop the ice making function Is there any ice in the storage unit Is the water pipe connected and the shut off valve open Is the freezer temperature too warm Did you wait for 12 hours after installa tion of the water supply line before m...

Page 35: ...eezer clogged Cubes jammed in chute Supply line or shutoff valve is clogged Water filter clogged Dispenser is LOCKED Replace filter cartridge with new cartridge or with plug Check to see if package is holding door open See about the controls This is normal Turn on icemaker or water supply Remove cubes and move the feeler arm to the ON position Break up with fingertip pressure and discard remaining...

Page 36: ... warranties This limited warranty covers manufacturing defects in materials and workmanship encountered in normal noncommercial use of this product and shall not apply to the following including but not limited to damage which occurs in shipment delivery and installation applications and uses for which this product was not intended altered product or serial numbers cosmetic damage or exterior fini...

Page 37: ......

Page 38: ......

Page 39: ......

Page 40: ...customer care center Samsung Electronics America Inc 105 Challenger Road Ridgefield Park NJ 07660 0511 1 800 SAMSUNG 1 800 726 7864 www samsung com All right reserved This manual maynot be reproduced in whole or in part in any form without written permission from the SAMSUNG ELECTRONICS Company ...

Reviews: