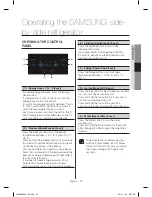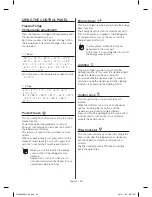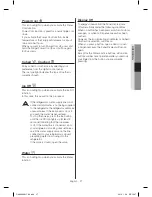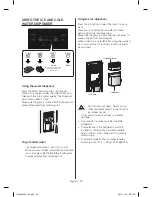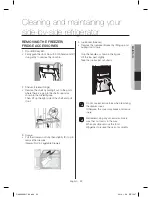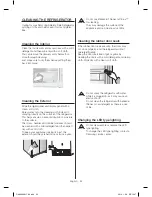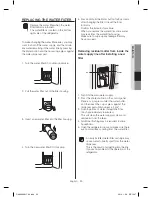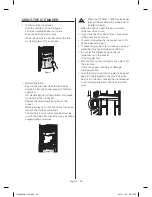
English - 21
SETTING
UP
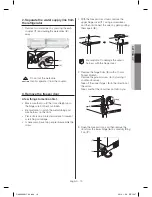
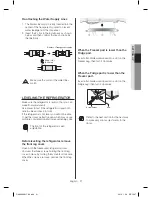
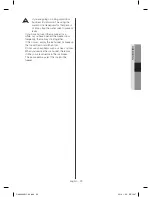
Re-attaching the Water Supply Lines
1. The Water Lines must be fully Inserted into the
center of the transparent coupler to prevent
water leakage from the dispenser.
2. Insert the 2 clips in the install pack as shown
below, and then confirm that each clip holds
the line firmly.
Center of Transparent coupler
Clip A (1/4”)
(6.35 mm)
Make sure the color of the water lines
match.
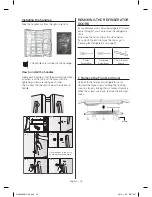
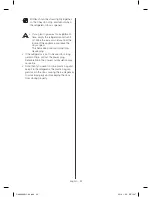
LEVELING THE REFRIGERATOR
Make sure the refrigerator is level so that you can
make final adjustments.
Use a level to test if the refrigerator is level both
side to side and back to front.
If the refrigerator is not level, you will not be able
to get the doors perfectly even, which may cause
moisture condensation and increased energy bills.
The front of the refrigerator is also
adjustable.
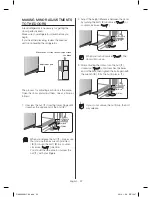
Before levelling the refrigerator, remove
the front leg cover.
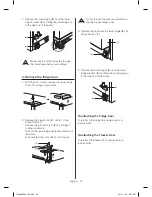
Open both the freezer and refrigerator doors.
Unscrew the three screws holding the front leg
cover in place by turning them counter-clockwise.
When the screws are loose, remove the front leg
cover.
CAUTION
When the Freezer part is lower than the
Fridge part.
Insert a flat-blade screwdriver into a slot on the
Freezer Leg, then turn it clockwise.
When the Fridge part is lower than the
Freezer part.
Insert a flat-blade screwdriver into a slot on the
Fridge Leg, then turn it clockwise.
Screw Driver
Leg
Refer to the next section for the best way
to make very minor adjustments to the
doors.
DA68-02981C-00.indb 21
2014. 1. 28. �� 10:47
Summary of Contents for RS25H5121
Page 39: ...Memo DA68 02981C 00 indb 39 2014 1 28 10 48...
Page 79: ...M mo DA68 02981C 00 indb 39 2014 1 28 10 48...
Page 82: ...DA68 02981C 3 AR indd 39 2014 1 28 10 40 DA68 02981C 00 indb 2 2014 1 28 10 48...
Page 83: ...38 DA68 02981C 3 AR indd 38 2014 1 28 10 40 DA68 02981C 00 indb 3 2014 1 28 10 48...
Page 88: ...33 1 2 3 4 DA68 02981C 3 AR indd 33 2014 1 28 10 40 DA68 02981C 00 indb 8 2014 1 28 10 48...
Page 89: ...32 DA68 02981C 3 AR indd 32 2014 1 28 10 40 DA68 02981C 00 indb 9 2014 1 28 10 48...
Page 92: ...29 DA68 02981C 3 AR indd 29 2014 1 28 10 40 DA68 02981C 00 indb 12 2014 1 28 10 48...
Page 106: ...15 DA68 02981C 3 AR indd 15 2014 1 28 10 39 DA68 02981C 00 indb 26 2014 1 28 10 48...
Page 107: ...14 24 ISO DA68 02981C 3 AR indd 14 2014 1 28 10 39 DA68 02981C 00 indb 27 2014 1 28 10 48...
Page 109: ...12 DA68 02981C 3 AR indd 12 2014 1 28 10 39 DA68 02981C 00 indb 29 2014 1 28 10 48...
Page 110: ...11 DA68 02981C 3 AR indd 11 2014 1 28 10 39 DA68 02981C 00 indb 30 2014 1 28 10 48...
Page 113: ...8 LED LED DA68 02981C 3 AR indd 8 2014 1 28 10 39 DA68 02981C 00 indb 33 2014 1 28 10 48...
Page 114: ...7 DA68 02981C 3 AR indd 7 2014 1 28 10 39 DA68 02981C 00 indb 34 2014 1 28 10 48...
Page 115: ...6 DA68 02981C 3 AR indd 6 2014 1 28 10 39 DA68 02981C 00 indb 35 2014 1 28 10 48...
Page 116: ...5 DA68 02981C 3 AR indd 5 2014 1 28 10 39 DA68 02981C 00 indb 36 2014 1 28 10 48...
Page 117: ...4 DA68 02981C 3 AR indd 4 2014 1 28 10 39 DA68 02981C 00 indb 37 2014 1 28 10 48...
Page 118: ...3 DA68 02981C 3 AR indd 3 2014 1 28 10 39 DA68 02981C 00 indb 38 2014 1 28 10 48...


