background image

setting up 

_07

setting up 

_07

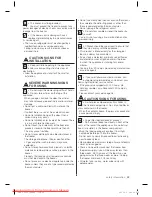
01 SETTING 

UP

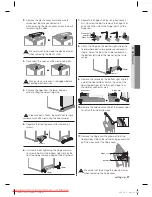
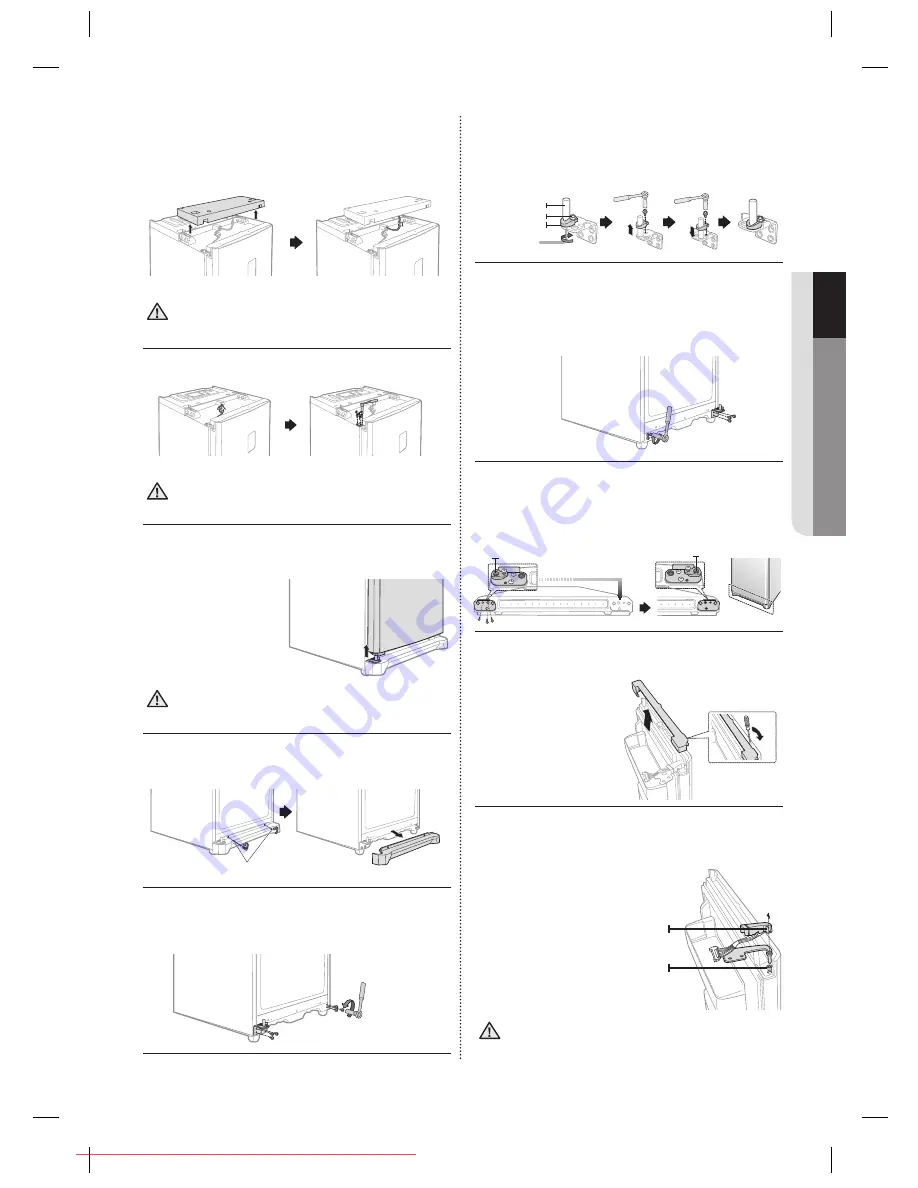
7. 

Separate the hinge shaft by using hex wrench 
fi rst. Unscrew the bolt to remove the hinge riser 
and switch the side of the hinge shaft and the 
hinge riser.

8. 

Attach the hinge on the bottom right side of the 
freezer where bolts were previously removed in 
step 6. Screw the bolts that were removed on 
the bottom left side of the freezer for the future 
usage.

9. 

Remove the screws on the bottom right and left 
side of the freezer door. Switch the side of the 
door stopper from left to the right. Hinge riser 
should be switched as well.

10. 

Remove the wire cover on top of the freezer door 
to switch the side of the wires.

11. 

Remove the hinge and the grommet from the 
freezer door. Detach the left side hinge cover and 
pull the wires out of the hinge cover.

Be careful not to damage the electrical wires 
when removing the hinge cover.

2. 

Remove the plastic cover and make sure to 
disconnect the wire connected to it.
After removing the plastic cover, check the parts 
for reversing the door.

Be careful not to damage the electrical wires 
when removing the p

lastic cover. 

3. 

Disconnect the wires and then remove 3 bolts.

Make sure your freezer is unplugged before 
handling electrical wires.

4. 

Remove the door from the lower hinge by 
carefully lifting the door straight up.

Freezer door is heavy, be careful not to injure 
yourself when removing the freezer door.

5. 

Separate the front leg cover after removing 2 
screws.

6. 

Unscrew 3 bolts tightening the hinge and also 
unscrew 3 bolts on the bottom right side by the 
front leg where removed hinge will be attached.

CAUTION

CAUTION

WARNING

Screws

Screws

10mm

10mm

10mm

10mm

Hinge shaft

Hinge shaft

8mm Bolt

8mm Bolt

Hinge riser

Hinge riser

10mm

10mm

10mm

10mm

Hinge riser

Hinge riser

Hinge riser

Hinge riser

Hinge cover

Hinge cover

Grommet

Grommet

CAUTION

DA99-01951G.indb   섹션2:07

DA99-01951G.indb   섹션2:07

2012.6.1   2:20:31 PM

2012.6.1   2:20:31 PM

Downloaded from Fridge-Manual.com Manuals

Summary of Contents for RZ-80 EERS

Page 1: ...ceive a more complete service please register your product at www samsung com register Free Standing Appliance Code No DA99 01951G REV 1 0 This manual is made with 100 recycled paper DA99 01951G indb 01 DA99 01951G indb 01 2012 6 1 2 20 28 PM 2012 6 1 2 20 28 PM Downloaded from Fridge Manual com Manuals ...

Page 2: ... electric shock or fire Do not place this freezer in direct sunlight or expose to the heat from stoves room heaters or other appliance Never use gas pipes telephone lines or other potential lightening rods as ground Improper use of the ground plug can result in electric shock Do not plug several appliances into the same multiple power board The freezer should always be plugged into its own individu...

Page 3: ...lerate the defrosting process other than those recommended by the manufacturer Do not damage the refrigerant circuit Do not disassemble or repair the freezer by yourself You run risk of causing a fire malfunction and or personal injury Children should be supervised to ensure that they do not play with the appliance This product is intended only for the storage of food in a domestic environment If a...

Page 4: ...eezer When this product contains flammable gas Refrigerant R600a contact your local authority in regard to safe disposal of this product Cyclopentane is used as a insulation blowing gas The gases in insulation material require special disposal procedure Please contact your local authorities in regard to the environmentally safe disposal of this product Ensure that none of the pipes on the back of t...

Page 5: ...o warm in the freezer when sited for an extended period of time below the cold end of the range of temperatures for which the refrigerating appliance is designed Your appliance is frost free which means there is no need to manually defrost your appliance as this will be carried out automatically Temperature rising during the defrost can comply with ISO requirement But If you want to prevent an und...

Page 6: ... service Height of the product may be different depending on the models Allow clearance to the right left back and top when installing This will help reduce power consumption and keep your energy bills lower Do not install the freezer in a place with the temperature lower than 10 C Pull the unit straight out when installing servicing or cleaning behind the freezer and push it straight back after w...

Page 7: ...the plastic cover and make sure to disconnect the wire connected to it After removing the plastic cover check the parts for reversing the door Be careful not to damage the electrical wires when removing the plastic cover 3 Disconnect the wires and then remove 3 bolts Make sure your freezer is unplugged before handling electrical wires 4 Remove the door from the lower hinge by carefully lifting the...

Page 8: ...p 11 Make sure to use right side hinge cover which can be found underneath the removed plastic cover from step 2 and remove the grommet After reassembling the hinge wire and the hinge cover switch the side from left to the right 14 After switching the hinge make sure to take out the right side wire cover and close it with the wire cover on the top of freezer door 15 Take off the handle cover and r...

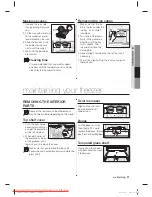
Page 9: ...ge amount of food stuff in the freezer compartment at least 24 hours before To deactivate the Power Freeze function press the Power Freeze button again LEVELLING THE FREEZER If the front of the appliance is slightly higher than the rear the door can be opened and closed more easily Turn the adjusting legs clockwise to raise and counter clockwise to lower the height Case 1 The appliance tilts down ...

Page 10: ...arm button to activate the Alarm function Alarm indicator will light up and the refrigerator will alert you with alarm sound if the refrigerator door is kept open for longer than 2 minutes To deactivate the Alarm function press the Alarm button again 2 Display Off As standard the temperature display is switched off to switch between on and off mode press alarm button for 3 seconds 5 Eco Press the ...

Page 11: ...one hour with the temperature set to Power Freeze for the ice cubes to form Twist ice maker Slightly lift up the twist ice maker and pull it towards you Boxes Pull the boxes out fully then slightly lift it up to remove the boxes Small box Fresher box Big box Tempered glass shelf Gently lift up the shelves with both hands and pull it toward you REMOVING THE INTERIOR PARTS Some of the features can b...

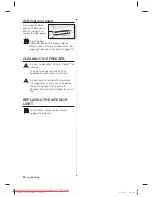
Page 12: ...t use Benzene Thinner or Clorox for cleaning They may damage the surface of the appliance and can create a risk of fire Do not spray the freezer with water while it is plugged in as it may cause an electric shock Do not clean the freezer with benzene thinner or car detergent for risk of fire REPLACING THE INTERIOR LIGHT For LED lamp please contact service engineer to replace it WARNING CAUTION DA99 ...

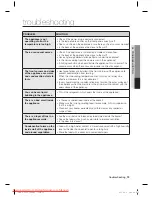
Page 13: ...ature rises this may not always be effective However this is not abnormal In very humid weather condensation may form on the outer surface of the appliance when the moisture in the air comes into contact with the cool surface of the appliance You can hear a liquid bubbling in the appliance This is the refrigerant which cools the inside of the appliance There is a bad smell inside the appliance Is ...

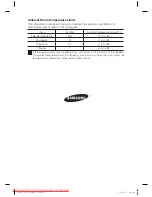
Page 14: ...to 32 Temperate N 16 to 32 Subtropical ST 16 to 38 Tropical T 16 to 43 Internal temperatures may be affected by such factors as the location of the refrigera tor ambient temperature and the frequency with which you open the door Adjust the temperature as required to compensate for these factors DA99 01951G indb 섹션4 14 DA99 01951G indb 섹션4 14 2012 6 1 2 20 44 PM 2012 6 1 2 20 44 PM Downloaded from ...

Page 15: ...sung Pour bénéficier d une assistance technique plus complète enregistrez votre produit sur www samsung com register Appareil en pose libre Ce manuel est en papier recyclé à 100 DA99 01951G indb 01 DA99 01951G indb 01 2012 6 1 2 20 45 PM 2012 6 1 2 20 45 PM Downloaded from Fridge Manual com Manuals ...

Page 16: ...entrer en contact avec l eau Un défaut d isolation des composants électriques peut entraîner une électrocution ou un incendie Ne placez pas l appareil dans un endroit exposé au rayonnement direct du soleil ou à proximité d une source de chaleur cuisinière radiateur etc Ne reliez jamais la borne de terre de l appareil à une conduite de gaz une ligne téléphonique ou une tige de paratonnerre Une mise...

Page 17: ...ns de température dans le congélateur Les produits nécessitant un contrôle strict de la température ne doivent pas être stockés dans cet appareil Ne placez pas et n utilisez pas d appareils électriques à l intérieur du congélateur sauf si ces derniers sont recommandés par le fabricant N accélérez pas le processus de dégivrage à l aide d appareils ou de méthodes autres que ceux recommandés par le f...

Page 18: ... appareil Avant la mise au rebut vérifiez que les tuyaux situés à l arrière de l appareil sont en bon état Selon le modèle cet appareil peut utiliser du fluide frigorigène de type R600a ou R134a Pour connaître le type de fluide utilisé consultez l étiquette apposée sur le compresseur à l arrière de l appareil ou la plaque signalétique située à l intérieur du congélateur Si l appareil contient un gaz ...

Page 19: ... devenue trop élevée dans le congélateur s il est resté pendant une période prolongée au dessous de la limite inférieure de la plage de températures pour laquelle il a été conçu Votre appareil est équipé d un système de dégivrage automatique ce qui vous évite d effectuer un dégivrage manuel La hausse de température constatée durant le dégivrage est conforme aux normes ISO en vigueur Pour éviter la...

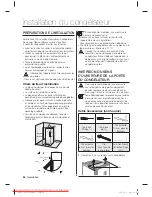
Page 20: ...ion des modèles il se peut que la hauteur du produit varie Prévoyez un espace suffisant tout autour de l appareil lors de son installation Vous réduirez ainsi sa consommation électrique N installez pas le congélateur dans une pièce où la température est inférieure à 10 C Pendant l installation à l occasion d une réparation ou du nettoyage de l arrière du congélateur tirez et replacez l appareil en ...

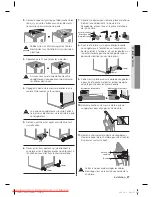
Page 21: ...ite les éléments nécessaires pour retourner la porte Veillez à ne pas endommager les câbles électriques lors du retrait du couvercle en plastique 3 Débranchez le fil puis retirez les 3 boulons Assurez vous que l alimentation de votre congélateur est coupée avant de manipuler les câbles électriques 4 Dégagez la porte de la charnière inférieure en la soulevant doucement à la verticale La porte du con...

Page 22: ...a porte du congélateur en suivant les étapes du point 11 dans l ordre inverse Utilisez bien le capot de charnière droite que vous trouverez sous le capot de plastique retiré à l étape 2 Après avoir remonté la charnière les fils et le capot de charnière remettez les en place du côté gauche au côté droit 14 Après avoir inversé la charnière remettez la protection des fils électriques en haut de la port...

Page 23: ...nde quantité de denrées alimentaires dans le congélateur Pour désactiver le mode Power Freeze appuyez à nouveau sur la touche Power Freeze sur la touche MISE À NIVEAU DU CONGÉLATEUR Si l appareil penche légèrement en arrière la porte s ouvrira et se fermera plus facilement Tournez les pieds dans le sens des aiguilles d une montre pour lever l appareil et en sens inverse pour l abaisser Cas 1 L app...

Page 24: ...n Éco désactive automatiquement le mode Power Freeze 4 Alarm 1 Alarm Appuyez sur la touche Alarm pour activer la fonction d alarme L indicateur d alarme s illumine et le congélateur vous alertera par un signal sonore si la porte reste ouverte plus de 2 minutes Pour désactiver l alarme appuyez à nouveau sur la touche Alarm 2 Affichage désactivé En principe l affichage de la température est éteint pou...

Page 25: ...mandons d attendre environ une heure avec la température réglée sur Power Freeze Bac à glaçons bac de récupération des glaçons Soulevez légèrement le bac et tirez le vers vous Bacs Tirez complètement les bacs puis soulevez les légèrement pour les sortir petit bac bac Quick frost bac en plastique Clayettes de support Soulevez doucement les clayettes en les tenant à deux mains puis tirez les vers vo...

Page 26: ...ors du nettoyage Vous risqueriez d endommager la surface de l appareil ou de provoquer un incendie Ne projetez pas d eau sur le congélateur lorsque celui ci est raccordé au secteur Vous risqueriez de vous électrocuter N utilisez jamais de benzène de solvant ou de détergent pour voiture afin d éviter tout risque d incendie REMPLACEMENT DE L AMPOULE Pour le remplacement d ampoules LED veuillez contac...

Page 27: ... avérer inefficace Cependant ce phénomène n est pas anormal Dans un climat très humide l air humide entrant en contact avec la surface froide de l appareil entraîne de la condensation sur les surfaces extérieures de l appareil Vous entendez un bruit d écoulement d eau Ce bruit est produit par le fluide frigorigène lorsqu il refroidit l intérieur de l appareil L intérieur de l appareil dégage des ode...

Page 28: ...memo DA99 01951G indb 섹션4 14 DA99 01951G indb 섹션4 14 2012 6 1 2 21 0 PM 2012 6 1 2 21 0 PM Downloaded from Fridge Manual com Manuals ...

Page 29: ...memo DA99 01951G indb 섹션4 15 DA99 01951G indb 섹션4 15 2012 6 1 2 21 0 PM 2012 6 1 2 21 0 PM Downloaded from Fridge Manual com Manuals ...

Page 30: ...N de 10 à 32 Tempérée N de 16 à 32 Subtropicale ST de 16 à 38 Tropicale T de 16 à 43 Les températures intérieures de l appareil peuvent varier sous l effet de facteurs tel que la pièce où il se trouve la température ambiante et la fréquence d ouverture de la porte Ces facteurs peuvent être compensés en réglant une température appropriée DA99 01951G indb 섹션4 16 DA99 01951G indb 섹션4 16 2012 6 1 2 21...

Page 31: ...ﻕ ﺍﻟﺮﻣﺰ ﺍﻟﻔﺌﺔ ٣٢ ﺇﻟﻰ ١٠ SN ﳑﺘﺪﺓ ﻣﻌﺘﺪﻟﺔ ٣٢ ﺇﻟﻰ ١٦ N ﻣﻌﺘﺪﻟﺔ ٣٨ ﺇﻟﻰ ١٦ ST ﺍﺳﺘﻮﺍﺋﻴﺔ ﺷﺒﻪ ٤٣ ﺇﻟﻰ ١٦ T ﺍﺳﺘﻮﺍﺋﻴﺔ ﺍﻟﺒﺎﺏ ﻓﺘﺢ ﺗﻜﺮﺍﺭ ﻭﻣﻌﺪﻝ ﺍﶈﻴﻄﺔ ﺍﳊﺮﺍﺭﺓ ﻭﺩﺭﺟﺔ ﻤﺪ ﺍ ﺍﻟﺜﻼﺟﺔ ﻣﻮﻗﻊ ﻣﺜﻞ ﺑﻌﻮﺍﻣﻞ ﺍﻟﺪﺍﺧﻠﻴﺔ ﺍﳊﺮﺍﺭﺓ ﺩﺭﺟﺎﺕ ﺗﺘﺄﺛﺮ ﻗﺪ ﺍﻟﻌﻮﺍﻣﻞ ﻫﺬﻩ ﻟﺘﻌﻮﻳﺾ ﺍﳊﺎﺟﺔ ﺣﺴﺐ ﺍﳊﺮﺍﺭﺓ ﺩﺭﺟﺔ ﺑﻀﺒﻂ ﻗﻢ DA99 01951G indb 14 DA99 01951G indb 14 2012 6 1 2 21 20 PM 2012 6 1 2 21 20 PM Downloaded from Fridge Manual com Manuals ...

Page 32: ...ﺗﻔﺎﻉ ﻋﻨﺪ ﺍﻟﺘﻜﺎﺛﻒ ﻃﺒﻴﻌﻲ ﺃﻣﺮ ﺫﻟﻚ ﺃﻥ ﻣﻦ ﺍﻟﺮﻏﻢ ﻋﻠﻰ ﻋﻨﺪ ﻟﻠﺠﻬﺎﺯ ﺍﻟﺨﺎﺭﺟﻲ ﺍﻟﺴﻄﺢ ﻋﻠﻰ ﺍﻟﺘﻜﺎﺛﻒ ﻳﺘﻜﻮﻥ ﻗﺪ ﺟﺪﺍ ﺍﻟﺮﻃﺐ ﺍﻟﺠﻮ ﻓﻲ ﻟﻠﺠﻬﺎﺯ ﺍﻟﺒﺎﺭﺩ ﻟﻠﺴﻄﺢ ﺍﻟﻬﻮﺍﺀ ﻓﻲ ﺍﻟﻤﻮﺟﻮﺩﺓ ﺍﻟﺮﻃﻮﺑﺔ ﻣﻼﻣﺴﺔ ﻓﻘﺎﻋﺎﺕ ﺻﻮﺕ ﺳﻤﺎﻉ ﻳﻤﻜﻨﻚ ﺍﻟﺠﻬﺎﺯ ﻣﻦ ﺗﻨﺒﻌﺚ ﺍﻟﺘﻲ ﺍﻟﺴﺎﺋﻞ ﺍﻟﺠﻬﺎﺯ ﻣﻦ ﺍﻟﺪﺍﺧﻠﻲ ﺍﻟﺠﺰﺀ ﺗﺒﺮﻳﺪﻩ ﻋﻠﻰ ﻳﻌﻤﻞ ﺍﻟﺬﻱ ﺍﻟﻤﺒﺮﺩ ﺻﻮﺕ ﻫﺬﺍ ﺩﺍﺧﻞ ﻣﻦ ﻛﺮﻳﻬﺔ ﺭﺍﺋﺤﺔ ﺗﻨﺒﻌﺚ ﺍﻟﺠﻬﺎﺯ ﺍﻟﻤﺠﻤﺪ ﺩﺍﺧﻞ ﻓﺎﺳﺪ ﻃﻌﺎﻡ ﺃﻱ ﻳﻮﺟﺪ ﻫﻞ ﻻﻳﺴﻤﺢ ﺑﺤﻴﺚ ﺍﻟﺴﻤﻚ ﻣﺜﻞ ﻗﻮﻳﺔ ﺭﺍﺋﺤﺔ ﻟﻪ ﺍﻟﺬﻱ ﺍﻟﻄﻌﺎﻡ ﺗﻐﻠﻴﻒ ﻣﻦ ﺗﺄﻛﺪ...

Page 33: ...ﺴﺒﺐ ﻓﻘﺪ ﺣﺮﻳﻖ ﻧﺸﻮﺏ ﻓﻲ ﺗﺘﺴﺒﺐ ﺃﻥ ﺍﻟﻜﻬﺮﺑﻲ ﺑﺎﻟﺘﻴﺎﺭ ﻣﻮﺻﻞ ﻭﻫﻮ ﺑﺎﳌﺎﺀ ﻤﺪ ﺍ ﺑﺮﺵ ﺗﻘﻢ ﻻ ﻛﻬﺮﺑﻴﺔ ﻟﺼﺪﻣﺔ ﺍﻟﺘﻌﺮﺽ ﺫﻟﻚ ﻋﻦ ﻳﻨﺠﻢ ﺃﻥ ﳝﻜﻦ ﺣﻴﺚ ﺍﻟﺪﻫﺎﻥ ﺗﺨﻔﻴﻒ ﺳﺎﺋﻞ ﺃﻭ ﺑﺎﻟﺒﻨﺰﻳﻦ ﻤﺪ ﺍ ﺑﺘﻨﻈﻴﻒ ﺗﻘﻢ ﻻ ﺍﳊﺮﻳﻖ ﻧﺸﻮﺏ ﻟﺘﺠﻨﺐ ﺍﻟﺴﻴﺎﺭﺓ ﻣﻨﻈﻒ ﺃﻭ ﺍﻟﺘﻨﺮ ﺍﻟﺪﺍﺧﻠﻲ ﺍﳌﺼﺒﺎﺡ ﺍﺳﺘﺒﺪﺍﻝ ﻟﻼﺳﺘﺒﺪﺍﻝ ﺍﻟﺼﻴﺎﻧﺔ ﲟﻬﻨﺪﺱ ﺍﻻﺗﺼﺎﻝ ﻳﺮﺟﻰ ﺗﻨﺒﻴﻪ ﺍﻟﺘﻨﻈﻴﻒ ١٢ ﺗﺤﺬﻳﺮ DA99 01951G indb 12 DA99 01951G indb 12 2012 6 1 2 21 19 PM 2012 6 1 2 21 19 PM Downloaded from Fridge Manual com...

Page 34: ... ﺩﺭﺟﺔ ﺿﺒﻂ ﻣﻊ ﺗﻘﺮﻳﺒﺎ ﺳﺎﻋﺔ ﳌﺪﺓ ﺑﺎﻻﻧﺘﻈﺎﺭ ﻳﻮﺻﻰ ﻟﺘﺸﻜﻴﻞ ﺳﺮﻳﻊ ﲡﻤﻴﺪ Power Freeze ﻭﺿﻪ ﻋﻠﻰ ﺍﻟﺜﻠﺞ ﻣﻜﻌﺒﺎﺕ ﺍﳌﻠﻔﻮﻑ ﺍﻟﺜﻠﺞ ﺗﻜﻮﻳﻦ ﻭﺣﺪﺓ ﺍﳌﻠﻔﻮﻑ ﺍﻟﺜﻠﺞ ﺗﻜﻮﻳﻦ ﻭﺣﺪﺓ ﺍﺭﻓﻊ ﻧﺤﻮﻙ ﻭﺍﺟﺬﺑﻬﺎ ﺑﺮﻓﻖ ﺍﻟﺼﻨﺎﺩﻳﻖ ﺣﺘﻰ ﻟﻠﺨﺎﺭﺝ ﺍﻟﺼﻨﺎﺩﻳﻖ ﺍﺟﺬﺏ ﺑﺮﻓﻖ ﺍﺭﻓﻌﻬﺎ ﺛﻢ ﻧﻬﺎﻳﺘﻬﺎ ﻹﺯﺍﻟﺘﻬﺎ ﺻﻨﺪﻭﻕ ﺍﻟﺼﻐﻴﺮ ﺍﻟﺼﻨﺪﻭﻕ ﺍﻟﺼﻨﺪﻭﻕ ﺍﻟﺴﺮﻳﻊ ﺍﻟﺘﺠﻤﻴﺪ ﺍﻟﻜﺒﻴﺮ ﺍﳌﻘﺎﻭﻡ ﺍﻟﺰﺟﺎﺝ ﺭﻑ ﻣﺴﺘﺨﺪﻣﺎ ﺑﺮﻓﻖ ﺍﻟﺮﻓﻮﻑ ﺍﺭﻓﻊ ﻧﺤﻮﻙ ﻭﺍﺳﺤﺒﻬﺎ ﻳﺪﻳﻚ ﻛﻠﺘﺎ ﺍﻷﺟﺰﺍﺀﺍﻟﺪﺍﺧﻠﻴﺔ ﻓﻚ ﻟﻠﻄﺮﺍﺯ ﺗﺒﻌﺎ ﺗﺘﻮﻓﺮ ﻻ ﻭﺭﲟﺎ ﺍﳌﻴﺰﺍﺕ ﺑﻌﺾ ...

Page 35: ...ﺠﻤﻴﺪ Power Freeze ﻭﻇﻴﻔﺔ ﲢﺪﻳﺪ ﺍﻟﺘﻮﻓﻴﺮ Eco ﻭﻇﻴﻔﺔ ﺗﻨﺸﻴﻂ ﺇﻟﻐﺎﺀ ﺇﻟﻰ ﻤﺪ ﺍ Freezer ﺗﻠﻘﺎﺋﻴﺎ ﺍﻻﻗﺘﺼﺎﺩﻱ ١ ٢ ٣ ٤ ٥ ﺍﻟﺘﺸﻐﻴﻞ ١٠ ﻟﻠﻄﺮﺍﺯ ﺗﺒﻌﺎ ﺗﺘﻮﻓﺮ ﻻ ﻭﺭﲟﺎ ﺍﳌﻴﺰﺍﺕ ﺑﻌﺾ ﺗﺨﺘﻠﻒ ﺃﻥ ﳝﻜﻦ ﻭﺍﻟﺼﻨﺪﻭﻕ ٢ ﺍﳌﺎﺋﻞ ﺍﻟﺜﻠﺞ ﺻﺎﻧﻊ ﺃﻭﺿﺎﻉ ﺗﺒﺪﻳﻞ ﳝﻜﻦ ﺍﻟﺒﻌﺾ ﺑﻌﻀﻬﺎ ﻣﻊ ٥ ﺍﻟﺼﻐﻴﺮ ﺍﻟﻌﻠﻮﻱ ﺍﻟﺮﻑ ﻏﻄﺎﺀ ﺇﺯﺍﻟﺔ ﺑﺈﻣﻜﺎﻧﻚ ﺃﻛﺒﺮ ﻣﺴﺎﺣﺔ ﻋﻠﻰ ﻟﻠﺤﺼﻮﻝ ٣ ﺍﳌﻨﻌﺶ ﻭﺻﻨﺪﻭﻕ ٢ ﺍﳌﻠﻔﻮﻑ ﺍﻟﺜﻠﺞ ﺗﻜﻮﻳﻦ ﻭﻭﺣﺪﺓ ١ ﻟﻦ ٥ ﺍﻟﺼﻐﻴﺮ ﻭﺍﻟﺼﻨﺪﻭﻕ ٤ ﺍﻟﻜﺒﻴﺮﺓ ﺍﻟﺼﻨﺎﺩﻳﻖ ﻣﻦ ﺛﻼﺛﺔ ﻭﺃﻋﻠﻰ ﺣﺠﻢ ﺣﺴﺎﺏ ﻳﺘﻢ ﻭﺍﳌﻴﻜ...

Page 36: ...ﺘﺠﻤﻴﺪ Power Freeze ﻭﻇﻴﻔﺔ ﺗﻨﺸﻴﻂ ﻹﻟﻐﺎﺀ ﺃﺧﺮﻯ ﻣﺮﺓ ﺍﻟﺴﺮﻳﻊ ﺍﻟﺘﺠﻤﻴﺪ Power Freeze ﺍﻟﺰﺭ ﻋﻠﻰ ﻤﺪ ﺍ ﺍﺳﺘﻮﺍﺀ ﺿﺒﻂ ﺍﻟﺒﺎﺏ ﻓﺘﺢ ﻓﻴﻤﻜﻦ ﺍﻟﻤﺆﺧﺮﺓ ﻣﻦ ﻗﻠﻴﻼ ﺃﻋﻠﻰ ﺍﻟﺠﻬﺎﺯ ﻣﻘﺪﻣﺔ ﻛﺎﻧﺖ ﺇﺫﺍ ﺍﻟﺴﻬﻮﻟﺔ ﻣﻦ ﺃﻛﺒﺮ ﺑﻘﺪﺭ ﻭﻏﻠﻘﻪ ﻋﻜﺲ ﻭﻓﻲ ﺍﻻﺭﺗﻔﺎﻉ ﻟﺰﻳﺎﺩﺓ ﺍﻟﺴﺎﻋﺔ ﻋﻘﺎﺭﺏ ﺍﺗﺠﺎﻩ ﻓﻲ ﺍﻟﻀﺒﻂ ﺳﺎﻗﻲ ﺃﺩﺭ ﻟﺨﻔﻀﻪ ﺍﻟﺴﺎﻋﺔ ﻋﻘﺎﺭﺏ ﺍﺗﺠﺎﻩ ﺍﻟﻴﺴﺎﺭ ﺟﻬﺔ ﻷﺳﻔﻞ ﺍﻟﺠﻬﺎﺯ ﻣﻴﻞ ١ ﺍﻟﺤﺎﻟﺔ ﺿﺒﻂ ﻳﺘﻢ ﺃﻥ ﺇﻟﻰ ﺍﻟﺴﻬﻢ ﺍﺗﺠﺎﻩ ﻓﻲ ﺍﻟﻴﺴﺮﻯ ﺍﻟﻀﺒﻂ ﺳﺎﻕ ﺃﺩﺭ ﺍﺳﺘﻮﺍﺀﺍﻟﺠﻬﺎﺯ ﺍﻟﺘﺤﻜﻢ ﻟﻮﺣﺔ ﻓﺤﺺ ﺻﺎﻓﺮﺓ ﺻﻮﺕ ﺇﺻﺪﺍ...

Page 37: ...ﺳﺘﺨﺪﺍﻡ ﻣﻦ ﺗﺄﻛﺪ ١١ ﺍﻟﺨﻄﻮﺓ ﺇﻟﻰ ﺍﻟﻐﻄﺎﺀ ﺃﺳﻔﻞ ﻋﻠﻴﻪ ﺍﻟﻌﺜﻮﺭ ﻳﻤﻜﻦ ﺍﻟﺬﻱ ﺍﻷﻳﻤﻦ ﺍﻟﺠﺎﻧﺐ ﺛﻢ ﺍﻟﺜﺎﻧﻴﺔ ﺍﻟﺨﻄﻮﺓ ﻣﻦ ﺍ ﹰ ﺀ ﺑﺪ ﺇﺯﺍﻟﺘﻪ ﺗﻢ ﺍﻟﺬﻱ ﺍﻟﺒﻼﺳﺘﻚ ﻣﻦ ﻛﻞ ﺗﺮﻛﻴﺐ ﺇﻋﺎﺩﺓ ﺇﺟﺮﺍﺀ ﺑﻌﺪ ﺍﻟﺘﺜﺒﻴﺖ ﺣﻠﻘﺔ ﺑﺈﺯﺍﻟﺔ ﻗﻢ ﺍﻻﺗﺠﺎﻩ ﺑﺘﻐﻴﻴﺮ ﻗﻢ ﺍﻟﻤﻔﺼﻠﺔ ﻭﻏﻄﺎﺀ ﻭﺍﻟﺴﻠﻚ ﺍﻟﻤﻔﺼﻠﺔ ﺍﻟﻴﻤﻴﻦ ﺇﻟﻰ ﺍﻟﻴﺴﺎﺭ ﻣﻦ ﺍﻟﺴﻠﻜﻲ ﺍﻟﻐﻄﺎﺀ ﻭﺿﻊ ﻣﻊ ﺍﻏﻠﻘﻬﺎ ﺍﻟﻤﻔﺼﻠﺔ ﺗﺒﺪﻳﻞ ﺑﻌﺪ ١۴ ﺍﻟﻤﻔﺼﻠﺔ ﺗﺒﺪﻳﻞ ﺑﻌﺪ ﺍﻟﻔﺮﻳﺰﺭ ﺑﺎﺏ ﻣﻦ ﺍﻟﻌﻠﻮﻱ ﺍﻟﺠﺰﺀ ﻋﻠﻰ ﻣﻦ ﺍﻟﻌﻠﻮﻱ ﺍﻟﺠﺰﺀ ﻋﻠﻰ ﺍﻟﺴﻠﻜﻲ ﺍﻟﻐﻄﺎﺀ ﻭﺿﻊ ﻣﻊ ﺍﻏﻠﻘﻬﺎ ﺍﻟﺜﻼﺟﺔ...

Page 38: ...ﻧﺐ ﻗﻢ ﺍﻟﻤﺠﻤﺪ ﺑﺎﺏ ﻣﻦ ﺍﻟﺘﺜﺒﻴﺖ ﻭﺣﻠﻘﺔ ﺍﻟﻤﻔﺼﻠﺔ ﺑﺈﺯﺍﻟﺔ ﻗﻢ ١١ ﺛﻢ ﺍﻷﻳﺴﺮ ﺍﻟﺠﺎﻧﺐ ﻋﻠﻰ ﺍﻟﻤﻮﺟﻮﺩﺓ ﺍﻟﻤﻔﺼﻠﺔ ﻏﻄﺎﺀ ﺑﻔﺼﻞ ﺍﻟﻤﻔﺼﻠﺔ ﻏﻄﺎﺀ ﻋﻦ ﺍ ﹰ ﺪ ﺑﻌﻴ ﺍﻷﺳﻼﻙ ﺍﺳﺤﺐ ﻟﻠﻤﻔﺼﻠﺔ ﺍﻟﺪﻭﺍﺭ ﺍﻟﻌﻤﻮﺩ ﻣﻢ ٨ ﺑﺮﻏﻲ ﺍﻟﻤﻔﺼﻠﺔ ﻗﺎﺋﻢ ﺍﻟﻤﻔﺼﻠﺔ ﻗﺎﺋﻢ ﺍﻟﻤﻔﺼﻠﺔ ﻗﺎﺋﻢ ﻟﻮﻻ ﭘﻮﺷﺶ ﺣﻠﻘﺔ ﻣﻠﻮﻟﺒﺔ ﻣﺴﺎﻣﻴﺮ ﺛﻼﺛﺔ ﺑﻔﻚ ﻗﻢ ﺛﻢ ﺍﻷﺳﻼﻙ ﺑﻔﺼﻞ ﻗﻢ ٣ ﻷﻋﻠﻰ ﺑﻌﻨﺎﻳﺔ ﺑﺮﻓﻌﻪ ﺍﻟﺴﻔﻠﻴﺔ ﺍﻟﻤﻔﺼﻠﺔ ﻣﻦ ﺍﻟﺒﺎﺏ ﺑﻔﻚ ﻗﻢ ۴ ﺍﻟﻤﺴﻤﺎﺭﻳﻦ ﻓﻚ ﺑﻌﺪ ﺍﻷﻣﺎﻣﻴﺔ ﺍﻟﺴﺎﻕ ﻏﻄﺎﺀ ﺍﻓﺼﻞ ۵ ﺛﻢ ﺍﻟﻤﻔﺼﻠﺔ ﺑﺘﺜﺒﻴﺖ ﺗﻘﻮﻡ ﺍﻟﺘﻲ ﻣﺴﺎﻣﻴﺮ ٣...

Page 39: ... NN NN NN PS NN ﻟﻠﻄﺮﺍﺯ ﺗﺒﻌﺎ ﺍﻟﻤﻨﺘﺞ ﺍﺭﺗﻔﺎﻉ ﻳﺨﺘﻠﻒ ﻗﺪ ﻭﺍﻟﺨﻠﻒ ﻭﺍﻟﻴﺴﺎﺭ ﻳﻤﻴﻦ ﺇﻟﻰ ﺧﻠﻮﺹ ﻣﺴﺎﺣﺔ ﻭﺟﻮﺩ ﻣﻦ ﻻﺑﺪ ﺗﻘﻠﻴﻞ ﻓﻲ ﺫﻟﻚ ﺳﻴﺴﺎﻋﺪ ﺍﻟﺠﻬﺎﺯ ﺗﺮﻛﻴﺐ ﻋﻨﺪ ﻭﺍﻷﻋﻠﻰ ﺗﻜﻠﻔﺔ ﺍﻧﺨﻔﺎﺽ ﻋﻠﻰ ﺍﻟﺤﻔﺎﻅ ﻭﺑﺎﻟﺘﺎﻟﻲ ﺍﻟﻄﺎﻗﺔ ﺍﺳﺘﻬﻼﻙ ﺍﻟﻄﺎﻗﺔ ﻓﻮﺍﺗﻴﺮ ﺩﺭﺟﺎﺕ ٠١ ﻋﻦ ﺣﺮﺍﺭﺗﻪ ﺩﺭﺟﺔ ﺗﻘﻞ ﻣﻜﺎﻥ ﻓﻲ ﺍﻟﻤﺠﻤﺪ ﺑﺘﺮﻛﻴﺐ ﺗﻘﻢ ﺍ ﻣﺌﻮﻳﺔ ﺃﻭ ﺗﺮﻛﻴﺐ ﻋﻨﺪ ﻣﺴﺘﻘﻴﻢ ﺍﺗﺠﺎﻩ ﻓﻲ ﻟﻠﺨﺎﺭﺝ ﺍﻟﻮﺣﺪﺓ ﺍﺟﺬﺏ ﺍﺧﺮﻯ ﻣﺮﺓ ﻭﺍﺩﻓﻌﻬﺎ ﺍﻟﻤﺠﻤﺪ ﺧﻠﻒ ﺍﻟﺘﻨﻈﻴﻒ ﺃﻭ ﺍﻟﺼﻴﺎﻧﺔ ﺍﻟﻌﻤﻞ ﺇﻧﻬﺎﺀ ﺑﻌﺪ ﻣﺴﺘﻘﻴﻢ ﺑﺎﺗﺠﺎﻩ ﺍﻟﻜﺎﻣﻞ ﺍﻟﺤ...

Page 40: ...ﻪ ﻋﻨﺪ ﺍﻟﻤﺠﻤﺪ ﻓﻲ ﺟﺪﺍ ﺩﺍﻓﺌﺔ ﺍﻟﺤﺮﺍﺭﺓ ﺩﺭﺟﺔ ﺗﺼﺒﺢ ﺃﻥ ﺃﻭ ﺍﻟﺒﺎﺭﺩﺓ ﺍﻟﺤﺮﺍﺭﺓ ﺩﺭﺟﺎﺕ ﻧﻄﺎﻕ ﻣﻦ ﺃﻗﻞ ﺑﺮﻭﺩﺓ ﺩﺭﺟﺔ ﻓﻲ ﻃﻮﻳﻠﺔ ﺯﻣﻨﻴﺔ ﻋﻠﻴﻬﺎ ﺍﻟﺘﺒﺮﻳﺪ ﺟﻬﺎﺯ ﺗﺼﻤﻴﻢ ﺗﻢ ﺍﻟﺘﻲ ﺇﺯﺍﻟﺔ ﻋﻠﻴﻚ ﻳﺘﻌﻴﻦ ﻻ ﺃﻧﻪ ﻳﻌﻨﻲ ﻣﻤﺎ ﺍﻟﺜﻠﺞ ﺑﺘﺮﺍﻛﻢ ﺟﻬﺎﺯﻙ ﻳﺴﻤﺢ ﻻ ﺗﻠﻘﺎﺋﻴﺎ ﺑﺬﻟﻚ ﺍﻟﻘﻴﺎﻡ ﺳﻴﺘﻢ ﺣﻴﺚ ﻳﺪﻭﻳﺎ ﺑﺠﻬﺎﺯﻙ ﺍﻟﻤﻮﺟﻮﺩ ﺍﻟﺜﻠﺞ ﻣﺘﻄﻠﺒﺎﺕ ﻣﻊ ﺍﻟﺜﻠﺞ ﺇﺯﺍﻟﺔ ﺃﺛﻨﺎﺀ ﺗﺮﺗﻔﻊ ﺍﻟﺘﻲ ﺍﻟﺤﺮﺍﺭﺓ ﺩﺭﺟﺔ ﺗﺘﻮﺍﻓﻖ ﻗﺪ ﺍﻟﻄﻌﺎﻡ ﺣﺮﺍﺭﺓ ﺩﺭﺟﺔ ﻓﻲ ﺍﻟﻤﻔﺮﻁ ﺍﻻﺭﺗﻔﺎﻉ ﻣﻨﻊ ﺃﺭﺩﺕ ﺇﺫﺍ ﻭﻟﻜﻦ ISO ﺍﻷﻃﻌﻤﺔ ﺗﻐﻠﻴﻒ ﻓﻴﺮﺟﻲ ﺍﻟﺠ...

Page 41: ...ﺒﺮﺩ ﻧﻮﻉ ﻟﻤﻌﺮﻓﺔ ﺍﻟﻤﺠﻤﺪ ﺩﺍﺧﻞ ﺍﻟﻤﺒﺮﺩ ﺍﻻﺷﺘﻌﺎﻝ ﺳﺮﻳﻊ ﻏﺎﺯ ﻋﻠﻰ ﺍﻟﻤﻨﺘﺞ ﻫﺬﺍ ﺍﺣﺘﻮﺍﺀ ﻋﻨﺪ ﺑﻚ ﺍﻟﻤﻨﺘﺞ ﻫﺬﺍ ﻣﻦ ﻟﻠﺘﺨﻠﺺ ﺍﻟﻤﺤﻠﻴﺔ ﺑﺎﻟﺴﻠﻄﺔ ﺍﺗﺼﻞ R٦٠٠a ﻋﺎﺯﻝ ﺗﻮﻫﺠﻲ ﻛﻐﺎﺯ ﺳﻴﻜﻠﻮﺑﻨﺘﺎﻥ ﻏﺎﺯ ﻳﺴﺘﺨﺪﻡ ﺁﻣﻨﺔ ﺑﻄﺮﻳﻘﺔ ﺧﺎﺻﺔ ﺗﺨﻠﺺ ﺇﺟﺮﺍﺀﺍﺕ ﺍﻟﻌﺎﺯﻟﺔ ﺍﻟﻤﻮﺍﺩ ﻓﻲ ﺍﻟﻤﻮﺟﻮﺩﺓ ﺍﻟﻐﺎﺯﺍﺕ ﺗﺘﻄﻠﺐ ﻫﺬﺍ ﻣﻦ ﺍﻟﺘﺨﻠﺺ ﻳﺨﺺ ﻓﻴﻤﺎ ﺍﻟﻤﺤﻠﻴﺔ ﺑﺎﻟﺴﻠﻄﺎﺕ ﺍﻻﺗﺼﺎﻝ ﻳﺮﺟﻰ ﺍﻷﻧﺎﺑﻴﺐ ﻣﻦ ﺃﻱ ﺗﻠﻒ ﻋﺪﻡ ﻣﻦ ﺗﺄﻛﺪ ﻟﻠﺒﻴﺌﺔ ﺁﻣﻨﺔ ﺑﻄﺮﻳﻘﺔ ﺍﻟﻤﻨﺘﺞ ﺗﻜﺴﻴﺮ ﻳﻠﺰﻡ ﺍﻟﺘﺨﻠﺺ ﻋﻤﻠﻴﺔ ﻗﺒﻞ ﺍﻷﺟﻬﺰﺓ ﻇﻬﺮ ﻓﻲ ﺍﻟﻤﻮﺟﻮﺩﺓ ﻣﻔﺘﻮ...

Page 42: ...ﺍﻟﺘﺼﻨﻴﻊ ﺟﻬﺔ ﻗﺒﻞ ﻣﻦ ﺑﻪ ﻣﻮﺻﻰ ﻧﻮﻉ ﻣﻦ ﺗﻜﻦ ﻟﻢ ﻣﺎ ﻟﺰﻳﺎﺩﺓ ﺃﺧﺮﻯ ﻭﺳﺎﺋﻞ ﺃﻳﺔ ﺃﻭ ﺍﻟﻤﻴﻜﺎﻧﻴﻜﻴﺔ ﺍﻷﺩﻭﺍﺕ ﺗﺴﺘﺨﺪﻡ ﻻ ﻗﺒﻞ ﻣﻦ ﺑﻬﺎ ﺍﻟﻤﻮﺻﻲ ﺗﻠﻚ ﺑﺨﻼﻑ ﺍﻟﺜﻠﺞ ﺇﺯﺍﻟﺔ ﻋﻤﻠﻴﺔ ﺳﺮﻋﺔ ﺍﻟﺘﺼﻨﻴﻊ ﺟﻬﺔ ﻟﻠﻤﺒﺮﺩ ﺍﻟﻜﻬﺮﺑﻴﺔ ﺍﻟﺪﺍﺋﺮﺓ ﺇﺗﻼﻑ ﻋﺪﻡ ﻋﻠﻰ ﺍﺣﺮﺹ ﺑﻨﻔﺴﻚ ﺇﺻﻼﺣﻪ ﺃﻭ ﺍﻟﻤﺠﻤﺪ ﺑﻔﻚ ﺗﻘﻢ ﻻ ﺣﺪﻭﺙ ﺃﻭ ﻭ ﺣﺮﻳﻖ ﻧﺸﻮﺏ ﻟﺨﻄﺮ ﺗﺘﻌﺮﺽ ﺑﺬﻟﻚ ﻓﺄﻧﺖ ﺟﺴﺪﻳﺔ ﺇﺻﺎﺑﺔ ﺃﻭ ﻭ ﻋﻄﻞ ﻋﺒﺜﻬﻢ ﻋﺪﻡ ﻣﻦ ﻟﻠﺘﺄﻛﺪ ﺍﻷﻃﻔﺎﻝ ﻣﺮﺍﻗﺒﺔ ﻳﻨﺒﻐﻲ ﺑﺎﻟﺠﻬﺎﺯ ﺑﻴﺌﺔ ﻓﻲ ﺍﻟﻄﻌﺎﻡ ﻟﺘﺨﺰﻳﻦ ﻓﻘﻂ ﻣﺼﻤﻢ ﺍﻟﻤﻨﺘﺞ ﻫﺬﺍ ﻣﻨﺰﻟﻴﺔ ﺍﻟﻠﻬﺐ ﺃﻟ...

Page 43: ... ﺗﻌﺮﺿﻪ ﺃﻭ ﺍﻟﻤﺒﺎﺷﺮ ﺍﻟﺸﻤﺲ ﺿﻮﺀ ﻓﻲ ﺍﻟﻤﺠﻤﺪ ﻫﺬﺍ ﺗﻀﻊ ﻻ ﻏﻴﺮﻫﺎ ﺃﻭ ﺍﻟﻐﺮﻑ ﺗﺪﻓﺌﺔ ﺃﺟﻬﺰﺓ ﺃﻭ ﺍﻟﻤﻮﺍﻗﺪ ﻋﻦ ﺍﻟﺼﺎﺩﺭﺓ ﻟﻠﺤﺮﺍﺓ ﺍﻷﺟﻬﺰﺓ ﻣﻦ ﺃﻭ ﺍﻟﻬﺎﺗﻒ ﺧﻄﻮﻁ ﺃﻭ ﺍﻟﻐﺎﺯ ﺃﻧﺎﺑﻴﺐ ﺍﺳﺘﺨﺪﺍﻡ ﻋﺪﻡ ﻳﺠﺐ ﺍﻟﺘﺄﺭﻳﺾ ﻋﻤﻠﻴﺔ ﻓﻲ ﻣﻄﻠﻘﺎ ﺍﻟﺼﻮﺍﻋﻖ ﻣﺎﻧﻌﺎﺕ ﺍﻟﻤﺆﺭﺽ ﻟﻠﻘﺎﺑﺲ ﺍﻟﺼﺤﻴﺢ ﺍﻻﺳﺘﺨﺪﺍﻡ ﻋﺪﻡ ﻳﺆﺩﻱ ﺃﻥ ﻳﻤﻜﻦ ﻛﻬﺮﺑﻴﺔ ﻟﺼﺪﻣﺔ ﺍﻟﺘﻌﺮﺽ ﺇﻟﻰ ﺍﻟﻄﺎﻗﺔ ﻟﻮﺣﺔ ﻧﻔﺲ ﻓﻲ ﺃﺟﻬﺰﺓ ﻋﺪﺓ ﺑﺘﻮﺻﻴﻞ ﺗﻘﻢ ﻻ ﺍﻟﻤﺘﻌﺪﺩﺓ ﺍﻟﻜﻬﺮﺑﻲ ﺑﺎﻟﻤﺼﺪﺭ ﺍﻟﻤﺠﻤﺪ ﺗﻮﺻﻴﻞ ﻋﻠﻰ ﺩﺍﺋﻤﺎ ﺍﺣﺮﺹ ﻭﺍﺭﺩ ﻫﻮ ﻣﺎ ﻟﻪ ﺍﻟﻜﻬﺮﺑﻲ ﺍﻟﺠﻬﺪ ﻣﻌﺪﻝ ﻳﻄ...

Page 44: ...ﺧﺪﻣﺔ ﻋﻠﻰ ﻟﻠﺤﺼﻮﻝ ﺍﻟﻤﻮﻗﻊ ﻋﻠﻰ ﻣﻨﺘﺠﻚ www samsung com register ﺍﻟﻌﺮﺑﻴﺔ ﺍﳊﺮﻛﺔ ﺣﺮ ﺍﳊﺎﻣﻞ ﺫﻭ ﺍﳉﻬﺎﺯ Code No DA99 01951G REV 1 0 ١٠٠ ﺑﻨﺴﺒﺔ ﺗﺪﻭﻳﺮﻩ ﻌﺎﺩ ﹸ ﻣ ﻭﺭﻕ ﺑﺎﺳﺘﺨﺪﺍﻡ ﺍﻟﺪﻟﻴﻞ ﻫﺬﺍ ﺇﻧﺘﺎﺝ ﰎ DA99 01951G indb 1 DA99 01951G indb 1 2012 6 1 2 21 0 PM 2012 6 1 2 21 0 PM Downloaded from Fridge Manual com Manuals ...

Reviews: