background image

22

2nd

3rd

Description

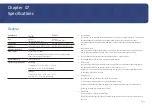
Color

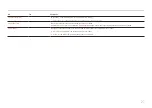
Adjust the tint of the screen.

Color Tone: 

Select a colour tone that best suits your viewing needs.

Red

: Adjust the red saturation level. Values closer to 100 mean greater intensity for the colour.

Green

: Adjust the green saturation level. Values closer to 100 mean greater intensity for the colour.

Blue

: Adjust the blue saturation level. Values closer to 100 mean greater intensity for the colour.

Gamma

: Adjust the middle level of luminance.

Saturation

: Adjust the saturation level. Values closer to 100 mean greater intensity for the colour. 

― This menu is not available when 

Picture Mode

 is set to Cinema. 

― This menu is not available when 

Game Mode

 is enabled.

― This menu is not available when 

Eye Saver Mode

 is enabled.

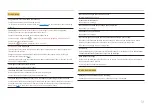
Black Level

If a DVD player or set-top box etc is connected to the product via HDMI, image quality degradation (contrast/colour degradation, black level, etc.) 
may occur, depending on the connected source device.
In such case, 

Black Level

 can be used to adjust the image quality.

Normal

 / 

Low

― This function is only available in 

HDMI

 mode.

― 

Black Level

 may not be compatible with some source devices.

― The 

Black Level

 feature is only activated at a certain 

AV

 resolution, such as 480p @ 60 Hz, 576p @ 50 Hz, 720p @ 60 Hz and 1080p @ 60 Hz

Eye Saver Mode

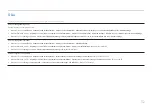
Set to an optimum quality suitable for eye relaxation.

TÜV Rheinland “Low Blue Light Content” is a certification for products which meet requirements for lower blue light levels. When Eye Saver Mode is 

'High', the blue light that wavelength is around 400nm will decrease, and it will provide an optimum picture quality suitable for eye relaxation. At the 

same time, the blue light level is lower than in the default settings, and it was tested by TÜV Rheinland and certified as it met the requirements of TÜV 

Rheinland “Low Blue Light Content” standards.

Summary of Contents for S24C33 Series

Page 1: ...parts or entirety without the authorization of Samsung is prohibited Trademarks other than that of Samsung are owned by their respective owners An administration fee may be charged in the following s...

Page 2: ...tions VESA 12 Control Panel 13 Direct Key Guide 14 2 Menu Picture 20 25 OnScreen Display 28 System Support Installing the Software Easy Setting Box 29 Restrictions and Problems with the Installation S...

Page 3: ...ct damage caused by customer s fault 36 Others 36 FreeSync 37 Troubleshooting Guide Requirements Before Contacting Samsung CustomerService Centre 30 Product diagnosis Screen issue 30 Checking the Reso...

Page 4: ...o protective earth ground Caution Consult instructions for use This symbol instructs the user to consult the user manual for further safety related information Electricity and Safety Warning Do not us...

Page 5: ...tchen or near the kitchen stove Do not install the product in poorly ventilated spaces such as a bookcase or closet Install the product at least 10cm away from the wall to allow ventilation Caution Do...

Page 6: ...hunderstorm power off the product and remove the power cable Do not drop objects on the product or apply impact Do not move the product by pulling the power cord or any cable If a gas leakage is found...

Page 7: ...the power cord from the power socket if you do not plan on using the product for an extended period of time vacation etc Dust accumulation combined with heat can cause a fire electric shock or electri...

Page 8: ...front of the screen Adjust the angle so light does not reflect on the screen Keep your forearms perpendicular to your upper arms and level with the back of your hands Keep your elbows at about a right...

Page 9: ...wn in the figure Check that the stand neck is firmly connected Tightly fasten the connecting screw at the bottom of the stand base Fasten the large screw in the middle for assembly 3 3 4 4 Push the as...

Page 10: ...by the stand Do not press down on the product There is a risk of damaging the product Checking the space around the product Make sure to have enough space forventilation when placing the product An in...

Page 11: ...shape and locking method depend on the manufacturer Refer to the manuals provided with your anti theft locking device for details To lock an anti theft locking device 1 Fix the cable of your anti thef...

Page 12: ...he wall mount specifications Do not fasten the screws too firmly This may damage the product or cause the product to fall leading to personal injury Samsung is not liable for these kinds of accidents...

Page 13: ...when the screen is turned on Source Changes the input source A message will appear on the top left corner of the screen if the input source has been changed Menu Displays the main on screen menu To e...

Page 14: ...Function Key Guide On the Direct Key Guide screen the following menu options appear when the product screen is switched on orthe input source is changed The Direct Key Guide screen shows if Eye SaverM...

Page 15: ...bles from both the product and the external device to prevent damage to the product due to a short circuit or over current 3 After all signal cables have been properly connected connect the power cabl...

Page 16: ...from what is shown Specifications are subject to change without notice to improve quality Refer to the actual product Port Description SERVICE Connect to a USB device Used to update the software Conne...

Page 17: ...MI cable connections If you use a unauthorized HDMI cable the image quality may be degrade Connection Using an DP Cable It is recommended to use the DP cable provided as an accessory If not provided b...

Page 18: ...1 Connect the power cable to the AC DC adapter Then connect the AC DC adapter to the DC14V port on the back of the product Rated power consumption for adapters differs depending on the model Use an ad...

Page 19: ...ect a language on information message and change the resolution on your PC to the optimum setting If the optimum resolution is not selected the message will appear up to three times for a specified ti...

Page 20: ...e for the environment where the product will be used This menu is not available when Eco Saving Plus is enabled This menu is not available when Game Mode is enabled This menu is not available when Eye...

Page 21: ...ording to your preferences Brightness You can adjust the general brightness of the picture Range 0 100 A highervalue will make the picture appear brighter This menu is not available when Eco Saving Pl...

Page 22: ...oduct via HDMI image quality degradation contrast colour degradation black level etc may occur depending on the connected source device In such case Black Level can be used to adjust the image quality...

Page 23: ...ppearmorevivid and natural Motion Blur Reduction MBR reduces blur by controlling LED behavior Only works at 100Hz Use Standard modewhen not playing a video orgame Change the picture size This option i...

Page 24: ...H Position Move the menu position to the left or right V Position Move the menu position up or down Language Set the menu language A change to the language setting will only be applied to the onscree...

Page 25: ...current used by the monitor panel Off Deactivate the Eco Saving Plus function Auto The power consumption will automatically be reduced by about10 over the current setting The reduction of power consu...

Page 26: ...If you do not want the timer to activate go to System Off TimerPlus and set Off Timer to Off Eco Timer Eco Timer Turn on Eco Timer mode Eco Off After The Eco Timer can be set between 10 and180 minutes...

Page 27: ...the response rate of a button when the button is pressed Acceleration 1 sec or 2 sec can be selected If No Repeat is selected a command responds only once when a button is pressed PowerLED On Configur...

Page 28: ...orming update make sure that only one BIN file bin is saved in the root directory If the No USB devices detected Please check and try again message is displayed this is probably due to the following r...

Page 29: ...ications If the shortcut icon does not appear press the F5 key Restrictions and Problems with the Installation The Easy Setting Box installation may be affected by the Graphics Card Motherboard and th...

Page 30: ...following Caution When the product makes popping cracking sound The sound may be caused by contraction or expansion from temperature change of external components or internal circuit of the product Th...

Page 31: ...creen appears unstable and shaky There are shadows orghost images left on the screen Check that the resolution and frequency for the PC are within the range of resolution and frequency compatible with...

Page 32: ...n refresh rate under Monitorsettings How can I change the resolution Windows 7 Go to Control Panel Appearance and Personalization Display Screen Resolution Adjust Resolution Windows 8 Windows 8 1 Go t...

Page 33: ...an find the registration number on the rating label of your product T rkiye only To access the energy labelling information of the model 1 Go to https www samsung com global ecodesign_energy 2 Get the...

Page 34: ...ugh the power LED turns on In such a case change the settings according to the following table by referring to the graphics card user manual Horizontal Frequency kHz Vertical Frequency Hz Pixel Clock...

Page 35: ...resolution other than the specified resolution may degrade the picture quality To avoid this it is recommended that you select the optimum resolution specified foryour product Some resolutions listed...

Page 36: ...gramme If customer requests software installation and setup for the product If a service technician removes cleans dusts or foreign materials inside of the product If customer requests an installation...

Page 37: ...response rate during the game may fluctuate depending on the resolution A higher resolution generally decreases the response rate The sound quality of the monitor may be degraded If you encounter any...

Reviews: