background image

30

Connecting and Using a Source Device

2

2 Connecting and Using a Source Device

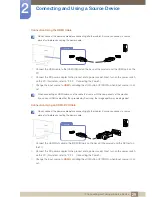
Connection Using an DP Cable


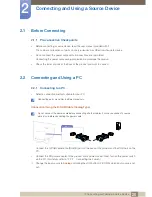
Do not connect the power cable before connecting all other cables. Ensure you connect a source 

device first before connecting the power cable.

A DP cable shorter under 1.5m in length is recommended. Using a cable longer than 1.5m can 

affect the picture quality.


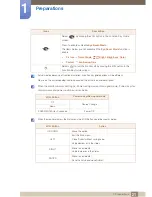
1

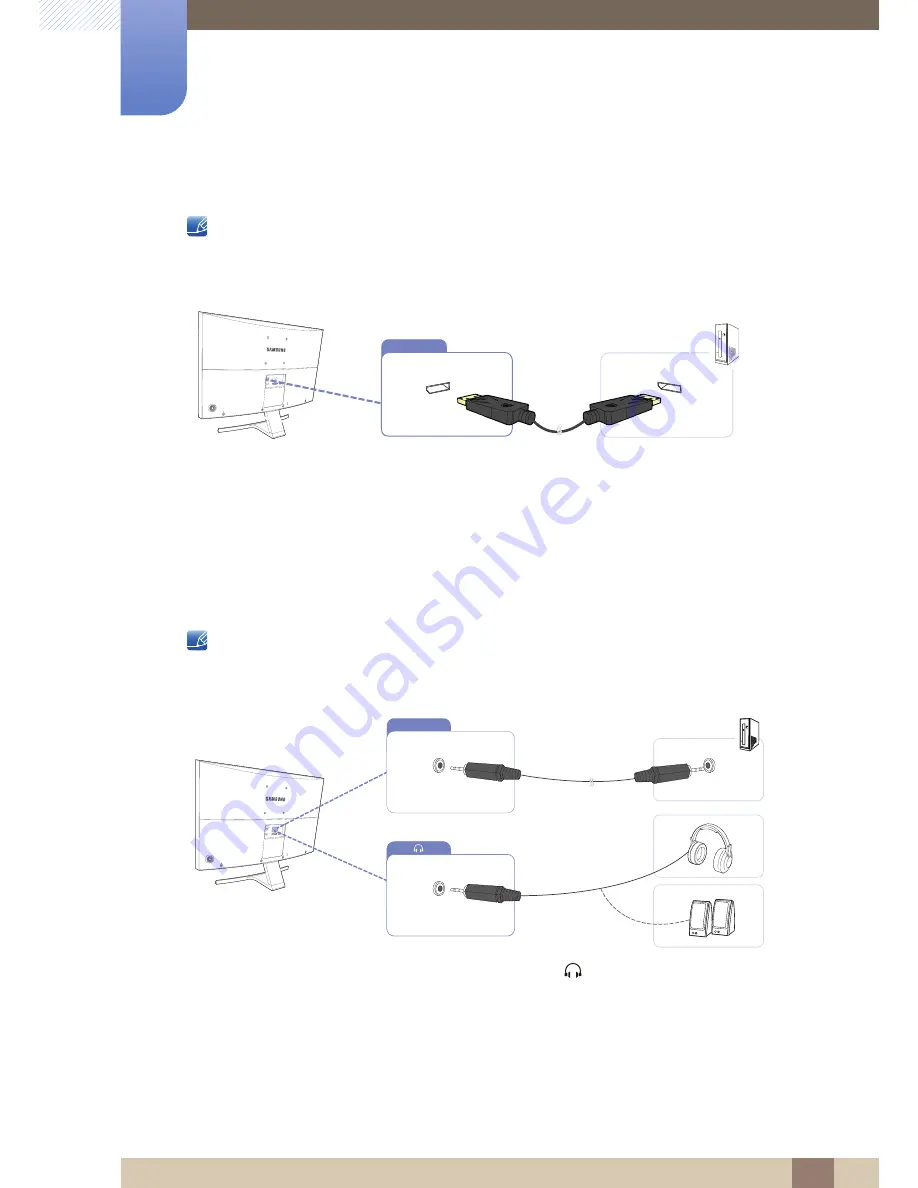
Connect the DP cable to the [DP IN] port on the back of the product and the DP port on the PC.

2

Connect the DC power adapter to the product and a power socket. Next, turn on the power switch 

on the PC. (For details, refer to "2.2.2

 Connecting the Power".)

3

Change the input source to 

DisplayPort

 controlling the JOG button UP/DOWN, when input source 

is not set.

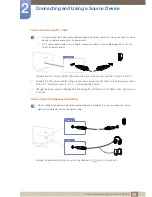
Connecting to Headphones or Speakers


Do not connect the power cable before connecting all other cables. Ensure you connect a source 

device first before connecting the power cable.


1

Connect an audio output device such as headphones to [

] port on the product.

DP IN

AUDIO IN

Summary of Contents for S27E591C

Page 1: ...User manual S27E591C The color and the appearance may differ depending on the product and the specifications are subject to change without prior notice to improve the performance BN46 00473A 03...

Page 2: ...o use the product PREPARATIONS 18 Checking the Contents 18 Checking the Components 19 Parts 19 Control Panel 20 Function Key Guide 22 Reverse Side 23 Installation 23 Attaching the Stand 24 Removing th...

Page 3: ...nfiguring Blue 43 Configuring the Color Tone Settings 44 Configuring Gamma 45 SAMSUNG MAGIC Upscale 45 Configuring SAMSUNG MAGIC Upscale 46 HDMI Black Level 46 Configuring the HDMI Black Level Setting...

Page 4: ...0 Configuring Sound Mode 61 Configuring Select Sound 65 Eco Saving Plus 65 Configuring Eco Saving Plus 66 Off Timer 66 Configuring Off Timer 67 Configuring Turn Off After 68 PC AV Mode 68 Configuring...

Page 5: ...ore Contacting Samsung Customer Service Center 78 Testing the Product 78 Checking the Resolution and Frequency 78 Check the following 81 Q A SPECIFICATIONS 83 General 85 PowerSaver 86 Standard Signal...

Page 6: ...M and DDC are registered trademarks of the Video Electronics Standards Association Icons used in this manual An administration fee may be charged if either a an engineer is called out at your request...

Page 7: ...by the plug and do not touch the cable with wet hands Otherwise an electric shock may result 3 Wipe the monitor screen using a clean soft and dry cloth Do not apply a cleaning agent that contains alc...

Page 8: ...product Be sure to allow the amount of space as shown below or greater when installing the product The exterior may differ depending on the product Precautions for storage Be sure to contact Samsung...

Page 9: ...high voltage is present inside It is dangerous to make any kind of contact with any internal part of this product This symbol alerts you that important literature concerning operation and maintenance...

Page 10: ...s Otherwise an electric shock may result Insert the power plug all the way in so it is not loose An unstable connection may cause a fire Ensure you connect the power plug to a grounded power socket ty...

Page 11: ...to completely cut the power to the product Power to the product cannot be completely cut off with the power button Hold the plug when disconnecting the power cord from the power socket An electric sho...

Page 12: ...e Otherwise the product lifespan may be reduced or a fire may result Do not install the product within the reach of young children The product may fall and injure children Edible oil such as soybean o...

Page 13: ...Contact Samsung Customer Service Center page 88 for repair To move the product first disconnect all the cables from it including the power cable Otherwise the power cord may be damaged and a fire or...

Page 14: ...result Do not use or keep combustible spray or an inflammable substance near the product An explosion or fire may result Ensure the vents are not blocked by tablecloths or curtains Otherwise a fire m...

Page 15: ...age Use the product at the recommended resolution and frequency Otherwise Your eyesight may deteriorate Do not put DC power adapters together Otherwise a fire may result Remove the plastic bag from th...

Page 16: ...een when the product has been turned on for an extended period of time as it will become hot Store the small accessories used with the product out of reach of children Exercise caution when adjusting...

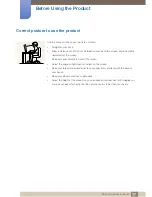
Page 17: ...look slightly downward at the screen Keep your eyes directly in front of the screen Adjust the angle so light does not reflect on the screen Keep your forearms perpendicular to your upper arms and lev...

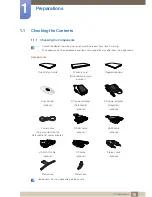
Page 18: ...m the image shown Components Components may vary depending on the country Quick Setup Guide Warranty card Not available in some locations Regulatory guide User manual optional DC power adapter Detacha...

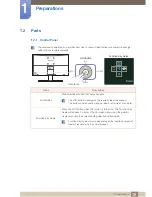
Page 19: ...ated on the rear left side of the product The button can be used to move up down left or right or as Enter Function Key Guide Press the JOG button when the screen is turned on The Function Key Guide w...

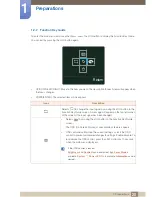
Page 20: ...the Function Key Guide screen A message will appear on the top left corner of the screen if the input signal has been changed Selects by moving the JOG button in the Function Key Guide screen The OSD...

Page 21: ...ion Key Guide screen Press to enable or disable Eye Saver Mode The items below are not available if the Eye Saver Mode function is enable Picture Game Mode Bright Brightness Color System Eco Saving Pl...

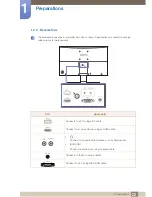
Page 22: ...e subject to change without notice to improve quality Port About ports Connects to a PC using a DP cable Connect to a source device using an HDMI cable Connect to an audio output device such as headph...

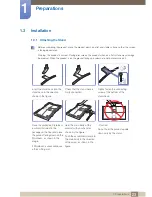
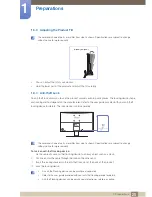
Page 23: ...to the stand base in the direction shown in the figure Check that the stand neck is firmly connected Tightly fasten the connecting screw at the bottom of the stand base Place the protective Styrofoam...

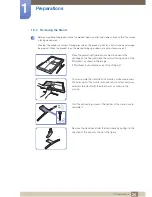
Page 24: ...ace the protective Styrofoam cushion included in the package on the floor and place the product facing down on the Styrofoam as shown in the image If Styrofoam is unavailable use a thick sitting mat T...

Page 25: ...theft locking device for details The lock device is sold separately The color and shape of parts may differ from what is shown Specifications are subject to change without notice to improve quality T...

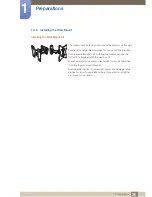
Page 26: ...l mount kit to use with the product For detailed information on installing the wall mount see the instructions provided with the wall mount We recommend you contact a technician for assistance when in...

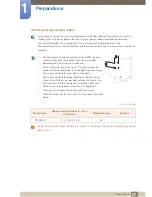
Page 27: ...shock For wall mounts that do not comply with the VESA standard screw specifications the length of the screws may differ depending on the wall mount specifications Do not fasten the screws too firmly...

Page 28: ...2 2 Connecting and Using a PC 2 2 1 Connecting to a PC Select a connection method suitable for your PC Connecting parts may differ in different products Connection Using the D SUB Cable Analog Type D...

Page 29: ...on UP DOWN when input source is not set Connection Using an HDMI DVI Cable Do not connect the power cable before connecting all other cables Ensure you connect a source device first before connecting...

Page 30: ...the DP IN port on the back of the product and the DP port on the PC 2 Connect the DC power adapter to the product and a power socket Next turn on the power switch on the PC For details refer to 2 2 2...

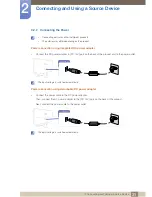
Page 31: ...DC power adapter Connect the DC power adapter to DC 14V port on the back of the product and to the power outlet The input voltage is switched automatically Power connection using detachable DC power a...

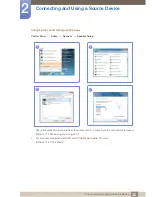
Page 32: ...nd settings on Windows Control Panel Audio Speaker Speaker Setup 1 Check the cable connection between the product and PC and ensure the connectors are locked Refer to 2 2 Connecting and Using a PC 2 F...

Page 33: ...product If the file provided is faulty visit the Samsung homepage http www samsung com and download the file 1 Insert the user manual CD provided with the product into the CD ROM drive 2 Click Windows...

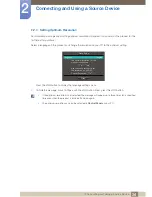
Page 34: ...g 1 Press the JOG button to display the language settings menu 2 To hide the message move to Close with the JOG button Next press the JOG button If the optimum resolution is not selected the message w...

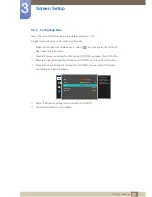
Page 35: ...en the Function Key Guide appears select by moving the JOG button UP Next press the JOG button 2 Move to Picture controlling the JOG button UP DOWN and press the JOG button 3 Move to Bright controllin...

Page 36: ...t this mode when the surroundings are bright This also provides a sharp image Movie Select this mode when the surroundings are dark This will save power and reduce eye fatigue Custom Select this mode...

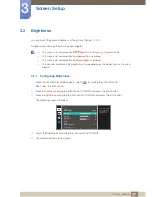
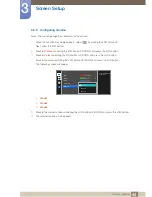
Page 37: ...3 2 1 Configuring Brightness 1 When the Function Key Guide appears select by moving the JOG button UP Next press the JOG button 2 Move to Picture controlling the JOG button UP DOWN and press the JOG...

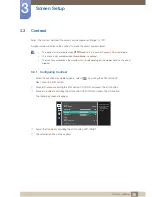
Page 38: ...Contrast 1 When the Function Key Guide appears select by moving the JOG button UP Next press the JOG button 2 Move to Picture controlling the JOG button UP DOWN and press the JOG button 3 Move to Con...

Page 39: ...Configuring Sharpness 1 When the Function Key Guide appears select by moving the JOG button UP Next press the JOG button 2 Move to Picture controlling the JOG button UP DOWN and press the JOG button 3...

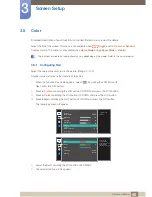
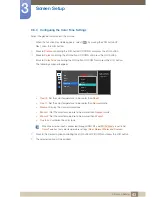
Page 40: ...Key Guide appears select by moving the JOG button UP Next press the JOG button 2 Move to Picture controlling the JOG button UP DOWN and press the JOG button 3 Move to Color controlling the JOG button...

Page 41: ...controlling the JOG button UP DOWN and press the JOG button 3 Move to Color controlling the JOG button UP DOWN and press the JOG button 4 Move to Green controlling the JOG button UP DOWN and press th...

Page 42: ...controlling the JOG button UP DOWN and press the JOG button 3 Move to Color controlling the JOG button UP DOWN and press the JOG button 4 Move to Blue controlling the JOG button UP DOWN and press the...

Page 43: ...ure to be cooler than Cool 1 Cool 1 Set the color temperature to be cooler than Normal mode Normal Display the standard color tone Warm 1 Set the color temperature to be warmer than Normal mode Warm 2...

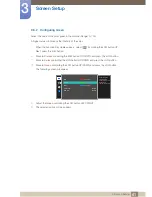
Page 44: ...press the JOG button 3 Move to Color controlling the JOG button UP DOWN and press the JOG button 4 Move to Gamma controlling the JOG button UP DOWN and press the JOG button The following screen will a...

Page 45: ...he Function Key Guide appears select by moving the JOG button UP Next press the JOG button 2 Move to Picture controlling the JOG button UP DOWN and press the JOG button 3 Move to Upscale controlling t...

Page 46: ...P Next press the JOG button 2 Move to Picture controlling the JOG button UP DOWN and press the JOG button 3 Move to HDMI Black Level controlling the JOG button UP DOWN and press the JOG button The fol...

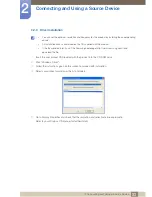
Page 47: ...V Rheinland Low Blue Light Content standards The functions available on the monitor may vary depending on the model Refer to the actual product 3 8 1 Configuring Eye Saver Mode 1 When the Function Key...

Page 48: ...press the JOG button 2 Move to Picture controlling the JOG button UP DOWN and press the JOG button 3 Move to Game Mode controlling the JOG button UP DOWN and press the JOG button The following screen...

Page 49: ...select by moving the JOG button UP Next press the JOG button 2 Move to Picture controlling the JOG button UP DOWN and press the JOG button 3 Move to Response Time controlling the JOG button UP DOWN a...

Page 50: ...ing the JOG button UP DOWN and press the JOG button 3 Move to Picture Size controlling the JOG button UP DOWN and press the JOG button The following screen will appear Auto Display the picture accordi...

Page 51: ...is connected using the HDMI cable A digital output device is connected using the DP cable The input signal is 480p 576p 720p or 1080p and monitor can display normally Not every model can support all...

Page 52: ...OG button 2 Move to Picture controlling the JOG button UP DOWN and press the JOG button 3 Move to Screen Adjustment controlling the JOG button UP DOWN and press the JOG button 4 Move to the H Position...

Page 53: ...ess the JOG button 2 Move to Picture controlling the JOG button UP DOWN and press the JOG button 3 Move to Screen Adjustment controlling the JOG button UP DOWN and press the JOG button 4 Move to Coars...

Page 54: ...t press the JOG button 2 Move to Picture controlling the JOG button UP DOWN and press the JOG button 3 Move to Screen Adjustment controlling the JOG button UP DOWN and press the JOG button 4 Move to F...

Page 55: ...ext press the JOG button 2 Move to OnScreen Display controlling the JOG button UP DOWN and press the JOG button 3 Move to Transparency controlling the JOG button UP DOWN and press the JOG button The f...

Page 56: ...sition controlling the JOG button UP DOWN and press the JOG button 4 Move to the H Position or V Position controlling the JOG button UP DOWN and press the JOG button The following screen will appear 5...

Page 57: ...button UP Next press the JOG button 2 Move to OnScreen Display controlling the JOG button UP DOWN and press the JOG button 3 Move to Language controlling the JOG button UP DOWN and press the JOG butt...

Page 58: ...g the JOG button UP Next press the JOG button 2 Move to OnScreen Display controlling the JOG button UP DOWN and press the JOG button 3 Move to Display Time controlling the JOG button UP DOWN and press...

Page 59: ...2 Move to System controlling the JOG button UP DOWN and press the JOG button 3 Move to Sound controlling the JOG button UP DOWN and press the JOG button 4 Move to Volume controlling the JOG button UP...

Page 60: ...ing the JOG button UP DOWN and press the JOG button 4 Move to Sound Mode controlling the JOG button UP DOWN and press the JOG button The following screen will appear Standard Selects the normal sound...

Page 61: ...JOG button 4 Move to Select Sound controlling the JOG button UP DOWN and press the JOG button The following screen will appear Stereo Enable the sound both from the left and right speakers Left Chann...

Page 62: ...62 Setup and Reset 5 5 Setup and Reset If using a single monitor 1 Go to the select sound mode menu and select Stereo Sound Volume Sound Mode Select Sound Stereo Left Channel Right Channel 50 L R...

Page 63: ...fer to 5 4 PC AV Mode 3 Connect an earphone distributor to the AUDIO OUT port on your PC then use a stereo cable to connect the earphone distributor to the AUDIO IN port on the monitor 4 Go to the sel...

Page 64: ...le Select Right Channel for the monitor on your right To use multiple monitors connect the monitors to your PC via HDMI or D sub cables 2 2 Connecting and Using a PC Sound Volume Sound Mode Select Sou...

Page 65: ...ss the JOG button 3 Move to Eco Saving Plus controlling the JOG button UP DOWN and press the JOG button The following screen will appear Off Deactivate the Eco Saving Plus function Auto The power cons...

Page 66: ...DOWN and press the JOG button 4 Move to Off Timer controlling the JOG button UP DOWN and press the JOG button The following screen will appear Off Deactivate the off timer so that the product does not...

Page 67: ...urn Off After controlling the JOG button LEFT RIGHT 6 The selected option will be applied The off timer can be set within a range of 1 to 23 hours The product will automatically power off after the sp...

Page 68: ...e appears select by moving the JOG button UP Next press the JOG button 2 Move to System controlling the JOG button UP DOWN and press the JOG button 3 Move to PC AV Mode controlling the JOG button UP D...

Page 69: ...ng the JOG button UP DOWN and press the JOG button 3 Move to Source Detection controlling the JOG button UP DOWN and press the JOG button The following screen will appear Auto The input source is auto...

Page 70: ...and press the JOG button 3 Move to Key Repeat Time controlling the JOG button UP DOWN and press the JOG button The following screen will appear Acceleration 1 sec or 2 sec can be selected If No Repeat...

Page 71: ...and press the JOG button 3 Move to Power LED On controlling the JOG button UP DOWN and press the JOG button The following screen will appear Working The power LED is on when the product is turned on...

Page 72: ...button UP Next press the JOG button 2 Move to System controlling the JOG button UP DOWN and press the JOG button 3 Move to Reset All controlling the JOG button UP DOWN and press the JOG button The fol...

Page 73: ...ext press the JOG button 2 Move to Information controlling the JOG button UP DOWN and press the JOG button The following screen will appear The displayed menu items may vary depending on the model Inf...

Page 74: ...ast This option is not available when Bright is in Cinema or Dynamic Contrast mode This menu is not available when Game Mode is enabled Sharpness This option is not available when Bright is in Cinema...

Page 75: ...by moving the JOG button left or right Mute can also be disabled when the monitor turns on or power saving mode activates If the audio quality of a connected input device is poor the Auto Mute functi...

Page 76: ...ructions given on the screen to proceed with installation The software may not work properly if you do not restart the computer after the installation The Easy Setting Box icon may not appear dependin...

Page 77: ...re 7 7 Installing the Software 7 1 2 Removing the Software Click Start select Settings Control Panel and then double click Add or Remove Programs Select Easy Setting Box from the program list and clic...

Page 78: ...agnosis test 1 Power off both the PC and product 2 Disconnect the cables from the product 3 Power on the product 4 If the message Check Signal Cable appears the product is working normally If the scre...

Page 79: ...he product Refer to 2 2 Connecting and Using a PC The screen is not clear The screen is blurry Adjust Coarse page 53 and Fine page 54 Remove any accessories video extension cable etc and try again Set...

Page 80: ...mode Press any key on the keyboard or move the mouse to return to normal operating mode Issues Solutions There is no sound Check the connection of the audio cable or adjust the volume Check the volume...

Page 81: ...r and adjust Refresh rate under Monitor settings Windows Vista Go to Control Panel Appearance and Personalization Personalization Display Settings Advanced Settings Monitor and adjust Refresh rate und...

Page 82: ...s Control Panel Appearance and Personalization Display Adjust Resolution and adjust the resolution How do I set power saving mode Windows XP Set power saving mode in Control Panel Appearance and Theme...

Page 83: ...is device is a Class B digital apparatus Model Name S27E591C Panel Size 27 Inches 68 cm Display area 597 888 mm H x 336 312 mm V 23 539 Inches H x 13 241 Inches V Pixel Pitch 0 3114 mm H x 0 3114 mm V...

Page 84: ...ifications 9 9 Specifications USA only Dispose unwanted electronics through an approved recycler To find the nearest recycling location go to our website www samsung com recyclingdirect or call 877 27...

Page 85: ...a power saving function The displayed power consumption level can vary in different operating conditions or when settings are changed ENERGY STAR is a US registered mark of the United States Environme...

Page 86: ...ed from the PC does not belong to the standard signal modes the screen may be blank even though the power LED turns on In such a case change the settings according to the following table by referring...

Page 87: ...is called a horizontal cycle The reciprocal number of a horizontal cycle is called horizontal frequency Horizontal frequency is measured in kHz Vertical Frequency Repeating the same picture dozens of...

Page 88: ...124 421 Demais cidades e regi es 4004 0000 Capitais e grandes centros http www samsung com br support CHILE 800 SAMSUNG 726 7864 http www samsung com cl support COLOMBIA Bogot 600 12 72 Gratis desde c...

Page 89: ...NG 726 7864 http www samsung com mx support NICARAGUA 001 800 5077267 http www samsung com latin support Spanish http www samsung com latin_en support English PANAMA 800 7267 800 0101 http www samsung...

Page 90: ...ung com support BULGARIA http www samsung com bg support CROATIA 072 726 786 http www samsung com hr support CYPRUS 8009 4000 only from landline toll free http www samsung com gr support CZECH 800 SAM...

Page 91: ...upport LITHUANIA 8 800 77777 http www samsung com lt support LUXEMBURG 261 03 710 http www samsung com support MONTENEGRO 020 405 888 http www samsung com support NETHERLANDS 0900 SAMSUNG 0900 7267864...

Page 92: ...500 55 500 http www samsung com support GEORGIA 0 800 555 555 http www samsung com support KAZAKHSTAN 8 10 800 500 55 500 GSM 7799 VIP care 7700 http www samsung com support KYRGYZSTAN 8 10 800 500 5...

Page 93: ...SIA 1800 88 9999 603 77137477 Overseas contact http www samsung com my support MYANMAR 01 2399888 http www samsung com support NEW ZEALAND 0800 726 786 http www samsung com nz support PHILIPPINES 1 80...

Page 94: ...om iran support JORDAN 0800 22273 06 5777444 http www samsung com Levant support English KUWAIT 183 CALL 183 2255 http www samsung com ae support English http www samsung com ae_ar support Arabic MORO...

Page 95: ...rica_fr support DRC 499999 http www samsung com support GHANA 0800 10077 0302 200077 http www samsung com africa_en support KENYA 0800 545 545 http www samsung com support MOZAMBIQUE 847267864 8272678...

Page 96: ...If customer requests software installation and setup for the product If a service technician removes cleans dusts or foreign materials inside of the product If customer requests an installation additi...

Page 97: ...the environment or human health from uncontrolled waste disposal please separate these items from other types of waste and recycle them responsibly to promote the sustainable reuse of material resourc...

Page 98: ...n image although the refreshing is invisible to the naked eye The number of screen refreshes is called scanning rate and is measured in Hz A scanning rate of 60 Hz means that the screen refreshes 60 t...

Page 99: ...me time E g A resolution of 1920 x 1080 consists of 1920 horizontal pixels horizontal resolution and 1080 vertical lines vertical resolution E g A resolution of 1920 x 1200 consists of 1920 horizontal...

Page 100: ...Saver Mode 47 G Game Mode 48 General 83 H HDMI Black Level 46 I Information 73 Installation 23 K Key Repeat Time 70 L Language 57 O Off Timer 66 P Parts 19 PC AV Mode 68 Picture Size 50 Position 56 Po...

Page 101: ...Index Index 101 Standard Signal Mode Table 86 T Terminology 98 Transparency 55...

Reviews: