background image

Shooting options

  64

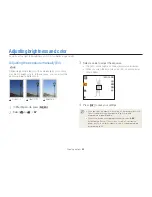
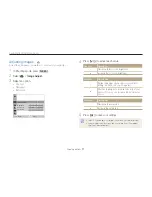
Adjusting brightness and color

Select an option.

Icon

Description

Off

: ACB is off.

On

: ACB is on.

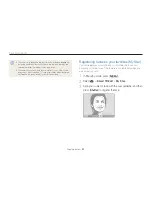
• 

The ACB feature is always on in Smart Auto mode.

• 

The ACB feature is not available when you set Burst options or  
Smart Filter options.

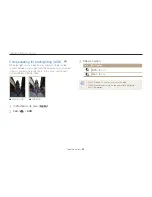
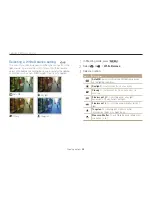
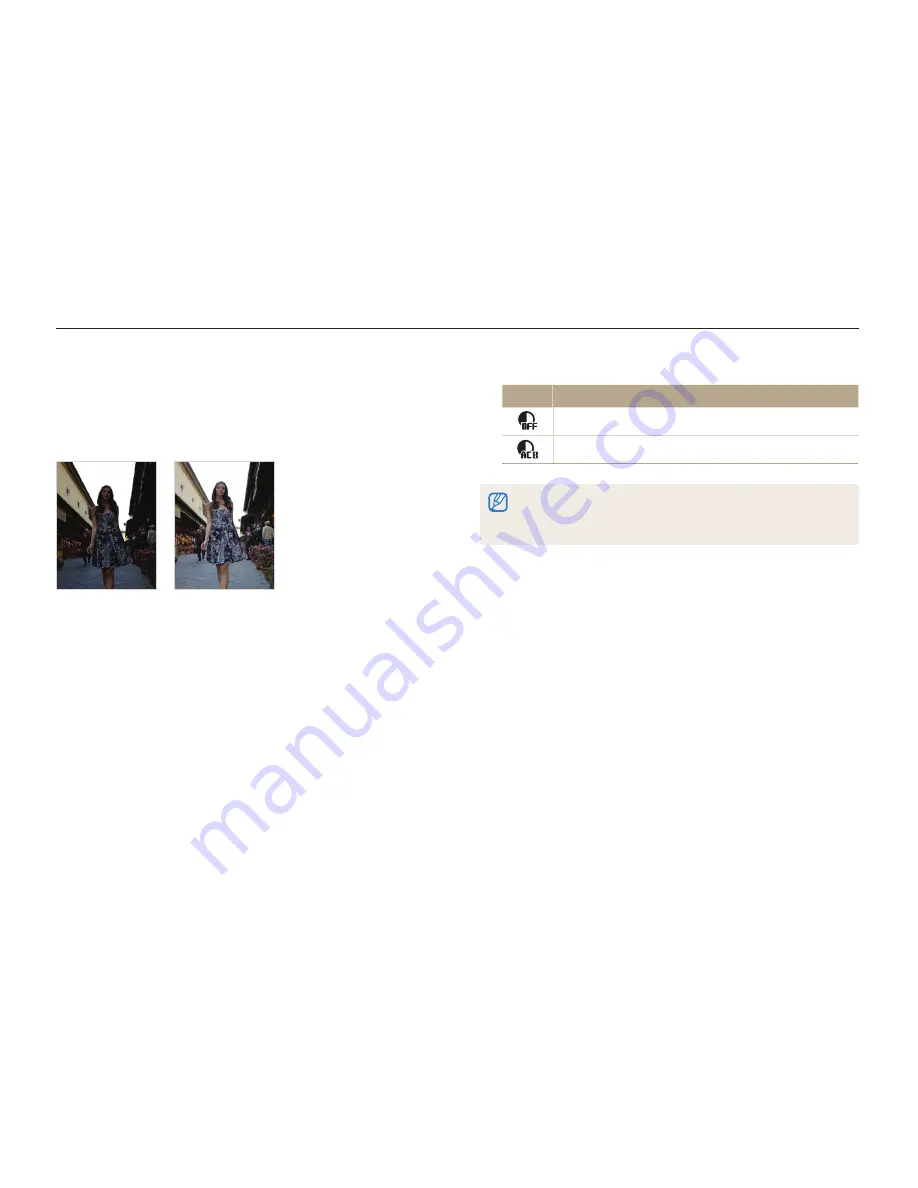
Compensating for backlighting (ACB)

When the light source is behind your subject or there is high 
contrast between your subject and the background, your subject 
is likely to appear dark in the photo. In this case, set the Auto 
Contrast Balance (ACB) option. 

S

 Without ACB

S

 With ACB

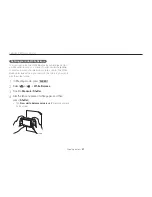
In Shooting mode, press [

m

].

Select 

a


“


ACB

.

    p

Summary of Contents for SAMSUNG ST66

Page 1: ...usage instructions for your camera Please read this manual thoroughly Basic troubleshooting Quick reference Contents Basic functions Extended functions Shooting options Playback Editing Settings Appen...

Page 2: ...ediately disconnect all power sources such as the battery or charger and then contact a Samsung service center Health and safety information Always comply with the following precautions and usage tips...

Page 3: ...used by unapproved batteries chargers cables or accessories Use the battery only for its intended purpose Misusing the battery may cause a re or electric shock Do not touch the ash while it res The as...

Page 4: ...ase Information stored on the card may be damaged or erased Never use a damaged charger battery or memory card This may result in electric shock or camera malfunction or cause a re Check that the came...

Page 5: ...ws and regulations concerning its use You are not allowed to reuse or distribute any part of this manual without prior permission Outline of the User Manual Basic functions 12 Learn about your camera...

Page 6: ...The s mode may not support functions for all scenes For example Available in Program and Movie modes Icons used in this manual Icon Function Additional information Safety warnings and precautions Came...

Page 7: ...ll life Background the objects around the subject Composition the combination of a subject and background Composition Background Subject Exposure Brightness The amount of light that enters your camera...

Page 8: ...on or half press Shutter to ensure the subject is focused p 30 Photos are blurred when shooting at night As the camera tries to let in more light the shutter speed slows This can make it dif cult to h...

Page 9: ...or subjects against bright backgrounds f 64 Metering f 65 AEB to capture 3 photos of the same scene with different exposures f 68 Capturing photos of scenery N mode f 36 s mode Landscape f 39 Applying...

Page 10: ...ng the Movie mode 45 Using the Smart Scene Detection mode 47 Basic functions 12 Unpacking 13 Camera layout 14 Inserting the battery and memory card 17 Charging the battery and turning on your camera 1...

Page 11: ...us 56 Adjusting the focus area 57 Using Face Detection 58 Detecting faces 58 Capturing a self portrait shot 59 Capturing a smile shot 59 Detecting eye blinking 60 Using Smart Face Recognition 60 Regis...

Page 12: ...nsferring les with Intelli studio 91 Transferring les by connecting the camera as a removable disk 93 Disconnecting the camera for Windows XP 94 Transferring les to your Mac computer 95 Printing photo...

Page 13: ...Performing the initial setup 19 Learning icons 21 Selecting options or menus 22 Using MENU 22 Using Fn 24 Setting the display and sound 25 Setting the display type 25 Setting the sound 25 Capturing ph...

Page 14: ...art Guide Optional accessories Camera case A V cable Battery charger Memory card Memory card adapter The illustrations may differ slightly from the items shipped with your product You can purchase opt...

Page 15: ...V cable Camera layout Before you start familiarize yourself with your camera s parts and their functions Battery chamber cover Insert a memory card and battery Tripod mount Speaker Shutter button AF...

Page 16: ...age is out of focus or there is a problem charging the battery Steady When the camera is connected to a computer charging the battery or when the image is in focus Zoom button In Shooting mode Zoom in...

Page 17: ...e d Picture in Picture Capture or select a full sized background photo and then insert a smaller photo into the foreground to create a synthesized photo s Scene Capture a photo with options preset for...

Page 18: ...card gently until it disengages from the camera and then pull it out of the slot Rechargeable battery Battery lock Slide the lock up to release the battery You can use the internal memory for tempora...

Page 19: ...by pressing and holding P until the status lamp blinks the camera does not emit any sounds Charging the battery Before you use the camera for the rst time you must charge the battery Plug the small e...

Page 20: ...below to con gure the camera s basic settings 4 Press F t to select a time zone and then press o To set daylight savings time press D GMT 00 00 2012 01 01 12 00PM Back DST Time Zone London 1 Press t t...

Page 21: ...the language selected 6 Press F t to select an item 7 Press D c to set the date and time and then press o 8 Press D c to select Date Type and then press t or o 9 Press D c to select a date type and t...

Page 22: ...lays on the screen change according to the mode you select or the options you set 1 3 2 Icon Description Photo resolution when Intelli zoom is on Zoom indicator Zoom ratio Current time and date 2 Shoo...

Page 23: ...m again to go back to the previous menu Half press Shutter to return to Shooting mode Using MENU To select options press m and then press D c F t or o 1 In Shooting mode press m 2 Select an option or...

Page 24: ...Exit Back 6 Press F t to select a White Balance option Back Move Daylight 7 Press o to save your settings For example to select a White Balance option in Program mode 1 In Shooting mode press M 2 Sele...

Page 25: ...some options are not available For example to select a White Balance option in Program mode 1 In Shooting mode press M 2 Select p 3 Press f Photo Size Exit Move 4 Press D c to scroll to White Balance...

Page 26: ...camera emits sounds Setting the display type You can select a display type for the Shooting or Playback mode Each type displays different shooting or playback information See the table below Show all...

Page 27: ...eans the subject is in focus A red frame means the subject is out of focus 5 Press Shutter to capture a photo 6 Press P to view the captured photo To delete the photo press f and then select Yes 7 Pre...

Page 28: ...om in up to 25 times Optical range Digital range Zoom indicator The Digital zoom is not available with the Smart Filter effect or Tracking AF option If you capture a photo with the Digital zoom the ph...

Page 29: ...s not available with the Smart Filter effect or Tracking AF option The Intelli zoom helps you capture a photo with less quality deterioration than the Digital zoom However the photo quality may be low...

Page 30: ...o follow a moving subject you use the Digital zoom there is too much camera shake the shutter speed is slow for example when you capture night scenes the battery is low you capture a close up shot If...

Page 31: ...us frame appears in green Change the composition and half press Shutter again if the focus frame appears in red Reducing camera shake Set the Digital Image Stabilization option to reduce camera shake...

Page 32: ...subject is too bright the subject is shiny or re ective the subject includes horizontal patterns such as blinds the subject is not positioned in the center of the frame Turn on the ash p 52 Use the C...

Page 33: ...sing the Scene mode 39 Using the Magic Frame mode 40 Using the Beauty Shot mode 41 Using the Intelligent Portrait mode 42 Using the Funny Face mode 43 Using the Night mode 44 Using the Movie mode 45 U...

Page 34: ...Blue skies Forested areas Close up photos of colorful subjects Camera is stabilized or on a tripod when shooting in the dark Actively moving subjects Fireworks when using a tripod 4 Half press Shutter...

Page 35: ...t a portrait mode depending on the subject s position or lighting The camera may not select the correct scene depending on the shooting conditions such as camera shake lighting or distance to the subj...

Page 36: ...e shutter speed and aperture value which the camera sets automatically 1 In Shooting mode press M 2 Select p 3 Set the desired options For a list of options refer to Shooting options p 48 4 Align your...

Page 37: ...hen the view nder is aligned with the next scene the camera captures the next photo automatically 6 When you are nished release Shutter When you have captured all the necessary shots the camera combin...

Page 38: ...olor of light is changing Selecting Live Panorama mode will disable the Digital and Optical zoom functions If you select Live Panorama mode while the lens is zoomed in the camera automatically zooms o...

Page 39: ...ured are saved The nal Picture in Picture photos are saved as one combined le and the inserted photos are not saved separately When inserting an image the resolution for the combined le is automatical...

Page 40: ...ress m and then select s You can select any of the scenes listed 4 Align your subject in the frame and then half press Shutter to focus 5 Press Shutter to capture the photo 1 In Shooting mode press M...

Page 41: ...In Magic Frame mode the resolution is automatically set to Using the Magic Frame mode In Magic Frame mode you can apply various frame effects to your photos The shape and the feel of the photos will c...

Page 42: ...5 Select an option For example increase the face tone setting to make skin appear lighter Back Move Level 2 6 Press m 7 Select a Face Retouch 8 Select an option For example increase the face retouch s...

Page 43: ...ct s Intelligent Portrait 3 Align your subject in the frame and then half press Shutter to focus 4 Press Shutter to capture the photo The original photo and 2 cropped photos are showed on the display...

Page 44: ...t a funny effect You can review the face with the effect applied on the display Back Up Nose Move 6 Press m 7 Select a Distortion Level 8 Adjust the distortion level 9 Align your subject in the frame...

Page 45: ...Use a tripod to prevent blurry photos When using the Night mode the focus distance options are not available Using the Night mode In Night mode you can use a slow shutter speed to extend the time the...

Page 46: ...the zoom operating To decrease zoom noise use the Sound Alive function See Steps 7 and 8 below 7 Select v Sound Alive 8 Select a Sound Alive option Icon Description Sound Alive On Turn on the Sound A...

Page 47: ...options p 48 10 Press Shutter to start recording 11 Press Shutter again to stop recording Pause recording The camera allows you to temporarily pause a video while recording With this function you can...

Page 48: ...selects a scene An appropriate scene icon will appear at the top left of the screen Icon Description Landscapes Sunsets Blue skies Forested areas 6 Press Shutter to start recording 7 Press Shutter ag...

Page 49: ...ection 58 Detecting faces 58 Capturing a self portrait shot 59 Capturing a smile shot 59 Detecting eye blinking 60 Using Smart Face Recognition 60 Registering faces as your favorites My Star 61 Adjust...

Page 50: ...TV 640 X 480 Files to play back on an analog TV 320 X 240 Post on a web page v Selecting a resolution As you increase the resolution your photo or video will include more pixels so it can be printed o...

Page 51: ...format 1 In Shooting mode press m 2 Select a Quality 3 Select an option Icon Description Super Fine Capture photos in super high quality Fine Capture photos in high quality Normal Capture photos in no...

Page 52: ...Face Detection options or the Focus Area options you selected the timer function may not be available Timer options are not available if you set Burst options 1 In Shooting mode press t Off 2 Select a...

Page 53: ...ing mode press F Auto 2 Select an option Icon Description Off The ash will not re The camera will display the shake warning when you are shooting in low light S p d s Preventing red eye If the ash res...

Page 54: ...ubjects are within the recommended distance from the ash p 118 If light from the ash is re ected or there is a substantial amount of dust in the air tiny spots may appear in your photo Icon Descriptio...

Page 55: ...The higher ISO sensitivity you select the more sensitive to light your camera becomes Use a higher ISO sensitivity to capture better photos and reduce camera shake when not using the ash 1 In Shootin...

Page 56: ...apture sharp photos select the appropriate focus option according to your distance from the subject 1 In Shooting mode press c Normal AF S p s v Using macro Use macro to capture close up photos of sub...

Page 57: ...ion Icon Description Normal AF Focus on a subject farther than 80 cm away 250 cm when you use the zoom Macro Focus on a subject that is 5 80 cm from the camera 100 250 cm when you use the zoom Auto Ma...

Page 58: ...do not select a focus area the focus frame will appear in the center of the screen Tracking a subject may fail when the subject is too small the subject moves excessively the subject is backlit or yo...

Page 59: ...ar from the camera it is too bright or too dark the subject is not facing the camera the subject is wearing sunglasses or a mask the subject s facial expression changes drastically the subject is back...

Page 60: ...quick beep press Shutter When faces are located in the center the camera beeps rapidly If you turn Volume off in the sound settings the camera will not emit a beep p 99 Capturing a smile shot The cam...

Page 61: ...ce Recognition feature is available only when you use a memory card 1 In Shooting mode press m 2 Select a Face Detection Smart Face Recognition Faces that you have registered as favorites To register...

Page 62: ...Star 3 Align your subject s face with the oval guideline and then press Shutter to register the face Back Set The camera may recognize and register faces incorrectly depending on lighting conditions...

Page 63: ...for best results one each from the front left right above and below When capturing photos from the left right above and below instruct the subject not to turn his or her face more than 30 degrees You...

Page 64: ...tored automatically You may need to change the exposure value later to avoid overexposure or underexposure If you cannot decide on an appropriate exposure select AEB Auto Exposure Bracket The camera w...

Page 65: ...ot available when you set Burst options or Smart Filter options Compensating for backlighting ACB When the light source is behind your subject or there is high contrast between your subject and the ba...

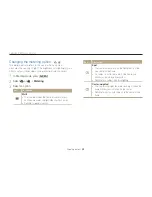
Page 66: ...ire frame with emphasis placed on the center Suitable for photos with subjects in the center of the frame Changing the metering option The metering mode refers to the way in which a camera measures th...

Page 67: ...Tungsten p v 1 In Shooting mode press m 2 Select a or v White Balance 3 Select an option Icon Description Auto WB Automatically set the White Balance based on the lighting conditions Daylight For outd...

Page 68: ...r under the lighting conditions in which you intend to capture a photo The White Balance feature will help you to match the colors in your photo with the actual scene 1 In Shooting mode press m 2 Sele...

Page 69: ...mal underexposed and overexposed Use a tripod to prevent blurry photos You can use the ash timer ACB DIS and Smart Filter options only when you select Single When you select Motion Capture your camera...

Page 70: ...o imitate the visual effect of a sheye lens Defog Make image clearer Classic Apply a black and white effect Retro Apply a sepia tone effect Negative Apply a negative lm effect Depending on the option...

Page 71: ...ply the retro looking colors high contrast and strong vignette effect of Lomo cameras Fish eye Distort close objects to imitate the visual effect of a sheye lens Defog Make image clearer Classic Apply...

Page 72: ...Description Decrease the color and brightness Increase the color and brightness Sharpness Description Soften the edges on your photos suitable for editing the photos on your computer Sharpen the edge...

Page 73: ...t order DPOF 87 Viewing les on a TV 89 Transferring les to your Windows computer 90 Transferring les with Intelli studio 91 Transferring les by connecting the camera as a removable disk 93 Disconnecti...

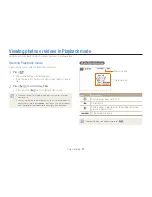
Page 74: ...he screen press D Starting Playback mode View photos or play videos stored in your camera 1 Press P The most recent le will be displayed If the camera is off it will turn on and display the most recen...

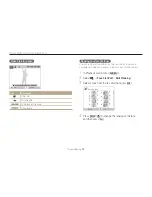
Page 75: ...en you insert a memory card into the camera 1 In Playback mode press m 2 Select u Face List Edit Edit Ranking 3 Select a face from the list and then press o 1 2 3 5 6 7 4 8 Set Back Face List Edit 4 P...

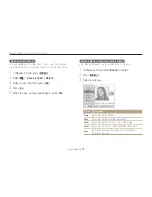
Page 76: ...te View les by the date they were saved Color View les by the dominant color of the image Week View les by the day of the week they were saved Face View les by recognized faces and favorite faces Up t...

Page 77: ...ls 9 or 20 at a time Rotate Zoom to the right to return to the previous view Filter To Description Scroll through les Press D c F t Delete les Press f and then select Yes 4 Press F t to scroll through...

Page 78: ...nt to protect and then press o Press o again to cancel your selection Select Set Protected le icon 4 Press f You cannot delete or rotate a protected le Deleting les Select les to delete in Playback mo...

Page 79: ...a memory card 1 In Playback mode press m 2 Select u Copy to Card 3 When the pop up message appears select Yes Deleting multiple les You can select multiple les and then delete them at once 1 In Playb...

Page 80: ...o will be saved as a new le The original photo is retained in its original form When you view photos that were captured by another camera the zoom ratio may differ Viewing photos Enlarge part of a pho...

Page 81: ...set the Effect option to Off to set the interval Viewing panoramic photos View photos captured in Live Panorama mode 1 In Playback mode press F t to scroll to a desired panoramic photo The entire pan...

Page 82: ...show Press o to pause the slide show Press o again to resume the slide show Press o and then press F t to stop the slide show and return to Playback mode Rotate Zoom to the left or right to adjust the...

Page 83: ...layback mode Capturing an image from video 1 While viewing a video press o at the point where you want to capture an image 2 Press c The resolution of the captured image will be the same as the origin...

Page 84: ...photo 1 In Playback mode select a photo and then press m 2 Select e Rotate 3 Select an option Back Move Right 90 The camera will overwrite the original le Resizing photos Change the size of a photo a...

Page 85: ...ved with consecutive le names Save Back Move The Intelligent Portrait feature will not function if no face is detected more than 2 faces are detected the detected facial area is larger than a certain...

Page 86: ...e Adjust ACB 3 Press o to save your settings Icon Description Vignetting Apply the retro looking colors high contrast and strong vignette effect of Lomo cameras Soft Focus Hide facial imperfections or...

Page 87: ...t e Image Adjust Face Retouch 3 Press o 4 Press F t to adjust the skin tone As the number increases the skin tone appears brighter and smoother 5 Press o to save your settings Adjusting brightness con...

Page 88: ...DPOF compatible printers 1 In Playback mode press m 2 Select u DPOF Standard Select Select All to print all photos 3 Scroll to a photo you want to print rotate Zoom to the left or right to select the...

Page 89: ...t shop that supports DPOF Digital Print Order Format or you can print photos directly through a DPOF compatible printer at home Photos with dimensions that are wider than the paper may be cut off on t...

Page 90: ...ode when you connect it to a TV 8 View photos or play videos using the camera buttons Depending on the TV model you may see some digital noise or part of an image may not appear Images may not be cent...

Page 91: ...camera as a removable disk The manufacturer is not responsible for any damage that results from using unquali ed computers such as a computer you assembled yourself Requirements Item Requirements CPU...

Page 92: ...s of data 5 Turn on the camera When the Intelli studio installation pop up appears on the computer screen follow the on screen instructions to complete the installation Once the Intelli studio is inst...

Page 93: ...bar You can update the rmware of your camera by selecting Web Support Upgrade rmware for the connected device from the program toolbar You cannot edit les directly on the camera Transfer les to a fold...

Page 94: ...r any loss of data No Description 1 Open menus 2 Display les in the selected folder 3 Switch to the Photo edit mode 4 Switch to the Video edit mode 5 Switch to the Sharing mode to send les by email or...

Page 95: ...e bottom right of your computer screen 3 Click the pop up message 4 Click the message box that indicates the camera can be removed safely 5 Remove the USB cable The camera may not disconnect safely wh...

Page 96: ...the camera The computer recognizes the camera automatically and displays a removable disk icon If you set the USB option to Select Mode select Computer in the pop up window 4 Double click the removabl...

Page 97: ...n a single sheet of paper Type Set the type of paper Quality Set the print quality Date Print Set to print the date File Name Set to print the le name Reset Reset settings to their default values Some...

Page 98: ...Settings menu 98 Accessing the settings menu 98 Sound 99 Display 99 Settings 100 Settings Refer to options to con gure your camera s settings...

Page 99: ...d AF Sound Off Low Medium High 5 Press m to return to the previous screen Accessing the settings menu 1 In Shooting or Playback mode press m 2 Select a menu Exit Change Shooting Sound Display Settings...

Page 100: ...ult Item Description Function Description Display a brief description of an option or a menu Off On Start Image Set a start image to display when the camera turns on Off Display no start image Logo Di...

Page 101: ...save power Settings Default Item Description Format Format the internal memory and the memory card Formatting will delete all les including protected les Yes No Errors can occur if you use a memory c...

Page 102: ...le names according to the Design rule for Camera File system DCF standard If you intentionally change le names the camera may not play back the les Default Item Description Imprint Set whether or not...

Page 103: ...Set a light to automatically turn on in dark places to help you focus Off On USB Select the mode to use when you connect the camera to a computer or printer with a USB cable Computer Connect your came...

Page 104: ...105 Using or storing the camera 106 About memory cards 107 About the battery 110 Before contacting a service center 114 Camera speci cations 117 Glossary 121 FCC notice 126 Index 127 Appendixes Get i...

Page 105: ...lete unnecessary les or insert a new memory card No Image File Capture photos or insert a memory card that contains some photos Error message Suggested remedies Card Error Turn off your camera and the...

Page 106: ...lutions can damage the camera or cause it to malfunction Do not press on the lens cover or use a blower brush on the lens cover Cleaning your camera Camera lens and display Use a blower brush to remov...

Page 107: ...e to your camera Do not paint your camera as paint can clog moving parts and prevent proper operation Turn off the camera when not using it Using or storing the camera Inappropriate places to use or s...

Page 108: ...a from scratches by keeping it away from sand sharp implements or loose change Do not use the camera if the screen is cracked or broken Broken glass or acrylic could cause injury to your hands and fac...

Page 109: ...e Normal 106 210 308 122 238 349 142 280 412 168 328 477 325 617 873 531 970 1 358 873 1 455 1 909 1 608 2 546 3 055 Videos Size 30 FPS 15 FPS Approx 4 03 Approx 7 31 Approx 9 20 Approx 18 04 Approx 3...

Page 110: ...memory cards Avoid exposing memory cards to very cold or very hot temperatures below 0 C 32 F or above 40 C 104 F Extreme temperatures can cause memory cards to malfunction Insert a memory card in th...

Page 111: ...between each step Repeat the process for 5 minutes and then turn off the camera for 1 minute 4 Repeat steps 1 to 3 Videos Approximately 110 min Record videos at resolution and 30 FPS The gures above...

Page 112: ...0 minutes before turning on the camera If you connect the camera to an external power source when the battery is depleted using high energy consuming functions will cause the camera to turn off To use...

Page 113: ...After charging is nished disconnect the cable from your camera Do not bend or place heavy objects on the AC cable Doing so may damage the cable Notes about charging with a computer connected Use only...

Page 114: ...a prolonged period When the camera is switched on do not leave it in any con ned space for a prolonged period Do not allow battery terminals to come in contact with metallic objects such as necklaces...

Page 115: ...the battery and insert it again The camera heats up While you use the camera it may heat up This is normal and should not affect your camera s lifespan or performance The ash does not work The ash op...

Page 116: ...using memory cards for more detail p 109 Cannot play back les If you change the name of a le your camera may not play the le the name of the le should meet the DCF standard If you encounter this situ...

Page 117: ...ssion may be interrupted by static electricity Disconnect the USB cable and connect it again Your computer cannot play videos Videos may not play on some video player programs To play video les captur...

Page 118: ...Exposure Control Program AE Metering Multi Spot Center weighted Face Detection Compensation 2EV 1 3 EV Step ISO equivalent Auto ISO 80 ISO 100 ISO 200 ISO 400 ISO 800 ISO 1600 ISO 3200 Image sensor Ty...

Page 119: ...nt_H Fluorescent_L Tungsten Measure Shutter Date Imprinting Off Date Date Time Shooting Photos Modes Smart Auto Portrait Night Portrait Backlight Portrait Night Backlight Landscape White Natural Green...

Page 120: ...a Internal memory Approximately 70 MB External memory Optional microSD card 1 2 GB guaranteed microSDHC card up to 8 GB guaranteed Internal memory capacity may not match these speci cations File forma...

Page 121: ...V Power source Rechargeable battery Lithium ion battery BP70A 700 mAh Connector type Micro USB 5 pin The power source may differ depending on your region Dimensions W X H X D 90 9 X 53 9 X 16 9 mm wit...

Page 122: ...on Digital zoom A feature that arti cially increases the amount of zoom available with a zoom lens Optical zoom When using the Digital zoom the image quality will deteriorate as the magni cation incre...

Page 123: ...w light However images with high sensitivity are more susceptible to noise DPOF Digital Print Order Format A format for writing printing information such as selected images and number of prints on a m...

Page 124: ...ges contain more pixels and typically show more detail than low resolution images JPEG Joint Photographic Experts Group A lossy method of compression for digital images JPEG images are compressed to r...

Page 125: ...let light in and the photo becomes darker and more easily freezes subjects in motion Vignetting A reduction of an image s brightness or saturation at the periphery outer edges compared to the center o...

Page 126: ...t be mixed with other commercial wastes for disposal PlanetFirst represents Samsung Electronics commitment to sustainable development and social responsibility through eco driven business and manageme...

Page 127: ...ne or more of the following measures Reorientate or relocate the receiving antenna Increase the distance between the equipment and receiver Connect the equipment into an outlet on a circuit different...

Page 128: ...xposure Bracket AEB 68 Continuous 68 Motion Capture 68 C Camera maintenance 105 Camera speci cations 117 Capturing an image from video 82 Charging 18 Cleaning Camera body 105 Display 105 Lens 105 Conn...

Page 129: ...86 Shooting mode 71 Red eye Fix 86 Saturation Playback mode 86 Shooting mode 71 Sharpness 71 Image Quality 50 Imprint 101 Intelligent Portrait mode Playback mode 84 Shooting mode 42 Intelli studio 92...

Page 130: ...rait 59 Smart Face Recognition 60 Smile Shot 59 Shutter button 14 Slide Show 80 Smart Album 75 Smart Auto mode 33 Smart Face Recognition 60 Smart Filter Playback mode 84 Shooting mode 69 R Red eye Pla...

Page 131: ...port 14 V Video Playback mode 81 Shooting mode 45 Video out 102 Viewing les Panoramic photos 80 Slide Show 80 Smart Album 75 Thumbnails 76 TV 89 W White Balance 66 Z Zoom Using the zoom 27 Zoom butto...

Page 132: ...Please refer to the warranty that came with your product or visit our website www samsung com for after sales service or inquiries...

Reviews: