background image

DAY/NIGHT COLOR CAMERA

SCC-B2303(P)/B2003P

SCC-B2307P/B2007P

User’s Manual

E

D

F

Es

I

00424A 

SCC-B2307P-eng 


4/7/05 

9:11 

PM 


˘

` 1

All manuals and user guides at all-guides.com

all-guides.com

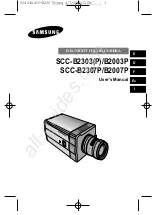
Summary of Contents for SCC-B2303

Page 1: ...DAY NIGHT COLOR CAMERA SCC B2303 P B2003P SCC B2307P B2007P User s Manual E D F Es I 00424ASCC B2307P eng 4 7 059 11PM 1 All manuals and user guides at all guides com a l l g u i d e s c o m ...

Page 2: ... any interference that may cause undesired operation CAUTION Danger of explosion if battery is incorrectly replaced Replace only with the same or equivalent type recommended by the manufacturer Dispose of used batteries according to the manufacturer s instructions This symbol indicates high voltage is present inside It is dangerous to make any kind of contact with any inside part of this product T...

Page 3: ...he obsolete outlet 10 Protect the power cord from being from being walked on or pinched particularly at plugs convenience receptacles and the point where they exit from the apparatus 11 Only use attachments accessories specified by the manufacturer 12 Use only with cart stand tripod bracket or table specified by the manufacturer or sold with the apparatus When a used caution when moving the cart a...

Page 4: ...hutter Lens Connector 14 Fixing Lens and Adjusting Lens Selection Switch 15 Adjusting Back Focus 16 Connecting Cables 18 Chapter 5 Camera Set Up 20 Appendix Product Specification 39 NOTE Avoid aiming the camera directly towards extremely bright objects such as the sun as this may damage the CCD image sensor 00424ASCC B2307P eng 4 7 059 11PM 4 All manuals and user guides at all guides com ...

Page 5: ...re prominently The DAY NIGHT Camera is mostly used in dark places like basement parking lots with a comparatively low illumination In daytime it provides a color screen of high density with a horizontal resolution of 480 and at night it utilizes the DAY NIGHT function as well as the Sense Up function to identify objects In same cases you may use this camera in relation to the infrared ray emission...

Page 6: ...stment Function In case the object has a bright illumination or sunlight behind it this camera adjusts the image shaded by the back light for clear photographs Digital Power Supply Synchronization Method The Full Digital Method Line Lock is realized in this camera which adjusts the vertical camera synchronization directly to improve controllability and reliability of the camera Resolution It reali...

Page 7: ...d be cleaned softly with a lens tissue or ethanol painted cotton cloth Auto Iris Lens Connector This connector provides the automatic shutter lens with power supply control signal video signal or DC signal necessary for the control of the lens shutter Automatic Shutter Lens Control Cable ALC Lens Selection Switch Auto Iris Lens Connector Mount Adapter Fixing Groove Back Focus Control Bar Camera Le...

Page 8: ...ing Switch This switch sets the Auto Iris lens type for use DC When you attach an Auto Iris lens requiring the DC control signal please put this switch in the DC position VIDEO When you attach an Auto Iris lens requiring the video control signal please put this switch in the VIDEO position Rear View 00424ASCC B2307P eng 4 7 059 11PM 8 All manuals and user guides at all guides com ...

Page 9: ...video input terminal is connected with this terminal through which the camera video signal comes out Remote Input Terminal RS 232 This terminal is used for camera control at the production plant 1 2 3 4 1 TXD 2 RXD 3 5V 4 GND 00424ASCC B2307P eng 4 7 059 11PM 9 All manuals and user guides at all guides com ...

Page 10: ...T Connect an external sensor to the DAY NIGHT terminal as shown in then connect any external device such as a buzzer or lamp to the ALARM terminal as shown in The ALARM output terminal is an open collector with the following capacity DC 16V and 100mA OFF Open contact ON Below 100mA The DAY NIGHT input terminal has the input of DC 5V pull up and over 0 2mA OFF Open contact ON Closed contact 00424AS...

Page 11: ...vel ENTER key It is used to enter the Setup menu Press it about 2 seconds In the setup menu mode UP DOWN key These keys move up or down the cursor LEFT RIGHT key These keys move the cursor to the left or right or identify the values sequentially which can be assigned in each setup menu ENTER key It is used to enter a sub menu of a setup menu by clicking the setup menu or to set the current value P...

Page 12: ...Then it describes how to install the camera and connect the cable in actual circumstances Be sure to check if the following items are included in the package Before Installation Checking the contents of the package Camera Camera Holder Mount C Mount Adapter Auto Iris Lens Connector User s Manual 00424ASCC B2307P eng 4 7 059 11PM 12 All manuals and user guides at all guides com ...

Page 13: ... to avoid any damage Do not put or operate the camera in rain or wet places Do not scrub the camera body with rough sandpaper when it is stained Please use a dry cloth at all times Put the camera in a cool area free from direct light Otherwise the camera may be damaged What should be done during installation and use 00424ASCC B2307P eng 4 7 059 11PM 13 All manuals and user guides at all guides com...

Page 14: ...ry as follows Connect each uncovered shutter control cable wire to the Auto Iris lens connector as follows Pin No DC Control Type VIDEO Control Type 1 Damp Power 12V 2 Damp N A 3 Drive VIDEO Signal 4 Drive GROUND 00424ASCC B2307P eng 4 7 059 11PM 14 All manuals and user guides at all guides com ...

Page 15: ...clockwise until it is fixed as shown as follows In case of C lenses Turn the C mount adapter clockwise to fix it Then turn the C lens clockwise until it is fixed as follows CS lens C lens 00424ASCC B2307P eng 4 7 059 12PM 15 All manuals and user guides at all guides com ...

Page 16: ...elivery but some lenses are out of focus though the number differs in types If it s the case you should make the back focus adjustment as follows First this is the back focus adjustment procedure for fixed focus lenses Lenses without zoom function Image an object with high resolution letticed at more than 10m distance and put the lens focus ring in the infinite position Rotate the BACK FOCUS contr...

Page 17: ...t the lens focus bar until the object is seen best Zoom in the lens as close to WIDE as possible and adjust the BACK FOCUS adjustment bar until the object is seen best Repeat from to above 2 or 3 times until the focus on the ZOOM TELE side is in line with that on the ZOOM WIDE side 00424ASCC B2307P eng 4 7 059 12PM 17 All manuals and user guides at all guides com ...

Page 18: ... 3 Then connect the power adapter Connect a part of the power adapter composed of 2 lines to the Camera Power In terminal with a flat head driver as follows GND marked with a white line Power source may be AC24V or DC12V irrespective of polarity BNC cable Video Out Terminal Video In Terminal of Monitor Rear Surface 00424ASCC B2307P eng 4 7 059 12PM 18 All manuals and user guides at all guides com ...

Page 19: ...E 19 00424ASCC B2307P eng 4 7 059 12PM 19 All manuals and user guides at all guides com ...

Page 20: ...SETUP GAIN AGC COLOR SETUP BURST SETUP BURST LEVEL DURATION SETUP 3200K 5600K USER RED BLUE SETUP PHASE SETUP AREA SETUP SENSITIVITY SETUP BAU DRATE D ZOOM PIP MIRROR POSI NEGA DETAIL MOTION DET IRIS ALC ELC COLOR BW COLOR BW AUTO EXT SHUTTER OFF 1 100 1 10K OFF AUTO X2 X128 OFF FIX X2 X128 AGC OFF LOW HIGH MOTION S SLOW F FAST WHITE BAL ATW AWC MANU SYNC INT LINE SETUP MENU SPECIAL EXIT QUIT SAVE...

Page 21: ...ombination of these up to 20 digits The designated CAMERA ID can be located at any place as desired by using the submenu CAMERA ID press the ENTER key CAMERA ID ON IRIS ALC BLC OFF COLOR BW COLOR SHUTTER AUTO X8 MOTION F FAST WHITE BAL ATW SYNC INT SPECIAL EXIT QUIT CAMERA ID A B C D E F G H I J K L M N O P Q R S T U V W X Y Z 0 1 2 3 4 5 6 7 8 9 SP SP LOCATION RET 00424ASCC B2307P eng 4 7 059 12P...

Page 22: ...ightness level Here you are able to set the brightness level by pressing the LEFT or RIGHT key in the LEVEL menu Level setting is available only by using the DC IRIS lens IRIS press the ENTER key CAMERA ID ON IRIS ALC BLC OFF COLOR BW COLOR SHUTTER AUTO X8 MOTION F FAST WHITE BAL ATW SYNC INT SPECIAL EXIT QUIT ALC DC IRIS 00 I RET 00424ASCC B2307P eng 4 7 059 12PM 22 All manuals and user guides at...

Page 23: ... Speed Shutter Level within a limited range in the event of too intensive radiation from outside while using the Manual Lens If you select the ELC in the IRIS menu and press the ENTER key the following subscreen will appear Here you are able to set the level by pressing the LEFT or RIGHT key press the ENTER key CAMERA ID ON IRIS ELC BLC OFF COLOR BW COLOR SHUTTER AUTO X8 MOTION F FAST WHITE BAL AT...

Page 24: ...key at OFF to set the USER function for a setting of the already set 5 areas including BOTTOM TOP LEFT RIGHT and CENTER or USER for a direct area setting If you select the BOTTOM in the BLC menu and press the ENTER key you will be able to certify the already set BOTTOM area BLC press the ENTER key CAMERA ID OFF IRIS ALC BLC BOTTOM COLOR BW COLOR SHUTTER AUTO X8 MOTION F FAST WHITE BAL ATW SYNC INT...

Page 25: ... the BLC area by yourself When the area is not flashing you can specify the area size by pressing the direction keys LEFT RIGHT UP or DOWN If you press the ENTER key when the area is not flashing the area will start flashing Then you can specify the area size by pressing the direction keys LEFT RIGHT UP or DOWN If you press the ENTER key again you will escape from the USER AREA setting menu SIZE S...

Page 26: ...AL ATW SYNC INT SPECIAL EXIT QUIT COLOR GAIN 0 I AGC COLOR 0 I RET Use the Left Right Key CAMERA ID OFF IRIS ALC BLC OFF COLOR BW COLOR SHUTTER AUTO X8 MOTION F FAST WHITE BAL ATW SYNC INT SPECIAL EXIT QUIT CAMERA ID OFF IRIS ALC BLC OFF COLOR BW BW SHUTTER AUTO X8 MOTION F FAST WHITE BAL ATW SYNC INT SPECIAL EXIT QUIT COLOR This is the IR Filter ON Mode with the normal screen If you press the Ent...

Page 27: ...e BW submenu screen will appear You will be able to send out the BURST signal by turning on or off in this menu press the ENTER key CAMERA ID OFF IRIS ALC BLC OFF COLOR BW BW SHUTTER AUTO X8 MOTION F FAST WHITE BAL SYNC INT SPECIAL EXIT QUIT BW BURST ON RET 00424ASCC B2307P eng 4 7 059 12PM 27 All manuals and user guides at all guides com ...

Page 28: ...rol AUTO BW submenu will appear on the menu screen You will be able to send out the BURST signal by turning on or off in this menu set up the DURATION TIME for conversion or set up the standard brightness level for converting the COLOR mode into the BW mode press the ENTER key CAMERA ID OFF IRIS ALC BLC OFF COLOR BW AUTO SHUTTER AUTO X8 MOTION F FAST WHITE BAL ATW SYNC INT SPECIAL EXIT QUIT AUTO B...

Page 29: ...er key the EXTERNAL BW submenu will appear on the menu screen You will be able to send out the BURST signal by turning on or off in this menu press the ENTER key CAMERA ID OFF IRIS ALC BLC OFF COLOR BW EXT SHUTTER AUTO X8 MOTION F FAST WHITE BAL ATW SYNC INT SPECIAL EXIT QUIT EXTERNAL BW BURST ON RET 00424ASCC B2307P eng 4 7 059 12PM 29 All manuals and user guides at all guides com ...

Page 30: ...which slows the shutter speed to make clearer and brighter the screen images taken in dark illumination If you want to slow the shutter speed automatically depending on the degree of darkness by sensing the intensity of radiation please select the AUTO low speed and if you want to set up the shutter speed irrespective of the screen brightness please set up the menu starting with FIX If you keep pr...

Page 31: ...ject taken in dark illumination Setting up the AGC menu is available only in either High Speed Shutter mode or OFF mode If you press the LEFT or RIGHT key to reach the LOW or HIGH position the AGC function will start activating LOW is used for the lower AGC GAIN whereas HIGH is used for the higher AGC GAIN While the COLOR BW menu is set to AUTO the AGC menu is all and the maximum AGC GAUN stays at...

Page 32: ...y of AGC low to monitor objects with a little movement in the dark The NORM standardizes the intensity of AGC to monitor moving objects in the dark The FAST keeps the intensity of AGC high to monitor fast moving objects in the dark The F FAST maximize the intensity of AGC to monitor very fast moving objects in the dark To activate the MOTION function you should press the DOWN key to move the curso...

Page 33: ...MANU mode in the WHITE BAL menu you will be able to set up the White Balance in consideration of the current illumination manually If you select the MANU item and press the ENTER key the MANU submenu will appear to select the White Balance If you press the LEFT or RIGHT key in the PRESET menu you will be able to select the 3200K 5600K or USER mode 3200K Set the color temperature to 3200 K 5600K Se...

Page 34: ...T key to select the LINE item and press the ENTER key Now you will see the submenu to adjust the PHASE The PHASE ranges from 106H to 106H NTSC 138H to 138H PAL When you use DC power source the SYNC Menu is full and you can not use the SYNC function SYNC press the ENTER key CAMERA ID OFF IRIS ALC BLC OFF COLOR BW COLOR SHUTTER AUTO X8 MOTION F FAST WHITE BAL ATW SYNC LINE SPECIAL EXIT QUIT LINE LOC...

Page 35: ...AIL 0 MOTION DET OFF LANGUAGE ENGLISH RET press the ENTER key SPECIAL BAUD RATE 38400 D ZOOM X2 PIP ON MIRROR OFF POSI NEGA DETAIL 0 I MOTION DET OFF LANGUAGE ENGLISH RET BAUD RATE Sets the communication speed to 4800 9600 19200 or 38400bps for RS 232 communication D ZOOM Sets the magnification of the Digital Zoom to the 5 steps x2 x4 x6 x8 and x10 PIP Picture In Picture function to show a 1 16 sc...

Page 36: ...ct the movement If you select the ON mode and press the ENTER key the MOTION DET submenu screen will appear LANGUAGE You can choose one of the following languages English German French Spanish and Italian Use the Left Right Key SPECIAL BAUD RATE 38400 D ZOOM OFF PIP MIRROR OFF POSI NEGA DETAIL 0 I MOTION DET OFF LANGUAGE ENGLISH RET SPECIAL BAUD RATE 38400 D ZOOM AUS BIB SPIEGEL AUS POSI NEGA DETA...

Page 37: ...hen the MOTION DET function will be applied to the selected area of the product during shipment You can also move the cursor to the SENSITIVITY menu and press the LEFT or RIGHT key to set up the detectability of the selected area movement Use the ENTER key press the ENTER key MOTION DET AREA USER SENSITIVITY L I H RET SIZE SIZE POSITION POSITION POSITION SIZE 00424ASCC B2307P eng 4 7 059 12PM 37 A...

Page 38: ...L ATW SYNC INT SPECIAL EXIT SAVE The EXIT menu is used for the termination of the CAMERA SETUP menu QUIT Ignores any change and returns to the previously saved SETUP menu SAVE Saves all the changes to the menu until now PRESET Ignores any change and returns to the initial value of the CAMERA SETUP menu which was set for the product shipment EXIT 00424ASCC B2307P eng 4 7 059 12PM 38 All manuals and...

Page 39: ...onization Method INT Line Lock Resolution 500 530 TV Lines COLOR BW S N Ratio 52dB AGC OFF Minimum Scene Illumination COLOR 0 3 Lux F1 2 0 002 Lux B W 0 06 Lux F1 2 0 0004 Lux Day Night COLOR BW AUTO EXT Color Temperature ATW AWC MANUAL MODE 3200 K 5600 K R B Gain Adjustment Electronic Shutter Speed ALC OFF 1 10K sec 7 steps ELC Max 1 100K sec Back Light Compensation OFF BOTTOM TOP LEFT RIGHT CENT...

Page 40: ...eft Right Detailed Setting Signal Output Composite Video Out 1 0 Vp p 75 ohms BNC AI Lens VIDEO DC Lens Mount CS C Mount Adaptor Operating Temperature 10 C 50 C Operating Humidity 90 Physical Size 68 W x 55 H x 128 5 D mm Weight SCC B2303 Approx 450g 00424ASCC B2307P eng 4 7 059 12PM 40 All manuals and user guides at all guides com ...

Page 41: ...xel 752 H X 582 V Scanning Method 625 Line 2 1 Interlace Line Frequency Horizontal 15 625 Hz INT 15 625 Hz L L Vertical 50 Hz INT 50 Hz L L Synchronization Method INT Line Lock Resolution 500 530 TV Lines COLOR BW S N Ratio 52dB AGC OFF Minimum Scene Illumination SCC B2303P B2003P COLOR 0 3 Lux F1 2 0 002 Lux B W 0 06 Lux F1 2 0 0004 Lux SCC B2307P B2007P COLOR 0 2 Lux F1 2 0 001 Lux B W 0 03 Lux ...

Page 42: ... 128X Digital Zoom OFF ON X10 PIP Motion Detection OFF ON Area Sensitivity Setting Video Control Posi Nega Mirror LEFT RIGHT Detailed Setting Signal Output Composite Video Out 1 0 Vp p 75 ohms BNC AI Lens VIDEO DC Lens Mount CS C Mount Adaptor Operating Temperature 10 C 50 C Operating Humidity 90 Physical Size 68 W x 55 H x 128 5 D mm Weight SCC B2303P B2307P Approx 450g SCC B2003P B2007P Approx 5...

Page 43: ...D TAG NACHT FARBE KAMERA SCC B2303 P B2003P SCC B2307P B2007P BEDIENUNGSANLEITUNG 00424A SCC B2307P GER 4 7 05 9 44 PM 1 All manuals and user guides at all guides com ...

Page 44: ...ehrere Kameras an einen Adapter an Wird die Kapazität überschritten kann es zu einer anormalen Wärmeentwicklung oder Feuer kommen 4 Stecken Sie das Netzkabel fest in die Steckdose ein Ein loser Anschluss kann Feuer verursachen 5 Bei der Wand oder Deckeninstallation bringen Sie die Kamera sicher und fest an Fällt die Kamera herunter kann es zur Verletzung von Personen kommen 6 Plazieren Sie keine l...

Page 45: ...n 1 Lassen Sie keine Gegenstände auf das Gerät fallen und setzen Sie es keinen starken Stößen aus Setzen Sie die Kamera keinen starken Vibrationen oder magnetischen Störfeldern aus 2 Die Kamera darf nicht an Orten mit hohen Temperaturen über 50 C bzw tiefen Temperaturen unter 10 C oder hoher Luftfeuchtigkeit installiert werden Andernfalls besteht die Gefahr eines Brandes oder Stromschlags 3 Instal...

Page 46: ...bjektiv Anschlußes 14 Einstellung des Objektivs und des Auswahl Schalters 15 Einstellung des Rück brennpunktes 16 Anschluß der Kabel 18 Kapitel 5 Einstellung der Kamera 20 Beilage Produkt Spezifikationen 39 HINWEIS Richten Sie die Kamera niemals direkt auf sehr helle Objekte wie z B die Sonne da dadurch der CCD Bildsensor beschädigt werden kann 00424A SCC B2307P GER 4 7 05 9 44 PM 4 All manuals an...

Page 47: ...e TAG NACHT Kamera ist meistens an der dunklen Stelle wie am Untergeschoß parkplatz benutzt werden Am Tag als Farbmode der hohen Dichte mit einer horizontalen 480 Resolution wird es besorgt und an der Nacht die TAG NACHT Funktion dazu die Sense Up Funktion wird es nutzen den Objekt zu identifizieren Außerdem könen Sie diese Kamera zusätzlich in Bezug auf die Infrarot Emission Geräte benutzen TAG N...

Page 48: ...tellung Funktion Im Fall von einer hellen Beleuchtung oder Sonnenstrahlen hinter dem Gegenstand kann das Bild das wegen der Gegenlicht verdunkelt worden war deutlich aufgenommen werden Digital Stromquelle Synchronisation Methode Mit dem Vollen Digital Methode Linie Schluß Line Lock kann man die vertikale Synchronisation der Kamera direkt struern so die Kontrollfähigkeit und die Zuverläßigkeit der ...

Page 49: ...han benetzten Baumwolltuch sanft reinigen werden Automatischer Verschluß Objektiv Anschluß Dieser Anschluß versorgt das automatische Verschluß Objektiv mit dem Strom versorgung Kontrollsignal Videosignal oder DC Signal nötwendig für die Kontrolle des Objektiv verschlußes Automatische Verschluß Objektive Kontrollkabel ALC Objektiv Auswahlschalter Automatischer Verschluß Objektiv Anschluß Passeparto...

Page 50: ...r Schalter stellt für die Verwendung des Auto Blende blende Verschluß Typs ein DC Wenn Sie ein Auto Blende blende Objektiv gebraucht mit dem DC Kontrollsignal eingestellt haben wählen Sie dieser Schalter zur DC Position VIDEO Wenn Sie ein Auto Blende blende Objektiv mit dem VIDEO Kontrollsignal eingestellt haben wählen Sie dieser Schalter zur VIDEO Position Vista Posteriore 00424A SCC B2307P GER 4...

Page 51: ...ist angeschloßen mit diesem Terminal der durch diesen Terminal das Videosignal der Kamera senden Fernbedienung Input Terminal RS 232 Dieser Terminal ist für die Kamera Kontrolle an der Produktion Fabrik 1 TXD 2 RXD 3 5V 4 GND 1 2 3 4 00424A SCC B2307P GER 4 7 05 9 44 PM 9 All manuals and user guides at all guides com a l l g u i d e s c o m ...

Page 52: ...zum TAG NACHT Terminal anschließen wie Nummer zeigt Die Äußerengeräte wie ein Summer oder eine Lampe zum ALARM Terminal anschließen wie Nummer zeigt Der ALARM Ausgabe Terminal ist ein offene Einnehmer mit dem folgenden Fassungsvermögen DC 16V und 100 mA AUS OFF Offener Kontakt EIN ON Unter 100mA Der TAG NACHT Input Terminal hat ein Input DC 5V Pull up über 0 2mA AUS OFF Offener Kontakt EIN ON Gesc...

Page 53: ... Menus Über 2 Sekunden drücken In der Setup Menu Mode OBEN UNTEN Richtungstaste Diese Tasten werden bei der Bewegung des Sursors nach oben oder unten benutzt LINKS RECHTS Richtungstaste Diese Tasten werden bei der Bewegung des Cursors nach LINKS oder RECHTS benutzt und auch bei der Zuweisung in jedem Setup Menu der Wert Reihenweise zu identifizieren ENTER Taste Diese Taste wird benutzt zu dem Unte...

Page 54: ...en sind Nun können Sie die Kamera installieren und die Kabel anschließen Überprüfen Sie bitte ob die folgende Zubehörteile im Lieferumfang enthalten sind Vor der Installation Überprüfung des Inhalts in der Verpackung Kamera Kamera Stütze Passepartout C Passepartout Adapter Auto Blende Objektiv Anschluß Manuale d utenteBedienungs anleitung 00424A SCC B2307P GER 4 7 05 9 44 PM 12 All manuals and use...

Page 55: ... darauf daß die Kamera an einer regenfreien oder nicht feuchten Lage installiert werden und an der naßen Lage nicht betreiben lassen Nicht schrubben die Kamera mit dem rauhen Sandpapier und beim Reinigen benutzen Sie die Trockentücher Installieren Sie die Kamera an einem kühlen Ort und nicht in direkten Sonnenlicht Vorsichtsmaßnahmen für die Installation und den Gebrauch 00424A SCC B2307P GER 4 7 ...

Page 56: ...eiten Jede Abgezogene Verschluß Kontrollkabel Leitung zu dem automatischen Verschluß Objektiv Anschluß wie folgt verbinden Stecknadel Nr DC Kontrolltyp VIDEO Kontrolltyp 1 Damp Strom 12V 2 Damp N A 3 Drive VIDEO Signal 4 Drive GROUND 00424A SCC B2307P GER 4 7 05 9 44 PM 14 All manuals and user guides at all guides com a l l g u i d e s c o m ...

Page 57: ...is es wie unten befestigt wird C Objektive Fall Der C Passepartout Adapter im Uhrzeigersinn drenen um es zu befestigen Dann drehen der C Objektiv im Uhrzeigersinn bis es wie unten befestigt wird CS Objektive C Objektive 00424A SCC B2307P GER 4 7 05 9 44 PM 15 All manuals and user guides at all guides com ...

Page 58: ...gestellt aber einige Objektive sind aus dem Brennpunkt je nach der Objektivtypen Wenn es so ist müßen Sie der Rück brennpunkt wie folgt einstellen Zuerst es ist das Rück brennpunkt Einstell verfahren für die Fixierten Brennpunkt Objektive Objektive ohne Zoom Funktion Ein Gegenstand mit hocher Resolution Gitterförmige Gegenstand über als 10m Entfernung einbilden und der Objektiv Brennpunktring in d...

Page 59: ...punktring bis der Gegenstand deutlicher sein wird Der Zoom in dem Objektiv zu WIDE als möglich nahe einstellen und dann drehen der RÜCK BRENNPUNKT Einstellstab bis der Gegenstand deutlicher sein wird Nummer bis und für 2 oder 3 male wiederholen bis der Brennpunkt auf der ZOOM TELE Seite mit denem auf der ZOOM WIDE Seite deutlich passen wird 00424A SCC B2307P GER 4 7 05 9 44 PM 17 All manuals and u...

Page 60: ... Sie dann Netzadapter an Verwenden Sie einen Schlitzschraubenzieher um das zweiadrige Ende des Netzadapters an den Netzeingangsanschluß der Kamera wie folgt anzuschließen GND mit einer weißen Linie auf dem Kabel gekennzeichnet Die Stromquelle kann mit AC24V und DC12V ungeachteter Polatität anschließen BNC KABEL VIDEO AUS TERMINAL VIDEO EIN TERMINAL des Monitor hinterteils 00424A SCC B2307P GER 4 7...

Page 61: ...D 19 00424A SCC B2307P GER 4 7 05 9 44 PM 19 All manuals and user guides at all guides com a l l g u i d e s c o m ...

Page 62: ...ICH SETUP 3200K 5600K BENUTZER ROT BLAU SETUP PHASE SETUP BEREICH SETUP SENSITIVITY SETUP BAUD RATE D ZOOM BIB SPIEGEL POSI NEGA DETAIL AKTIVITAET BLENDE ALC ELC FARBE S W FARBE S W AUTO EXT SHUTTER AUS 1 100 1 10K AUS AUTO X2 X128 AUS FEST X2 X128 AGC AUS WENIG HOCH BEWEGUNG S LANGS S SCHN WEISSABGL ATW AWC MANU SYNC INT LINIE SETUP MENU SPEZIAL AUSGANG VERL SICHERN PRESET BLC AUS UNTEL OBEN LINK...

Page 63: ...unerische Zeichen und einige Sonderzeichen verwenden die in KAMERA ID gezeigt werden Der gezeigte KAMERA ID können Sie im Untermenu POSITION an einer bestimmten Stelle auf dem Monitor plazieren KAMERA ID Die Taste ENTER drücken KAMERA ID AUS BLENDE ALC BLC AUS FARBE S W FARBE SHUTTER AUTO X8 BEWEGUNG S SCHN WEISSABGL ATW SYNC INT SPEZIAL AUSGANG VERL KAMERA ID A B C D E F G H I J K L M N O P Q R S...

Page 64: ... einstellung nur bei der Verwendung der DC BLENDE OBJEKTIV Es ist möglich die DC BLENDE Niveau auch bei der Bewegungsmenu nicht nur bei der Aufbaumenumode Wenn Sie die Taste LINKS oder RECHTS für ca 2 Sek drücken kommt das Menu des DC BLENDE Lichtsniveau Aufbaus Beim Speichern mit der Taste LINKS RECHTS von AUSGANG zu SICHERN dann ENTER drücken BLENDE Die Taste ENTER drücken KAMERA ID AUS BLENDE A...

Page 65: ...ENDE der ELC wählen und die Taste ENTER drücken wird das folgende Unterbild erscheinen Sie können die Taste LINKS RECHTS pressen um das Niveau einzustellen Die Taste ENTER drücken KAMERA ID AUS BLENDE ELC BLC AUS FARBE S W FARBE SHUTTER AUTO X8 BEWEGUNG S SCHN WEISSABGL ATW SYNC INT SPEZIAL AUSGANG VERL ELC PEGEL 00 I RUE DC BLENDE 00 I AUSGANG VERL 00424A SCC B2307P GER 4 7 05 9 44 PM 23 All manu...

Page 66: ...t Hilfe der Taste LINKS RECHTS können Sie die 5 bereit eingestellte Bereich UNTERTEIL OBERTEIL LINKS RECHTS MITTE und diedirekt einstellbare BENUTZER Funktion aufbauen Im Menu BLC zB beim UNTERTEIL die Taste ENTER drücken dann können Sie der eingestellte UNTEN Bereich bestätigen BLC Die Taste ENTER drücken KAMERA ID AUS BLENDE ALC BLC UNTEN FARBE S W FARBE SHUTTER AUTO X8 BEWEGUNG S SCHN WEISSABGL...

Page 67: ...chs direkt angeben Wenn der Bereich nicht blinkt die Tasten LINKS RECHTS OBEN oder UNTEN drücken können Sie die Größen des Bereichs angeben Wenn der Bereich nicht blinkt die Taste ENTER drücken dann beginnt der Bereich zu blinken Sie können jetzt mit den Tasten UNTEN LINKS RECHTS OBEN die Position des Bereichs festlegen Durch erneuten Drücken von ENTER verlassen Sie das einstellmenu BENUTZER BEREI...

Page 68: ...EWEGUNG S SCHN WEISSABGL ATW SYNC INT SPEZIAL AUSGANG VERL FARBE GAIN 0 I AGC FARBE 0 I RUE Die Taste LINKS RESCHTS verwenden KAMERA ID AUS BLENDE ALC BLC AUS FARBE S W FARBE SHUTTER AUTO X8 BEWEGUNG S SCHN WEISSABGL ATW SYNC INT SPEZIAL AUSGANG VERL FARBE Es ist die IR Filter EIN ON Mode mit dem normalen Bild Wenn Sie die Taste ENTER drücken können Sie das FARBE VERSTÄRKUNG NIVEAU einstellen und ...

Page 69: ...W Untermenu erscheint werden Sie können einstellen das BRUCH Signal auszusenden drehend auf EIN oder AUS Die Taste ENTER drücken KAMERA ID AUS BLENDE ALC BLC AUS FARBE S W S W SHUTTER AUTO X8 BEWEGUNG S SCHN WEISSABGL SYNC INT SPEZIAL AUSGANG VERL S W FARBTRAGER EIN RUE 00424A SCC B2307P GER 4 7 05 9 44 PM 27 All manuals and user guides at all guides com ...

Page 70: ... Taste ENTER drücken das AUTO SW Unterbild erscheint werden und dieses Bild reguliert das SW NIVEAU Sie können das BRUCH Signal drehend auf EIN oder AUS aussenden die DAUERZEIT für die Umwandlung einstellen oder das Standard Beleuchtungsniveau für die Umwandlung die FARBE Mode in der SW Mode einstellen Die Taste ENTER drücken KAMERA ID AUS BLENDE ALC BLC AUS FARBE S W AUTO SHUTTER AUTO X8 BEWEGUNG...

Page 71: ...AL S W Untermenu auf dem Menubild erscheinen Sie können das BRUCH Signal drehend auf EIN oder AUS in diesem Menu aussenden Die Taste ENTER drücken KAMERA ID AUS BLENDE ALC BLC AUS FARBE S W EXT SHUTTER AUTO X8 BEWEGUNG S SCHN WEISSABGL ATW SYNC INT SPEZIAL AUSGANG VERL EXTERN S W FARBTRAGER EIN RUE 00424A SCC B2307P GER 4 7 05 9 44 PM 29 All manuals and user guides at all guides com a l l g u i d ...

Page 72: ...eiten von x2 bis x128 und hat die Funktion eine langsamere Verschlußzeit einzustellen um ein klares und helles Bild auf dem Monitor zu erhalten Wählen Sie AUTO Langsamezeit Verschluß damit die Kamera die Lichtmenge ermittelt und je nach Grad der Dunkelheit eine langsame Verschlußzeit automatisch einstellen möchten Wählen Sie FEST Menu um die Verschlußzeit ohne Rücksicht auf der Monitor helligkeit ...

Page 73: ...nter einer bestimmten Helligkeit liegt weil es bei unzureichende Licht verhältnissen aufgenommen wurde Beim nur Schnellverschluß oder AUS können Sie das Menu AGC einstellen Mit der Taste LINKS RECHTS auf WENIG oder HOCH platzieren dann die AGC funktioniert WENIG wird beim maximalen niedrigen AGC NIVEAU HOCH beim höhen AGC NIVEAU verwenden Wenn das Menu FARBE S W AUTO ist wird das Menu AGC als ange...

Page 74: ...nig bewegende Objekte an dunklen Orten überzuwachen Mit NORM läßt sich die AGC Verstärkung auf Mitte einstellen um bewegende Objekte an dunklen Orten überzuwachen Mit SCHN läßt sich die AGC Verstärkung vergrößern um sich schnell bewegende Objekte an dunklen Orten überzuwachen Mit S SCHN läßt sich die AGC Verstärkung vergrößern um sich schnell bewegende Objekte an dunklen Orten überzuwachen Ist Ver...

Page 75: ...ich direkt ausführen Wenn Sie den Punkt MANUELL auswählen und ENTER drücken wird ein MANUELL Untermenu eingeblendet in dem Sie einen manuellen Weissabgleich vornehmen können Sie haben die Wahl unter 3200 K 5600 K oder BENUTZER Mode in dem Sie die Tasten LINKS oder RECHTS im PRESET Menu drücken 3200K Die Farbtemperatur bei 3200 K einstellen 5600K Die Farbtemperatur bei 5600 K einstellen Benutzer Un...

Page 76: ...n erscheint der Bildschrim eines Untermenus in dem Sie die Phase Einstellung anpassen können Sie können die Phase von 106H bis 106H einstellen NTSC von 138H bis 138H PAL Bei der DC Stromversorgung Verwendung erscheint das SYNC Menu zu und die SYNC funktion kann nicht benutzen SYNC Die Taste ENTER drücken KAMERA ID AUS BLENDE ALC BLC AUS FARBE S W FARBE SHUTTER AUTO X8 BEWEGUNG S SCHN WEISSABGL ATW...

Page 77: ...0 I AKTIVITAET AUS SPRACHE DEUTSCH RUE Die Taste ENTER drücken SPEZIAL BAUD RATE 38400 D ZOOM X2 BIB EIN SPIEGEL AUS POSI NEGA DETAIL 0 I AKTIVITAET AUS SPRACHE DEUTSCH RUE BAUD RATE Bei der RS232 das Kommunikationstempo auf 4800 9600 19200 38400 bps einstellen D ZOOM Die Vergrößerung ist von 2fach bis 10fach in 5 Schritten einstellbar BIB Bild in Bild Funktion Zeigt einen 1 16 großen Bildschirm n...

Page 78: ... wählen und ENTER drücken wird das AKTIVITAET Untermenubild eingeblendet SPRACHE Die folgende sprache stehen zur Auswhl Englich Deutsch Francais Espanõl und Italiano Die Taste ENTER verwenden SPEZIAL BAUD RATE 38400 D ZOOM AUS BIB SPIEGEL AUS POSI NEGA DETAIL 0 I AKTIVITAET EIN SPRACHE DEUTSCH RUE Die Taste LINKS RECHTS verwenden SPEZIAL BAUD RATE 38400 D ZOOM AUS BIB SPIEGEL AUS POSI NEGA DETAIL ...

Page 79: ... die AKTIVITAET Funktion wird auf gewählten Bereich des Produkts während der Sendung angewendet werden Sie können auch den Cursor zum Empfindlichkeit Menu bewegen und die Tasten LINKS RECHTS drücken um die Entdeckung der gewählten Bereichs bewegung aufzubauen Die Taste ENTER drücken Die Taste ENTER drücken GROESSE GROESSE POSITION POSITION POSITION GROESSE AKTIVITAET BEREICH BENUTZER EMPF L I H RU...

Page 80: ...SGANG SICHERN Das AUSGANG Menu benutzt für die Beendigung des Kamera Aufbaumenus VERL Übergeht alle von Ihnen vorgenommenen Veränderungen und stellt das vorherig gespeicherte Einstellmenu wieder her SICHERN Speichert die Einstellmenu die bisher verändert worden sind PRESET Übergeht alle von Ihnen vorgenommenen Veränderungen und stellt die wertseitigen KAMERA EINSTELLUNG Menu wieder her EXIT 00424A...

Page 81: ... 500 530 TV Linien FARBE S W S N Ratio 52dB AGC OFF Min Szenenbeleuchtung FARBE 0 3 Lux F1 2 0 002 Lux S W 0 06 Lux F1 2 0 0004 Lux TAG NACHT FARBE S W AUTO EXT Farbtemperatur ATW AWC MANUELL MODE 3200 K 5600 K R B Verstärkungsregelung Elektronische Verschlusszeit ALC OFF 1 10K sek 7 Stufen ELC Max 1 100K sek Gegenlichtkompensation AUS UNTEN OBEN LINKS RECHTS MITTE BENUTZER Restlichtbetrieb AUS AU...

Page 82: ...S RECHTS DETAIL Signalausgang Composite Videoausgang 1 0Vp p 75 ohms BNC Objektiv VIDEO DC Objektiv Passepartout CS C Passepartout Adapter Temperatur bei Betrieb 10 C 50 C Luftfeuchtigkeit bei Betrieb 90 Abmessungen 68 W x 55 H x 128 5 D mm Gewicht Approx 450g 00424A SCC B2307P GER 4 7 05 9 44 PM 40 All manuals and user guides at all guides com ...

Page 83: ...003P 1 3 inch Super HAD CCD SCC B2307P B2007P 1 3 inch EXview HAD CCD Effektive Pixel 753 H x 582 V Abtastverfahren 625 Linien 2 1 Zeilensprung Zeilenfrequenz Horizontal 15 625Hz INT 15 625 Hz L L Vertikal 50 Hz INT 50 Hz L L Synchronisationsverfahren INT LINIE Schleuse Auflösung 500 530 TV Linien FARBE S W S N Ratio 52dB AGC OFF Min Szenenbeleuchtung SCC B2303P B2003P Farbe 0 3 Lux F1 2 0 002 Lux...

Page 84: ...m AUS EIN x10 BIB Bewegungsmeldung AUS EIN Einstellung von BEREICH EMPFINDLICHKEIT Videosteuerung Einstellung von POSI NEGA SPIEGEL LINKS RECHTS DETAIL Signalausgang Composite Videoausgang 1 0Vp p 75 ohms BNC Objektiv VIDEO DC Objektiv Passepartout CS C Passepartout Adapter Temperatur bei Betrieb 10 C 50 C Luftfeuchtigkeit bei Betrieb 90 Abmessungen 68 W x 55 H x 128 5 D mm Gewicht SCC B2303P B230...

Page 85: ...F CAMERA COULEUR JOUR NUIT SCC B2303 P B2003P SCC B2307P B2007P Manuel d Utilisation 00424ASCC B2307P Fra 4 7 059 40PM 1 All manuals and user guides at all guides com ...

Page 86: ...n incendie ou des décharges électriques 3 Ne branchez jamais plus d une caméra sur un seul adaptateur Le dépassement de la capacité de charge risque de générer une chaleur anormale au point de causer un incendie 4 Branchez le cordon d alimentation sur la prise murale Assurez vous que la connexion est solidement fixée Une mauvaise connexion peut constituer le risque d un incendie 5 Lorsque vous ins...

Page 87: ...tenir compte d une mise en garde peut entraåner des blessures cor porelles ou des dégâts à la propriété 1 Ne laissez pas tomber d objets sur le produit ni ne soumettez le produit à de forts coups Ne placez pas le produit dans un emplacement où il pourrait subir de fortes vibrations ou des interférences magnétiques 2 Ne placez pas le produit dans un emplacement où il fait très chaud plus de 50 C 12...

Page 88: ... automatique 14 Fixation de l objectif Réglage du bouton de sélection de l objectif 15 Focalisation 16 Connexion du câble 18 Chapitre 5 Configuration de la Caméra 20 Annexe Spécifications Techniques 39 REMARQUE Évitez de diriger l appareil photo directement en direction d objets très brillants tels que le soleil cela risque d endommager le capteur d image CCD 00424ASCC B2307P Fra 4 7 059 40PM 4 Al...

Page 89: ...e d accumulation Field La caméra JOUR NUIT est conçue pour une application en zone sombre comme dans les parkings souterrains où la luminosité est en dessous d un certain seuil Elle fonctionne en mode couleur en offrant une haute résolution horizontale de 480 lignes dans la journée et elle peut capter des objets même dans la nuit en appliquant la fonction JOUR NUIT et la fonction Sense Up Vous pou...

Page 90: ... du contre jour Malgré la présence d un éclairage puissant ou d un rayonnement solaire derrière l objet cette caméra permet d obtenir une prise de vue nette grâce à la correction des images assombries par le contre jour Mode de synchronisation numérique Le mode de synchronisation numérique des fréquences trame et réseau est intégré dans cette caméra pour un réglage direct de la synchronisation ver...

Page 91: ...ent avec un tissu spécifique pour l optique ou un tissu de coton humidifié à l éthanol Connecteur de l objectif à diaphragme automatique Ce connecteur fournit au diaphragme de l objectif l alimentation le signal de contrôle le signal vidéo ou le signal DC nécessaires à son contrôle Câble de contrôle de l objectif à diaphragme automatique Bouton de sélection de l objectif ALC Connecteur de l object...

Page 92: ...ctif ALC Utilisez ce bouton pour sélectionner le type d objectif à diaphragme automatique souhaité DC Positionnez ce bouton sur DC si vous avez installé un objectif à diaphragme automatique nécessitant un signal de contrôle DC VIDEO Positionnez ce bouton sur VIDEO si vous avez installé un objectif à diaphragme automatique nécessitant un signal de contrôle VIDEO Vue arrière 00424ASCC B2307P Fra 4 7...

Page 93: ... Cette sortie est reliée à l entrée vidéo du moniteur et donne le signal vidéo de la caméra Entrée REMOTE RS 232 Cette entrée est utilisée pour le réglage de la caméra en usine 1 TXD 2 RXD 3 5V 4 GND 1 2 3 4 00424ASCC B2307P Fra 4 7 059 40PM 9 All manuals and user guides at all guides com ...

Page 94: ...tion de mouvement DAY NIGHT IN GND ALARM OUT Reliez le détecteur externe au terminal JOUR NUIT comme le montre la figure puis reliez l équipement externe tel que sonnerie ou lampe au terminal d alarme comme le montre la figure La sortie d alarme est un collecteur ouvert de puissance inférieur DC 16V inférieur 100mA OFF contact ouvert ON inférieur à 100mA L entrée JOUR NUIT est de DC 5V pull up et ...

Page 95: ...t plus de 2 secondes pour entrer dans le menu Setup Mode Setup Touches Haut Bas Utilisez ces touches pour déplacer le curseur vers le haut ou le bas Touches Gauche Droite Utilisez ces touches pour déplacer le curseur vers la gauche ou la droite ou pour afficher dans l ordre les valeurs ajustables de chaque menu Setup Touche ENTER Utilisez cette touche pour accéder au sous menu Setup ou pour sélect...

Page 96: ...ces indications avant d installer la caméra et de connecter le câble Vérifiez que les éléments suivants sont inclus dans l emballage Avant l installation Lors du déballage vérifiez le contenu du paquet Caméra Adaptateur Mount Adaptateur C Mount Connecteur de l objectif à diaphragme automatique Manuel d utilisation 00424ASCC B2307P Fra 4 7 059 41PM 12 All manuals and user guides at all guides com a...

Page 97: ...N installez pas la caméra sous la pluie ou dans des endroits humides Utilisez un tissu sec pour le nettoyage Ne frottez pas excessivement le corps de la caméra avec des produits abrasifs Installez la caméra dans un endroit frais en évitant le rayonnement direct du soleil car celui ci peut endommager l appareil Précaution d installation et d utilisation 00424ASCC B2307P Fra 4 7 059 41PM 13 All manu...

Page 98: ...tion des câbles de contrôle du diaphragme et reliez chaque câble au connecteur de l objectif du diaphragme automatique en vous référant au tableau suivant N de la clé Type de contrôle DC Type de contrôle VIDEO 1 Damp Alimentation 12V 2 Damp Non utilisé 3 Drive Signal VIDEO 4 Drive GROUND 00424ASCC B2307P Fra 4 7 059 41PM 14 All manuals and user guides at all guides com ...

Page 99: ...me l indique la figure ci dessous Lors de l objectif C Vissez d abord le support d installation dans le sens des aiguilles d une montre Vissez ensuite l objectif C dans le même sens comme l indique la figure ci dessous l objectif CS l objectif C 00424ASCC B2307P Fra 4 7 059 41PM 15 All manuals and user guides at all guides com ...

Page 100: ...sation peut ne pas correspondre à certains types d objectif Dans ce cas réglez la focale selon les indications suivantes Ceci est une méthode pour le réglage d un objectif à focale fixe Objectif sans fonction de zoom Prenez l image d un objet net en forme de carreau placé à une distance de plus de 10 m et positionnez l anneau de la focale de l objectif sur l infini Tournez le jusqu à ce que l imag...

Page 101: ...de l objet soit la plus nette possible Réglez le zoom au maximum vers WIDE et tournez la barre de focalisation jusqu à ce que l image de l objet soit la plus nette possible Répétez ou fois les procédés 2 et 3 jusqu à de que la focale sur le côté ZOOM TELE et celle sur le côté ZOOM WIDE soient correctement réglées 00424ASCC B2307P Fra 4 7 059 41PM 17 All manuals and user guides at all guides com a ...

Page 102: ...suite reliez le cordon d alimentation comme le montre la figure ci dessous Reliez un des 2 liges à l entrée de l alimentation de la caméra avec un tournevis plat GND indiqué par une ligne blanche La source d alimentation peut être AC 24V ou DC 12V sans respect de polarité Câble BNC Sortie Vidéo Entrée Vidéo située derrière le moniteur 00424ASCC B2307P Fra 4 7 059 41PM 18 All manuals and user guide...

Page 103: ...F 19 00424ASCC B2307P Fra 4 7 059 41PM 19 All manuals and user guides at all guides com ...

Page 104: ...AIN CAG COULEUR SETUP S PORTEUSE SETUP S PORTEUSE DUREE NIVEAU SETUP 3200K 5600K UTIL ROUGE BLEU SETUP PHASE SETUP ZONE SETUP SENSIBILITÉ SETUP VITESSE D ZOOM PIP MIROIR POSI NEGA DETAIL DET MOUVE LANGAGE IRIS ALC ELC COULEUR N B COULEUR N B AUTO EXT SHUTTER OFF 1 100 1 10K OFF AUTO X2 X128 OFF FIXE X2 X128 CAG OFF BAS HAUT MOUVEMENT T LENT T VITE BAL BLANCS BA BM MANU SYNC INT LIGNE SETUP MENU SP...

Page 105: ...les chiffres et quelques caractères spéciaux Le nom donné à la caméra ID peut être positionné à l endroit souhaité sur l écran en utilisant le sous menu POSITION CAMERA ID Appuyez sur la touche ENTER CAMERA ID OFF IRIS ALC CJOUR OFF COULEUR N B COULEUR SHUTTER AUTO X8 MOUVEMENT T VITE BAL BLANCS BA SYNC INT SPECIAL SORTIE QUITTER CAMERA ID A B C D E F G H I J K L M N O P Q R S T U V W X Y Z 0 1 2 ...

Page 106: ... sur la touche ENTER Utilisez les touches Gauche Droite pour régler la luminosité dans le menu NIVEAU Le réglage du niveau est disponible uniquement avec l objectif DC IRIS IRIS Appuyez sur la touche ENTER CAMERA ID OFF IRIS ALC CJOUR OFF COULEUR N B COULEUR SHUTTER AUTO X8 MOUVEMENT T VITE BAL BLANCS BA SYNC INT SPECIAL SORTIE QUITTER ALC DC IRIS 00 I RET 00424ASCC B2307P Fra 4 7 059 41PM 22 All ...

Page 107: ...ragme à haute vitesse en utilisant l objectif manuel afin de préserver le niveau réglé lorsque la luminosité externe est trop élevée Sélectionnez ELC dans le menu IRIS puis appuyez sur la touche ENTER pour entrer dans le sous menu comme le montre la figure suivante Utilisez les touches Gauche Droite pour régler ce niveau Appuyez sur la touche ENTER CAMERA ID OFF IRIS ELC CJOUR OFF COULEUR N B COUL...

Page 108: ... OFF vous pouvez en utilisant les touches Gauche Droite sélectionner au choix 5 zones préréglées BAS HAUT GAUCHE DROITE CENTRE ou le mode USER pour choisir vous même la zone Vous pouvez vérifier la zone correspondante en appuyant sur la touche ENTER après la sélection p ex BAS CJOUR Appuyez sur la touche ENTER CAMERA ID OFF IRIS ALC CJOUR BAS COULEUR N B COULEUR SHUTTER AUTO X8 MOUVEMENT T VITE BA...

Page 109: ... ENTER pour régler vous même la dimension et la position de la zone CJOUR Pour régler la dimension de la zone appuyez sur les touches Gauche Droite Haut Bas pendant que la zone ne clignote pas Celle ci se met alors à clignoter et vous pouvez ensuite régler la positon de la zone en utilisant les touches Gauche Droite Haut Bas Pour sortir du menu UTIL ZONE ré appuyez sur la touche ENTER TAILLE TAILL...

Page 110: ...MOUVEMENT T VITE BAL BLANCS BA SYNC INT SPECIAL SORTIE QUITTER Appuyez sur les touches Gauche Droite CAMERA ID OFF IRIS ALC CJOUR OFF COULEUR N B COULEUR SHUTTER AUTO X8 MOUVEMENT T VITE BAL BLANCS BA SYNC INT SPECIAL SORTIE QUITTER CAMERA ID OFF IRIS ALC CJOUR OFF COULEUR N B N B SHUTTER AUTO X8 MOUVEMENT T VITE BAL BLANCS BA SYNC INT SPECIAL SORTIE QUITTER COULEUR Ceci est un mode standard et le...

Page 111: ...e N B s affiche sur l écran Dans ce sous menu vous pouvez activer ON ou désactiver OFF l envoie du signal S PORTEUSE Appuyez sur la touche ENTER CAMERA ID OFF IRIS ALC CJOUR OFF COULEUR N B N B SHUTTER AUTO X8 MOUVEMENT T VITE BAL BLANCS SYNC INT SPECIAL SORTIE QUITTER N B S PORTEUSE ON RET 00424ASCC B2307P Fra 4 7 059 41PM 27 All manuals and user guides at all guides com a l l g u i d e s c o m ...

Page 112: ...appuyez sur la touche ENTER après avoir sélectionné AUTO le sous menu AUTO N B apparaît Vous pouvez activer ou désactiver l envoi du signal S PORTEUSE et régler la DUREE ainsi que le critère de luminosité pour la conversion du mode couleur en mode noir et blanc Appuyez sur la touche ENTER CAMERA ID OFF IRIS ALC CJOUR OFF COULEUR N B AUTO SHUTTER AUTO X8 MOUVEMENT T VITE BAL BLANCS BA SYNC INT SPEC...

Page 113: ...TIE le sous menu EXTERNAL N B apparaît sur l écran Vous pouvez activer ou désactiver le signal S PORTEUSE en sélectionnant ON ou OFF dans ce menu Appuyez sur la touche ENTER CAMERA ID OFF IRIS ALC CJOUR OFF COULEUR N B EXT SHUTTER AUTO X8 MOUVEMENT T VITE BAL BLANCS BA SYNC INT SPECIAL SORTIE QUITTER EXTERNAL N B S PORTEUSE ON RET 00424ASCC B2307P Fra 4 7 059 41PM 29 All manuals and user guides at...

Page 114: ...2 vitesses de diaphragme de x2 à x128 ralentissant sa vitesse afin de rendre plus nettes et plus lumineuses les images prises en basse luminosité Si vous souhaitez ralentir automatiquement la vitesse du diaphragme selon la luminosité par une détection d intensité de la lumière sélectionnez la basse vitesse AUTO Si vous souhaitez régler la vitesse du diaphragme indépendamment de la luminosité de l ...

Page 115: ...osité standard lorsque l image a été prise en basse luminosité Le réglage du menu CAG est possible uniquement en mode High Speed Shutter ou OFF Lorsque vous sélectionnez BAS ou HAUT en utilisant les touches Gauche Droite la fonction CAG est activée Le mode BAS est utilisé pour diminuer le GAIN CAG et le mode HAUT pour augmenter le GAIN CAG Lorsque le menu COLOR N B est en mode AUTO le menu CAG s a...

Page 116: ...as de mouvement mportant en zone sombre en diminuant le niveau AGC NORM est utilisé pour surveiller les objets mobiles en zone sombre en réglant sur une valeur moyenne le niveau AGC VITE est utilisé pour surveiller les objets ayant un mouvement rapide en zone sombre en augmentant le niveau AGC T VITE est utilisé pour surveiller les objets ayant un mouvement très rapide en zone sombre en maximisant...

Page 117: ...LANCS vous pouvez régler vous même la balance de blanc selon l éclairage actuel Sélectionnez MANU puis appuyez sur la touche ENTER pour accéder au sous menu qui permettra de sélectionner la balance de blanc manuellement Dans le menu PRESET sélectionnez 3200K 5600K ou UTIL en utilisant les touches Gauche Droite 3200K La température de couleur sera réglée à 3200 K 5600K La température de couleur ser...

Page 118: ...oite pour la sélection puis appuyez sur la touche ENTER pour accéder au sous menu La phase est réglable de 106H à 106H NTSC de 138H á 138H Lorsque vous utilisez l alimentation DC la fonction SYNC n est pas disponible et le menu SYNC s affiche comme SYNC Appuyez sur la touche ENTER CAMERA ID OFF IRIS ALC CJOUR OFF COULEUR N B COULEUR SHUTTER AUTO X8 MOUVEMENT T VITE BAL BLANCS BA SYNC LIGNE SPECIAL...

Page 119: ...RET Appuyez sur la touche ENTER SPECIAL VITESSE 38400 D ZOOM X2 PIP ON MIROIR OFF POSI NEGA DETAIL 0 I DET MOUVE OFF LANGAGE FRANCAIS RET VITESSE Lors de la communication RS 232 vous pouvez régler la vitesse de communication entre 4800 9600 19200 38400 bps D ZOOM Vous pouvez choisir le zoom numérique parmi 5 modes x2 x4 x6 x8 x10 PIP c est une fonction dite Picture In Picture image dans l image El...

Page 120: ...ller par la fonction DET MOUVE Appuyez sur la touche ENTER après avoir sélectionné ON pour accéder au sous menu DET MOUVE LANGAGE Vous pouvez sélectionner l une des langues suivantes anglais allemand français espagnol et Italien Appuyez sur les touches ENTER SPECIAL VITESSE 38400 D ZOOM OFF PIP MIROIR OFF POSI NEGA DETAIL 0 I DET MOUVE ON LANGAGE FRANCAIS RET DET MOUVE ZONE UTIL SENSIBILITE L I H ...

Page 121: ... appliquer la fonction DET MOUVE à la zone par défaut fixée en sortie d usine Positionnez le curseur sur le menu SENSIBILITÉ et réglez la sensibilité de détection en utilisant les touches Gauche Droite Appuyez sur la touche ENTER Appuyez sur la touche ENTER DET MOUVE ZONE UTIL SENSIBILITÉ L I H RET TAILLE TAILLE POSITION POSITION POSITION TAILLE 00424ASCC B2307P Fra 4 7 059 41PM 37 All manuals and...

Page 122: ...UVEMENT T VITE BAL BLANCS BA SYNC INT SPECIAL SORTIE SAUVER Utilisez ce menu pour fermer le menu CAMERA SETUP QUITTER Annule les modifications et retourne au menu SETUP précédent SAUVER Sauvegarde les modifications effectuées jusqu à présent PRESET Annule les modifications et rétablit les paramètres par défaut du menu CAMERA SETUP réglés en sortie d usine SORTIE 00424ASCC B2307P Fra 4 7 059 41PM 3...

Page 123: ...4 Hz INT 60 Hz L L Mode de synchronisation INT LIGNE BLOC Résolution 500 530 TV Lignes COULEUR N B Rapport S B 52dB CAG OFF Luminosité minimale Couleur 0 3 Lux F1 2 0 002 Lux Noir et blanc 0 06 Lux F1 2 0 0004 Lux JOUR NUIT COULEUR N B AUTO EXT Température de couleur Mode BA BM Manuel 3200 K 5600 K contrôle du gain R B Vitesse d obturation ALC OFF 1 10K sec 7 étape électronique ELC Max 1 100K sec ...

Page 124: ...ite Réglage du DETAIL Sortie Signal Sortie vidéo composite 1 0 Vp p 75 ohms BNC Objectif VIDEO DC Support d objectif CS C Support de fixation Température de fonctionnement 10 C 50 C Humidité de fonctionnement Inférieur à 90 Dimensions 68 L x 55 H x 128 5 P mm Poids Approx 450g 00424ASCC B2307P Fra 4 7 059 41PM 40 All manuals and user guides at all guides com ...

Page 125: ...inch EXview HAD CCD Nombre de pixels 752 H X 582 V Mode de balayage 625 lignes Rapport d entrelacement 2 1 Fréquence de ligne Horizontal 15 625 Hz INT 15 625 Hz L L Vertical 50 Hz INT 50 Hz L L Mode de synchronisation INT LIGNE BLOC Résolution 500 530 TV Lignes COULEUR N B Rapport S B 52dB CAG OFF Luminosité minimale SCC B2303P B2003P Couleur 0 3 Lux F1 2 0 002 Lux Noir et blanc 0 06 Lux F1 2 0 00...

Page 126: ...0 PIP Détection de mouvement OFF ON RÉGLAGE DE ZONE SENSIBILITE Contrôle vidéo POSI NEGA MIROIR gauche droite réglage du DETAIL Sortie Signal Sortie vidéo composite 1 0 Vp p 75 ohms BNC Objectif VIDEO DC Support d objectif CS C Support de fixation Température de fonctionnement 10 C 50 C Humidité de fonctionnement Inférieur à 90 Dimensions 68 L x 55 H x 128 5 P mm Poids SCC B2303P B2307P Approx 450...

Page 127: ...Es CÁMARA COLOR POR DÍA NOCHE SCC B2303 P B2003P SCC B2307P B2007P Manual del usuario 00424A SCC B2307P SPA 4 7 05 9 48 PM 1 All manuals and user guides at all guides com ...

Page 128: ...CC asegurándose de tener en cuenta las polaridades Una conexión incorrecta de la fuente de alimentación puede ocasionar un incendio un choque eléctrico o un daño al producto 3 No conecte varias cámaras a un adaptador El exceder la capacidad puede producir una generación anormal de calor o fuego 4 Enchufe firmemente el cable eléctrico en el receptáculo de corriente Una conexión floja puede producir...

Page 129: ...decoloración de la superficie o causar un daño al acabado Precaución El ignorar este aviso de precaución puede ocasionar una lesión o daño a la propiedad 1 No deje caer objetos en el producto ni lo golpee Manténgalo alejado de lugares sujetos a vibración excesiva o interferencia magnética 2 No lo instale en un sitio sujeto a altas temperaturas por encima de 500 C 122 F bajas temperaturas por debaj...

Page 130: ... del Obturador Automático 14 Fijar Lentes y Ajustar Conmutador de la Selección de Lentes 15 Ajustar el Foco Trasero 16 Conectar Cables 18 Capítulo 5 Configuración de Cámara 20 Apéndice Xpecificaciones del Producto 39 NOTA evite apuntar con la cámara directamente a objetos muy brillantes como el sol ya que así puede dañar el sensor de imagen CCD 00424A SCC B2307P SPA 4 7 05 9 48 PM 4 All manuals an...

Page 131: ...CHE se utiliza sobre todo en lugares oscuros como el estacionamiento del sótano con una baja iluminación comparativamente En día provee la pantalla del color de la alta densidad con la resolución horizontal de 480 y en la noche utiliza la función de DÍA NOCHE así como la función de Sense Up para identificar objetos En los mismos casos usted puede utilizar esta cámara en lo referente al equipo de l...

Page 132: ...ior En caso de que el objeto tenga una iluminación brillante o luz del sol detrás de él esta cámara ajusta la imagen sombreada por la luz trasera para fotografías claras Método de la Sincronización de la Fuente de Alimentación Digital La Cerradura de la Línea de Método Completo Digital se observa en esta cámara que ajusta la sincronización vertical de la cámara directamente para mejorar controlabi...

Page 133: ...e o el paño del algodón pintado etanol Conectador Automático De la Lente Del Obturador Este conectador provee de la lente automática del obturador la fuente de alimentación la señal de control la señal video o la señal de la DC necesaria para el control del obturador de la lente Cable de Control Automático de Lente de Obturador Conmutador de la Selección de Lentes ALC Conectador Automático de la L...

Page 134: ...or ajusta el tipo auto de la lente de diafragma para el uso DC Cuando usted unió la lente con diafragma automático necesitada la señal de control de DC ponga por favor este conmutador en la posición de DC VIDEO Cuando usted unió la lente con diafragma automático necesitada la señal de control de video ponga por favor este conmutador en la posición de VIDEO Rear View Vista Posterior Vista Posterior...

Page 135: ...e entrada de video de monitor está conectado con este terminal a través de lo cual la señal de video de la cámara venga Terminal Remoto de Entrada Este terminal se utiliza para el control de la cámara en la planta de producción 1 TXD 2 RXD 3 5V 4 GND 1 2 3 4 00424A SCC B2307P SPA 4 7 05 9 48 PM 9 All manuals and user guides at all guides com ...

Page 136: ...on el terminal de DÍA NOCHE según lo demostrado en y luego conecte cualquier dispositivo externo tal como zumbador o lámpara al terminal del ALARM según lo demostrado en El terminal de salida del ALARM es colector abierto con la capacidad debajo DC 16V y 100mA OFF Abra el contacto ON Debajo de 100mA El terminal de la entrada de DÍA NOCHE tiene la entrada de DC 5V pull up y más de 0 2mA OFF Abra el...

Page 137: ...za para incorporar a la menú de configuración presionelo durante cerca de 2 segundos En el modo del menú de la configuración Tecla ARRIBA ABAJO Estas teclas mueve el cursor hacia arriba y hacia abajo Tecla IZQUIERDA DERECHA Estas teclas mueven el cursor al izquierdo o derecho o identifican los valores secuencialmente que se pueden asignar en cada menú de la configuración Tecla ENTER Es utilizado p...

Page 138: ... instalar la cámara y conectar el cable en circunstancias reales Configurese de que los artículos siguientes se incluyen en el paquete Antes de la Instalación Comprobación del contenido del paquete Cámara Soporte de cámara Montaje Adaptador de C Montaje Conectador de Lente de Obturador Automático Manual del usuario 00424A SCC B2307P SPA 4 7 05 9 48 PM 12 All manuals and user guides at all guides c...

Page 139: ...uidado para evitar cualquier daño No ponga ni funcione la cámara en lugares lluviosos o mojados No friegue el cuerpo de cámara con papeles de lija ásperos cuando se mancha Utilice por favor el paño seco toda la hora Ponga la cámara en un área fresca libre de una luz directa Si no la cámara puede ser dañada Qué se debe hacer durante la instalación y el uso 00424A SCC B2307P SPA 4 7 05 9 48 PM 13 Al...

Page 140: ...cada alambre destapado del cable de control del obturador con el conectador de la lente del obturador automático como sigue Número de Pin El Tipo de Control de DC El Tipo de Control de VIDEO 1 Humédad Alimentación 12V 2 Humédad N A 3 Impulsión Señal de VIDEO 4 Impulsión TIERRA 00424A SCC B2307P SPA 4 7 05 9 48 PM 14 All manuals and user guides at all guides com ...

Page 141: ... lo demostrado como sigue En caso de las lentes de C Dé vuelta el adaptador de C Montaje a la derecha para fijarlo Y luego dé vuelta la lente de C a la derecha hasta que está fijada como sigue lentes de CS lentes de C 00424A SCC B2307P SPA 4 7 05 9 48 PM 15 All manuals and user guides at all guides com a l l g u i d e s c o m ...

Page 142: ...ca del tipo del control de de video usted debe poner el conmutador en DC o la posición VIDEO respectivamente El Foco Trasero BACK FOCUS de la cámara se ajusta en la planta antes de la entrega pero algunas lentes están desenfocado aunque el número diferencia en tipos Si es el caso usted debe hacer el ajuste foco trasero como sigue Primero éste es el procedimiento de ajuste de foco trasero para las ...

Page 143: ... de objeto con el alto resolution objeto en la distancia de 3 a 5 m y zoom en la lente como cerca de TELE como sea posible Entonces ajuste la anilla de foco de la lente hasta que el objeto se mostra lo más mejor posible Enfoque en la lente como cerca de AMPLIO como posible y ajuste la barra del ajuste del FOCO TRASERA hasta que el objeto se mostra lo más mejor posible Repita de a más de 2 o 3 vece...

Page 144: ...ergía Conecte una pieza del adaptador de la energía integrado por 2 líneas con el terminal de entrada de la energía de la cámara con un conductor de cabeza llana como sigue GND marcado con una línea blanca La fuente de alimentación puede ser AC24V o DC12V independiente de polaridad Cable de BNC TERMINAL DE SALIDA DE VÍDEO terminal de entrada de video en la vista posterior de monitor 00424A SCC B23...

Page 145: ...Es 19 00424A SCC B2307P SPA 4 7 05 9 48 PM 19 All manuals and user guides at all guides com ...

Page 146: ...NA SETUP 3200K 5600K UTIL ROJO AZUL SETUP FASE SETUP ZONASETUP SENSIBILIDAD SETUP BAUDRATE D ZOOM PIP MIRROR POSI NEGA DETAIL DET MOVI DIAFRAGMA ALC ELC COLOR ByN COLOR ByN AUTO EXT OBTURADOR OFF 1 100 1 10K OFF AUTO X2 X128 OFF FIJO X2 X128 AGC OFF BAJO ALTO MOVIMIENTO S SLOW F FAST BAL BLANCO BA BM MANU SYNC INT LÍNEA SETUP MENU ESPECIAL SALIDA DEJAR SAVE PRESET CLUZ OFF ABAJO ARRIBA IZQUIERDA D...

Page 147: ...speciales o de una combinación de esos hasta 20 dígitos La identificación de la CÁMARA señalada se puede situar en cualquier lugar según lo deseado usando el submenú CÁMARA ID Si prosione el botón ENTER CÁMARA ID ON DIAFRAGMA ALC CLUZ OFF COLOR ByN COLOR OBTURADOR AUTO X8 MOVIMIENTO M RAPI BAL BLANCO BA SINC INT ESPECIAL SALIDA DEJAR CÁMARA ID A B C D E F G H I J K L M N O P Q R S T U V W X Y Z 0 ...

Page 148: ...brillo Aquí usted puede configurar el nivel del brillo presionando la tecla IZQUIERDA O DERECHA en el menú NIVEL El configurar el nivel está disponible solamente usando la lente del DIAFRAGMA de DC DIAFRAGMA Si prosione el botón ENTER CÁMARA ID OFF DIAFRAGMA ALC CLUZ OFF COLOR ByN COLOR OBTURADOR AUTO X8 MOVIMIENTO M RAPI BAL BLANCO BA SINC INT ESPECIAL SALIDA DEJAR ALC DC DIAFRAGMA 00 I VUE 00424...

Page 149: ... Alta Velocidad dentro del margen limitado en el acontecimiento de la radiación demasiada intensiva del exterior mientras que usa la Lente Manual Si usted selecciona el ELC en el menú del DIAFRAGMA y presiona la tecla ENTER aparecerán los siguientes pantallas de submenú Aquí usted puede fijar el nivel presionando la tecla IZQUIERDA O DERECHA Si prosione el botón ENTER CÁMARA ID OFF DIAFRAGMA ELC C...

Page 150: ...HA para fijar la función de USER para el ajuste del ya fijado 5 áreas incluyendo ABAJO ARRIBA IZQUIERDA DERECHA y CENTRO o para el ajuste directo del area en OFF Si usted selecciona el ABAJO en el menú de BLC y presiona la tecla ENTER usted puede certificar el área de ABAJO ya fijado CLUZ Si prosione el botón ENTER CÁMARA ID OFF DIAFRAGMA ALC CLUZ ABAJO COLOR ByN COLOR OBTURADOR AUTO X8 MOVIMIENTO...

Page 151: ...í mismo Cuando no está destellando el área usted puede especificar el tamaño del área presionando las teclas de la dirección IZQUIERDA DERECHA ARRIBA o ABAJO Si usted presiona la tecla ENTER cuando el área comenzará a destellar Entonces usted puede especificar el tamaño del área presionando las teclas de la dirección IZQUIERDA DERECHA ARRIBA o ABAJO Si usted presiona la tecla ENTER otra vez usted ...

Page 152: ... DEJAR COLOR GANANCIA 0 I CAG COLOR 0 I VUE Usa las teclas Izquierda Derecha CÁMARA ID OFF DIAFRAGMA ALC CLUZ OFF COLOR ByN COLOR OBTURADOR AUTO X8 MOVIMIENTO M RAPI BAL BLANCO BA SINC INT ESPECIAL SALIDA DEJAR CÁMARA ID OFF DIAFRAGMA ELC CLUZ OFF COLOR ByN ByN OBTURADOR AUTO X8 MOVIMIENTO M RAPI BAL BLANCO BA SINC INT ESPECIAL SALIDA DEJAR COLOR Éste es el modo de ON de filtro de IR con la pantal...

Page 153: ...el submenú de ByN aparecerá Usted podrá enviar la señal de la SATURACION activándose o desactivándose en este menú Si prosione el botón ENTER CÁMARA ID OFF DIAFRAGMA ALC CLUZ OFF COLOR ByN ByN OBTURADOR AUTO X8 MOVIMIENTO M RAPI BAL BLANCO SINC INT ESPECIAL SALIDA DEJAR ByN SATURACION ON VUE 00424A SCC B2307P SPA 4 7 05 9 48 PM 27 All manuals and user guides at all guides com ...

Page 154: ... del NIVEL de ByN aparecerá en la pantalla de menú Usted podrá enviar la señal de la SATURACION activándose o desactivándose en este menú y configurar la HORA de la DURACIÓN para la conversión o fijar el nivel de brillo estándar para convertir el modo del COLOR en el modo de ByN Si prosione el botón ENTER CÁMARA ID OFF DIAFRAGMA ALC CLUZ OFF COLOR ByN AUTO OBTURADOR AUTO X8 MOVIMIENTO M RAPI BAL B...

Page 155: ... submenú de ByN EXTERNO aparecerá en la pantalla de menú Usted puede enviar la señal de la SATURACION activándose o desactivándose en este menú Si prosione el botón ENTER CÁMARA ID OFF DIAFRAGMA ALC CLUZ OFF COLOR ByN EXT OBTURADOR AUTO X8 MOVIMIENTO M RAPI BAL BLANCO BA SINC INT ESPECIAL SALIDA DEJAR EXTERNAL ByN SATURACION ON VUE 00424A SCC B2307P SPA 4 7 05 9 48 PM 29 All manuals and user guide...

Page 156: ...n 12 velocidades deobturación de x2 a x128 que retarda la velocidad del obturador para hacer clarificante y más brillante las imágenes de pantalla tomadas en la iluminación oscura Si usted desea retardar la velocidad del obturador automáticamente dependiendo del grado de oscuridad detectando la intensidad de la radiación seleccione por favor la baja velocidad AUTO y si usted desea instalar la velo...

Page 157: ...omado en la iluminación oscura Instalar el menú de CAG está disponible solamente en modo de obturador de alta velocidad o de modo OFF Si usted presiona la tecla IZQUIERDA o DERECHA para alcanzar la posición de BAJO o de ALTO la función de CAG comenzará a activar BAJO se utiliza para la ganancia de CAG más bajo de CAG mientras que ALTO se utiliza para la ganancia de CAG más alto Cuando el menú COLO...

Page 158: ...G bajo para supervisar objetos con un pequeño movimiento en la obscuridad La NORM estandardiza la baja intensidad de CAG para supervisar objetos móviles en la obscuridad El RÁRI mantiene la alta intensidad de CAG para supervisar objetos móviles rápidos en la obscuridad M RÁRI maximiza la intensidad de CAG para supervisar objetos móviles muy rápidos en la obscuridad Para activar la función de MOVIM...

Page 159: ...e BAL BLANCO usted puede instalar el BAL BLANCO en la consideración de la iluminación actual manualmente Si usted selecciona el artículo de MANUAL y presione la tecla ENTER el submenú de MANUAL aparecerá seleccionar el BAL BLANCO Si usted presiona la tecla IZQUIERDO o DERECHA en el menú de PRESET usted puede seleccionar el 3200K el 5600K o el modo del USUARIO 3200K Fije la temperatura del color a ...

Page 160: ...artículo de la LÍNEA y presione la tecla ENTER Ahora usted se verá el submenú para ajustar la FASE Fásico puede fijar de 106H a 106H NTSC de 138H a 138H PAL Cuando usted utiliza fuente de la alimentación DC el menú SINC es lleno y usted no puede utilizar la función de SINC SYNC Si prosione el botón ENTER CÁMARA ID OFF DIAFRAGMA ALC CLUZ OFF COLOR ByN COLOR OBTURADOR AUTO X8 MOTION M RAPI BAL BLANC...

Page 161: ...MA ESPAÑOL VUE Si prosione el botón ENTER ESPECIAL VELOCIDAD 38400 D ZOOM X2 PIP ON ESPEJO OFF POSI NEGA DETALLE 0 I DET MOVI OFF IDIOMA ESPAÑOL VUE VELOCIDAD Fija la velocidad de la comunicación a 4800 9600 19200 o 38400bps para la comunicación de Rs 232 D ZOOM Fija la ampliación del Zoom Digital a los 5 pasos x2 x4 x6 x8 y x10 PIP la función de imagen sobre imagen para demostrar una pantalla de ...

Page 162: ...el movimiento Si usted selecciona el modo ON y presiona la tecla ENTER la pantalla del submenú DET MOVI aparecerá IDIOMA Usted puede elegir un de los idiomas siguientes Inglés alemán Francés Español e italiano Usando las teclas Izquierda y Derecha ESPECIAL VELOCIDAD 38400 D ZOOM X2 PIP ON ESPEJO OFF POSI NEGA DETALLE 0 I DET MOVI ON IDIOMA ESPAÑOL VUE Usando las teclas Izquierda y Derecha ESPECIAL...

Page 163: ...á aplicada al área seleccionada del producto durante el embarque Usted puede también mover el cursor al menú SENSIBILIDAD y presionar la tecla IZQUIERDA o DERECHA para configurar la detectabilidad del movimiento del área seleccionado Usa las teclas Izquierda Der echa Arriba A bajo Si prosione el botón ENTER DET MOVI ZONA UTIL SENSIBILIDAD 0 I VUE DIMENSION DIMENSION POSICIÓN POSICIÓN POSICIÓN DIME...

Page 164: ...NC INT ESPECIAL SALIDA SALVAR El menú SALIDA se utiliza para la terminación del menú CONFIGURACIÓN de CÁMARA DEJAR No hace caso de cualquier cambio y vuelve al menú CONFIGURACIÓN ya grabado SALVAR Graba todos los cambios al menú hasta ahora PRESET No hace caso de cualquier cambio y vuelve al valor inicial del menú CONFIGURACIÓN de CÁMARA que fue fijado para el embarque del producto SALIDA 00424A S...

Page 165: ...OC Resolución 500 530 Líneas de TV COLOR ByN Proporción S N 52dB CAG OFF Iluminación Mínima de la Escena COLOR 0 3 Lux F1 2 0 002 Lux ByN 0 06 Lux F1 2 0 0004 Lux DÍA NOCHE COLOR ByN AUTO EXT Temperatura del Color BA BM MANUAL MODE 3200 K 5600 K R B Ajuste de Ganancia Velocidad del obturador ALC OFF 1 10K seg 7 pasos electrónico ELC Max 1 100K seg Compensación de Luz Ambiental OFF ABAJO ARRIBA IZQ...

Page 166: ...Salida de Señal Salida de video compuesto 1 0 Vp p 75 ohms BNC Lente VIDEO DC Lente de Montaje CS C Adaptador de Montaje Temperatura de Funcionamiento 10 C 50 C Humedad de Funcionamiento 90 Tamaño Físico 68 W x 55 H x 128 5 D mm Peso Aprox 450g 00424A SCC B2307P SPA 4 7 05 9 48 PM 40 All manuals and user guides at all guides com a l l g u i d e s c o m ...

Page 167: ...z 752 H X 582 V Método de Digitalización 625 Líneas 2 1 Entrelazado Frecuencia de Línea Horizontal 15 625 Hz INT 15 625 Hz L L Vertical 50 Hz INT 50 Hz L L Método de la Sincronización INT LÍNEA BLOC Resolución 500 530 Líneas de TV COLOR ByN Proporción S N 52dB CAG OFF Iluminación Mínima de la Escena SCC B2303P B2003P COLOR 0 3 Lux F1 2 0 002 Lux ByN 0 06 Lux F1 2 0 0004 Lux SCC B2307P B2007P COLOR...

Page 168: ...X10 PIP Detección de Movimiento OFF ON Ajuste ZONA SENSIBILIDAD Control de Video Ajuste de POSI NEGA ESPEJO IZQUIERDA DERECHA DETALLE Salida de Señal Composite Video Out 1 0 Vp p 75 ohms BNC Salida de video compuesto 1 0 Vp p 75 ohms BNC Lente VIDEO DC Lente de Montaje CS C Adaptador de Montaje Temperatura de Funcionamiento 10 C 50 C Humedad de Funcionamiento 90 Tamaño Físico 68 W x 55 H x 128 5 D...

Page 169: ...I MACCHINAFOTOGRAFICACOLORE GIORNO NOTTE SCC B2303 P B2003P SCC B2307P B2007P Manuale d Utente 00424ASCC B2307P ITA 02 4 7 059 46PM 1 All manuals and user guides at all guides com ...

Page 170: ...tesso adattatore Il superamento della capacità può provocare una generazione anomala di calore oppure incendi 4 Inserire il cavo di alimentazione nell apposita presa Un collegamento allentato può provocare incendi 5 Quando si installa la telecamera a soffitto oppure a parete fissare bene l apparecchio Una telecamera instabile può cadere e provocare lesioni personali 6 Non collocare oggetti con cap...

Page 171: ...rietà 1 Non far cadere oggetti sopra il prodotto e non sottoporre quest ultimo a forti colpi Il prodotto non va tenuto in un luogo soggetto a vibrazioni eccessive o a interferenze magnetiche 2 Non installare il prodotto in un luogo soggetto ad alte superiori ai 50 gradi o basse temperature 10 gradi oppure ad elevata umidità In caso contrario si possono provocare incendi o scosse elettriche 3 Evita...

Page 172: ...nti 14 Lenti Fissando e Aggiustando per l Interruttore di Selezione 15 Aggiustando Fuoco Posteriore 16 Connttendo Cavi 18 Capitolo 5 Camera Set up 20 Appendice Prodotto Specificazione 39 NOTA evitare di puntare la telecamera direttamente su oggetti molto luminosi ad esempio sul sole In caso contrario si potrebbe danneggiare il sensore CCD 00424ASCC B2307P ITA 02 4 7 059 46PM 4 All manuals and user...

Page 173: ...e La camera Giorno Notte è usato generalmente nei posti scuri come il parcheggio seminterrato moltissimi con uno illuminazione basso comportivamente In ore diurne fornire uno schermo colore di densità alta con una risoluzione orizzontale di 48 e alla notte utilizzare La funzione Giorno Notte cosi bene come il senso sopra di funzione agli oggetti identificare Nello stesso cosi può usare questa came...

Page 174: ...uce Retro Superiore Nel caso gli oggetti ha un illuminazione chiaro o luce di sole indietro questa camera aggiusta l imagine ombreggiato dalla luce per fotografare chiaro Metodo Sincoronizazione Alimentazione Digitale La serratura linea metodo digitale intera in questa camera che aggiusta la sincronizazione della camera verticale diretamente per improvare controllabilemente e la camera dell attend...

Page 175: ...eramente con un tessuto per lente o l etnolo dipinto di tessuto cottone Collegatore Lente Otturatore Automatica Questo collegatore fornisce la lente otturatore automatica con l alimentazione lo segnale controllo segnale di video o segnale necessaria di DC per il controllo del lente otturatore Cavo Controllo Lente Otturatore Automatica Interrutore Setting Lente ALC Connectore Lente Otturatore Autom...

Page 176: ...errutore mette il tipo di lente Iris per usare DC Quando attacare un lente Iris Auto richiedendo la segnale di controllo DC per favore mette questo interrutore nella posizione DC VIDEO Quando attacca un lente Iris Auto richiedendo la segnale controllo video per favore mette questa interruttore nella posizione VIDEO Vista Posteriore 00424ASCC B2307P ITA 02 4 7 059 46PM 8 All manuals and user guides...

Page 177: ...tor del video è collegato con questa terminale attraverso che il video segnale della camera uscire Terminale Input Remoto RS 232 Questa terminale è usato per il controllo della camera alla impianta di produzione 1 TXD 2 RXD 3 5V 4 GND 1 2 3 4 00424ASCC B2307P ITA 02 4 7 059 46PM 9 All manuals and user guides at all guides com ...

Page 178: ...ore al terminale Giorno Notte come mostrando in poi collegare qualche dispositivo esteriore per esempio un segnale acustico o lampada al terminale ALARM come ha mostrato in Il terminale output ALARM è un collezionista aprire con la capacità seguente Sotto DC 16V e Sotto 100mA OFF Aprire il contatto ON Sotto 100mA Il terminale input Giorno Notte ha il input di DC 5V avvicina e sopra 0 2 mA OFF Apri...

Page 179: ...hiave Questo è usato per entrare il menu di Setup Premerlo sopra 2 secondi Nel modo menu di setup UP DOWN chiave Questi chiavi muovere sopra o in giù del cursore LEFT RIGHT chiave Questi chavi muovere il cursore alla sinistra o destra o identificare il valore sequentemente che può essere assegnato in ogni menu setup ENTER chiave È usato per entrare un menu di setup di sotto menu da far scattando i...

Page 180: ...descrivere come per installare la camera e collegare il cavo nelle circostanze reale Non mancare di controllare se l articolo seguente sono incluso nel pacco Prima Installazione Controllazione Gli Contenuti del Pacco Camera Supporto camera Montatura Adattatore supporto C Collegatore lente otturatore automatico Manuale d utente 00424ASCC B2307P ITA 02 4 7 059 46PM 12 All manuals and user guides at ...

Page 181: ...la camera in pioggia o in posto umidità Non strofinare il corpo della camera con la carta vetrata ruvido quando è macchiato Per favore usare un tessuto asciugato sempre Mettere una camera nell aria libera fresca dalla luce directta Altrimenti la camera può essere danneggiato Che cosa dovrebbe essere fatto mentre l installazione e uso 00424ASCC B2307P ITA 02 4 7 059 46PM 13 All manuals and user gui...

Page 182: ...ria come seguente Collegare ogni cavo di filo metalico d otturatore rivelato al collegatore otturatore automatico come seguente Numero Pin Tipo Controllo DC Tipo Controllo Video 1 Damp Potenza 12V 2 Damp N A 3 Drive Segnale Video 4 Drive Ground 00424ASCC B2307P ITA 02 4 7 059 46PM 14 All manuals and user guides at all guides com ...

Page 183: ...o questo è fissato come è mostrato come seguente Nel caso di lenti C Girare l adattore C supporto in senso orario per fissarlo Poi girare il lente C in senso orario fino è fissato come seguenti lenti CS lenti C 00424ASCC B2307P ITA 02 4 7 059 46PM 15 All manuals and user guides at all guides com ...

Page 184: ...ti sono fuori di fuoco attraverso il numero differisce in tipi Se questi è il caso dovrebbe produrre il fuoco retro aggiustamento come seguenti Prima questo è il fouco retro aggiustamento procedura per fuochi fissati dei lenti Lenti senza funzione zoom Immaginare un oggetto con la risoluzione letticed alta a più che la distanza 10m e mette il fuoco di lente circondare nella posizione infinita Ruot...

Page 185: ...fuoco del lente anello fino l oggetto è visto migliore Zoom nel lente al più vicinare a WIDE e aggiustare il BACK FOCUS aggiustamente ilbar fino l oggetto è visto migliore Ripetere da 1 a 2 oltre 2 o 3 volte fino il fuoco sulla parte ZOOM TELE è nella linea con sulla parte ZOOM WIDE 00424ASCC B2307P ITA 02 4 7 059 46PM 17 All manuals and user guides at all guides com ...

Page 186: ...e una parte dell adattatore potenza composto delle line 2 al terminale Potenza In Camera In con un dispositivo della testa piatta come seguente GND marcato con una linea bianca Il sorgente della potenza deve essere collegare noncurrante della polità AC24V e DC 12V CAVO BNC MORSETTO VIDEO OUT Morsetto di Video in dello schermo posteriore 00424ASCC B2307P ITA 02 4 7 059 46PM 18 All manuals and user ...

Page 187: ...I 19 00424ASCC B2307P ITA 02 4 7 059 46PM 19 All manuals and user guides at all guides com ...

Page 188: ...SETUP ZONA SETUP 3200K 5600K UTIL ROSSO BLU SETUP FASE SETUP ZONA SETUP SENSIBILITÁ SETUP BAUDRATE D ZOOM PIP MIRROR POSI NEGADETTAGLIO ACTIVITY DET IRIS ALC ELC COLORE B N COLORE B N AUTO EST SHUTTER OFF 1 100 1 10K OFF AUTO X2 X128 OFF FISSO X2 X128 AGC OFF BASSO ALTO MOVIMENTO M LENTO M VELOC BIL BIANCO ATW AWC MANU SYNC INT LINE SETUP MENU SPECIALE EXIT ESCI SALVA PRESET BLC OFF BASSO ALTO SIN...

Page 189: ...binazione di questa sopra ai digitali Il ID CAMERA designata può essere collocato al altro posto come desiderato da usando il sottomenu ID CAMERA Se premere la Chiave Enter ID CAMERA ON IRIS ALC BLC OFF COLORE B N COLORE SHUTTER AUTO X8 MOVIMENTO M VELOC BIL BIANCO ATW SYNC INT SPECIALE USCITA ESCI ID CAMERA A B C D E F G H I J K L M N O P Q R S T U V W X Y Z 0 1 2 3 4 5 6 7 8 9 SP SP POSIZIONE RE...

Page 190: ...della luminosità Ecco può mettere il livello della luminosità da premendo la chiave LEFT o RIGHT nel menu LIVELLO Il setting di Level è disponibile solo da usando il lente DC IRIS IRIS Se premere la Chiave Enter ID CAMERA OFF IRIS ALC BLC OFF COLORE B N COLORE SHUTTER AUTO X8 MOVIMENTO M VELOC BIL BIANCO ATW SYNC INT SPECIALE USCITA ESCI ALC DC IRIS 00 I RET 00424ASCC B2307P ITA 02 4 7 059 46PM 22...

Page 191: ...à Alta entro un raggio limitato nel caso di troppo radizione d intensività dal esterno metre usando il lente Manuale Se selezionare il ELC nel menu IRIS e premere la chiave ENTER il sotto schermo seguente sarà apparire Ecco può mettere il livello da premendo la chiave LEFT o RIGHT Se premere la Chiave Enter ID CAMERA OFF IRIS ELC BLC OFF COLORE B N COLORE SHUTTER AUTO X8 MOVIMENTO M VELOC BIL BIAN...

Page 192: ...LEFT o RIGHT per mettere la funzione OFF o la funzione UTIL per il setting già mette 5 aree incluso BASSO ALTO SINISTRA DESTRA CENTRO o UTIL o per la montatura d area diretto Se selezionare il BASSO nel menu BLC e premere la chave ENTER sarà potere certificare l area BASSO già è messo BLC Se premere la Chiave Enter ID CAMERA OFF IRIS ALC BLC BASSO COLORE B N COLORE SHUTTER AUTO X8 MOVIMENTO M VELO...

Page 193: ... il LEFT o RIGHT e premere la chaive ENTER sarà potere a determinare la misura e la locazione dell area BLC da solo Quando l area non è lampeggiato può specificare la misura d area da premnedo la chiave della direzione LEFT RIGHT UP DOWN Se premere la chiave ENTER ancora sarà fuggire dal menu setting UTIL ZONA DIMENSIONE DIMENSIONE DIMENSIONE POSIZIONE POSIZIONE POSIZIONE 00424ASCC B2307P ITA 02 4...

Page 194: ... BIL BIANCO ATW SYNC INT SPECIALE USCITA ESCI COLORE GUADAGNO 0 I AGC COLORE 0 I RET Usare la chiave Left Right ID CAMERA OFF IRIS ALC BLC OFF COLORE B N COLORE SHUTTER AUTO X8 MOVIMENTO M VELOC BIL BIANCO ATW SYNC INT SPECIALE USCITA ESCI ID CAMERA OFF IRIS ELC BLC UTIL COLORE B N B N SHUTTER AUTO X8 MOVIMENTO M VELOC BIL BIANCO ATW SYNC INT SPECIALE USCITA ESCI COLORE Questo è un Filtro IR di Mo...

Page 195: ...o di sottomenu B N sarà apparire Deve potere a mandare la segnale BURST da acceso o spento in questo menu Se premere la Chiave Enter ID CAMERA OFF IRIS ALC BLC OFF COLORE B N B N SHUTTER AUTO X8 MOVIMENTO M VELOC BIL BIANCO SYNC INT SPECIALE USCITA ESC B N BURST ON RET 00424ASCC B2307P ITA 02 4 7 059 46PM 27 All manuals and user guides at all guides com ...

Page 196: ... B N sarà apparire sullo schermo menu Sarà potere a mandare fuori la segnale BURST da accso o spento in questo menu setup il DURATION TIME per conversione o setup il livello di luminosità standard per convertendo il modo COLORE nel modo B N Se premere la Chiave Enter ID CAMERA ON IRIS ALC BLC OFF COLORE B N AUTO SHUTTER AUTO X8 MOVIMENTO M VELOC BIL BIANCO ATW SYNC INT SPECIALE USCITA ESCI AUTO B ...

Page 197: ...ottomenu EXTERNAL B N sarà apparire sul menu di schermo Sarà potere a mandare fuori la segnale BURST da accendo o spento in questo menu Se premere la Chiave Enter ID CAMERA ON IRIS ALC BLC OFF COLORE B N EST SHUTTER AUTO X8 MOVIMENTO M VELOC BIL BIANCO ATW SYNC INT SPECIALE USCITA ESCI ESTERNO B N BURST ON RET 00424ASCC B2307P ITA 02 4 7 059 46PM 29 All manuals and user guides at all guides com ...

Page 198: ...ite oda x2 a 128 che rallentare la velocità d otturatore fare più pulito e più chiaro l immagine dello schermo che ha preso nell illuminazione di buio Se vuole mostrare la velocià d otturatore automaticamente secondo il grado dell oscurità da sondando la radiazione della intensità per favore selezionare la velocità debole AUTO e se vuole set up la velocità d otturatore senza riguardo dello schermo...

Page 199: ...che l oggetto preso nell illuminazione scuro Setting up il menu AGC è disponibile solo nell uno o l altro modo High Speed Shutter o modo OFF Se premere la chiave LEFT o RIGHT per arrivare la posizione BASSO o ALTO la funzione AGC sarà cominciare attivamdo BASSO è usato per il AGC GAIN inferiore mentre ALTO è usato per il AGC GAIN superiore Quando il menu COLORE B Nè auto l articolo di menu AGC ind...

Page 200: ...ità di AGC debole agli oggetti di monitor con un poco movimento nel buio Il NORM standardizzare ls intensità di AGC agli oggetti di monitor movimento nel buio Il VELOC matenere la intensità di AGC agli oggetti di monitor movimento nel buio Il M VELOC massimizzare la intensità di AGC agli oggetti movimento molto presto nel buio Per attivare la funzione MOVIMENTO dovrebbe premere la chiave DOWN per ...

Page 201: ... sarà potere setup la Bilancia Bianca in considerazione dell illuminazione corrente manualmente Se seleziona l articolo MANU e premere la chiave ENTER lo sottomenu MANU sarà apparire per selezionare la Bilancia Bianca Se premere la chiave LEFT o RIGHT nel menu PRESET sarà potere selezionare il 3200K 5600K o mido UTIL 3200K Mette il colore della temperatura a 3200 K 5600K Mettere il colore della te...

Page 202: ...FT RIGHT per selezionare l articolo LINE e premere la chiave ENTER Ora sarà vedere il sottomenu per aggiustare il PHASE PHASE può fare set up fino a 106H 106H NTSC a 138H 138H PAL Quando usare lo sorgente potenza DC il Menu SYNC è pieno e Non può usare la funzione SYNC SYNC Se premere la Chiave Enter ID CAMERA ON IRIS ALC BLC OFF COLORE B N COLORE SHUTTER AUTO X8 MOVIMENTO M VELOC BIL BIANCO MANU ...

Page 203: ...TAGLIO 0 I ACTIVITY DET OFF LINGUA ITALIANO RET Se premere la Chiave Enter SPECIALE VELOCITÁ 38400 D ZOOM X2 PIP ON MIRROR OFF POSI NEGA DETTAGLIO 0 I ACTIVITY DET OFF LINGUA ITALIANO RET VELOCITÁ Mette la velocità di communicazione a 4800 9600 19200 o 38400bps per RS 232 D ZOOM Mette l ingrandimento del Zoom Digitale al 5 passi x2 x4 x6 x8 e x10 PIP Dipingere nella funzione Picture per mostrare u...

Page 204: ... l area per trovare il movimento Se selezionare il modo ON e premere la chiave ENTER il sottomenu ACTIVITY DET dello schermo sarà apparire LINGUA Può scegliere uno delle lingue seguente Inglese Tedesco Francese Spagnolo e Italiano Usare Chiave Left Right SPECIALE VELOCITÁ 38400 D ZOOM X2 PIP ON MIRROR OFF POSI NEGA DETTAGLIO 0 I ACTIVITY DET ON LINGUA ITIALIANO RET ACTIVITY DET ZONA PRESET SENSIBI...

Page 205: ...T sara essere applicato per l aria selezionata del prodotto mentre l imbarco Può anche muovere il cursore al menu SENSIBILITÁ e premere la chiave LEFT o RIGHT per set up la detectiva del movimento d aria selezionata Usare la chiave Left Right Up Down Se premere la Chiave Enter ACTIVITY DET ZONA UTIL SENSIBILITA 0 I RET DIMENSIONE DIMENSIONE POSIZIONE POSIZIONE POSIZIONE DIMENSIONE 00424ASCC B2307P...

Page 206: ...IALE USCITA SALVA Il menu USCITAè usato per la terminazione del menu CAMERA SETUP ESCI Ignorare qualche cambiamento e ritornare al menu SETUP risparmiato precedentemente SALVA Risparmiare tutti cambiamenti al menu fino d ora PRESET Ignorare qualche cambiamento e ritornare al valore iniziale del menu CAMERA SETUP che era set per il prodotto d imbarco USCITA 00424ASCC B2307P ITA 02 4 7 059 46PM 38 A...

Page 207: ...Hz L L Metodo Sincronizazione INT Line Serrata Risoluzione 500 530 TV Linee COLORE B N S N Tasso 52dB AGC OFF Illuminazione minimma COLORE 0 3 Lux F1 2 0 002 Lux Scena B N 0 06 Lux F1 2 0 0004 Lux Giorno Notte COLORE B N AUTO EST Temperatura Colore ATW AWC MANU 3200 K 5600 K R B Aggiustamento Gain Velocità otturatore elettronic ALC OFF 1 10K sec 7 passi ELC Max 1 100K sec Compensazione Luce Retro ...

Page 208: ...EGA Mirror Left Right Setting DETTAGLIO Segnale Output Composito Video Out 1 0 Vp p 75 ohms BNC Lenti VIDEO DC Suppport Lente CS C Adarratore Supporto Operazone Temperatura 10 C 50 C Operazione Humidità 90 Misura Fisicale 68 W x 55 H x 128 5 D mm Peso SCC B2303 Approx 450g 00424ASCC B2307P ITA 02 4 7 059 46PM 40 All manuals and user guides at all guides com ...

Page 209: ...CD Pixel Effetiva 752 H X 582 V Metodo Scannin 625 Line 2 1 Interlace Frequenza Linea Orizzontal 15 625 Hz INT 15 625 Hz L L Verticale 50 Hz INT 50 Hz L L Metodo Sincronizazione INT LINE Serratura Risoluzione 500 530 TV Linee COLORE B N S N Tasso 52dB AGC OFF Illuminazione minimma Scena SCC B2303P B2003P COLORE 0 3 Lux F1 2 0 002 Lux B N 0 06 Lux F1 2 0 0004 Lux SCC B2307P B2007P COLORE 0 2 Lux F1...

Page 210: ... 2X 128X Zoom Digitale OFF ON X10 PIP Moto Scoperta OFF ON ZONA SETTING SENSIBILITÀ Video Controllo POSI NEGA MIRROR Left Right Setting DETTAGLIO Segnale Output Composito Video Out 1 0 Vp p 75 ohms BNC Lenti VIDEO DC Suppport Lente CS C Adarratore Supporto Operazone Temperatura 10 C 50 C Operazione Humidità 90 Misura Fisicale 68 W x 55 H x 128 5 D mm Peso SCC B2303P B2307P Approx 450g SCC B2003P B...

Page 211: ...Part No AB68 00424A 02 Made in Korea 00424ASCC B2307P ITA 02 4 7 059 46PM 43 All manuals and user guides at all guides com a l l g u i d e s c o m ...

Reviews: