background image

SCC-C6475(P)

E

RU

PL

IP 

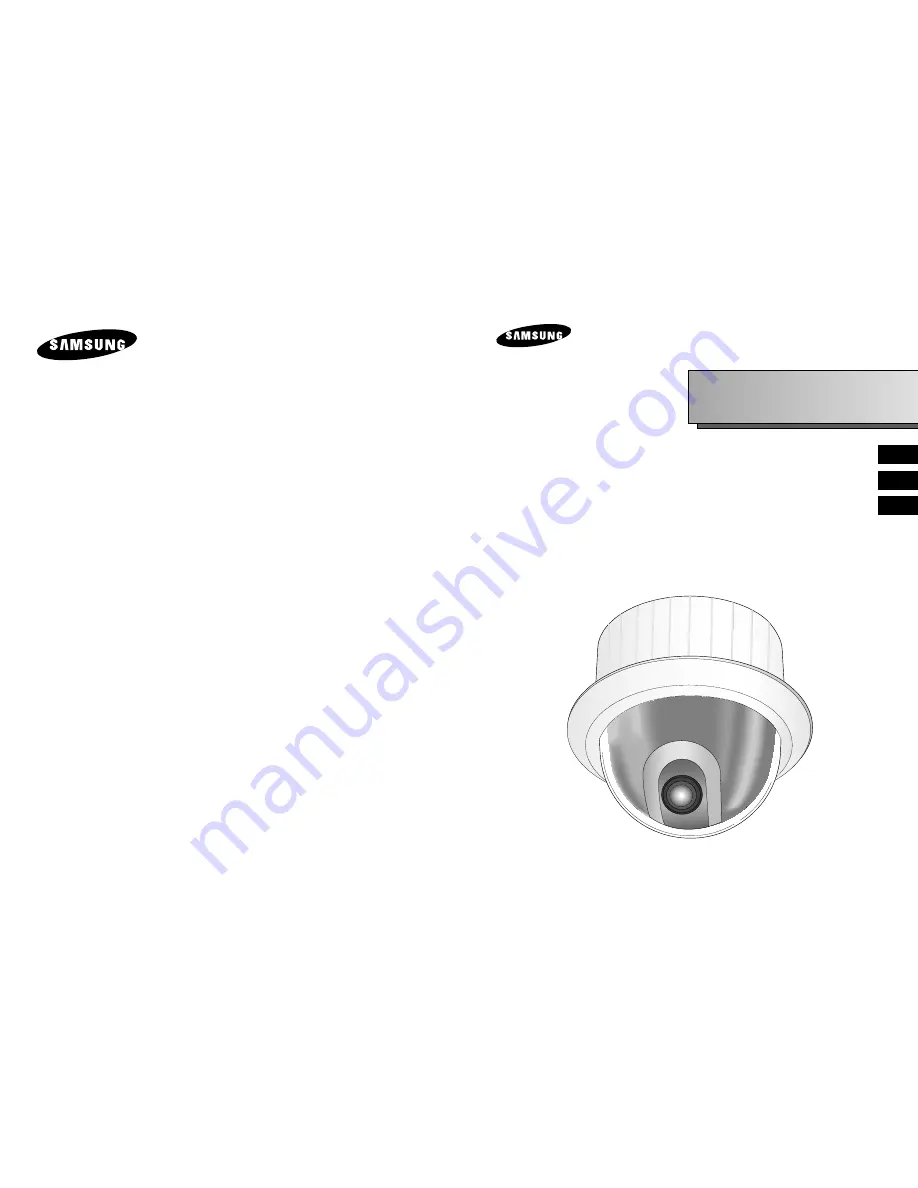
SmartDome Camera

Owner’s Instructions

êÛÍÓ‚Ó‰ÒÚ‚ÓÔÓθÁÓ‚‡ÚÂÎfl

Instrukcja obs∏ugi

Summary of Contents for SCC-C6475(P)

Page 1: ...SCC C6475 P E RU PL IP SmartDome Camera Owner s Instructions êÛÍÓ Ó ÒÚ ÓÔÓÎ ÁÓ ÚÂÎfl Instrukcja obs ugi ...

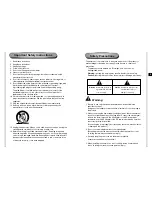
Page 2: ...a on a wall or ceiling fasten it securely and firmly A falling camera may cause personal injury 1 Read these instructions 2 Keep these instructions 3 Heed all warnings 4 Follow all instructions 5 Do not use this apparatus near water 6 Clean only with dry cloth 7 Do not block any ventilation openings Install in accordance with the manufacturer s instructions 8 Do not install near any heat sources s...

Page 3: ...ature over 122 F low temperature below 14 F or high humidity Doing so may cause fire or electrical shock 3 Avoid a location which is exposed to direct sunlight or near heat sources such as heaters or radiators Neglecting to do so may result in a risk of fire 4 If you want to relocate the already installed product be sure to turn off the power and then move or reinstall it 5 Install in a well venti...

Page 4: ... used when read from beginning to end but for users wanting to read only the part they need here are the Chapter summaries Chapter 1 SCC C6475 P Overview includes a brief introduction of the SCC C6475 P part names and functions and Switch Settings Chapter 2 SCC C6475 P Installation explains the installation procedures of the SCC C6475 P and provides preparation and installation environment require...

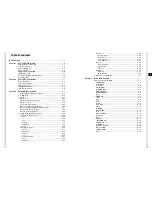
Page 5: ... 7 Locations of Control 1 8 Camera Main Body 1 8 Camera Holder 1 9 ADAPTER CONNECTION 1 10 INITIAL SETTING 1 11 Setting RS 422A RS 485 termination 1 12 Factory Default 1 13 Chapter 2 SCC C6475 P Installation 2 1 Before Installing 2 2 Preparing the Cables 2 3 Cable Connection 2 4 Installing SCC C6475 P 2 5 Installing the Camera 2 8 Chapter 3 Network Manual Overview 3 1 1 Connecting SCC C6475 P Netw...

Page 6: ... AREA 4 21 LOCATION 4 22 ZONE ID SET 4 22 ZONE ENABLE 4 22 5 AUTO SET 4 23 AUTO PAN 4 23 START SET 4 23 END SET 4 23 DIRECTION 4 24 ENDLESS 4 24 SPEED 4 24 DWELL TIME 4 24 PATTERN 4 24 SCAN 4 25 AUTO PLAY 4 26 AUTO RETURN 4 26 PLAY NUMBER 4 26 6 ALARM SET 4 27 ALARM PRIORITY SET 4 27 ALARM IN SET 4 27 ALARM OUT SET 4 27 AUTO SET 4 28 AUX OUT CONTROL 4 28 7 OTHER SET 4 28 PROPORTINAL P T 4 28 TURBO...

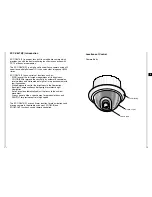
Page 7: ...the full screen irregardless of its brightness COLOR BW to improve the sensitivity by automatic conversion into the black and white mode at night or in the environment with low illumination White Balance to control the brightness to the illumination Backlight Compensation under spotlight or utmost bright illumination Auto Focus to automatically adjust the focus to the subject movement Privacy zone...

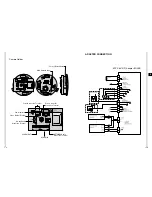
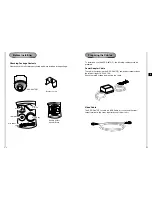
Page 8: ...9 ADAPTER CONNECTION SCC C6475 P Adapter BOARD Camera Holder Power Connection Terminal Power Indicator Video Output Terminal ALARM IN ALARM OUT Factory Default Button MAC Address Label NETWORK Cable Connection Terminal RS 232 Cable Connection Terminal Remote controller Connection Terminal ...

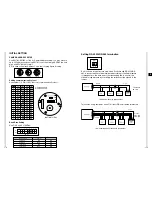
Page 9: ...may allocate up to 255 addresses by using SW701 to set the 3rd digit SW702 the 2nd digit and SW703 the 1st digit EX In case of Camera Address 1 see the following figure for setup Setting communication Protocol Use number 1 4 PIN of SW704 to set communication Protocol Baud Rate Setting Use PIN 5 and 6 of SW704 SW701 SW702 SW703 1 2 3 4 5 6 7 8 ON OFF BAUD RATE 4800 BPS 9600 BPS 19200 BPS 38400 BPS ...

Page 10: ...he Reset page Refer to 5 Setting and changing the function System Reset in Chapter 3 Network menu Overview 2 Using the Factory Default button on the side of the unit Proceed as follows 1 Turn the power off 2 While pressing the Factory default button turn the power on 3 When the Status LED flickers 3 times in red unpress the Factory Default button 4 If the Status LED turns to green the whole settin...

Page 11: ...sing the cable Video Cable The SCC C6475 P s cable is a BNC Cable for connecting the video output terminal to the video input terminal of the monitor Preparing the Cables 2 3 E 2 2 SCC C6475 P Bracket anchor Camera Holder Adapter Board Cover Body Screws Installation CD RJ 45 CROSS LAN CABLE Before Installing Checking Package Contents Please check that all components listed below are included in th...

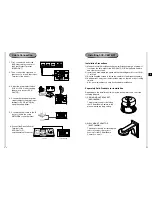
Page 12: ...R 100DCM This bracket is used for installing the IP SmartDome Camera in the plenum above the drop ceiling 2 WALL MOUNT ADAPTOR SADT 100WM This adaptor is used for installing the indoor housing or the outdoor housing for the IP SmartDome Camera on a wall 2 5 E 2 4 6 Connect the Remote Control Terminal of the SCC C6475 P and the external Controller Controller Adapter BOARD 1 First connect one end of...

Page 13: ...DAPTOR SADT 100PM This adaptor is used for installing the WALL MOUNT ADAPTOR SADT 100WM to a pole that is over 8 cm 2 76 in in diameter 3 INDOOR HOUSING SHG 120 This housing is used for installing the IP SmartDome Camera to an indoor wall or a ceiling 4 OUTDOOR HOUSING SHG 220 This housing is used for installing the IP SmartDome Camera to an outdoor wall or a ceiling 2 7 E 2 6 ...

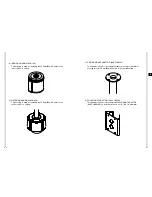
Page 14: ...s PH M4 x 8 to assemble them Figure 5 6 Pull the safety wire from the case body and assembly it to the camera holder Figure 6 3 Figure 2 Assemble the BRKT ANCHOR on the ceiling and screw the 4 bolts in Figure 2 2 Make a hole in the ceiling where the camera will be installed The hole should be about ø185 4 Figure 3 4 Connect the various cables to the CAMERA ADAPTER See page 2 4 Figure 4 Figure 3 Fi...

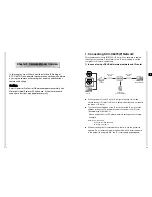
Page 15: ...ase of using xDSL Cable Internet network and IP router If the user wants to use IP router to configure the network he she should connect IP router to ADSL or Cable modem first and set them in the menu of IP router To access the setup menu of the IP router enter the IP router access address in the Local PC internet browser connected to the IP router Example http 192 168 1 1 Please assign the Local ...

Page 16: ...p Basic Setup as figure After finishing the setting click the Save settings button and save the setting Check the Status page to verify that xDSL or Cable modem is connected successfully Execute IPinstaller exe program in the user s Local PC to set the SCC C6475 P IP connected to the IP router If not click the Connect button to retry or recheck the setting value and retry If xDSL or Cable modem is...

Page 17: ...ifferently 6 After completing every setup enter the Password and click the Apply button And then SCC C6475 P will reboot automatically Password is the root user s log in Password to access the SCC C6475 P Password is set as basic value 4321 when it is shipped Setup Refer to the Local IP Address and Subnet Mask of the Router IP in the Network Setup at the Basic Setup Local IP Address becomes the SC...

Page 18: ...ss port that SCC C6475 P network program is using in case that several SCC C6475 P is connected to one IP router SCC C6475 P port should be set differently RTSP Control port Port to control the image sending The basic value is set 554 TCP TCP Streaming port Port to send the image by using the TCP process The basic value is set 555 TCP UDP Streaming port Port to send the image by using the UDP proc...

Page 19: ... 6c attach the lower case m and when starting from 00 68 36 attach the lower case p Example 1 If the MAC Address of SCC C6475 is 00 00 f0 ff fe 42 DDNS address c fffe42 websamsung net cfffe42 websamsung net Example 2 If the MAC Address of SCC C6475 is 00 16 6c ff fe 42 DDNS address m fffe42 websamsung net mfffe42 websamsung net Example 3 If the MAC Address of SCC C6475 is 00 68 36 ff fe 42 DDNS ad...

Page 20: ...tup Local IP Address becomes the SCC C6475 P Gateway value 5 HTTP Port that Internet browser use to access is set 80 as a basic value but it can be changed as the user s network configuration For example more than 2 SCC C6475 P cameras are connected to an IP router HTTP Port of each camera should be set differently 6 After completing every setup enter the Password and click the Apply button And th...

Page 21: ...g value when needed Assign IP Type as Static IP in the Connection Configuration and assign Connection Type as IP Router LAN In case that the Connection Configuration is not set for the user s network environment the access cannot be done or the image cannot be appeared smoothly Set RTSP Control port TCP Streaming port UDP Streaming port and Upload port Each port is the access port that SCC C6475 P...

Page 22: ...nnecting the camera to the xDSL Cable internet network INTERNET Modem Modem SCC C6475 DDNS Server Data Center KOREA Remote PC SCC C6475 Cross Ethernet Cable SCC C6475 P SCC C6475 P After completing the Port Forwarding setting to the SCC C6475 P Click the Save Settings and save the setting value Completing the above setting User can access the SCC C6475 P and monitor the monitoring image by using t...

Page 23: ... it is shipped User access http 192 168 1 200 by using the PC internet browser If the indicated content in the camera list is not the same as follows fix the setting as the follow Example Example SCC C6475 P User PC IP 192 168 1 200 IP 192 168 1 201 Subnet mask 255 255 255 0 Subnet mask 255 255 255 0 Gateway 192 168 1 1 Gateway 192 168 1 1 HTTP Port 80 Accessing SCC C6475 P by using the internet b...

Page 24: ...n be delayed or failed as the ISP condition In case of this ON OFF the modem and wait for about 1 minute after powering off SCC C6475 P and then power on again This new ADSL Cable IP is registered in the DDNS server User can monitor the image to access the camera after entering the DDNS address Example cfffe42 websamsung net in the Remote PC internet browser Depends on the ISP condition the ADSL C...

Page 25: ...net with a Remote PC in the LAN out of network the access can be failed if the firewall is installed In case of this please contact the network manager 4 In case of connecting the camera in the intranet LAN INTERNET HUB SCC C6475 Local PC DDNS Server Data Center KOREA Remote 2 Setting the IP 1 If you execute the IPInstaller exe find the camera connected the inner LAN network as follows and show in...

Page 26: ... C6475 is 00 00 f0 ff fe 42 DDNS address c fffe42 websamsung net cfffe42 websamsung net Example 2 If the MAC Address of SCC C6475 is 00 16 6c ff fe 42 DDNS address m fffe42 websamsung net mfffe42 websamsung net Example 3 If the MAC Address of SCC C6475 is 00 68 36 ff fe 42 DDNS address p fffe42 websamsung net pfffe42 websamsung net 2 Enter the User ID root and Password 4321 and log in The root ID ...

Page 27: ...t the image is being shown If you choose the other camera in the list the selected camera image will be displayed Sequence Mode Sequence Mode that is set in the Setup Basic Configuration Camera will be executed If the Sequence Mode is being executed the other buttons in the main page is not activated and can not be used Setup the image screen adjustment button that has been logged in is usable Sto...

Page 28: ...ute C Program Files Samsung Smart Viewer for ProCam Capture saving route or file format can be changed in Setup Basic Video File name yy mm dd_hh mm ss_camera name bmp Example 20050317_144605_IP SmartDome Camera bmp Click the button and the saved information will be displayed in the screen Record Save the video image to the cam format that is being shown Save route C Program Files Samsung Smart Vi...

Page 29: ...the Refresh button in the window that is appeared when pressing the button and it will display the latest Autopan information set in the camera Scan Execute the selected Scan item Unable to use Preset AutoPan Pattern Function while executing Stop executing if the user click the other control button Click the Refresh button in the window that is appeared when pressing the button and it will display...

Page 30: ...he image Frame rate is subjected to adjust by the number of access network environment the frame rate can be less than the user set the frame rate Setting the connection Select the setting value according to the user s network environment camera installed If the setting is different with the actual installed network environment the image cannot display smoothly Select setting according to the netw...

Page 31: ... cable operating dynamic IP In case of this if they use ADSL or Cable modem power off the modem and power it on and then reconnect the camera power User Setting Login Authentication as disable able to access without login process But in case of this information about connector doesn t display The user who accesses as non authentication is authorized by User Use authority Administrator Manager who ...

Page 32: ... them Apply Save Log In Camera name and Sequence Mode setting value Language Support only English for the initial model Preset list Display the preset item that is currently set Insert Set preset as the name that has been input the current position Delete Delete the selected preset item Able to input up to 20 preset items Able to add or modify the camera After checking the several camera in the ca...

Page 33: ...rrent system time by receiving it from the NTP server Time Set the time synchronous with NTP time server User should input the NTP server IP KT NTP server IP is input basically Set the time zone according to the user s location Check the check box and input the start time date and end time date to apply summer time Unable to connect NTP server in case of using Local network ...

Page 34: ...put in the accessible IP list Log Display the log information recorded the system modifying events with time log specifics User Log In Video Configuration Change System Time Change etc N N N No o o ot t t te e e e Log information will be Initialized if the set reboots Displays Log information only when the system time is set ...

Page 35: ... and start the system update Select Cancel to cancel the update Reset Press Restart and the window as bellows appears and press the confirm button and the system restarts W W W Wa a a ar r r rn n n ni i i in n n ng g g g W W W Wa a a ar r r rn n n ni i i in n n ng g g g 1 Reaccess after Restarting because the user access does not maintain 2 It takes several minutes to complete system booting Befor...

Page 36: ... Parameter Load network setting will be exceptional Overlay Image Display the specific image that user chose company logo etc on the main screen with camera image Menu function by item 1 Disable Enable Select the Enable radio button to set Overlay image as the main image 2 Use transparency Select the Use transparency in check box to set the transparent color of Overlay image Enter transparent colo...

Page 37: ... up to 5 Overlay Text Displays the camera image in the main screen with the text that the user set Menu functions by item 1 Disable Enable Select the Enable radio button to set the Overlay text in the main screen 2 Show camera ip Select the check box to display the camera ip in the screen 3 Show camera name Select the check box to display the camera name in the screen 4 Show date Select the check ...

Page 38: ...go in Select existing image or type url in External and check the Logo check box Logo Link Type url to use for Logo Link and check the Logo Link check box View HTML Code HTML Code of Viewer Displays the HTML Code that applies the set item Overlay Image Overlay Text to the current Viewer Able to see the image in the web page if the user copy this code and use this for the other web page Image size ...

Page 39: ...ing to the set value when alarming Able to select alarm event to transfer the image Input port Transfers the image for the alarm through the camera Input port Manual Transfers the image when the user click the Manual button in the Main screen directly Schedule Transfers the image automatically according to the schedule that the user had set Pre Post Alarm Setup Able to set the image pages to trans...

Page 40: ...ternal Sensor and output the Alarm output signal from the outside If the Alarm signal input lasts over 150 ms it will be recognized as the Alarm signal And the Alarm operation time depends on the Preset Dwell Time to each Alarm and the Pattern connection of it 1 ALARM PRIORITY SET Set the priority of the 4 Alarm inputs and react the Alarm input according to the priority Default priority is Alarm1 ...

Page 41: ...3 Half1 Pattern1 Pattern2 serial operation Half2 Pattern2 Pattern3 serial operation Full Pattern1 Pattern2 Pattern3 serial operation Scan 1 2 3 4 execution 5 AUX OUT CONTROL Set if the set Alarm output keep operating regardless of Alarming or operate only when Alarming If set Off Alarm Out will operate only when Alarming Active Low if set On always Alarm output operates regardless of Alarm To test...

Page 42: ...ransfers and receives by one to N the network load for receivers becomes lower but operates only in the network environment that uses Multicast support router Multicast address is available for the range from 224 0 0 0 to 239 255 255 255 TTL is the abbreviation for Time To Live setting how many steps take to deliver the packets without loss to the router Router will reduce the TTL value one by one...

Page 43: ...sender and receiver in case of using TCP IP in communication Gateway In a wide meaning function unit or devices that make communicate information between network by accessing same kinds of network or different kinds of network Subnet mask Mask that determines which IP address is included in which subnet ISP Internet Service Provider DDNS Dynamic Domain Name System DNS that can upgrade modify and n...

Page 44: ...he overall structure of the Setup Menu In this section a description of the Setup menu features will enable users of the SCC C6475 P to tailor it to their personal needs ALARM SET ALARM PRIORITY SET ALARM1 1 4 ALARM2 1 4 ALARM3 1 4 ALARM4 1 4 EXIT QUIT SAVE ALARM IN SET ALARM1 NO NC OFF ALARM2 NO NC OFF ALARM3 NO NC OFF ALARM4 NO NC OFF EXIT QUIT SAVE ALARM OUT SET ALARM1 1 3 ALARM2 1 3 ALARM3 1 3...

Page 45: ...trol is made camera will do the same function after the power is turned on Menu setting is available only when tilt position is under 90 When tilt position is over 90 and menu on command is received pan will automatically rotate 180 and tilt will be move to the corresponding position Press Enter CAMERA SET CAMERA ID OFF V SYNC LINE COLOR BW COLOR MOTION DET OFF ZOOM SPEED 3 DIGITAL ZOOM OFF EXIT Q...

Page 46: ...AL ZOOM OFF EXIT QUIT In AUTO mode AGC will operates in high speed mode and you cannot change it manually as it is indicated by Caution If you use an infrared light source while in AUTO mode AUTO switching malfunction and camera AF malfunction may occur AUTO BURST ON LEVEL LOW DURATION S L RET Select ON and press ENTER and the MOTION DET additional menu will appear The AREA menu selecting the scre...

Page 47: ...evel and BLC will be shown The Video Output Level can be set in the level item using the Left Right keys BLC Submenu of the ALC menu With conventional cameras strong background lighting interferes with the clarity of objects making them appear dark In the SCC C6475 P setting the BLC Back Light Compensation submenu of ALC MANU menu will solve the problem of backlight and give you a clear screen Set...

Page 48: ...TO X8 AUTO X12 AUTOX16 AUTO X20 AUTO X40 AUTO X80 AUTO X160 OFF VIDEO SET IRIS ALC SHUTTER OFF AGC OFF WHITE BAL ATW1 DIS OFF FOCUS MODE AF SPECIAL EXIT QUIT 4 10 VIDEO SET IRIS ALC SHUTTER AUTO x2 MOTION F FAST WHITE BAL ATW1 DIS OFF FOCUS MODE AF SPECIAL EXIT QUIT AGC The AGC menu was designed to provide you with brighter screen supposed you photographed any subject in the dark resulting in less...

Page 49: ...modes ATW1 2500K 9300K 1 ATW2 2000K 10000K Mode recommended for sodium lighting 2 1 If the color temperature is out of this range in ATW1 mode proper white balance may not be obtained In that case select ATW2 mode 2 In ATW2 mode if one color is dominated in the shooted area the color can be displayed differently Therefore select the mode which is appropriate for the environment AWC Auto Tracing Wh...

Page 50: ...VIDEO SET IRIS ALC SHUTTER OFF AGC LOW WHITE BAL ATW1 DIS ON FOCUS MODE AF SPECIAL EXIT QUIT SPECIAL DETAIL 0 I RET EXIT It s the same as the EXIT function of the CAMERA SET menu 4 14 3 PRESET This is the menu that user sets the PAN TILT location Zoom Focus and screen condition so the camera can monitor the presetting area on demand A total of 128 presets are available Among the 128 PRESETS PRESET...

Page 51: ...nformation and returns to a higher menu SAVE Do saves the selected information and returns to a higher menu DEL Deletes the selected information and restores the DEFAULT Then returns to a higher menu 4 16 STYLE In the STYLE menu you may the shape of the PRIVACY ZONE area on the screen MOSAIC1 The privacy zone is displayed with the mosaic of 16 X 16 pixel MOSAIC2 The privacy zone is displayed with ...

Page 52: ...arded as the ZONE area 4 18 After P T Z control press ENTER After P T Z control press ENTER PRIVACY ZONE P T 3 PRIVACY ZONE P T 2 PRIVACY ZONE P T 4 SET ZONE AREA Press ENTER at the SET ZONE AREA position to enter the PRIVACY ZONE setup screen Control PAN TILT ZOOM to select 4 apexes of the PRIVACY ZONE area and the rectangular PRIVACY ZONE area will be completed Press Enter After P T Z control pr...

Page 53: ...will be in action only at the higher magnification than the Zoom magnification as set Press Enter SET ZOOM PRIVACY ZONE SET 0 SET ZONE AREA ON SET ZOOM REVERSE OFF EXIT QUIT 4 20 ZONE DIR SET Press the Enter key in the ZONE DIR SET ON mode to enter the NORTH SET screen MAP Move PAN to set the NORTH position and press ENTER Based on the North position the direction of N North NE North East E East S...

Page 54: ...ter ZONE AREA ID 0 A B C D E F G H I J K L M N O P Q R S T U V W X Y Z 0 1 2 3 4 5 6 7 8 9 SP ï î SP LOCATION RET ZONE 0 4 22 AUTO PAN After selecting the locations of two points PAN TILT of START and END it loops continuously in the set up SPEED The number of AUTO PAN is up to 4 5 AUTO SET The AUTO SET menu includes AUTO PAN PATTERN and SCAN and it is able to set up the AUTO PLAY motion Press Ent...

Page 55: ...N AND ENTER PATTERN can be set upto 3 Choose 1 2 or 3 with the left or right key in the PATTERN SET and press ENTER to get into the PATTERN set up screen From the moment PATTERN 1 SET is gone for 2 minutes it memorizes the MANUAL movements and after 2 minutes it will return to a higher menu If you want to finish set up before the 2 minutes ends press ENTER If you enter the SCAN SET screen PRESET M...

Page 56: ...t performs with PRESET or PATTERN function and outputs the ALARM OUT signals The Alarm will be recognized only when its input lasts more than 150ms and the alarm operation time depends on the Preset Dwell time corresponding to the alarm and whether AUTO is involved ALARM PRIORITY SET This sets the priority of the 4 ALARM inputs so ALARM can work corresponding to the priority The priority of the DE...

Page 57: ...ing Active Low and if it s set to ON the ALARM OUT will always operate regardless of the ALARM 4 28 TURBO P T This function doubles up the speed of PAN TILT movement by manual operation of PAN TILT The speed may go up to 180 sec PAN AUTO CAL This function turns on or off Auto Calibration SCC C6475 P has the Auto Calibration function to improve the precision of LENS and PAN TILT motor You may set t...

Page 58: ... Enter PASSWORD 0 1 2 3 4 5 6 7 8 9 RET 9 SHORT KEYS SSC 1000 or SSC 2000 Controller supports the following short keys Other keys than AUTO CAL and AUTO RETURN upon execution shall be applied to the MENU setup process 1 The use of AUTO RETURN will be available only when the function equivalent to AUTO PLAY a sub menu of AUTO SET has been built in Function Key CAMERA SET COLOR BW COLOR COLOR BW BW ...

Page 59: ... FAN CAMERA FAN ERROR This message is displayed when the FAN which is connected with camera of SCC C6475 P does not work properly ALARM FAN ERROR This message is displayed when the FAN which is located bottom of SCC C6475 P does not work properly Appendix Installation of IP router Linksys Model WRT54G Netgear Model RP614v2 D Link Model DI 624 Specifications ...

Page 60: ...in 3 Press the OK 1 In case of using ADSL select the PPPoE 2 In order to access at ISP Internet Service Provider enter the user name and password 2 1 ADSL 1 In case of using Cable select the Automatic Configuration DHCP 1 In case of using the Static Fixed IP select the Static IP 2 Network Properties 1 Enter Internet IP Address 2 Enter Subnet Mask 3 Enter Gateway 4 Enter DNS server Contact the netw...

Page 61: ...ick the Applications and Gaming 2 Click the Port Range Forward 3 Port forwarding First line Application Enter HTTP Start and End Enter 80 both Protocol Select TCP IP Address 192 168 1 2 255 Enable Select Second line Application Enter TCP Start Enter 554 RTSP Port 555 TCP Streaming Port End Enter 556 Upload Server Port Protocol Select the TCP IP Address The same IP with HTTP Enable Select Third lin...

Page 62: ...e and Domain Name when accessing the internet enter the provided contents from ISP Internet Service Provider 4 Enter the user name and password 5 Select the Get automatically from ISP 6 Press the Apply button 1 Select the Basic Settings in Setup Wizard 2 Select No in case of Cable Modem 3 Enter the Account Name and Domain Name only when ISP Internet Service Provider demands 4 Select the Get Dynami...

Page 63: ...sk Subnet Mask Enter Gateway IP Gateway 5 Select Use These DNS Servers 6 Enter Primary DNS and Secondary DNS DNS 7 Select Use Default Address 8 Press the Apply button Check the connection status as follows 1 Select Router Status 2 Verify WAN Port information Be sure to write down the Subnet Mask number to use the set SCC C6475 P afterwards 3 Verify the connection status 4 Port Forwarding Be sure t...

Page 64: ...ess the Add Button 4 Port forwarding UDP Press Add Custom Service Service Name Enter UDP Start Port Enter 8000 End Port Enter 8009 Server IP Address The same IP with HTTP TCP Select Enable Press the Add button N N N No o o ot t t te e e e Be sure to memorize the above set value to use the SCC C6475 P setting afterwards 5 Close the web browser Setting IP router Example D Link model DI 624 1 Access ...

Page 65: ...ext button 5 Time zone 1 Set the time zone that is suitable for user 2 Press the Next button 1 In case of using ADSL enter the user name and password 2 Press Next button and move 7th step 3 Unable to connect automatically set them manually as the left lower side Select PPPoE and press the Next button 6 Setting the internet connection 6 1 ADSL 6 2 Cable Modem 3 ...

Page 66: ...e Contact the network manager in case of not knowing the above value 5 Press the Next button 1 In case of not using Wireless LAN press the Next button N N N No o o ot t t te e e e In case of using Wireless LAN Enter SSID and Channel and press the Next button 7 Wireless LAN 1 In case of not using Encryption press the Next button N N N No o o ot t t te e e e In case of using Encryption mark to Enabl...

Page 67: ...168 0 2 255 Except the IP assigned to the connected internet equipment Protocol Type Select TCP Private Port and Public Port Enter 80 Schedule Select Always Press the Apply button 3 Virtual Server Port Forwarding for TCP Enabled Select Name Enter TCP Private IP Enter the same IP with HTTP Protocol Type Select TCP Private Port and Public Port Enter 554 554 555 555 556 556 Schedule Select Always Pre...

Page 68: ...IZE Weight Lives of Main Parts One Year for use of Full AF Rotated 10 000 000 Times 4 5 Years Product specifications SCC C6475 Contents Zoom lens single body WDR IP SmartDome CAMERA AC 24 10 60Hz 0 3Hz 25W NTSC STANDARD COLOR SYSTEM 1 4 inch WDR compatible Exview HAD CCD 768 H x 494 V 525 Lines 2 1 Interlace Horizontal 15 734 Hz INT 15 750 Hz L L Vertical 59 94 Hz INT 60 Hz L L INT LINE LOCK 480 T...

Page 69: ...s that it should not be disposed with other household wastes at the end of its working life To prevent possible harm to the environment or human health from uncontrolled waste disposal please separate this from other types of wastes and recycle it responsibly to promote the sustainable reuse of material resources Household users should contact either the retailer where they purchased this product ...

Reviews: