4-11
Samsung Electronics
Summary of product
Service Manual
3) Paper Feeding, Toner Cartridge Sensing
When paper passes the actuator on the feed sensor, it is detected by the Photo interrupter.
Signal (nP_FEED, PIN 186) monitored by the CPU and this signal starts the process of creating the image after certain
delay time If the feed sensor is not detected within 1 sec. after paper is fed, a paper Jam0 occurs. (Displayed on the
LCD panel).
When a toner cartridge is inserted it also operates the Paper Feed sensor. A message is displayed on the LCD id no
cartridge is detected.
4) Paper Exit Sensing
This detects that paper exits cleanly from the set using an exit sensor on the engine board and actuator on the frame.
The monitors signal (P_EXIT, PIN 84) and detects the on/off time of the exit sensor and if jam status is detected then
JAM2 is displayed the on the LCD panel.
5) Cover Open Sensing
The Cover open sensor actuator is located on the front cover and the senor is in the main frame.
When the front cover is open the +24V and +5V supplies to the DC fan, solenoid, main motor, polygon motor part of
LSU, HVPS and LSU Laser diode are cut off. The CPU monitors signal (COVER_OPEN, GPIO_11) to recognize when
the cover is open.
6) DC FAN / SOLENOID Driver
It is driven by a transistor and controlled by signal (FAN, GPIO_7; Main Clutch Solenoid:PIN 185,MP Clutch Solenoid:
PIN 184) bit of the CPU.
When it is high the fan is activated by turning on the TR, and it is off when the sleep mode is selected. There are three
solenoids and these are driven by the Paper Pick-up, Regi and MP signals. The diode protects the driving TR from the
Back-EMF pulse which is generated when the solenoid is de-energized.
7) Motor Driver
The motor driving circuit is activated when the Driver IC is enabled. An AN44060 (Motor driver IC) is used in this case.
The resistance Rs value of sensing and the voltage value of the V reference can be changed by the motor driving volt-
age value.
Summary of Contents for scx-4100 series
Page 13: ...2 6 Reference Information Samsung Electronics Service Manual 2 4 2 A4 2 Pattern ...
Page 14: ...2 7 Samsung Electronics Reference Information Service Manual 2 4 3 A4 IDC 5 Patten ...
Page 15: ...2 8 Reference Information Samsung Electronics Service Manual MEMO ...
Page 21: ...3 6 Specifications Samsung Electronics Service Manual MEMO ...
Page 23: ...4 2 Summary of Product Samsung Electronics Service Manual 4 1 2 Rear View ...
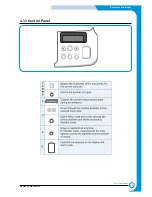
Page 24: ...4 3 Samsung Electronics Summary of product Service Manual 4 1 3 Control Panel ...
Page 25: ...4 4 Summary of Product Samsung Electronics Service Manual 4 2 System Layout SCAN PART ...
Page 39: ...4 18 Summary of Product Samsung Electronics Service Manual MEMO ...
Page 57: ...5 18 Disassembly and Reassembly Samsung Electronics Service Manual MEMO ...
Page 93: ...7 28 Troubleshooting Samsung Electronics Service Manual MEMO ...
Page 110: ...9 9 9 1 Samsung Electronics Block Diagram Service Manual 9 Block Diagram ...

