background image

SCX-5312F/51

12                               User

’s

 Guide   

Home

Visit us at: 

www.samsungelectronics.com/mfp

P/N: JC68-00851A Rev. 2.00

Summary of Contents for SCX-5112

Page 1: ...SCX 5312F 5112 User s Guide Home Visit us at www samsungelectronics com mfp P N JC68 00851A Rev 2 00 ...

Page 2: ...g the Paper Size 1 20 Changing the Display Language 1 20 Using Save Mode 1 21 Toner Save 1 21 Paper Save 1 21 Power Save 1 22 Chapter 2 INSTALLING SOFTWARE About Samsung Software 2 2 MFP Driver 2 2 SmarThru Software 2 2 OCR Software AnyPage Lite 2 2 System Requirements 2 3 Installing Samsung Software 2 4 Configuring Fax and Internet Gates 2 8 Uninstalling Samsung Software 2 12 Uninstalling the MFP...

Page 3: ...the Automatic Document Feeder 4 3 Making Copies on the Document Glass 4 4 Setting Copy Options 4 6 Image 4 6 Contrast 4 6 Set 4 7 Zoom 4 7 Auto Fit 4 8 Clone 4 9 Duplex Copy 4 10 Collation Copy 4 11 Chapter 5 PRINTING Printing a Document 5 2 Printer Settings 5 3 Accessing Printer Settings 5 3 Printer Properties Tabs 5 4 Printer Properties Buttons Icons 5 12 Chapter 6 SCANNING Scanning using the Sa...

Page 4: ... Document Jams 8 2 Input Misfeed 8 2 Exit Misfeed 8 3 Roller Misfeed 8 3 Paper Jams 8 4 Paper Feed Area 8 4 Fuser Area 8 6 Paper Exit Area 8 7 Duplex Jam 8 9 Bypass Jam 8 10 LCD Error Messages 8 11 Solving Problems 8 13 Copier Problem Solution Chart 8 13 Printing Problem Solution Chart 8 15 Fax Problem Solution Chart 8 18 Chapter 9 APPENDIX General Specifications 9 2 Scanner and Copy Specification...

Page 5: ...r conditioner or ventilation duct 8 Do not allow anything to rest on the power Do not locate your product where the cords will be abused by persons walking on them 9 Do not overload wall outlets and extension cords This can diminish performance and may result in the risk of fire or electric shock 10 Do not allow pets to chew on the AC power telephone or PC interface cords 11 Never push objects of ...

Page 6: ... power and telephone cord for the duration of the lightning storm 17 SAVE THESE INSTRUCTIONS Laser Safety Statement The printer is certified in the U S to conform to the requirements of DHHS 21 CFR chapter 1 Subchapter J for Class I 1 laser products and elsewhere is certified as a Class I laser product conforming to the requirements of IEC 825 Class I laser products are not considered to be hazard...

Page 7: ... NÄKYMÄTTÖMÄLLE LASERSÄTEILYLLE ÄLÄ KATSO SÄTEESEEN Ozone Safety During normal operation this product produces ozone The ozone produced does not present a hazard to the operator However it is advisable that the product be operated in a well ventilated area If you need additional information about ozone please request your nearest Samsung dealer Power Saver This product contains advanced energy con...

Page 8: ...us as set out in the interference causing equipment standard entitled Digital Apparatus ICES 003 of the Industry and Science Canada Cet appareil numérique respecte les limites de bruits radioélectriques applicables aux appareils numériques de Classe A prescrites dans la norme sur le matériel brouilleur Appareils Numériques ICES 003 édictée par l Industrie et Sciences Canada Fax Branding The Teleph...

Page 9: ...nstalling several types of equipment on the same telephone line may result in problems making and receiving telephone calls especially ringing when your line is called The sum of all Ringer Equivalence Numbers of the equipment on your telephone line should be less than five in order to assure proper service from the telephone company In some cases a sum of five may not be usable on your line If an...

Page 10: ...emergency number This product may not be used on coin service or party lines This product provides magnetic coupling to hearing aids You may safely connect this equipment to the telephone network by means of a standard modular jack USOC RJ 11C Declaration of Conformity European Countries Approvals and Certifications The CE marking applied to this product symbolises Samsung Electronics Co Ltd Decla...

Page 11: ...ional requirements to ensure network compatibility of TBR21 terminals The product has been designed against and is fully compliant with all of the relevant advisory notes contained in this document Replacing the Fitted Plug for UK Only IMPORTANT The mains lead for this machine is fitted with a standard BS 1363 13 amp plug and has a 13 amp fuse When you change or examine the fuse you must re fit th...

Page 12: ...lug do the following You must connect the green and yellow wire to the pin marked by the letter E or by the safety Earth symbol or coloured green and yellow or green You must connect the blue wire to the pin which is marked with the letter N or coloured black You must connect the brown wire to the pin which is marked with the letter L or coloured red You must have a 13 amp fuse in the plug adaptor...

Page 13: ...xii ...

Page 14: ... functions This chapter provides step by step instructions on setting up the product and installing the software This chapter includes Unpacking Component Location Control Panel Functions Making Connections Installing Drum and Toner Cartridges Turning the Product On Loading Paper Setting the Paper Size Changing the Display Language Using Save Mode ...

Page 15: ...ing it straight and the scan unlock switch automatically moves to the unlock position NOTE To scan or copy a document the switch must be on that position When you are moving the product or do not use the it for a long time pull the switch toward the Lock mark 3 Pull open the paper cassette and remove the packing material from the paper cassette Tape Scanner module ...

Page 16: ...pplied with your Network Print Server USB Cable AC Power Cord The appearance of the power cord and the telephone line cord vary according to countries Telephone Line Cord For SCX 5312F only TAM Lead For SCX 5312F UK only This User s Guide SmarThru User s Guide Facsimile User s Guide SCX 5312F only Quick install Guide Software CD Starter Toner Cartridge Drum Cartridge ...

Page 17: ...the main components of your product Front View Automatic Document Feeder Document Guides Document Input Tray Document Output Tray Control Panel See page 1 6 SCX 5312F See page 1 9 for SCX 5112 Paper Cassette Front Cover Release lever Side Cover Paper Guides Bypass Tray Scanner Module ...

Page 18: ...iew Paper Exit Extension ADF Automatic Document Feeder Connector Document Cover Paper Cassette Telephone Connections available in SCX 5312F only Document Glass AC Power Cord Connector Parallel Connector USB Connector Power Switch ...

Page 19: ... number in memory Also use to delete digit in the edit mode Use to store frequently dialed fax number and dial them using the 2 digit speed number Also use to display alternatively the currently active and pending jobs Redials the last number in Standby mode or insert a pause into a fax number in the edit mode Use to perform a switch hook operation such as call waiting 01 21 System Data 02 22 03 2...

Page 20: ...idge see page 7 3 and page 7 8 Turns on when the input tray you are using is empty To load paper see page 1 17 Turns on when an error occurs on the system 4 Displays current status and prompts during operation 5 C O P Y Use to adjust the contrast of the documents for the current copy or fax job Use to select the text type for the current copy job or fax job Use to specify the paper tray you want t...

Page 21: ...vious menu level or exits the menu 9 Scrolls though the menu items When you set the copy size or the copy page number they can be used to change the number Scrolls though the option available for the selected menu item In the Copy mode allows you to change the zoom rate and to change the number of copies 10 Selects the mode to activate FAX or COPY Also confirms the selection on the display 11 Enga...

Page 22: ...tails on the meaning of the error messages see page 8 11 Error indicators Turns on when a paper jam occurs To clear the jam see page 8 4 Turns on when the toner or drum almost runs out To replace the toner or drum cartridge see page 7 3 and page 7 8 Turns on when the input tray you are using is empty To load paper see page 1 17 Turns on when an error occurs on the system 2 Displays current status ...

Page 23: ...er to print a document Allows you to save power by reducing power consumption when not printing Allows you to save paper by printing 2 pages on a single sheet of paper available in the Copy mode only 6 Enters menu mode 7 Scrolls though the menu items When you set the copy size or the copy page number they can be used to change the number Scrolls though the option available for the selected menu it...

Page 24: ...er cord to this port and fasten the side screws NOTE Without connecting the cord to the port you cannot use the ADF 2 If you have SCX 5112 Skip this step and proceed to step 3 If you have SCX 5312F Connect the supplied telephone line to the LINE jack and the other end to the wall jack ...

Page 25: ...chine into the EXT jack UK users should plug the cord of the extension phone into the supplied TAM lead and plug the cord of the TAM lead into the EXT jack on the back of your product NOTES For UK users it is strongly recommended to use the TAM lead and the telephone line cord supplied with your product If you are replacing the line cord with other manufacturer s it should be AWG 26 or lower guage...

Page 26: ...er requires a certified parallel cable You will need to buy the IEEE1284 compliant cable You only need to connect one of the above cables If you are using a USB cable you must be running Windows 98 Me 2000 XP When using USB connection your product provides two USB modes Fast and Slow Fast is the default mode Some PC user may experience poor USB implementation in the default mode If this occurs sel...

Page 27: ... 1 Pull the release lever to open the side cover CAUTION Ensure that the side cover is always open before opening the front cover 2 Open the front cover 3 If the cartridge locking lever is on the lower position turn the lever upward until it locks into place ...

Page 28: ...to place completely 5 Remove the starter toner cartridge from its bag Gently shake the cartridge to loosen the toner Thoroughly shaking the cartridge will assure maximum copies per cartridge 6 Slide the toner cartridge into the product aligning the cartridge to the left of the slot until it locks into place completely ...

Page 29: ... the front cover and the side cover NOTE When the drum or toner cartridge need to be replaced the display indicates the corresponding message with the error indicator Refer to the list of error messages on page 8 11 To replace the drum and toner cartridges see page 7 8 and page 7 3 repectivly 1 2 1 2 ...

Page 30: ...a properly grounded AC outlet 2 Turn on the power switch WARMING UP PLEASE WAIT appears on the display indicating the product is on To view your display text in another language see page 1 20 Loading Paper The paper cassette can hold a maximum of 550 sheets of 20lb plain paper For copying or faxing you can use A4 letter or legal size paper only 1 Pull open the paper cassette ...

Page 31: ...ition 3 Adjust the rear paper guide to the desired paper length It is preset to Letter or A4 size depending on country To load another size lift and insert the rear guide into the corresponding position 4 Fan the paper and insert it into the cassette LGL FOLIO A4 LTR Rear guide ...

Page 32: ...ill above the max fill line 6 While squeezing the side guide as shown move it toward the stack of paper until it lightly touches the side of the stack Do not too tightly to press the guide the edge of the paper the guide may bend the paper 7 Close the paper cassette Corner snubber Max Fill Line ...

Page 33: ... are using and press Mode Enter Enter for SCX 5112 to save the selection You can press the corresponding number shown on the display to select the paper size 3 To return to Standby mode press Stop Clear Changing the Display Language To change the language that is displayed on the LCD display take the following steps 1 Press Menu Exit and then System Setup from the one touch dial keypad SCX 5112 us...

Page 34: ...cklight is on To disable the mode select OFF The button backlight is off 3 Press Mode Enter Enter for SCX 5112 to save the selection Paper Save This feature prints 2 pages on a single sheet of paper to save paper To turn this feature on take the following steps 1 Press SAVE Paper The display shows the current setting on the bottom line 2 Press SAVE Paper or use the navigation buttons to change the...

Page 35: ...r select the length of time the product waits after a job is printed before it switches to a reduced power state 1 Press Menu Exit and then System Data from the one touch dial keypad SCX 5112 users should press Menu and then Enter 2 Press or until POWER SAVE appears on the display Make sure that 1 ON blinks on the bottom line If necessary use or to select 1 ON and press Mode Enter Enter for SCX 51...

Page 36: ...lied Samsung software You must install the Samsung software to use your product as a printer and scanner The topics included in this chapter are About Samsung Software System Requirements Installing Samsung Software Configuring Fax and Internet Gates Uninstalling Samsung Software ...

Page 37: ...anying software for your multifunctional product SmarThru contains a powerful image editor that allows you to edit images in many ways and also includes powerful Internet mail client software With SmarThru you can save the scanned images in a dedicated storage area for subsequent editing sending via e mail or fax printing and processing by other programs of your choice OCR Software AnyPage Lite OC...

Page 38: ...er Windows XP Home edition or Professional Minimal Requirements Disk space 120 MB for installation Memory 64 MB CPU Pentium II 233 or higher Required software Internet Explorer 4 01 Recommended Disk space 220 MB for installation Memory 128 MB CPU Pentium II 400 or higher Required software Internet Explorer 5 5 NOTES Administrative rights should be set for installation on Windows NT 2000 XP Windows...

Page 39: ...pport USB connection 1 Insert the supplied SmarThru CD ROM into your CD ROM drive The SmarThru CD ROM should automatically run and opening window appears If the opening window does not appear click Start and then Run Type X Autorun exe replacing X with the letter of your drive and click OK 2 If you are asked to select the language choose the desired language 3 Click Install the Samsung Software on...

Page 40: ...ly the MFP driver will be installed Custom You may choose the options you want to install Recommended for advanced users 6 Selecting the type Click Next If you select the Custom installation you may choose the options you want to install SmarThru Software to scan and edit images and work with electronic documents OCR Software AnyPage Lite software to enable OCR MFP Driver to print and scan ...

Page 41: ... as Remote Fax or Remote Scan service If you selected SmarThru networking you can select to install Server Client or both Server allows you to share local fax modem and or scanner over a LAN You can control sharing by managing remote service user Client allows you to use Remote Fax or Remote Scan services provided by SmarThru Remote Services Server over a LAN You need to have a client account Thes...

Page 42: ... your computer does not shut down and restart automatically you must shut it down manually and restart it before the changes will be saved NOTE When you install the software the Digital Signature Not Found window appears in Windows 2000 and Windows XP Click OK in Windows 2000 and click Continue Anyway in Windows XP ...

Page 43: ...nly the first time you try to launch Mailbox in the SmarThru program For information on SmarThru please refer to the SmarThru User s Guide NOTE To configure the Internet gate you must enter your e mail address incoming POP3 or IMAP4 and outgoing SMTP mail server address and account name Ask your Internet service provider or on line service provider for the information on your Internet gate configu...

Page 44: ...t The e mail address has been assigned to you by your Internet service provider 4 Enter the addresses of your incoming and outgoing mail servers Choose the incoming mail server type then click Next Your Internet service provider will be able to provide you with this information ...

Page 45: ... 10 5 Enter your account name and password to access your Internet mail server then click Next Your Internet service provider will be able to provide you with this information 6 Enter the account record name then click Next ...

Page 46: ...RE 2 11 2 7 Click Finish to quit the wizard and enable Internet e mail service NOTE If you wish you can reconfigure the Internet gate later by using SmarThru Configuration For details refer to the SmarThru User s Guide ...

Page 47: ...e all applications are closed on your PC A system reboot is required after the software is uninstalled Uninstalling the MFP Driver 1 From the Start menu select Programs then select Samsung SCX 5x12 Series 2 You can select the component in the MFP driver to uninstall individually If you want to uninstall the scan driver select TWAIN Driver Uninstaller If you want to uninstall the printer driver sel...

Page 48: ... your computer 4 When the uninstallation is done click OK 5 The message box recommends you restart your computer Click OK then restart Windows NOTE If you want to install the printer driver or the scan driver using the SmarThru CD ROM make sure that you select the Setup Type to Compact Or select Custom then select MFP Driver For details see page 2 5 ...

Page 49: ...ace Then removes SmarThru system including the data Delete Deletes all the SmarThru data and options No backup or copying takes place Be careful while using this option as you can easily lose your data Leave intact Uninstalls SmarThru software leaving data and option intact This can be useful if for example you decide to install Stand Alone configuration over SmarThru Networking In this case unins...

Page 50: ... the un installation The SmarThru software and all components will be removed 6 When uninstalling is done click OK The message box recommends restarting your computer 7 Click OK Shut down and restart your computer to complete the un installation process and save your changes ...

Page 51: ...y run and the opening window appears If the opening window does not appear select Run from the Start menu then type X Autorun exe replacing X with the letter of your drive and click OK 2 If you are asked to select the language choose the desired language 3 Click Uninstall the Samsung Software on your PC 4 Follow the on screen instructions to complete un installation You must shut down and restart ...

Page 52: ...oduces you to the basics of selecting print media and loading print media into your product This chapter includes Selecting Print Media Paper Guidelines Loading Paper in Cassette Using the Bypass Tray Setting the Paper Size for Copying ...

Page 53: ... 5 in A4 210 x 297 mm B5 182 x 257 mm A5 148 x 210 mm YES 550 YES 550 YES 550 NO 0 YES 550 NO 0 NO 0 YES 100 YES 100 YES 100 YES 100 YES 100 YES 100 YES 100 Envelopes No 10 4 12 x 9 5 in C5 162 x 229 mm DL 110 x 220 mm Monarch 3 87 x 7 5 in B5 176 x 250 mm NO 0 NO 0 NO 0 NO 0 NO 0 YES 10 YES 10 YES 10 YES 10 YES 10 Labelsb Letter 8 5 x 11 in A4 210 x 297 mm b If you are experiencing excessive jamm...

Page 54: ...e paper and other media that conform with those listed under General Specifications on page 9 2 Use only well constructed envelopes with sharp well creased folds DO NOT use envelopes with clasps and snaps DO NOT use envelopes with windows coated lining self adhesive seals or other synthetic materials DO NOT use damaged or poorly made envelopes It is recommended that you feed special paper types on...

Page 55: ...se labels to peel off during printing which can cause paper jams Exposed adhesive can also cause damage to product components Do not feed a sheet of labels through the product more than once The adhesive backing is designed for one pass through the product Do not use labels that are separating from the backing sheet or are wrinkled bubbled or otherwise damaged Loading Paper in Cassette The paper c...

Page 56: ...ES When you print a file from your PC using the paper cassette make sure that you select the Paper source and the correct paper size from your software application before starting your print job If you experience problems feeding paper place the paper in the Bypass tray When printing on the used paper from the cassette you can load up to 300 sheets The printed side should be facing down and the ed...

Page 57: ...lowing table summarizes the print media allowed as well as their stacking height limit Notes Always load only the print media specified in Specifications to avoid paper jams and print quality problems Do not hit the bypass tray or rest your hands on it otherwise the tray may be damaged or detached from the product Remove any curl on postcards envelopes and labels before loading them into the multi...

Page 58: ...evel surface For transparencies hold the transparencies by the edges and avoid touching the print side Oils from your fingers that are deposited on the transparency can cause print quality problems If you are using the transparencies with paper backing insert a sheet of plaing paper on the tray before loading transparencies Doing so prevents paper jams while feeding 3 Load the print material with ...

Page 59: ...a The stack should be under the max fill line The print media buckles if you load a stack that is too deep or push it in too far NOTES When printing on the used paper from the bypass tray the printed side should be facing up and the edge without curl at the left side If you experience problems feeding paper turn the paper around Max fill line ...

Page 60: ...ect the paper size you are using and press Mode Enter Enter for SCX 5112 to save the selection You can press the corresponding number shown on the display to select the paper size 3 To return to Standby mode press Stop Clear To set the paper size for the bypass tray take the following steps 1 Press Menu Exit and then System Data from the one touch dial keypad SCX 5112 users should press Menu and t...

Page 61: ...PAPER HANDLING 3 10 NOTE ...

Page 62: ...ructions for copying documents This chapter includes Loading Paper for Copy Output Selecting Paper Tray Making Copies from the Automatic Document Feeder Making Copies on the Document Glass Setting Copy Options Auto Fit Clone Duplex Copy Collation Copy ...

Page 63: ...have to select the paper tray you will use for the copy job and the fax job SCX 5312F only 1 Press Paper Tray The current setting appears on the bottom line of the display 2 Select CASSETTE or BYPASS by pressing Paper Tray repeatedly or using the navigation buttons and press Mode Enter Enter on SCX 5112 to save the selection 3 If you selected BYPASS at the step 2 the display prompts you to select ...

Page 64: ...e ADF 2 SCX 5312F users should verify that the product is in the Copy mode If necessary press Mode Enter to change the mode into the Copy mode In the Copy mode the LCD display shows Note that you cannot make copies in the Fax mode The product will only sound an error beep 3 Make sure that you have selected the required paper tray See page 4 2 4 Customise the copy settings incluing the number of co...

Page 65: ...eep it always clean Making Copies on the Document Glass If you want to make copies from booklet pamphlet transparencies or documents having other unusual characteristics use the document glass to load document 1 Lift the document cover 2 Place the document face down on the glass and align it with registration guide on the left top corner of the document glass ...

Page 66: ...Copy mode the LCD display shows Note that you cannot make copies in the Fax mode The product will only sound an error beep 5 Make sure that you have selected the required paper tray See page 4 2 6 Customise the copy settings incluing the number of copies copy size contrast and image type using the control panel buttons See Setting Copy Options on page 4 6 To clear the settings use the Stop Clear b...

Page 67: ...ave the selection NOTE If you select the MIXED mode when you copy the document with dark background such as a newspaper or a catalogue from the document glass using the normal contrast the machine will automatically remove the background colour This will make the copy lighter than the original document To include the background colour in your copy load the document about 5 mm away from the guideli...

Page 68: ...nal from the document glass from 25 to 100 from the ADF Note that the zoom rate available is different according to the document loading method 1 Press Zoom The triangle symbol on the middle of the top line heads for the zoom rate 2 Enter the desired size using the number keypad The selected number appears on the display You can also use Increase or Decrease to change the zoom rate Press Increase ...

Page 69: ... mode SCX 5312F users should press Special Copy in the Copy mode see page 4 5 and SCX 5112 users should press Autofit Clone 4 Press Special Copy Autofit Clone on SCX 5112 repeatedly or use the navigation buttons until AUTO FIT appears on the bottom line of the display 5 Press Mode Enter Enter for SCX 5112 to save the selection 6 If necessary customise the copy settings incluing the number of copie...

Page 70: ...e 4 2 3 To enter the special copy mode SCX 5312F users should press Special Copy in the Copy mode see page 4 5 and SCX 5112 users should press Autofit Clone 4 Press Special Copy Autofit Clone on SCX 5112 repeatedly or use the navigation buttons until CLONE appears on the bottom line of the display 5 Press Mode Enter Enter on SCX 5112 to save the selection 6 If necessary customise the copy settings...

Page 71: ...he required paper tray See page 4 2 3 Press Duplex Copy The current setting appears on the bottom line of the display 4 Press Duplex Copy or use the navigation buttons to select the binding orientation If you select OFF you cannot use duplex copying 5 Press Mode Enter Enter on SCX 5112 to save the selection 6 If necessary customise the copy settings incluing the number of copies copy size contrast...

Page 72: ...see page 4 3 Press Special Copy repeatedly or use the navigtion buttons until COLLATION appears on the bottom line of the display SCX 5112 users should press Collation Copy and press Collation Copy or the navigation buttons to select ON to turn the feature on 4 Press Mode Enter Enter on SCX 5112 to save the selection 5 If necessary customise the copy settings incluing the number of copies copy siz...

Page 73: ...COPYING 4 12 NOTE ...

Page 74: ...5 PRINTING Read this chapter to learn how to select and load print media and how to use the print settings This topics included in this chapter are Printing a Document Printer Settings ...

Page 75: ...duct is properly connected to the computer the product is powered on and there is paper in the paper tray 2 Verify that you have installed the Samsung software for your computer For details see Installing Samsung Software on page 2 4 3 Start the program you are using to create the document and create or open the document you want to print 4 Choose Print or Print Setup from the File menu Make sure ...

Page 76: ...tings made in the application to create the document will usually override settings made in the printer driver NOTE You do not need to use any of the operation panel buttons to use the product as a PC printer For example if you want to adjust the printing contrast you do not have to press Contrast on the control panel The control panel buttons are used primarily for copying Accessing Printer Setti...

Page 77: ...eferences from the drop down list Printer Properties Tabs When the Printer Properties are displayed you can review and change whatever settings are needed for your printer job Your printer s Properties window consists of 5 tabs Paper Graphic Output Watermark and About If you access the Printer Properties through the Printers folder you can view more Windows based tabs as well as these 5 tabs For i...

Page 78: ...ut a check mark to use the different paper source for the first page Select the desired paper source for the first page and other pages independently Select the desired paper source Select Cassette if you load media in the paper cassette Bypass if you load in the bypass tray Select the size of paper you are using Select the type of paper you are using 1 2 3 4 1 2 3 4 ...

Page 79: ...and images appear smoother Printer Default Choose this setting to use SRT that your printer provides Normal Choose to disable SRT mode Text Enhance Choose to refine the print quality of characters by smoothing out jagged edges that can occur on the angles and curves of each character Image Enhance Choose to refine the print quality of photo image using SRT With this option checked all text in your...

Page 80: ...er Side Booklet Printing Fit to Page Poster and Duplex printing Multiple Pages per Side Choose the Multiple Pages per Side option to print multiple pages on a single sheet of paper Select the number of page you want to print per sheet 1 2 4 6 9 or 16 in the Pages per Sheet drop down list Click on the box to put a check mark to print a border around each page on the sheet 1 2 1 2 ...

Page 81: ...g option allows you to print a document out as a booklet Once your document prints fold the pages in half and staple the pages Fit to Page Choose this option to scale your print job to any selected paper size regardless of the logical document size 7 ...

Page 82: ... Poster option to enlarge the printed document To determine the scaling factor select the style You can choose from 2x2 3x3 or 4x4 For example if you select 2x2 the output will be automatically stretched to cover 4 physical pages 1 1 ...

Page 83: ...tab to print the document on both sides of the paper Choosing Long Edge lets you have the binding orientation along the long edge of the paper as in a megazine Choosing Short Edge lets you have the binding orientation along the short edge of the paper as in a calendar 1 1 ...

Page 84: ...IDENTIAL or perhaps the name of your company or department By changing the watermark settings you can create faint watermarks that are not intrusive to a document or bold watermarks to call attention to specific information To create a watermark enter the desired text message in the Text field and select the desired watermark options You can select the font type and size color position and angle T...

Page 85: ...re an internet user Printer Properties Buttons Icons Click OK when done reviewing or making changes Click Cancel if you want to exit the tab menus without applying any changes Click Help to view the online Help feature and tab menu details Click the icon in the title bar Position the pointer over the parameter in question and click to see a pop up window explaining that parameter ...

Page 86: ...ur computer Then you can fax or e mail the files display them on your web site or use them to create projects that you can print out using Samsung SmarThru software which came with your product This chapter includes Scanning using the Samsung SmarThru Scanning Process with TWAIN enabled Software ...

Page 87: ...e the following steps to start scanning using the SmarThru 1 Feed the document s to be scanned face up into the ADF Or Place a single document on the document glass face down then close the cover 2 Once you installed Samsung software you see the SmarThru icon on the desktop window Double click the SmarThru 3 icon The SmarThru 3 window opens Double click ...

Page 88: ...form to send the just scanned image attached to a new mail The email account must be configured in the Samsung SmarThru system to enable e mail service Scan to FAX Lets you scan the original documents then launches a New Fax form which helps you send them as a fax image Scan to WEB Lets you scan the original documents for further publishing to the Web Scan to OCR Lets you scan the original documen...

Page 89: ...software you will have to use TWAIN compliant software such as Adobe PhotoDeluxe or Adobe Photoshop The first time you scan with your product you will need to select it as your TWAIN source on the application you will use The basic scanning process involves a number of steps Placing your photograph or page on the document glass Opening an application such as PhotoDeluxe or Photoshop Opening the TW...

Page 90: ...the cartridge and your product This chapter includes Cleaning the Scan Unit Expected Cartridge Life Replacing the Toner Cartridge Setting to Notify Toner Low Available in SCX 5312F only Cleaning the Drum Replacing the Drum Cartridge Consumables and Replacement Parts ...

Page 91: ...uct Do not use ammonia based cleaner or volatile solvents such as thinner on or around your product They may damage the product 1 Slightly dampen a soft lint free cloth or paper towel with water 2 Open the document cover 3 Wipe the surface of the document glass and ADF glass until it is clean and dry 4 Wipe the underside of the white document cover and white sheet until it is clean and dry 5 Close...

Page 92: ...The actual number may vary according to the print density of the page you print If you print a lot of graphics you may need to change the cartridge more often Replacing the Toner Cartridge When the toner cartridge is near the end of its life white streaks or hue change will occur The LCD displays warning message TONER LOW You can temporarily re establish the print quality by re distributing the re...

Page 93: ...ds to release the toner cartridge 4 Pull the toner cartridge out and gently shake the cartridge to distribute the toner evenly inside the cartridge NOTE If the toner gets on your clothing wipe it off with a dry cloth and wash clothing in cold water Hot water sets toner into fabric ...

Page 94: ...ne time only When the toner eventually runs out only blank pages will print when a print job is sent or when a fax is received At this stage the toner cartridge needs to be replaced The display shows warning message TONER EMPTY Take the following steps to replace the toner cartridge 1 Open the side cover then the front cover Make sure that the side cover must be open to open the front cover 2 Turn...

Page 95: ...tails 4 Shake the new toner cartridge horizontally four or five times Save the box and the cover for shipping 5 Slide the new toner cartridge in until it locks in place 6 Turn the cartridge locking lever downwards until it locks in place 7 Close the front cover then the side cover The display shows NEW TONER 1 YES 2 NO 8 Select YES by pressing 1 The product returns to Standby mode ...

Page 96: ...Use or until NOTIFY TONER appears on the bottom line of the display and press Mode Enter NOTIFY TONER LOW appears on the top line and the current setting appears on the bottom line 3 Press or to change the setting Select ON to enable this feature then press Mode Enter If you select OFF you can not use this feature 4 Enter your fax number then press Mode Enter 5 Enter your name up to 20 digits then...

Page 97: ...ode Enter Enter on SCX 5112 4 The product prints out a cleaning page Toner particles on the drum surface are fixed to the paper Repeat printing three or four times Replacing the Drum Cartridge The useful life of the drum cartridge is approximately 15 000 copies The LCD displays DRUM WARNING when the drum is near the end of life Approximately 1 000 more copies can be made but you should have a repl...

Page 98: ... toner cartridge must be removed to replace the drum cartridge 3 Pull the used drum cartridge NOTE Help the environment by recycling your used drum cartridge Refer to the recycling brochure packed with the drum cartridge for details 4 Unpack the new drum cartridge and slide it in place making sure not to touch the surface of the drum ...

Page 99: ... DRUM WARNING or DRUM EMPTY appears on the display replace the drum cartridge as described above then take the following steps to reset the drum counter 1 Press Menu Exit then Maintenance from the one touch dial keypad SCX 5112 users should press Menu then press or until MAINTENANCE appears on the top line 2 Use or until NEW DRUM appears on the bottom line of the display and press Mode Enter Enter...

Page 100: ...rts The following items should be replaced after you have printed a specified number of pages See the table below The purchase the consumables and replacement parts contact Samsung dealer or the place where you bought your product We strongly recommed that items expect for the print cartridge be installed by a trained servicer Items Yield Average ADF Rubber Pad 20 000 ADF Roller 50 000 Paper Feedi...

Page 101: ...MAINTENANCE 7 12 NOTE ...

Page 102: ... 8 TROUBLESHOOTING This chapter gives helpful information for what to do if you encounter an error This chapter includes Document Jams Paper Jams LCD Error Messages Solving Problems ...

Page 103: ...tails for clearing the three types of document misfeeds are given below Input Misfeed 1 Open the ADF top cover 2 Pull the document gently to the right and out of the ADF 3 Close the ADF top cover Then feed the documents back into the ADF NOTE To prevent document jams use the document glass for the thick thin or mixed documents ...

Page 104: ...he document cover Then feed the documents back into the ADF Roller Misfeed 1 Open the document cover 2 Turn the release knob so that you can easily seize the misfed document and remove the document from the ADF or the feed area by carefully pulling it rightwards using both hands 3 Close the document cover Then feed the documents back into the ADF ...

Page 105: ...ed Area If jammed in the paper feed area PAPER JAM0 appears in the display 1 Remove the paper cassette After you pull it out completely lift the front part of the cassette slightly up to release the cassette from the product 2 Remove the jammed paper by gently pulling it straight out If you remove the jammed paper here open the side cover then close it to clear PAPER JAM message on the display ...

Page 106: ... the side cover NOTE Do not touch the shiny drum cartridge surface Scratches or smudges will result in poor copy quality 4 Carefully remove the misfeed paper in the direction shown 5 Close the cover and insert the paper cassette Lower the rear part of the cassette to align the rear edge to the corresponding slot of the machine then insert it completely ...

Page 107: ...product 1 Press the release lever to open the side cover 2 Pull down on the fuser lever as shown below This will release pressure on the paper If paper is not seen in this area skip to the Exit Area NOTE Do not pull paper up through the fusing unit Unfused toner may adhere in the area resulting in smudged copies 3 Remove the jammed paper in the direction shown ...

Page 108: ... 8 7 8 4 Push up on the fuser lever then close the side cover Paper Exit Area If jammed in the paper exit area PAPER JAM 2 appears in the display 1 Press the release lever to open the side cover 2 Open the front cover ...

Page 109: ...on the fuser lever This will release pressure on the paper 4 Turn the jam remove lever in the direction of the arrow to move the paper to the exit area then gently pull the paper out through the exit area 5 Push up on the fuser lever ...

Page 110: ...to the original position 7 Close the front cover and the side cover Duplex Jam If paper jam occurs in the duplexer DUPLEX JAM appears in the display 1 Press the release lever to open the side cover 2 Remove the jammed paper Then close the side cover 1 2 1 2 ...

Page 111: ...hine does not detect paper in the bypass tray due to no paper or improper paper loading when you try to print using the bypass tray BYPASS JAM also may occur when the paper is not properly fed into the machine through the bypass tray In that case pull the paper out of the product ...

Page 112: ...Replace the drum cartridge See page 7 8 FUSER ERROR There is a problem in the fuser unit Unplug the power cord and plug it back in If the problem still persists please call for service OPEN HEAT ERROR HEATTING ERROR OVER HEAT INVALID CARTRIDGE You have used unauthorised cartridge You must use a Samsung approved cartridge LINE ERROR for SCX 5312F only Your product cannot connect with the remote mac...

Page 113: ...rginal document Enter the correct poll code NO DEVELOPER CARTRIDGE The drum cartridge is not installed Install the drum cartridge NO PAPER The paper in the paper cassette has run out Load the paper in the paper cassette RX TRAY FULL Paper is overstacked in the output bin Remove paper PAPER JAM 0 Paper has jammed in the paper feeding area of the cassette Clear the jam See page 8 4 PAPER JAM 1 Paper...

Page 114: ... does not turn on Check that the product is plugged into an electrical receptacle Ensure that there is power to the receptacle and that the product power switch is in the ON position The product beeps an error sound and does not make a copy Make sure that the product is in the Copy mode If not chagne the mode into the Copy mode by pressing Mode Enter Copies are too light or too dark If the origina...

Page 115: ...py paper remaining in the product after a paper jam has been cleared Toner yield is lower than expected and TONER LOW message appears in the LCD Toner may be lodged in the cartridge Remove the toner cartridge Shake the toner cartridge and tap along the top of the toner cartridge over a waste receptacle Take care not to touch the exposed toner on the left side of the cartridge Fewer copies from the...

Page 116: ...t job is being sent to the correct port For Example LPT1 Your product does not print continued The toner and drum cartridges are not installed properly Check that the toner and drum cartridges are installed properly The printer driver may not be installed properly Reinstall the software The parallel port cable specifications may not be correct Use the IEEE 1284 parallel port cable supplied with th...

Page 117: ...to return to Standby mode Printing is too slow The computer parallel port may not be set for high speed communications If your computer is equipped with an ECP parallel port enable this mode of operation Refer to the Enabling High Speed Printer Communications section and your PC s user guide If using Windows 95 the spool setting may be set incorrectly Point to the Start and then click Settings the...

Page 118: ...n packages of paper until necessary so that the paper does not absorb too much moisture from the air Printing over uneven surfaces If printing onto envelopes change your printing layout to avoid printing over areas that have overlapping seams on the reverse side Missing characters The paper may be too damp Try printing with a different batch of paper Do not open packages of paper until necessary s...

Page 119: ... not feed into the product Make sure that the document is not wrinkled and you are putting it in correctly Check the document is the right size not too thick or thin Make sure that the ADF top cover is firmly closed You cannot receive faxes automatically The FAX mode should be selected Is there paper in the cassette Check if the display shows MEMORY FULL Your product cannot receive faxes manually ...

Page 120: ...ur scan glass for marks and clean it See page 7 2 The product dials a number but fails to make a connection with another fax machine The other fax machine may be turned off out of paper or cannot answer incoming calls Speak with the other machine operator and ask them to sort out the problem You cannot store a document in the memory There may not be enough memory to store the document If the displ...

Page 121: ...TROUBLESHOOTING 8 20 NOTE ...
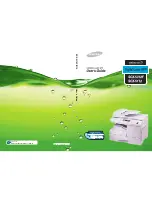
Page 122: ...9 APPENDIX This chapter includes General Specifications Scanner and Copy Specifications Printer Specifications Facsimile Specifications SCX 5312F only ...

Page 123: ... A5 A6 card Post Card 4x6 HagaKi Envelope 7 3 4 Envelope COM 10 Envolope DL Envelope C5 Min 3 9 x 5 8 inches 98 x 148 mm weight 60 120 g m2 16 32 lb Recording paper capacity for Cassette 550 sheets weight 75 g m2 20 lb for By pass Tray 100 sheets weight 75 g m2 20 lb Automatic document feeder Up to 30 pages 20 lb or 75 g m2 Consumables 2 piece Toner Drum cartridge system Compatibility Win 95 98 20...

Page 124: ...mm Weight Net 22 5 Kg including consumables Gross 26 5 Kg including consumables accessories and package Package Weight Paper 2 7 Kg Plastic 0 7 Kg Item Description Compatibility TWAIN standard Resolution Optical 600 dpi resolution Mono and Color Color bit depth Internal 32 bit External 24 bit Mono bit depth 1 bit for text mode 8 bit for Gray mode Copy speed 12 copies per minute Copy resolution 1 2...

Page 125: ...0 28800 21600 19200 14400 12000 9600 7200 4800 2400 bps with fall back Transmission speed Approx 3 seconds page Transmission time applies to memory transmission of text data with ECM compression using only ITU T No 1 Chart Scanning speed Platen approx 3 seconds letter at standard fax resolution mode ADF approx 5 seconds letter at standard fax resolution mode Resolution Standard 203x98 dpi Fine 203...

Page 126: ...ocument glass 4 4 document glass clean 7 2 load 4 4 drum clean 7 8 install 1 14 replace 7 8 E error 8 11 extension phone connect 1 12 F fit to page print in copy mode 4 8 in print mode 5 8 J jam clear document 8 2 paper 8 4 M MFP driver install 2 4 uninstall 2 12 P paper jame clear 8 4 paper load in bypass tray 3 6 in cassette 1 17 paper load capacity 3 2 paper save 1 21 paper size set in bypass t...

Page 127: ... R resolution print 5 6 S scan driver install 2 4 uninstall 2 12 scanner lock 1 2 SmarThru install 2 4 uninstall 2 14 software install 2 4 uninstall 2 16 T tel line connect 1 11 toner cartridge install 1 14 life 7 3 replace 7 5 toner save 1 21 two sided print in copy mode 4 10 in print mode 5 10 U USB connect 1 13 W watermark print 5 11 ...

Reviews: