background image

SCX-812x Series

CLX-92x1 Series

CLX-9301 Series

Multi-Functional Printer

User’s Guide

imagine

 the possibilities

Thank you for purchasing a Samsung product. 

Summary of Contents for SCX-812x Series

Page 1: ...SCX 812x Series CLX 92x1 Series CLX 9301 Series Multi Functional Printer User s Guide imagine the possibilities Thank you for purchasing a Samsung product ...

Page 2: ...dows Windows Vista Windows 7 and Windows 2008 Server R2 are either registered trademarks or trademarks of Microsoft Corporation PostScript 3 is a trademark of Adobe System Inc ABBYY FineReader Engine for Embedded OS 2009 ABBYY ABBYY FineReader the keenest eye in OCR ABBYY FINEREADER and ABBYY FineReader are registered trademarks of ABBYY Software Ltd All other brand or product names are trademarks...

Page 3: ... Display screen 35 Counter button 35 Eco button 36 Job Status button 37 Interrupt button MEDIA AND TRAY 38 38 Loading originals 38 On the scanner glass 38 In the duplex automatic document feeder DADF 39 Selecting print media 39 Guidelines to select print media 39 Loading paper in the tray 39 Standard tray optional dual cassette feeder 42 Multi purpose tray 44 Media sizes automatically detected 44 ...

Page 4: ...Programs 64 Loading Programs 64 Using the Quick Copy menu FAXING OPTIONAL 65 65 Preparing to fax 65 Sending a fax from your computer 65 Sending a fax Windows 65 Checking the sent fax list Windows 66 Sending a fax MAC 67 Understanding the fax screen 67 Basic tab 67 Advanced tab 67 Image tab 68 Sending a fax 68 Setting the fax header 68 Sending a fax 68 Sending a fax using speed dial numbers 68 Send...

Page 5: ...Scan to Server screen 79 Scanning and sending to an SMB FTP server 79 Resending to the last server address 80 Scanning originals and sending to a USB memory device scan to USB 80 Understanding the Scan to USB screen 81 Scanning to a USB memory device 81 Changing the scan feature settings 81 Changing the resolution 81 Changing Darkness 82 Scanning from both sides of originals 82 Selecting the orien...

Page 6: ... 96 Checking Address Book for an entry 96 Setting up an address book using SyncThru Web Service 96 Storing on your local machine PRINTING 100 100 Printer driver features 101 Basic printing 101 Canceling a print job 101 Opening printing preferences 101 Favorites tab 102 Basic tab 102 Paper tab 103 Graphics tab 103 Finishing tab 104 Advanced tab 105 Eco tab 105 Samsung tab 105 Print Mode 105 Using a...

Page 7: ...s user interface overview 120 Using Samsung Printer Status 120 Samsung Printer Status overview 121 Using Samsung Easy Document Creator 121 Understanding Samsung Easy Document Creator 122 Using features 123 Plug ins 123 Using the Linux Unified Driver Configurator 123 Opening the Unified Driver Configurator 123 Printers configuration 124 Scanners configuration 124 Ports configuration TROUBLESHOOTING...

Page 8: ... 150 Power and cable connecting problems 150 Display screen problem 151 Paper feeding problems 151 Printing problems 153 Printing quality problems 155 Copying problems 156 Scanning problems 156 Fax problems optional 157 Common PostScript problems 157 Common Windows problems 158 Common Linux problems 159 Common MAC problems SUPPLIES AND ACCESSORIES 160 160 How to purchase 160 Available supplies 160...

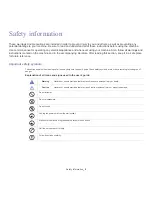
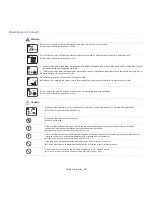
Page 9: ...section keep it in a safe place for future reference Important safety symbols This section explains the meanings of all icons and signs in the user s guide These safety symbols are in order according to the degree of danger Explanation of all icons and signs used in the user s guide Warning Hazards or unsafe practices that may result in severe personal injury or death Caution Hazards or unsafe pra...

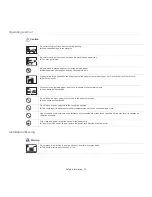
Page 10: ... handle the plug with wet hands This could result in electric shock or fire During an electrical storm or for a period of non operation remove the power plug from the electrical outlet This could result in electric shock or fire Be careful the paper output area is hot Burns could occur If the machine has been dropped or if the cabinet appears damaged unplug the machine from all interface connectio...

Page 11: ... jammed paper do not use tweezers or sharp metal objects It can damage the machine Do not allow too many papers to stack up in the paper output tray It can damage the machine Do not block or push objects into the ventilation opening This could result in elevated component temperatures which can cause damage or fire Use of controls or adjustments or performance of procedures other than those specif...

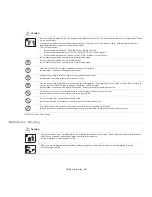
Page 12: ...tlet Otherwise this could result in electric shock or fire Use the power cord supplied with your machine for safe operation If you are using a cord which is longer than 2 meters 6 feet with a 110V machine then the gauge should be 16 AWG or larger Otherwise it can cause damage to the machine and could result in electric shock or fire Do not put a cover over the machine or place it in an airtight lo...

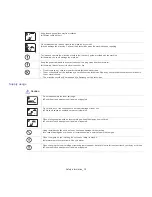
Page 13: ...icians could result in fire or electric shock The machine should only be repaired by a Samsung service technician Do not disassemble the toner cartridge Toner dust can be dangerous if inhaled or ingested Do not burn any of the supplies such as toner cartridge or fuser unit This could cause an explosion or uncontrollable fire When storing supplies such as toner cartridges keep them away from childr...

Page 14: ...er any human access to laser radiation above a Class I level during normal operation user maintenance or prescribed service condition WARNING Never operate or service the printer with the protective cover removed from Laser Scanner assembly The reflected beam although invisible can damage your eyes When using this product these basic safety precautions should always be followed to reduce risk of f...

Page 15: ...y lowered ENERGY STAR and the ENERGY STAR mark are registered U S marks For more information on the ENERGY STAR program see http www energystar gov Recycle or dispose of the packaging material for this product in an environmentally responsible manner This marking on the product accessories or literature indicates that the product and its electronic accessories e g charger headset USB cable should ...

Page 16: ...nada Cet appareil numérique respecte les limites de bruits radioélectriques applicables aux appareils numériques de Classe A prescrites dans la norme sur le matériel brouilleur Appareils Numériques ICES 003 édictée par l Industrie et Sciences Canada UNITED STATES OF AMERICA Federal Communications Commission FCC Intentional emitter per FCC Part 15 Low power Radio LAN type devices radio frequency RF...

Page 17: ...ge and 3 telephone number of either the sending machine business business entity or individual The Telephone Company may make changes in its communications facilities equipment operations or procedures where such action is reasonably required in the operation of its business and is not inconsistent with the rules and regulations in FCC Part 68 If such changes can be reasonably expected to render a...

Page 18: ...r of the right to bring a complaint to the Federal Communication Commission pursuant to procedures set out in FCC Rules and Regulations Subpart E of Part 68 You should also know that Your machine is not designed to be connected to a digital PBX system If you intend to use a computer modem or fax modem on the same phone line as your machine you may experience transmission and reception problems wit...

Page 19: ...ir conformity A full declaration defining the relevant Directives and referenced standards can be obtained from your Samsung Electronics Co Ltd representative EC Certification Certification to 1999 5 EC Radio Equipment Telecommunications Terminal Equipment Directive FAX This Samsung product has been self certified by Samsung for pan European single terminal connection to the analogue public switch...

Page 20: ...Regulatory information_ 20 China only ...

Page 21: ...our machine depending on its options or models The procedures in this user s guide are mainly based on the operating system of Windows 7 Conventions Some terms in this guide are used interchangeably Document is synonymous with original Paper is synonymous with media or print media Machine refers to printer or MFP The following table offers the conventions of this guide The date format may differ f...

Page 22: ...ng accessories Machine Driver Help This help guide provides you with help information on the printer driver and instructions for setting up the printing options see the User Guide Samsung website If you have Internet access you can get help support machine drivers manuals and order information from the Samsung website www samsung com Downloadable software You can download useful software from the ...

Page 23: ...FIDENTAL see Using watermarks on page 108 You can use preprinted forms and letterhead with plain paper see Using overlay on page 108 To save paper you can print multiple pages on one single sheet of paper see Printing multiple pages on one sheet of paper on page 106 This machine automatically conserves electricity by substantially reducing power consumption when not in use To save paper you can pr...

Page 24: ...ies Features by model include Included o Optional Blank Not available FEATURES CLX 9301 Series CLX 9251 Series CLX 9201 Series SCX 8128 Series SCX 8123 Series USB Memory Interface Duplex Automatic Document Feeder Hard Disk o Network Interface Ethernet 10 100 1000 Base TX wired LAN Duplex 2 sided printing 500 sheet Inner Finisher o o o o o Cabinet Stand o o o o o Dual Cassette Feeder o o o o o Work...

Page 25: ...troducing the display screen and useful buttons Machine overview Front view 1 4 3 7 5 6 10 13 1 12 11 9 8 2 1 Duplex automatic document feeder cover 8 Dual cassette feeder tray 3 tray 4 a 2 Duplex automatic document feeder width guides 9 Standard tray tray 1 tray 2 3 Duplex automatic document feeder input tray 10 Front door 4 Duplex automatic document feeder output tray 11 Front door handle 5 Powe...

Page 26: ...roduction_ 26 Front view 2 1 2 3 4 5 1 4 2 5 3 7 Optional dual cassette feeder right bottom door a Optional device Scanner glass Multi purpose tray paper width guide White sheet USB port Multi purpose tray ...

Page 27: ...Introduction_ 27 Rear view 1 2 3 4 1 3 2 4 Duplexing automatic document feeder cable USB port Network port USB printer port ...

Page 28: ...Inner view CLX 92x1 Series CLX 9301 Series 2 1 3 4 1 3 2 4 If you want to see the imaging unit you need to remove the waste toner container LSU window cleaning stick Toner Cartridges Waste toner container Imaging units ...

Page 29: ...Introduction_ 29 Inner view SCX 812x Series 1 2 3 1 3 2 If you want to see the imaging unit you need to remove the waste toner container Waste toner container Imaging unit Toner cartridge ...

Page 30: ...s alphanumeric characters You can also enter the number value for document copies or other options Reset Resets the current machine setup Redial Pause Redials the recently sent fax number or received caller ID in ready mode or inserts a pause into a fax number in edit mode Log in Log out Allows user to log in or log out On Hook Dial When you press this button you can hear a dial tone Then enter a ...

Page 31: ...the screen the focus will be moved straight slowly When releasing only the focus will be moved On the touchable view not item touch move will activate and through the touch move function will be activated micro control activates through touch move on the video player Release Action of removing your finger from the screen The moment that the function is activated Used with a press or long press ...

Page 32: ...paper jams on page 137 The door is open Close the door There is no paper in the tray Load paper in the tray see Loading paper in the tray on page 39 The machine has stopped due to a major error Check the display message see Understanding display messages on page 145 The waste toner container is not installed in the machine or the waste toner container is full see Replacing the waste toner containe...

Page 33: ...he power cord into the power receptacle 2 Plug the other end into a properly grounded AC outlet 3 Turn on the main power switch Some parts inside of the machine may be hot when power is on or after printing Be careful not to burn yourself when working inside the machine Do not disassemble the machine when it is turned on or plugged in Doing so may give you an electric shock ...

Page 34: ... can only be configured by an authorized user who has registered an ID and a password on the machine For detailed information about the power off mode using the Power button refer to the Administrator s Guide You can also turn the machine on by pressing the Power button If you turn the machine off directly using the main power switch above the power receptacle it could cause a hard disk problem in...

Page 35: ...age 64 USB Enters the USB menu When a USB memory device is inserted into the USB memory port on your machine USB is activated on the display screen see Using a USB memory device on page 116 Scan to USB Enters the Scan to USB menu When a USB memory device is inserted into the USB memory port on your machine Scan to USB is activated on the display screen see Scanning originals and sending to a USB m...

Page 36: ...ver s fax machine Connecting In the fax mode the machine is waiting to connect to destination Printing The machine is printing Storing The data is storing to a box or a USB Delayed Job The job is temporarily stopped until the time you set for Delay Send email fax server Held In the Secured Job tab the job is temporarily stopped when secure print job is sent from a computer You can release the job ...

Page 37: ...d job Close Closes the job status window Interrupt button When you press Interrupt the machine goes into interrupt mode which means it stops the current printing job for an urgent copy job When the urgent copy job is completed the previous printing job continues When you select the staple feature for a printing job interrupt mode works after stapling is completed in the printing job Status Descrip...

Page 38: ... original face down on the scanner glass and align it with the registration guide at the top left corner of the glass 3 Close the DADF Leaving the DADF open while copying may affect copy quality and toner consumption Dust on the scanner glass may cause black spots on the printout Always keep it clean If you are copying a page from a book or magazine lift the DADF until its hinges are caught by the...

Page 39: ...ee Print media specifications on page 165 Desired outcome The print media you choose should be appropriate for your project Brightness Some print media are whiter than others and produce sharper more vibrant images Surface smoothness The smoothness of the print media affects how crisp the printing looks on the paper Some print media may meet all of the guidelines in this user s guide and still not...

Page 40: ... the warranty or service agreements 1 Squeeze the lock lever on the handle and pull out the tray 2 Squeeze the paper length guide and pull it to the end of the tray 1 1 Paper length guide 3 Squeeze the paper width guide and pull it to the end of the tray 1 1 Paper width guide 4 Flex and fan the edge of the paper stack to separate the pages before loading papers 5 Load paper with the print side fac...

Page 41: ...de the tray 1 M A X 1 Paper capacity guide 8 Fix the the paper length guide using the locking switch Release the locking switch to load a different sized paper 1 1 Locking switch 9 Insert the tray back into the machine When you print a document set the paper type and size for the tray For information about setting the paper type and size on the control panel see Tray setting on page 47 The standar...

Page 42: ...urpose tray The multi purpose tray can hold special sizes and types of print material such as postcards note cards and envelopes It is useful for single page printing on colored paper Tips on using the multi purpose tray Load only one type size and weight of print media at a time in the multi purpose tray To prevent paper jams do not add paper while printing when there is still paper in the multi ...

Page 43: ...tray see Media sizes automatically detected on page 44 For information about setting the paper type and size on the control panel see Tray setting on page 47 The settings made from the machine driver override the settings on the control panel To print from an application a Open an application and start the print menu b Open Printing Preferences see Opening printing preferences on page 101 c Press ...

Page 44: ...rint quality may not be achieved sizea a This machine can detect paper of similar sizes as the listed paper sizes Standard tray optional dual cassette feeder Multi purpose tray Duplex printing Letter SEFb b SEF meaning is Short Edge Feed o Available Letter LEFc c LEF meaning is Long Edge Feed o Available Ledger o Available Legal o Available Executive SEF o o Available Executive LEF o Available Sta...

Page 45: ...he extra flaps and strips might cause wrinkling creasing or jams and may even damage the fuser For the best print quality position margins no closer than 15 mm 0 6 inches from the edges of the envelope Avoid printing over the area where the envelope s seams meet Labels Load the paper with the side to be printed on facing down To avoid damaging the machine use only labels designed for use in laser ...

Page 46: ...bout 170 C 338 F for 0 1 second Preprinted paper ink must be non flammable and should not adversely affect machine rollers Forms should be sealed in a moisture proof wrapping to prevent changes during storage Before you load preprinted paper verify that the ink on the paper is dry During the fusing process wet ink can come off preprinted paper reducing print quality Glossy Load a single sheet of p...

Page 47: ...ss the Custom Size Button to set the paper size You can also set and save the custom size using Custom Size You can select the custom size whenever you need it Setting the paper type 1 Press Machine Setup Tray Settings Settings select the tray you want from the display screen 2 Press Paper Type and select the paper type 3 Press to save the selection Setting the tray confirmation message When you l...

Page 48: ...ne continues printing using similar or large size paper If this option is inactivated the machine waits until the required size paper is loaded in the tray 1 Press Machine Setup Tray Settings Settings Auto Continue 2 Choose one of the options Paper substitution When the requested paper for a print job is not available in the tray this feature allows you to substitute similar paper size For example...

Page 49: ... the tray for printing the tray selected as in the Tray Priority Setting will be used in order If the tray does not have the paper on which you want to print the machine automatically prints from the trays in the priority order set 1 Press Machine Setup Tray Settings Settings Tray Priority Setting 2 Press a tray and give priority in the order for printing job using UP and Down Arrows ...

Page 50: ...age 53 Output Sets the machine s various output options see Deciding the form of copy output on page 53 Darkness Adjusts the brightness level to make a copy for easier reading when the original contains faint markings and dark images see Changing the darkness on page 54 Programs Allows you to save the current settings for future use see Using a program s setting on page 64 Advanced tab Original Si...

Page 51: ...tabs if necessary see Using special copy features on page 55 5 Enter the number of copies using the numeric keypad on the control panel if necessary 6 Press Start from the control panel to begin copying To cancel the current copy job press Stop on the control panel You can delete current and pending jobs using Job Status on the control panel Select the job you want to cancel and press Delete see J...

Page 52: ...ach tray and press the tray containing the paper size you want Reducing or enlarging copies Using the Reduce Enlarge feature allows you to print an original image reducing or enlarging it to fit the paper You can press the icons that show how to reduce and enlarge copies Press the Basic tab Reduce Enlarge then press the appropriate option to reduce or enlarge an image on the paper When you use thi...

Page 53: ... and then select an appropriate color setting Full Color Select this setting to print the same as the original image color Refer to the sample images below Depending on the circumstances and quality of originals the printout s quality could be different from the sample image s B W Select this setting to print the copy in black and white regardless whether the scanned document is in color or in bla...

Page 54: ...hort edge feed and LEF Long edge feed For example direction of paper feeding in tray 1 is SEF and direction of paper feeding in tray 2 is LEF Changing the darkness Press the Basic tab You can adjust the degree of darkness using the left right arrows This feature allows dark images to be printed into lighter images or light images into darker images Refer to the sample images below Depending on the...

Page 55: ...ld occur In this case you need to select the appropriate paper size before you print Mixed Size Allows the use of both of Letter and Legal sized papers together and the machine uses the proper sized paper from several trays For example if the originals total 3 pages the 1st page is letter sized paper the 2nd page is legal sized paper and the 3rd page is letter sized paper then the machine prints t...

Page 56: ... t be copied 1 Press Copy from the display screen 2 Press the Advanced tab ID Copy from the display screen 3 Select a tray in Paper Source 4 Follow the steps on the display screen 5 Place the front side of an original facing down on the scanner glass as shown below and close the DADF When you place an original on the scanner glass leave a little space between the edge of the scanner glass and the ...

Page 57: ...1 Press Copy from the display screen 2 Place the originals face up in the DADF or place a single original face down on the scanner glass and close the DADF see Loading originals on page 38 3 Press Advanced tab N Up from the display screen 4 Press an option according to how many images to copy onto one page Off Copies an original onto one sheet of paper 2Up 9Up Copies corresponding numbers of separ...

Page 58: ...ation display screen Direction of paper feeding in the tray Available orientation Result In the DADF On the scanner glass Upright Images LEFa or SEFb Left to Right or Right to Left Left to Right Right to Left In the DADF On the scanner glass Sideways Images LEF or SEF ...

Page 59: ...On the scanner glass Sideways Images LEF or SEF Top to Down or Down to Top Top to Down Down to Top In the DADF On the scanner glass Upright Images LEF or SEF a LEF meaning is Long Edge Feed b SEF meaning is Short Edge Feed Original orientation DADF Scanner glass Original orientation display screen Direction of paper feeding in the tray Available orientation Result ...

Page 60: ...scanner glass and close the DADF see Loading originals on page 38 3 Adjust the settings for each copy such as Duplex and more in the Basic tab see Changing the settings for each copy on page 52 4 Press the Advanced tab Booklet from the display screen 5 Select a tray in Paper Source 6 Press the appropriate option Off Disables this feature 1 Sided Original Copies from one side of the original to one...

Page 61: ...g document For example you use it when you want to have large gray letters reading DRAFT or CONFIDENTIAL printed diagonally across the first page or all pages of a document This feature may not be available depending on models or option kits installed There are several predefined watermarks that come with the machine You can also enter a personalized watermark When you use this option Booklet in t...

Page 62: ... place a single original face down on the scanner glass and close the DADF see Loading originals on page 38 3 Adjust the settings for each copy such as Paper Source Reduce Enlarge Duplex and more in the Basic tab see Changing the settings for each copy on page 52 4 Press the Image tab Original Type from the display screen 5 Press the appropriate option Text Use for originals containing mostly text...

Page 63: ... face down on the scanner glass and close the DADF see Loading originals on page 38 3 Adjust the settings for each copy such as Paper Source Reduce Enlarge Duplex and more in the Basic tab see Changing the settings for each copy on page 52 4 Press the Image tab Erase Backside Image 5 Press the appropriate option Off Disables this feature Erase The higher the number is the lighter the backside imag...

Page 64: ...le original face down on the scanner glass and close the DADF see Loading originals on page 38 3 Press Programs Load 4 Press a program name you want to use on the list 5 Press Apply The machine is now set to copy according to the setting you selected 6 Press Start from the control panel to begin copying Using the Quick Copy menu The Quick Copy menu allows you to quickly set copy options without ha...

Page 65: ...g to fax Before you send or receive a fax you need to connect the supplied phone line cord to the wall jack Refer to the optional fax kit Installation Guide for how to make a connection The method of making a telephone connection varies from one country to another Sending a fax from your computer You can send a fax from your computer without going to the machine Make sure that your machine and the...

Page 66: ...e drop down list in Printer 4 Choose the number of copies and pages 5 Choose your paper size orientation and scale 6 Enter the recipients fax number into To s input area You can also use Addresses pressing button if you have stored frequently used fax numbers 7 If necessary enter the access code in the Dialing Prefix input area 8 If necessary you can send the fax with a cover page check Use Cover ...

Page 67: ...ed fax numbers using the control panel or SyncThru Web Service see Setting up an address book using the control panel on page 94 or Setting up an address book using SyncThru Web Service on page 96 Programs Allows you to save the current settings for future use see Using a programs setting on page 74 Advanced tab Original Size Selects the size of the original see Selecting the size of originals on ...

Page 68: ... you want to cancel a fax job press Stop on the control panel before the machine starts transmission or press the Job Status button on the control panel and select the job you want to delete then press Delete see Job Status button on page 36 If an original is placed on the scanner glass the machine shows the window asking if you want to place another page Load another original and press Yes When y...

Page 69: ...Adjusting the document settings on page 71 4 Press the Basic tab 5 Select Resolution see Changing the resolution on page 72 6 Press Recent 7 Press the fax number you want to redial Then press OK Add to Address Allows you to add a fax number in the Recent results to Address Book Delete Allows you to delete a fax number in the Recent results Press the fax number you want to delete Then press Delete ...

Page 70: ... extension phone and hear fax tones press the key 9 on the extension phone The machine receives the fax Press the buttons slowly in sequence If you still hear the fax tone from the remote machine try pressing 9 once again To change the 9 to for example 3 follow the steps below 1 Press Machine Setup Application Settings Fax Settings Recieve Start Code from the display screen 2 Press On to activate ...

Page 71: ...OK Receiving faxes in memory Since your machine is a multi tasking device it can receive faxes while you are making copies or printing If you receive a fax while you are copying or printing your machine stores incoming faxes in its memory Then as soon as you finish copying or printing the machine automatically prints the fax Adjusting the document settings Before sending a fax you can adjust the d...

Page 72: ...ng for an original document loaded into the DADF with the top of the original document toward the left side of the machine or an original document placed on the scan glass with the top of the original document toward the right side of the machine 3 Press OK from the display screen Changing the resolution The default document settings produce good results when using typical text based originals How...

Page 73: ...nt a report whether a fax transmission and reception is successfully completed or not If a report contains characters or fonts that the machine do not support Unknown could be printed instead of the characters fonts in the report 1 Press Machine Setup Report Fax Reports Settings from the display screen 2 Press the appropriate option Multi Fax Transmission Result Prints a confirmation report when y...

Page 74: ...ine is now set to fax according to the selected setting 8 Press Start on the control panel The machine starts scanning and sending a fax to destinations When you want to cancel a fax job press Stop on the control panel before the machine starts transmission or press the Job Status button on the control panel and select the job you want to delete then press Delete If an original is placed on the sc...

Page 75: ...hortcut in main screen Save to save current settings or cancel to quit without saving Loading 1 Press Scan to Email Scan to Server or Scan to USB from the display screen 2 Press Programs Load 3 Press the previous setting you want to use The machine is now set to scan according to the setting you selected 4 Press Add to home to make a shortcut in main screen Delete to delete the current setting or ...

Page 76: ... program is accompanying software for your machine You can use this program to scan images or documents see Understanding Samsung Easy Document Creator on page 121 Email You can send the scanned image as an email attachment see Scanning originals and sending through email scan to email on page 77 Server You can scan an image and send it to a server such as FTP or SMB see Scanning originals and sen...

Page 77: ...addresses used Also you can choose email addresses instead of pressing the pop up keyboard see Resending to the last email address on page 78 Favorite shows the frequently used addresses All Shows all the addresses ABC Shows the addresses that contains English characters 123 shows the addresses that contains numbers or special characters Programs Allows you to save the current settings for future ...

Page 78: ...n email confirmation report You can set the machine to print a report whether an email transmission is successfully completed or not If a report contains characters or fonts that the machine does not support Unknown could be printed instead of the characters fonts in the report 1 Press Machine Setup Application Setting Scan to Email Settings from the display screen 2 Press the appropriate option i...

Page 79: ...to an SMB FTP server You can select up to three destinations using SMB or FTP servers 1 Place the originals face up in the DADF or place a single original face down on the scanner glass and close the DADF see Loading originals on page 38 2 Press Scan to Server from the display screen 3 Set the scan features in the Advanced Image or Output tabs see Changing the scan feature settings on page 81 4 Pr...

Page 80: ...Go to upper Moves back to the upper level Select Moves to the selected folder New folder Makes a new folder in the USB memory device Detail Displays information of the selected folder or file Edit Changes the name of the selected folder or file Delete Deletes the selected folder or file File Name Makes a file name to store the scan data Resolution Selects the scanning resolution value see Changing...

Page 81: ...stored in root directory 6 Press the File Name input area The pop up keyboard appears 7 Enter a file name to store the scan data Press Done 8 Set the File format Resolution and Darkness see Scanning from both sides of originals on page 82 and Changing the resolution on page 81 9 Set the scan features in the Advanced Image or Output tabs if necessary see Changing the scan feature settings on page 8...

Page 82: ...ndow asking to place another page Load another original and press Yes When you finish select No for this option Selecting the orientation of originals 1 Press the Advanced tab Original Orientation then set the original orientation 2 Press the appropriate option Upright Images Select this setting for an original document loaded with the top toward the back of the machine Sideways Images Select this...

Page 83: ...ginals containing mostly text Text Photo Use for originals with mixed text and photographs Photo Use when originals are photographs 3 Press to go back to the previous screen Selecting the color mode Use one of these options to scan the original Auto Color Gray or Mono 1 Press the Image tab Color Mode from the display screen Select the appropriate option 2 Press the appropriate option Auto Automati...

Page 84: ...utput tab Quality from the display screen 2 Press the appropriate option Best Produces a high quality image but the file size will be larger Normal Both the image quality and file size will be between Best and Draft Draft Produces a low quality image but the file size will be smaller 3 Press OK from the display screen When you set Color Mode to Mono in the Image tab the Quality option is grayed ou...

Page 85: ...ob is completed this machine can send the completion notification using email This feature helps when you scan and send large quantities of documents You do not need to wait until the scan to email or scan to server job is completed beside the machine To receive the job completion notification you need to set up network parameters and email settings using the control panel or SyncThru Web Service ...

Page 86: ...ing the numeric keypad on the control panel 5 Press the application program you want and press Select Default setting is My Documents 6 Set the scan quality with Duplex and Resolution in the Basic tab 7 Set the size of original in the Advanced tab If you are not sure of the original size select Auto 8 Set the color mode in the Image tab 9 Set the file format in which the image is to be saved in th...

Page 87: ...ogress on the first scanner you may select the second scanner set the device options and start image acquisition simultaneously 4 Click Properties 5 Place the originals face up in the DADF or place a single original face down on the scanner glass and close the DADF see Loading originals on page 38 6 From the Scanner Properties window click Preview The document is scanned and the image preview appe...

Page 88: ...For further details about the Image Manager application refer to the on screen help Tools Name Function Save Saves the image Undo Cancels your last action Redo Restores the action you canceled Scroll Allows you to scroll through the image Crop Crops the selected image area Zoom Out Zooms the image out Zoom In Zooms the image in Scale Allows you to scale the image size you can enter the size manual...

Page 89: ...hat allows users to operate devices on the network by performing a set of pre constructed tasks called a Workform These Workforms allow repetitive and time consuming tasks to be automated making the users work days less tedious and more productive Understanding the SmarThru Workflow screen To use the SmarThru Workflow feature press SmarThru Workflow on the Main screen To switch to the other displa...

Page 90: ... new Workform execute SmaThru Workflow and log in You can create a maximum of 100 public Workforms SmaThruWorkflow should be installed on the network server To install SmaThruWorkflow refer to the Administrator s Guide on the supplied CD Workform Creation 1 Excute SmaThruWorkflow Programs SmarThru Workflow SmarThru Workflow 2 Enter your ID and Password to log into the system 3 Select Workform Work...

Page 91: ...kform Understanding the Shared Folder screen This feature allows you to use the machine s memory as a shared folder The advantage of this feature is that you can conveniently use the shared folder through your computer The administrator can set the ID and password to restrict the user s access and also set the maximum number of simultaneous users Creating a shared folder 1 Press the icon in the up...

Page 92: ...hich means the documents are stored on the HDD You can create a password for a certain Stored Document so unauthorized users cannot access it Also you can print stored documents by using a variety of printing features and send the documents to several destinations such as email server or fax You can set a Stored Document and use Stored Document feature with SyncThru Web Service see Setting up an a...

Page 93: ...Saving documents in the Stored Document 1 Press Stored Document on the main screen 2 Press Public or Private tab then you can see the saved files If there is no file you can save files from your PC see Print Mode on page 105 3 You can Rename Delete or Print files ...

Page 94: ... pause with some telephone systems you must dial an access code 9 for example and listen for a second dial tone In such cases you must insert a pause in the telephone number 5 Press the E mail input area Then enter the e mail address of the recipient 6 Press the OK to save the information Storing Individual addresses SMB FTP 1 Press Machine Setup Application Settings Address Book New SMB or FTP in...

Page 95: ...he contents using the pop up keyboard or numeric keypad on the control panel If you use the pop up keyboard 4 Press the icon to save the information Storing Group address 1 Press Machine Setup Application Settings Address Book new icon group icon from the display screen 2 Press the Group Name input area Then enter the group name 3 Press the Add Member Select the checkbox for the individual address...

Page 96: ...n SMB Server Address 14 Enter the server port number in SMB Server Port 15 Enter the login name in Login Name In case of SMB or FTP if you want the server to permit access for unauthorized persons Press the Anonymous box This box is unchecked by default If you checked the Anonymous box go to step 18 16 Enter the password in Password and re enter the password in Confirm Password 17 Enter the domain...

Page 97: ...123 123 123 123 3 Press Enter or click Go to access SyncThru Web Service If necessary you can change the language in the upper right corner of the SyncThru Web Service 4 Click Login 5 Enter the ID and password and select a domain to log into the machine 6 Click Login If you do not use the SyncThru Web Service for five minutes you will be automatically logged out 7 Click Address Book You can change...

Page 98: ...ple http 123 123 123 123 3 Press Enter or click Go to access the SyncThru Web Service shows If necessary you can change the language in the upper right corner of the SyncThru Web Service 4 Click Login 5 Enter the ID and password and select a domain to log into the machine 6 Click Login If you do not use the SyncThru Web Service for five minutes you will be automatically logged out 7 Click AddressB...

Page 99: ...dd individual addresses directly Check the addresses you want to add to Group Address Book from Individual Address Book You can delete individual addresses directly Check the addresses you want to delete and press Delete in Group Address Book ...

Page 100: ... You can also use various special printing features The following table shows a general overview of features supported by your printer drivers Some models or operating systems may not support all feature s shown in the following table Supported Blank Not supported Feature PCL PSa X PS PS Windows MAC Linux Unix Machine quality option Poster printing Multiple pages per sheet Booklet printing Fit to ...

Page 101: ...ettings see Opening printing preferences on page 101 4 To start the print job click OK or Print in the Print window Canceling a print job If the print job is waiting in the print queue or print spooler cancel the job as follows You can access this window by simply double clicking the machine icon in the Windows task bar You can also cancel the current job by pressing Stop on the control panel Open...

Page 102: ...paper handling specifications Click the Paper tab to display the options shown below Copies This option allows you to choose the number of copies to be printed You can select 1 to 9999 copies Paper Options Original Size This option allows you to set the actual paper size of the originals Output Size This option allows you to scale your print job to any selected paper size regardless of the origina...

Page 103: ... option for more information If you click Reset settings in the Levels or Matching return to the default setting You can change the image which is in the Advanced option Click the Import Image button and select a different image Font Text Select Clear Text to print text darker than in a normal document Check All Text Black to print in solid black regardless of the color it appears on the screen Ad...

Page 104: ...s you to specify not to print blank pages in the original data Manual Margin This option allows you to specify the binding margin Binding margin adjusts the binding position This option is not available when you use the PS printer driver PostScript Options These options are available only when you use the PS printer driver Click the question mark in the upper right corner of the window and click o...

Page 105: ...ftware connection method media type media size job complexity etc Samsung tab Use the Samsung tab to display the copyright and the version number of the driver If your computer is connected to the Internet you can have access to additional device services Print Mode This option allows you to choose how to print or save the print file by using the HDD in your machine The default Print Mode is Norma...

Page 106: ...ng system you are using 6 Select the appropriate option Tray Options Select the optional tray you installed You can select the Tray 3 4 dual cassette feeder Finisher Options Select the optional finisher you installed Administrator Settings You can select the Printer Status and EMF Spooling Advanced Select one of the options This option is available only when you use the PS printer driver Click the...

Page 107: ...tware application access Printing Preferences see Opening printing preferences on page 101 2 Click the Basic tab 3 From the Double Sided Printing section select the binding option you want Printer Default If you select this option this feature is determined by the setting you ve made on the control panel of the machine This option is available only when you use the PCL printer driver None Disables...

Page 108: ... the print settings from your software application access Printing Preferences see Opening printing preferences on page 101 2 Click the Advanced tab select Edit from the Watermark drop down list 3 Select the watermark you want to edit from the Current Watermarks list and change the watermark message and options 4 Click Update to save the changes 5 Click OK or Print until you exit the Print window ...

Page 109: ...lect Edit in the Text drop down list 3 Select the overlay you want to delete from the Overlay List box 4 Click Delete 5 When a confirmation message window appears click Yes 6 Click OK or Print until you exit the Print window Using direct printing utility This chapter explains how to use the Direct Printing Utility to print PDF files without open the files A HDD should be installed on your machine ...

Page 110: ...t Settings Printers For Windows XP 2003 select Printers and Faxes For Windows 2008 Vista select Control Panel Hardware and Sound Printers For Windows 7 select Control Panel Hardware and Sound Devices and Printers For Windows Server 2008 R2 select Control Panel Hardware Devices and Printers 3 Select your machine 4 Right click your machine and select Set as Default Printer For Windows 7 and Windows ...

Page 111: ...w many pages are to be printed on one page see Printing multiple pages on one sheet of paper on page 113 Layout Direction This option allows you to select the printing direction on a page similar to the examples in the UI Border This option allows you to print a border around each page on the sheet Two Sided This option allows you to print on both sides of a sheet of paper see Printing on both sid...

Page 112: ... the user name that you use to log into Mac OS X Job Name This option is used when you need to find a stored file using the control panel Printer Features Finishing You can select the print output options such as staple offset and etc This option is available only when the optional Inner Finisher or booklet finisher is installed Booklet Printing This feature prints your document on both sides of a...

Page 113: ... the other options you want to use 5 Click Print and the machine prints on both sides of the paper If you print more than 2 copies the first copy and the second copy might print on the same sheet of paper Avoid printing on both sides of paper when you are printing more than 1 copy Linux printing Some features may not be available depending on models or options Printing from applications There are ...

Page 114: ...lect the Show completed jobs check box to see previous jobs on the job list Classes This option shows the class of your machine Click Add to Class to add your machine to a specific class or click Remove from Class to remove the machine from the selected class 4 Click OK to apply the changes and close the Printer Properties window UNIX Printing Some features may not be available depending on models...

Page 115: ...s by changing the values in the respective fields Set by default these values depend on the page size selected Unit Change the units to points inches or centimeters Printer Specific Settings tab Select various options in the JCL and General frames to customize various settings These options are specific to the printer and depend on the PPD file ...

Page 116: ... PDF and PRN files see Printing from a USB memory device on page 117 Sends to Scan to USB see Scanning to a USB memory device on page 81 About USB memory device A B USB memory devices are available with a variety of memory capacities to give you more room for storing documents presentations music and videos high resolution photographs or whatever other files you want to store or move You can do th...

Page 117: ...y device see Printing to a file PRN on page 110 TIFF TIFF 6 0 Baseline JPEG JPEG Baseline PDF PDF 1 7 and below XPS In case of 8 bit CMYK JPEG files the job could be cancelled To print a document from a USB memory device 1 Insert a USB memory device into the USB memory port on your machine Your machine automatically detects the device and reads data stored on it see About USB memory device on page...

Page 118: ...ress Start button to print the file 7 Press to go back to the previous screen 8 After printing is completed you can remove the USB memory device from the machine Press USB Managing USB memory You can delete image files stored on a USB memory device one by one or all at once by reformatting the device After deleting files or reformatting a USB memory device files cannot be restored Confirm that you...

Page 119: ...eset How to use 1 Open a document to print 2 Print the document 3 Select the options you want to apply to the document You can see the preview of the applied features 4 Click Print Using Samsung Easy Printer Manager This feature may not be available depending on model or optional goods Available for Windows and Mac OS X users only Microsoft Internet Explorer 6 0 or higher is the minimum requiremen...

Page 120: ...epending on the machine or operating system in use Check the operating system s that are compatible with your machine see System requirements on page 167 Available for Windows OS users only Samsung Printer Status overview If an error occurs while operating you can check the error from Samsung Printer Status Samsung Printer Status is installed automatically when you install the machine software You...

Page 121: ...llows The screenshot may differ depending on operating system you are using Toner Level You can view the level of toner remaining in each toner cartridge The machine and the number of toner cartridge s shown in the above window may differ depending on the machine in use Some machines do not have this feature Option You can set printing job alert related settings Order Supplies You can order replac...

Page 122: ...nt issue it s needed to check security limitations established in your network with network administrator To guarantee correct functioning of SNS upload in Samsung Easy Document Creator unrestricted network environment is needed for HTTPS communication Converting to an E Book Scan Directly 1 Place a single document face down on the document glass or load the documents face up into the document fee...

Page 123: ...e Unified Driver Configurator on the desktop You can also click the Startup Menu icon and select Samsung Unified Driver Unified Driver Configurator 2 Click each button on the left to switch to the corresponding configuration window 1 Printers Configuration 2 Scanners Configuration To use the on screen help click Help 3 After changing the configurations click Exit to close the Unified Driver Config...

Page 124: ...er applications to these devices via the single I O port The Unified Linux Driver package provides an appropriate port sharing mechanism that is used by Samsung printer and scanner drivers The drivers talk to their devices via so called machine ports The current status of any machine port can be viewed via the Ports configuration The port sharing prevents you from accessing one functional block of...

Page 125: ...r light printing occurs Toner low related message appears on the display The status LED blinks red If this happens you can temporarily improve print quality by redistributing the remaining toner in the cartridge In some cases white streaks or light printing will still occur even after you have redistributed the toner Click this link to open an animation about redistributing toner 1 Open the front ...

Page 126: ...y empty The status LED turns red on and the display screen shows the error message of replacing toner The machine stops printing and incoming faxes are saved in memory However when the color toner cartridges are empty but there is toner left in the black toner cartridge you can still print black and white print jobs the submitted job must be in black and white Check the type of the toner cartridge...

Page 127: ...CLX 92x1 93x1 Series SCX 812x Series If toner gets on your clothing wipe it off with a dry cloth and wash clothing in cold water Hot water sets toner into fabric 6 Hold the toner cartridge and align it with the corresponding slot inside the machine Insert it back into its slot until locks in place CLX 92x1 93x1 Series SCX 812x Series 7 Close the front door Ensure that the door is securely closed C...

Page 128: ...If cleaning is done the message will disappear automatically Follow the cleaning procedure below 1 Open the front door CLX 92x1 93x1 Series SCX 812x Series 2 Hold the left right locking levers and push inward at the same time Then remove the waste toner container 1 2 1 CLX 92x1 93x1 Series SCX 812x Series 3 Pull the paper dust stick out SCX 812x Series CLX 92x1 93x1 Series 4 Remove the paper dust ...

Page 129: ...en the life of the imaging unit expires totally The status LED turns red on and the display screen shows the error message for replacing imaging unit Check the type of the imaging unit for your machine see Supplies and accessories on page 160 At this stage the imaging unit needs to be replaced 1 Open the front door CLX 92x1 93x1 Series SCX 812x Series 2 Push the left right locking levers and push ...

Page 130: ...hing in cold water Hot water sets toner into fabric Be careful not to scratch the surface of the imaging unit To prevent damage do not expose the imaging unit to light for more than a few minutes Cover it with a piece of paper to protect it if necessary 7 Pull the rubber stopper out of the developer SCX 812x Series only 8 Remove the tape on the imaging unit SCX 812x Series only 9 Remove the paper ...

Page 131: ...ick 4 or 5 times to clean the LSU window CLX 92x1 Series only 13 Insert the LSU window cleaning stick back into its place CLX 92x1 Series only 14 Insert the waste toner container until it locks in place SCX 812x Series CLX 92x1 93x1 Series 15 Close the front door Ensure that the door is securely closed CLX 92x1 93x1 Series SCX 812x Series If the front door is not completely closed the machine will...

Page 132: ...n page 160 1 Open the front door CLX 92x1 93x1 Series SCX 812x Series 2 Push the left right locking levers and push outward as shown below Then remove the waste toner container 1 2 1 CLX 92x1 93x1 Series SCX 812x Series 3 Remove the new waste toner container from its package 4 Insert the new waste toner container until it locks in place SCX 812x Series CLX 92x1 93x1 Series 5 Close the front door E...

Page 133: ...s on the display screen To avoid tearing the document remove the jammed document slowly and gently To prevent document jams use the scanner glass for thick thin or mixed paper type originals Original paper jam in front of scanner 1 Remove any remaining pages from the DADF 2 Open the DADF cover 3 Gently remove the jammed paper from the DADF 4 Close the DADF cover ...

Page 134: ...canner 1 Remove any remaining pages from the DADF 2 Open the DADF cover 3 Gently remove the jammed paper from the DADF If you can not grasp the jammed paper use lever as shown in the picture below If you do not see paper in this area go to the next step ...

Page 135: ...oubleshooting_ 135 4 Open the DADF input tray 5 Pull the jammed paper gently out of the DADF If you do not see paper in this area go to the next step 6 Close DADF cover and DADF input tray 7 Open the DADF ...

Page 136: ...e adjustable guides are positioned correctly see Loading paper in the tray on page 39 Do not overload the tray Ensure that the paper level is below the paper capacity mark on the inside of the tray Do not remove paper from the tray while your machine is printing Flex fan and straighten paper before loading Do not use creased damp or highly curled paper Do not mix paper types in a tray Use only rec...

Page 137: ...tray 1 2 Click this link to open an animation about clearing a jam The fuser area is hot Take care when removing paper from the machine 1 Open the right door 1 2 2 Remove the jammed paper by gently pulling it straight out Close the right door If you do not see paper in this area go to the next step 3 Pull out tray 1 or 2 4 Remove the jammed paper from the machine 5 Insert tray 1 or 2 back into the...

Page 138: ...ssette feeder 2 Remove the jammed paper by gently pulling it straight out Close the dual cassette feeder right bottom door If you do not see paper in this area go to the next step 3 Pull out tray 3 or 4 4 Remove the jammed paper from the machine 5 Insert tray 3 or 4 back into the machine until it locks into place Printing automatically resumes ...

Page 139: ... paper out of the machine 2 Open and close the front door to resume printing Paper jam inside the machine Jam feed 1 Jam feed 2 Click this link to open an animation about clearing a jam The fuser area is hot Take care when removing paper from the machine 1 Open the right door 1 2 2 Remove the jammed paper by gently pulling it straight out 3 Close the right door ...

Page 140: ...Remove the jammed paper by gently pulling it straight out 3 Close the dual cassette feeder right bottom door Paper jam inside the machine Jam Registration Click this link to open an animation about clearing a jam The fuser area is hot Take care when removing paper from the machine 1 Open the right door 1 2 2 Remove the jammed paper by gently pulling it straight out 3 Close the right door ...

Page 141: ...the fuser cover Then remove the jammed paper by gently pulling it straight out 1 2 3 Close the fuser cover and the right door Paper jam at the top of duplex path Jam Duplex Return Jam Duplex 1 Click this link to open an animation about clearing a jam The fuser area is hot Take care when removing paper from the machine 1 Open the right door 1 2 2 Remove the jammed paper by gently pulling it straigh...

Page 142: ...ne 1 Open the right door 1 2 2 Remove the jammed paper by gently pulling it straight out 3 Close the right door Paper jam bottom of duplex path Jam Duplex Regi Click this link to open an animation about clearing a jam The fuser area is hot Take care when removing paper from the machine 1 Open the right door 1 2 2 Remove the jammed paper by gently pulling it straight out 1 2 3 Close the right door ...

Page 143: ...he optional Inner Finisher or booklet finisher is installed remove the jammed paper as shown below If this paper jam persists make sure the bin full sensor is unfolded The bin full sensor is located in front of the output tray Paper jam at finisher s exit Click this link to open an animation about clearing a jam 1 Gently pull the paper out of the finisher s exit 2 Open and close the finisher front...

Page 144: ...to open an animation about clearing a jam 1 Lift up the finisher top cover 2 Let the jammed paper move out by rotating the paper roller gear 3 Gently pull the jammed paper out Close the top cover 4 Open and close the finisher front door Printing automatically resumes ...

Page 145: ...ging Unit Failure error number Install color imaging unit again There is a problem in the imaging unit Reinstall the imaging unit If the problem persists call for service color Imaging Unit Failure error number Please open close door There is a problem in the imaging unit Open and close the front door If the problem persists call for service color Imaging Unit Failure error number Turn off then on...

Page 146: ...h new transfer belt unit The life of the transfer belt unit expires totally Replace the transfer belt unit with a Samsung genuine transfer belt unit call for service Engine System Failure error number Please open close door There is a problem in the engine system Open and close the front door If the problem persists call for service Engine System Failure error number Turn off then on There is a pr...

Page 147: ... the tray If the problem persists call for service Image transfer belt cleaning unit is not compatible Check user s guide The image transfer belt cleaning unit you have installed is not for your machine Install a Samsung genuine image transfer belt cleaning unit designed for your machine call for service Image transfer belt unit is not original Samsung Check user s guide The image transfer belt yo...

Page 148: ...see Paper jam in the multi purpose tray on page 139 Prepare new color imaging unit The estimated life of the imaging unit is close Prepare a new imaging unit for a replacement Prepare new color toner cartridge Small amount of toner is left in the indicated cartridge The estimated cartridge life of toner is close Prepare a new cartridge for a replacement You may temporarily increase the printing qu...

Page 149: ...ed life of staple cartridge is close Prepare a new staple cartridge for a replacement Message Meaning Suggested solutions Staple cartridge of booklet I is not installed Install the cartridge The staple cartridge of booklet is not installed or the staple cartridge is not properly installed Install the staple cartridge If it is already installed try to reinstall the staple cartridge If the problem p...

Page 150: ...operate Turn off then on There is a problem in the waste motor Turn the machine off and back on again If the problem persists call for service Waste toner container is almost full Order new one The estimated life of the waste toner container is close Prepare a new waste toner container for a replacement Waste toner container is full Replace it The life of the waste toner container expires soon Rep...

Page 151: ...entative Transparenciesstick together in the paper exit Use only transparencies specifically designed for laser printers Remove each transparency as it exits from the machine Envelopes skew or fail to feed correctly Ensure that the paper guides are against both sides of the envelopes Condition Possible cause Suggested solutions The machine does not print The machine is not receiving power Check th...

Page 152: ...nctioning Try printing a job from another application The operating system is malfunctioning Exit Windows and reboot the computer Turn the machine off and back on again If you are in a DOS environment the font setting for your machine may be set incorrectly Change the language setting Condition Possible cause Suggested solutions Pages print but they are blank The toner cartridge is defective or ou...

Page 153: ...is bad The manufacturing processes can cause some areas to reject toner Try a different kind or brand of paper Change the printer option and try again Go to Printing Preferences click Paper tab and set type to thick paper see Opening printing preferences on page 101 If these steps do not correct the problem contact a service representative White Spots If white spots appear on the page The paper is...

Page 154: ... on page 165 Ensure that the paper or other material is loaded correctly and the guides are not too tight or too loose against the paper stack Ensure that the standard tray right bottom door dual cassette feeder right bottom door or high capacity feeder right bottom door is securely closed If the bottom doors are not completely closed open and close the bottom doors Condition Suggested Solutions C...

Page 155: ...Condition Suggested solution Copies are too light or too dark Use Light and Dark arrows to lighten or darken the backgrounds of copies in the Basic tab of the Copy menu Smears lines marks or spots appear on copies If the defects are on the original press left right arrow to lighten the background of your copies in the Basic tab of the Copy menu see Changing the darkness on page 54 If there are no ...

Page 156: ...erly connected or the power may be off The scanner driver is not installed or the operating environment is not set up properly Ensure that the machine is properly connected and the power is on then restart your computer The USB cable may be improperly connected or the power may be off condition suggested solutions The machine is not working there is no display or the buttons are not working Unplug...

Page 157: ... might need to reduce the complexity of the page or install more memory A PostScript error page prints The print job may not be PostScript Make sure that the print job is a PostScript job Check to see whether the software application expected a setup or PostScript header file to be sent to the machine The optional dual cassette feeder tray 3 tray 4 is not selected in the driver The printer driver ...

Page 158: ...st version of AFPL Ghostscript from http sourceforge net projects ghostscript and install it to solve this problem I cannot scan via Gimp Front end Check if Gimp Front end has Xsane Device dialog on the Acquire menu If not you should install Xsane plug in for Gimp on the your computer You can find Xsane plug in package for Gimp on Linux distribution CD or Gimp home page For the detailed informatio...

Page 159: ...ctly Some parts of graphics text or illustrations are missing Printing the PDF file as an image may enable the file to print Turn on Print As Image from the Acrobat printing options The document has printed but the print job has not disappeared from the spooler in Mac OS X10 3 2 Update your MAC OS to MAC OS X 10 3 3 or higher Some letters are not displayed normally during the cover page printing M...

Page 160: ...ns and job mode used the toner cartridge s lifespan may differ You must purchase supplies including toner cartridges in the same country where you purchased your machine Otherwise supplies will be incompatable with your machine since the system configuration of these vary from country to country SCX 812x Series CLX 92x1_9301 Series Type Average yielda a Declared yield value in accordance with 5 co...

Page 161: ...ose used batteries according to the instructions Available accessories You can purchase and install accessories to enhance your machine s performance and capacity Accessory function Part name Cabinet Stand You can place the machine on the ergonomically designed cabinet which lets you reach the machine conveniently Also you can easily move the cabinet with its wheels if necessary and store miscella...

Page 162: ...perience frequent paper jams or printing problems check the remaining lifespan of supplies Replace the corresponding parts if necessary 1 Press Machine Setup Others Supplies Life from the main screen 2 Check the supplies life 3 Press Back for return to the previous screen ...

Page 163: ...tomatic document feeder 5 Kg 11 lbs Item SCX 812x Series CLX 93x1 Series CLX 92x1 Series Noise Levela a Sound Pressure Level ISO 7779 Configuration tested machine basic installation A4 paper simplex printing Ready mode 43 dB A Printing mode Simplex Duplex Simplex 2dBA Tray 1 52dB A MP 54 dB A Option tray 54dB A Tray 1 52dB A MP 54 dB A Option tray 54dB A Copying mode Simplex Duplex Simplex 2dBA Tr...

Page 164: ...evice and void the product warranty Item Description Power ratinga a see the rating label on the machine for the correct voltage frequency hertz and type of current for your machine 110 volt models AC 110 127 V 220 volt models AC 220 240 V Power consumption Average operating mode Less than 1 100 W Ready mode Less than 250 W Power save mode Less than 3 W Power off mode Less than 0 W ...

Page 165: ...High capacity feeder Envelope Letter Statement A4 A5 JIS B5 A6 ISO B5 Refer to the Plain paper section Not available in tray1 2 3 4 High capacity feeder 75 to 90 g m2 20 to 24 lb bond 10 sheets stacking Envelope Monarch 98 x 191 mm 3 87 x 7 5 inches Envelope No 10 105 x 241 mm 4 12 x 9 5 inches Envelope No 9 98 x 225 mm 3 87 x 8 87 inches Envelope DL 110 x 220 mm 4 33 x 8 66 inches Envelope C5 162...

Page 166: ...ond 20 sheets stacking Thick cardstock Refer to the Plain paper section Refer to the Plain paper section 170 to 216 g m2 45 to 57 lb bond 350 sheets stacking Not available in the high capacity feeder 170 to 216 g m2 45 to 57 lb bond 20 sheets stacking Thin glossy Refer to the Plain paper section Refer to the Plain paper section Not available in tray1 2 3 4 High capacity feeder 106 to 169 g m2 28 t...

Page 167: ... Pentium III 933 MHz Pentium IV 1 GHz 128 MB 256 MB 1 5 GB Windows Server 2003 Intel Pentium III 933 MHz Pentium IV 1 GHrmz 128 MB 512 MB 1 25 GB to 2 GB Windows Server 2008 Intel Pentium IV 1 GHz Pentium IV 2 GHz 512 MB 2048 MB 10 GB Windows Vista Intel Pentium IV 3 GHz 512 MB 1024 MB 15 GB Windows 7 Intel Pentium IV 1 GHz 32 bit or 64 bit processor or higher 1 GB 2 GB 16 GB Support for DirectX 9...

Page 168: ...008 2009 2009 1 2010 32 64 bit Ubuntu 6 06 6 10 7 04 7 10 8 04 8 10 9 04 9 10 10 04 32 64 bit SuSE Linux Enterprise Desktop 10 11 32 64 bit Debian 4 0 5 0 32 64 bit CPU Pentium IV 2 4 GHz IntelCore2 RAM 512 MB 1024 MB Free HDD space 1 GB 2 GB Item Requirements Operating system Sun Solaris 9 10 x86 SPARC HP UX 11 0 11i v1 11i v2 11i v3 PA RISC Itanium IBM AIX 5 1 5 2 5 3 5 4 PowerPC Free HDD space ...

Page 169: ...000 only from landline www samsung com CZECH REPUBLIC 800 SAMSUNG 800 726786 www samsung com Samsung Electronics Czech and Slovak s r o Oasis Florenc Sokolovská 394 17 180 00 Praha 8 DENMARK 70 70 19 70 www samsung com DOMINICA 1 800 751 2676 www samsung com ECUADOR 1 800 10 7267 www samsung com EGYPT 08000 726786 www samsung com EIRE 0818 717100 www samsung com EL SALVADOR 800 6225 www samsung co...

Page 170: ... 1 800 682 3180 www samsung com ROMANIA 08010 SAMSUNG 08010 726 7864 only from landline 40 21 206 01 10 from mobile and land line www samsung com Country Region Customer Care Center Web Site RUSSIA 8 800 555 55 55 www samsung com SAUDI ARABIA 9200 21230 www samsung com SENEGAL 800 00 0077 www samsung com SERBIA 0700 SAMSUNG 0700 726 7864 www samsung com SINGAPORE 1800 SAMSUNG 726 7864 www samsung ...

Page 171: ...stems running on them The BOOTP servers assign the IP address from a pool of addresses to each client BOOTP enables diskless workstation computers to obtain an IP address prior to loading any advanced operating system CCD Charge Coupled Device CCD is a hardware which enables the scan job CCD Locking mechanism is also used to hold the CCD module to prevent any damage when you move the machine Colla...

Page 172: ...tract model of the system being simulated often considering its internal state Ethernet Ethernet is a frame based computer networking technology for local area networks LANs It defines wiring and signaling for the physical layer and frame formats and protocols for the media access control MAC data link layer of the OSI model Ethernet is mostly standardized as IEEE 802 3 It has become the most wide...

Page 173: ...ished to standardize and regulate international radio and telecommunications Its main tasks include standardization allocation of the radio spectrum and organizing interconnection arrangements between different countries to allow international phone calls A T out of ITU T indicates telecommunication ITU T No 1 chart Standardized test chart published by ITU T for document facsimile transmissions JB...

Page 174: ...ped by Adobe Systems for representing two dimensional documents in a device independent and resolution independent format PostScript PostScript PS is a page description language and programming language used primarily in the electronic and desktop publishing areas that is run in an interpreter to generate an image Printer Driver A program used to send commands and transfer data from the computer t...

Page 175: ...cuments and resources on the Internet The first part of the address indicates what protocol to use the second part specifies the IP address or the domain name where the resource is located USB Universal Serial Bus USB is a standard that was developed by the USB Implementers Forum Inc to connect computers and peripherals Unlike the parallel port USB is designed to concurrently connect a single comp...

Page 176: ...ator 121 configuration 122 device name 122 e book conversion 122 plug in 123 quick scan 121 122 scan 121 122 123 SNS scanning 122 editing group address 95 individual address 95 erasing background copying 63 scanning 83 erasing backside scanning 84 error message 145 extension telephone 70 F favorites settings for printing 105 fax receiving changing the receive mode 70 extension telephone 70 in answ...

Page 177: ...57 print media card stock 46 envelope 45 glossy 46 39 labels 45 46 output support 165 paper tab in printer preferences 102 setting the paper size 47 44 print resolution set Linux 114 print resolution set Macintosh 111 printer preferences Linux 114 printer properties opening printer preferences 101 printer status general information 120 printing changing the default print settings 110 107 fitting y...

Page 178: ...es 160 ordering 160 T to USB memory device 80 81 toner cartridge redistributing toner 125 126 touch screen problem solving 150 tray loading paper in multi purpose tray 42 ordering an optional tray 161 setting the paper size and type 47 TWAIN scan 86 U understanding the fax screen 67 understanding the scan screen 76 UNIX printing 114 system requirements 168 usb understanding the usb screen 116 USB ...

Reviews: