English-17
4.
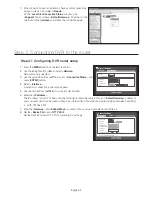
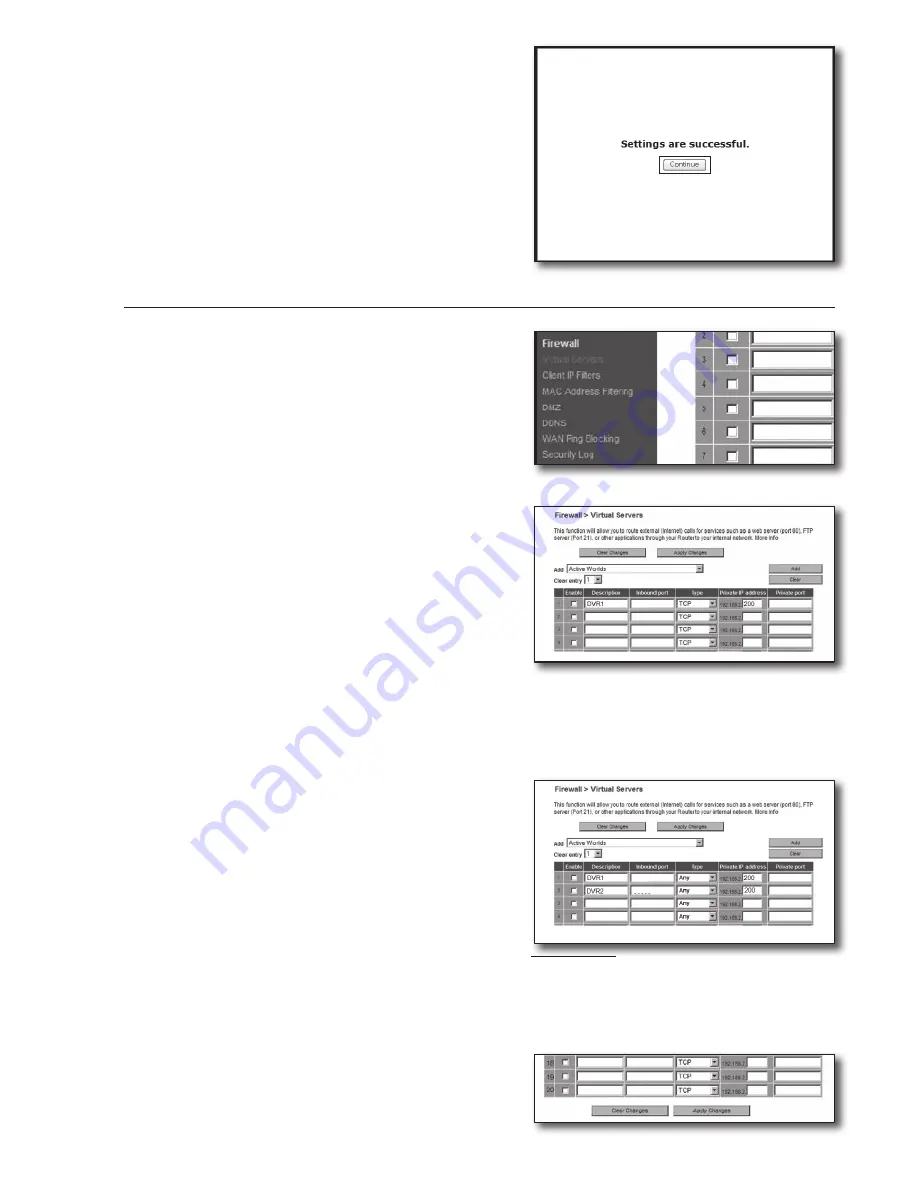
Click [
Save Settings
] button on the bottom.
5.
Once finished, completion screen appears.
Step 5.1-Case 4. BELKIN F5D8236-4
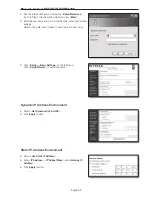
1.
Click <
Firewall
>-<
Virtual Servers
> on the left menu.
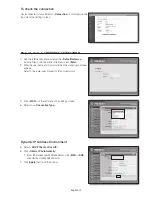
2.
Set the <
HTTP Port
> for port forwarding.
2
-1
. Check the <
Enable
> checkbox to mark selected.
2
-2
. Enter a name for the DVR port in the <
Description
> field.
`
ex) DVR1
2
-3
. In the <
Inbound port
>, enter the <
HTTP Port
> defined in
Step 3.
`
ex) 80
2
-4
. For the <
Type
>, select [
Any
].
2
-5
. In the <
Private IP address
>, enter the DVR's IP address defined in Step 3.
`
ex) 192.168.1.200
2
-6
. In the <
Private port
> field, enter the <
HTTP Port
> defined in Step 3.
`
ex) 80
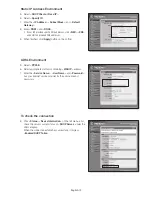
3.
Set the <
Device Port
> for port forwarding.
3
-1
. Check the <
Enable
> checkbox to mark selected.
3
-2
. Enter a name for the DVR port in the <
Description
> field.
`
ex) DVR2
3
-3
. In the <
Inbound port
> fields, enter the <
Device Port
>
defined in Step 3.
`
ex) 4520,4521,4522,4523,4524
3
-4
. For the <
Type
>, select [
Any
].
3
-5
. In the <
Private IP address
>, enter the DVR's IP address defined in Step 3.
`
ex) 192.168.1.200
3
-6
. In the <
Private port
> fields, enter the <
Device Port
> defined in Step 3.
`
ex) 4520,4521,4522,4523,4524
4.
Once finished, click [
Apply Changes
] button.
80
80
80
4524
80
4524


