English
_53
MAIN MENU
SETTING THE RECORDING
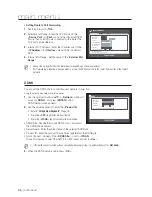
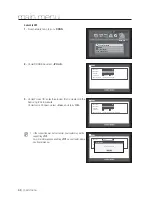
You can setup scheduled recording, event recording and other recording related settings.
Recording Schedule
Make your reservation on a date and time to schedule the recording on specified time.
Using the mouse may help make setup easier.
1.
Press the [
MENU
] button on the remote control.
2.
Use the left/right button (
◄ ►
) to select <
Record
>.
Record menu is selected.
3.
Use the up/down buttons (
▲▼
) to move to <
Recording
Schedule
>, and press [
ENTER
] button.
4.
Select <
Recording Schedule
>.
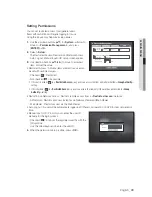
A window of scheduled recording setup appears.
5.
Use direction buttons (
▲▼◄ ►
) to move to a desired
item, and set the value.
1
Channel : Select a channel to set the recording schedule
time and date format.
1
Recording type : Select each time cell, and then select a
type to start recording.
1
Apply to All CH : If selected <
Apply to All CH
>, “
Apply to
All CH
” window appears.
Press <
OK
> to apply the setup to all channels.
6.
When the recording schedule setup is done, press <
OK
>.
M
Event recording and scheduled recording starts about 3
seconds prior to the event/schedule for guaranteed recording.
Record
Logout
Return
Recording Schedule
Event Record Duration
REC Quality & Resolution
Record Option
All
0
0
0
1
0
2
0
3
0
4
0
5
0
6
0
7
0
8
0
9 10 11 12 13 14 15 16 17 18 19 20 21 22 23
Sun
Mon
Tue
Wed
Thu
Fri
Sat
Hol
No Recording
Continuous
Event Both(Cont&Evnt)
Apply to All CH
OK
Cancel
Recording Schedule
CH1
All
0
0
0
1
0
2
0
3
0
4
0
5
0
6
0
7
0
8
0
9 10 11 12 13 14 15 16 17 18 19 20 21 22 23
Sun
Mon
Tue
Wed
Thu
Fri
Sat
Hol
No Recording
Continuous
Event Both(Cont&Evnt)
Apply to All CH
OK
Cancel
Recording Schedule
CH1
Apply to All CH
OK
Cancel
Apply recording schedule to all channels?

