instAll HArD Drive
M
`
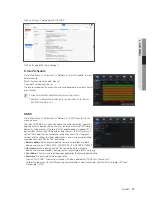
HDD is pre-installed. If you want to replace hard disk drive, please refer to the following instruction. Please do not remove the hard drive when DVR
is operating.
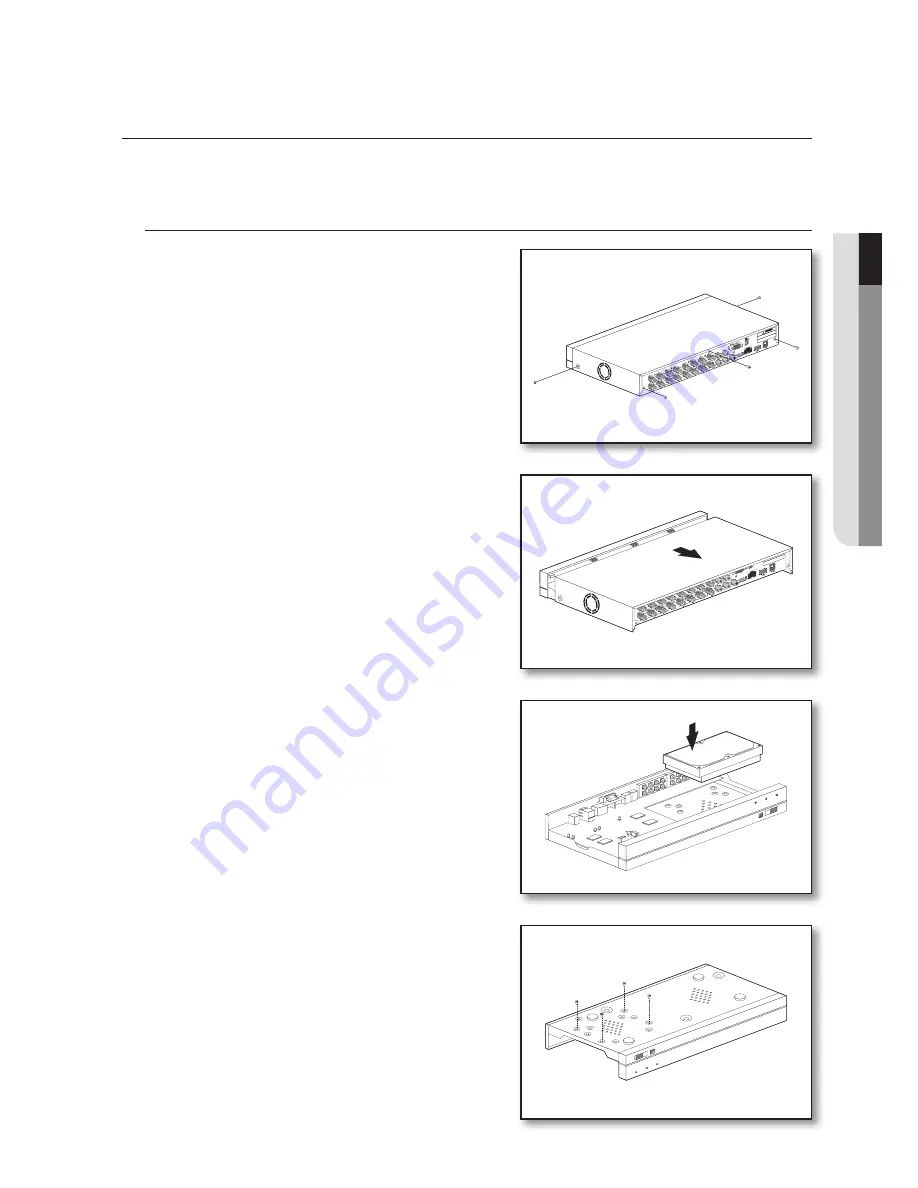
installation of Hard Drive
1.
Using a screwdriver, remove the screws from the side and back
panels.
2.
Remove the top cover.
3.
Connect data and power cables of hard drive to the motherboard.
Mount the hard drive by mounting it onto the rack and connecting
the power and data cables.
4.
Multiple groups of screw mounting holes are provided on the
bottom of the DVR. Screw the hard drive in place according to the
size of your hard drive.
2
HDMI
VGA
LAN
3
1
4
AUDIO
INPUT
AUDIO
OUTPUT
VIDEO INPUT
RS-485
12V
CAUTION
RISK
OF EL
ECTRI
SHOCK
DO N
OT OPEN
CAUTION
: TO REDU
CE THE R
ISK OF
ELECTRICA
L SHOCK
DO N
OT OPE
N COVERS
. NO USER
SER
VICEABLE
P
ARTS IN
SIDE
. REFER
SER
VICING TO Q
UALIFI
ED
SER
VICE PE
RSON
NEL.
WARNING :
TO PRE
VENT
FIRE OR
SHOC
K HAZA
RD. D
O NOT
EXP
OSE U
NITS
NOT
SPECIFIC
ALLY
DES
IGNED
FO
R OUTD
OOR USE TO R
AIN O
R MOIS
TURE
.
15
16
13
14
11
12
10
9
8
7
6
5
4
3
2
1
1
7
USB
REC
NET
PWR
USB
REC
NET
PWR
English
_
7
●
o
ver
view of D
vr
2
HDMI
VGA
LAN
3
1
4
AUDIO
INPUT
AUDIO
OUTPUT
VIDEO INPUT
RS-485
12V
CAUTION
RISK
OF EL
ECTR
I SHO
CK
DO NOT
OPE
N
CAU
TION :
TO R
EDUC
E THE R
ISK O
F EL
ECTR
ICAL SHO
CK
DO
NOT O
PEN CO
VERS.
NO USE
R SE
RVICE
ABLE
PAR
TS INSI
DE. R
EFER
SER
VICING
TO Q
UAL
IFIED
SER
VICE
PERSO
NNEL.
WARNING :
TO PR
EVENT
FIRE
OR
SHO
CK HAZARD.
DO NO
T
EXP
OSE
UNI
TS NO
T SP
ECIFI
CAL
LY DES
IGNED
FOR
OUT
DOO
R USE
TO R
AIN O
R MO
ISTUR
E.
15
16
13
14
11
12
10
9
8
7
6
5
4
3
2
1


