background image

12

 · Menu Operation

AlarmSetting

Sets the time value with HH, MM and select the ON or OFF to decide alarm or 

not.

dateSetting

Sets the year, month, date value to show in the monitor screen.

dateFormat

Sets the date format to show in the monitor screen.

TimeSetiing

Sets the time value with hour, minute to show in the monitor screen.

A/VoutFormat

Choose the TV system when outputting the video/audio to TV, DVR/VCR or 

other viewing/recording devices.

pairing

You can register a wireless camera with the receiver using the registration menu 

where you can view the video of the selected wireless camera. 

Pairing The system comes with a camera that has already been paired with the 

receiver unit. 

The pairing function assigns the camera to a channel on the wireless receiver. 

Up to 4 Cameras (each additional camera sold separately) may be paired, which 

each optional camera on its own channel.  

If additional cameras are paired, they must each be configured separately.

It is highly recommended to pair the cameras to the receiver before permanently 

mounting the cameras. See the pairing section on this manual for details.

n

`

reset

Choose <

YeS

> to reset the receiver to factory defaults. 

All menu settings will be reset.

Camera pairing settings will NOT be affected by a reset. The camera will remain 

paired with the receiver.

n

`

Memory-format

Delete recorded data.  

Choose <

YeS

> to delete all data.

pairingCamera

Power on and turn the switch to ON.  

The power LED for the camera and receiver should be ON.
Press the [

Menu

] button on the receiver.

Select Pairing menu by pressing [

A

] or [

M

] key.  

Press the [


] button to go into the Pairing menu.

Select a channel by pressing the [

+

] or [

] key. 

A message will be displayed on the receiver screen. 

The receiver will count down from 30~0 sec you must press the pairing button on 

the camera during this time to successfully pair the camera.
Press the [

] button on the back of the camera.  

If not, the receiver will return to the view screen, and no pairing will take place. 

Once the camera has been paired, it will be immediately viewable on the receiver 

monitor.

Video Playback

You can search and play if recording data exists on the inserted Micro SD card.

Press [


] button during monitoring. 

File List shows.
Choose a file folder desired to play by using [

+

], [

] button.

Press [


] button to play the selected video. 

+ : Stops playback temporairily 

– : Stops playback  

A : Rewind (X1, X2, X4, X8) 

M : Fast Forward (X2, X4, X8)
Press [

Menu

] button to go back to search mode during playback. 

You will see a confirm message if you press [


].

To go back to monitoring mode press [

MENU

] button. 

1.

2.
3.

4.

5.

1.

2.
3.

4.

n

`

SEW-3035-ENGLISH.indd   12

2011-04-13   오후 5:37:31

Summary of Contents for SecureVIEW

Page 1: ...ou have additional questions or need further assistance contact Samsung support at 877 349 3149 To extend your one year warranty by three months be sure to go to www samsungsv com and register your product SEW 3035 ENGLISH indd 1 2011 04 13 오후 5 37 29 ...

Page 2: ...ds within reach of children ALWAYS KEEP THE TRANSMITTER RECEIVER AND AC ADAPTERS OUT OF REACH OF CHILDREN NEVER use the transmitter or receiver near water including near a bathtub sink laundry tub wet basement etc This product is intended for indoor use only This product is not intended for use as a medical monitor and its use should not replace adult supervision Check reception regularly Test mon...

Page 3: ...each When using the system with only battery power and the charge is low then the picture and or sound may affected If this occurs then please connect the AC power adapter and or replace with new batteries If you are using the optional rechargeable battery then plug in the AC power adapter to recharge BATTERY WARNING When using the product in portable mode check batteries regularly DO NOT use the ...

Page 4: ...rformance varies depending on environmental conditions Built in microphone and speaker Camera can be battery operated for true portable wireless operation Temperature sensor Remote Nightlight Receiver Features 3 5 color LCD monitor receiver with superior image quality Video Audio output for viewing on TV Monitor or recording on VCR DVD recorder Rechargeable battery for true portability Audio level...

Page 5: ...gnals from or to the camera 3 5 LCD Screen Displays video from the camera Microphone Transmits audio to the camera when Talk Button is pressed down and held like a walkie talkie MENU Button Press to access the receiver menu Press the button again to exit Navigation Controls Button Use the controls to move and select while in Viewing Mode and Menu Mode Play Press to go to File List if Micro SD card...

Page 6: ...e A V Out Port Connect the included A V cable to view video from a TV or monitor or record transmissions on a DVD recorder VCR Power Slide Switch Slide the switch to ON or OFF position to switch on off the receiver Micro SD Card Compartment Insert Micro SD card for video recording capavility Not included O N A V O U T D C IN 5 V A M record Press to auto record or manual record during monitoring On...

Page 7: ...rared LED s provide viewing in no low light conditions Night Light Switch Press to turn the night light ON or OFF Alternatively press the light button on the receiver to remotely turn the camera light ON or OFF Temperature Sensor Sense the air temperature where the camera is placed Microphone Receives sounds for the area near the camera and transmits sound from the camera to the receiver Pairing B...

Page 8: ... batteries not included into the Battery Pack Make sure to correctly line up the Positive and negative terminals of the batteries Replace the battery pack cover When the battery level is low and requires recharging the LED light will blink intermittently When using the system with only battery power and the charge is low then the picture and or sound may affected n 1 2 3 If this occurs then please...

Page 9: ...reach Never use extension cords with AC Adapters Only use the AC Adaptors provided 1 2 n Carefully unpack the camera If you are installing cameras that did not come with the system please see the pairing camera section of this manual for details on installation Mount the camera to the wall Mark the position of the screw holes on the wall and drill holes and insert 2 screws then firmly attach the c...

Page 10: ...o YES the applicable message appears on the screen Micro SD card status Indicates when a Micro SD card is inserted It indicates that micro SD card get full capacity when the icon is red and card has some spaces when icon is white It displays the recording type if you press REC A or REC M button File List Indicates if recording file exists To go to file list press button A M record Press to auto re...

Page 11: ...ted by pushing A M and SLEEP the monitor will go back to black screen after the time you set if there is no sound trigger during that time Screen Saver After selected time the monitor will go to a select screen saver or black screen if blank is selected as the screen saver Auto Mute Automatically cuts off the audio when there is only slight environmental noise on the camera side Choose YES to enab...

Page 12: ...reset Camera pairing settings will NOT be affected by a reset The camera will remain paired with the receiver n Memory format Delete recorded data Choose YES to delete all data Pairing Camera Power on and turn the switch to ON The power LED for the camera and receiver should be ON Press the MENU button on the receiver Select Pairing menu by pressing A or M key Press the button to go into the Pairi...

Page 13: ...5 86 30 57 30 Recording times are shown in hours and minutes Recording times are estimated based on product usage with Kingston and Sandisk branded Micro SD memory cards Usage of alternative brands and or non branded media may result in different recording time In addition Recording time may vary depending on the environment of operation n Appendix Hardware and CD driver installation Put CD into C...

Page 14: ...amera to your friends and family via MSN Next time you make a video call to your contacts they will see what your baby monitor camera sees 1 2 3 4 5 6 7 Using Your Monitor with Skype Install USB Driver see previous section Connect your monitor to a PC Your monitor should indicate that it is in USB PC CAMERA MODE Install and Open Skype Select Echo Sound Test Service under contacts Then on the Skype...

Page 15: ...ge 8 LEDs 940nm 3m with IR LED Power Requirement 5V DC 5 Power Consumption 500mA MAX IR LED 340mA MAX without IR LED Operating Temperature 10 C 40 C 14 F 104 F Operating Humidity 0 85 RH Weight 146g Size WXHXD 94 x 148 x 94mm Item Details Receiver Receiving Frequency Range 2 400GHz 2 4835GHz Monitor 3 5 Color LCD Data Rate 2 0 Mbps Receiving Sensitivity 81dBm Demodulation Type GFSK Resolution 320 ...

Page 16: ...omers with more environmentally friendly products The Eco mark represents Samsung Techwin s devotion to creating environmentally friendly products and indicates that the product satisfies the EU RoHS Directive Troubleshooting Problem Solution The monitor beeps or vibrates for no apparent reason The unit may be beeping or vibrating because the sound sensitivity on the camera is too high Try lowerin...

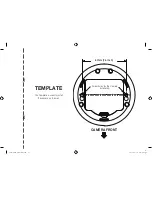
Page 17: ...This template is used to install the camera on the wall TEMPLATE CAMERA FRONT Screw holes for the Camera installation 67mm 2 6 inch SEW 3035 ENGLISH indd 17 2011 04 13 오후 5 37 32 ...

Page 18: ...AMSUNG TECHWIN AMERICA Inc 100 Challenger Rd Suite 700 Ridgefield Park NJ 07660 Toll Free 1 877 213 1222 Direct 1 201 325 6920 Fax 1 201 373 0124 www samsungsv com SAMSUNG TECHWIN EUROPE LTD Samsung House 1000 Hillswood Drive Hillswood Business Park Chertsey Surrey UNITED KINGDOM KT16 OPS TEL 44 1932 45 5300 FAX 44 1932 45 5325 SEW 3035 ENGLISH indd 18 2011 04 13 오후 5 37 32 ...

Reviews: