background image

4

.6

Advanced fax

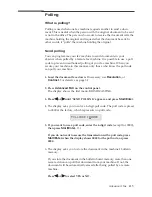
7. The machine stores the document in the memory. The display counts

the number of pages being stored in the memory and the memory
capacity remaining.

The machine returns to standby mode and the display shows a
reminder that a send polling is set. The machine automatically 
switches to FAX mode (automatic receiving) when set to be polled.

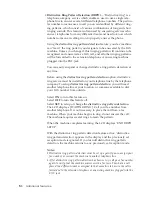
Receive polling 

You can set your machine to automatically receive documents from 
one or more unattended remote fax machines. This feature permits 
unattended polling in the evening hours when telephone rates are lower.

Note: 

The remote machine must be ready for polling.

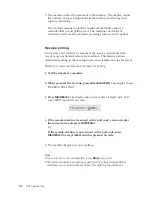
1. Call the remote fax machine.

2. When you hear the fax tone, press 

Advanced FAX. 

The display shows 

‘RECEIVE POLLING?’.

3. Press 

Start/Enter

The display asks you to enter a 4-digit code. Poll

code ‘0000’ represents no code.

4. 

If the remote machine is secured with a poll code, you must enter 
the correct code, and press 

Start/Enter.

Or

If the remote machine is not secured with a poll code, press

Start/Enter

to accept [0000] which represents no code.

5. The machine begins to receive polling.

Note: 

• If you want to cancel the operation, press 

Stop

at any time.

• Not all fax machines have polling capability, and polling incompatibility 

sometimes occurs between fax machines from different manufacturers.

POLLCODE [0000]

Summary of Contents for SF-515

Page 1: ...Advanced fax 4 ...

Page 2: ...git speed dial number then press Start Enter The stored number appears on the dis play 5 Press Start Enter to confirm the number The display asks you to enter another fax number to send the document to another location 6 Enter another fax number using the number keypad one touch dial or 2 digit speed dial number Note that you cannot use group dial numbers for another fax number The number appears ...

Page 3: ...igit speed dial number then press Start Enter The stored number appears on the display 5 Press Start Enter to confirm the number The display asks you to enter another fax number to send the document to another location Note If MEMORY FULL occurs while scanning into the memory the display will show Press or to select the option you want If you select CANCEL broadcasting is cancelled If you select D...

Page 4: ...e 2 3 8 Press Start Enter The display shows the current time and asks you to enter the time when the fax is to be sent 9 Enter the time by using the number keypad then press Start Enter Enter the time in 24 hour format For example enter 2230 for 10 30 P M If you set a time earlier than the current time the document will be sent at that time on the following day 10 The document will be scanned into...

Page 5: ...ress or until PRIORITY FAX appears then press Start Enter 4 Enter the number of the remote machine then press Start Enter To enter the number you can also press a one touch button including group dial button Otherwise press Speed enter a 2 digit speed dial number then press Start Enter The stored number appears on the display 5 Press Start Enter to confirm the number The display asks you to enter ...

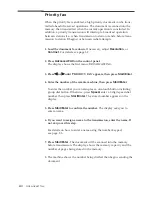
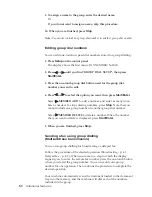
Page 6: ...wn If necessary use Resolution or Contrast For details see page 3 2 2 Press Advanced FAX on the control panel The display shows the first menu BROADCASTING 3 Press or until SEND POLLING appears and press Start Enter 4 The display asks you to enter a 4 digit poll code The poll code is preset to 0000 at the factory which represents no poll code 5 If you want to use a poll code enter the 4 digit code...

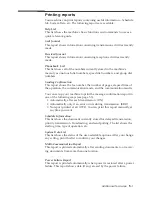
Page 7: ...tes are lower Note The remote machine must be ready for polling 1 Call the remote fax machine 2 When you hear the fax tone press Advanced FAX The display shows RECEIVE POLLING 3 Press Start Enter The display asks you to enter a 4 digit code Poll code 0000 represents no code 4 If the remote machine is secured with a poll code you must enter the correct code and press Start Enter Or If the remote ma...

Page 8: ... reserved in your machine s memory 1 Load the document face down If necessary adjust Resolution or Contrast For details see page 3 2 2 Press Advanced FAX on the control panel The display shows the first menu BROADCASTING 3 Press or until ADD SCHEDULE appears then press Start Enter The display shows the operation time and number currently reserved in the memory 4 Press or repeatedly until you find ...

Page 9: ...Additional features 5 ...

Page 10: ...ation results You can set up your machine to print the message confirmation report in one of the following ways see page 5 3 Automatically after each transmission ON Automatically only if an error occurs during transmission ERR No report printed at all OFF You can print this report manually at any time you want Schedule Information This list shows the document currently stored for delayed transmis...

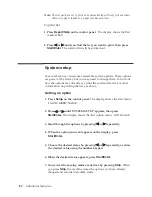
Page 11: ...tly set print the system data list For more information on printing the list see above Setting an option 1 Press Setup on the control panel The display shows the first menu FAX NUMBER NAME 2 Press or until SYSTEM SETUP appears then press Start Enter The display shows the first option menu LANGUAGE 3 Scroll through the options by pressing or repeatedly 4 When the option you want appears on the disp...

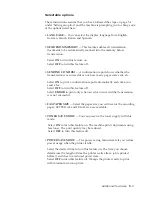
Page 12: ...automatically each time you send a fax Select OFF to turn this feature off Select ERROR to print only when an error occurs and the transmission was not successful FAX PAPER SIZE Select the paper size you will use for the recording paper LETTER A4 and LEGAL size are available TONER SAVE MODE You can preserve the toner supply with this mode Select ON to turn this feature on The machine prints docume...

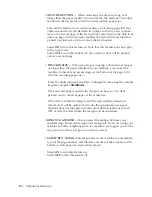
Page 13: ... to discard any excess image at the bottom of the page to fit onto the recording paper size Enter the desired discard size from 0 through 30 mm using the number keypad and press Start Enter If the received page is outside the margin you have set it will be printed on two sheets of paper at the actual size If the data is within the margin and the auto reduction feature is turned on it will be reduc...

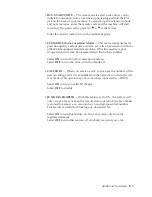
Page 14: ...n time may be increased when the ECM is enabled Select ON to turn the error correction mode on Select OFF to turn the error correction mode off CALLER ID When you receive a call you can see the number of the person calling you if it is available from the network on which the call was made This option may not work when connected to a PABX Select ON to turn on caller ID display Select OFF to disable...

Page 15: ...ne company To setup distinctive ring pattern detection you will need another telephone line at your location or someone available to dial your FAX number from outside Select ON to turn this feature on Select OFF to turn this feature off Select SET to setup or change the distinctive ring pattern detection The LCD displays WAITING RING Call your fax number from another telephone It is not necessary ...

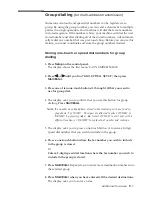
Page 16: ...nter 3 Press one of ten one touch buttons 1 through 10 that you want to use for group dial 4 The display asks you to confirm that you use this button for group dialling Press Start Enter Note If a number has already been stored in the location you chose the dis play shows Txx USED Then you are allowed to select OTHER or RENEW by pressing or Select OTHER to start over with a different location or R...

Page 17: ... num bers as needed To stop entering numbers press Stop Note that you cannot include one group number in another group dial number Select MEMBER DELETE to delete a number When the number that you want to delete is displayed press Start Enter 5 When you are finished press Stop Sending a fax using group dialling Multi address transmission You can use group dialling for broadcasting or delayed fax Fo...

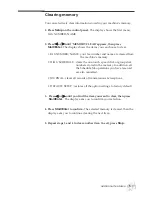
Page 18: ...ouch speed dial or group dial numbers stored in the memory In addition all the Schedule Job operations you have reserved are also cancelled JOURNAL clears all records of transmissions receptions DEFAULT SETUP restores all the option settings to factory default 3 Press or until you find the item you want to clear then press Start Enter The display asks you to confirm your selection 4 Press Start En...

Page 19: ...Troubleshooting 6 ...

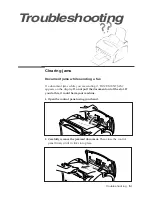
Page 20: ...ou are sending it DOCUMENT JAM appears on the display Do not pull the document out of the slot If you do this it could harm your machine 1 Open the control panel using your hand 2 Carefully remove the jammed document Then close the control panel firmly until it clicks into place Troubleshooting ...

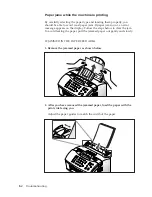
Page 21: ...jams occur an error message appears on the display Follow the steps below to clear the jam To avoid tearing the paper pull the jammed paper out gently and slowly IF JAMMED IN THE PAPER FEED AREA 1 Remove the jammed paper as shown below 2 After you have removed the jammed paper load the paper with the print side facing you Adjust the paper guides to match the width of the paper ...

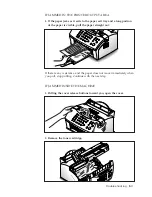
Page 22: ... and a long portion of the paper is visible pull the paper straight out If there is any resistance and the paper does not move immediately when you pull stop pulling Continue with the next step IF JAMMED INSIDE THE MACHINE 1 Pulling the cover release buttons toward you open the cover 2 Remove the toner cartridge ...

Page 23: ...ccur frequently make sure that you are following these preventative tips Follow the procedures in Loading paper on page 1 11 to load paper properly Make sure that the adjustable guides are positioned correctly Do not overload the paper Up to 150 sheets can be loaded at a time Flex fan and straighten the paper before loading it Do not load wrinkled creased damp or highly curled paper Do not mix pap...

Page 24: ...s please call for service FUSER ERROR There is a problem in the fuser unit Unplug the power code and plug it back in If the problem still per sists please call for service MEMORY FULL The memory is full Either delete unnecessary docu ments or retransmit after more memory becomes available or split the transmission into more than one operation LCD error messages JAM NO CARTRIDGE Recording paper has...

Page 25: ...achine stops Replace with a new toner cartridge Wait until the printer is on line TONER LOW TONER EMPTY The toner is almost empty Take out the toner cartridge and gently shake it By doing this you can temporarily re establish printing operations RETRY REDIAL The machine is waiting for a specified time interval to redial a previously busy station You can press Start Enter to immediately redial or S...

Page 26: ... not wrinkled and you are putting it in correctly Check the document is the right size not too thick or thin Make sure that the cover is firmly closed You cannot receive faxes automatically The FAX or AUTO mode should be selected Is there paper in the machine Check if the display shows MEMORY FULL The machine will not send anything Make sure that the document is loaded face down TX should show up ...

Page 27: ...documents you send Check your scan glass for marks and clean it See page 6 11 The machine dials a number but fails to make a connec tion with another fax machine The other fax machine may be turned off out of paper or cannot answer incoming calls Speak with the other machine operator and ask them to sort out the problem You cannot store a document in the memory There may not be enough memory to st...

Page 28: ... panel The display shows the first setup menu FAX NUMBER NAME 3 Press or until MAINTENANCE appears then press Start Enter 4 Press or until you find CLEAN DRUM then press Start Enter The machine automatically pulls in a sheet of paper and prints it out The toner particles on the OPC drum surface are fixed to the paper 5 Press Stop to return to standby mode 6 9 Troubleshooting ...

Page 29: ... OFF then press Start Enter If you want to protect your machine from being opened by an unauthorized person select OFF 5 Press Stop to return to standby mode Adjusting shading When the scanning unit gets dirty it might alter the shading value If your print has black lines or is blurred adjusting the shading may solve the problem Take the following steps 1 Load a sheet of white paper into the docum...

Page 30: ...notify toner low menu option to ON when the toner cartridge needs to be replaced your machine automatically sends a fax to your service company or the dealer to notify them that your machine requires a new toner cartridge This feature will be activated only when the phone number of the service company or the dealer is stored in your machine s memory by technician Ask your dealer for more informati...

Page 31: ...n the ADF rubber piece also 2 Disassemble the white roller as follows Both ends of the white roller have plastic bushings that are snapped shut with small tabs on them Pull the bushing slightly inward then rotate the bushing until it reaches a slot A Then pull the roller upward B A B bushing ...

Page 32: ...a soft dry cloth If the glass is very dirty first wipe it with a slightly dampened cloth then with a dry cloth Be very careful not to scratch the glass surface 6 Replace the roller in reverse order and then close the control panel firmly until it clicks into place ...

Page 33: ... save mode see page 5 3 The toner save mode uses less toner than normal printing The printed image is much lighter and is adequate for printing drafts or proofs Replacing the toner cartridge When the toner cartridge is near the end of its life white streaks or hue changes will occur You can temporarily re establish the print quality by re distributing the remaining toner in the cartridge 1 Open th...

Page 34: ...the used cartridge 3 Unpack the cartridge from its plastic bag and then remove the paper rolled around the cartridge Holding on to each end of the paper pull it straight out and then carefully remove it Take the following steps to replace the toner cartridge 1 Pulling the cover release buttons toward you open the cover ...

Page 35: ...he machine one on each side Grasp the handle and slide the cartridge down between the cartridge slots until it drops into place 4 Shake the cartridge from side to side 5 or 6 times to distribute the toner evenly inside the cartridge 6 Close the cover firmly ...

Page 36: ...6 17 Troubleshooting MEMO ...

Page 37: ...Appendix ...

Page 38: ...equipment into an outlet on a circuit different from that to which the receiver is connected Consult the dealer or an experienced radio TV technician for help Do not make any changes or modifications to the equipment unless specified in the manual If such changes or modifications should be made you could be required to stop operating the equipment Use of a shielded cable is required to comply with...

Page 39: ...onics Co Ltd representative EC Certification Certification to 1999 5 EC Radio Equipment Telecommunications Terminal Equipment Directive FAX This Samsung product has been self certified by Samsung for pan European single terminal connection to the analogue public switched telephone network PSTN in accordance with Directive 1999 EC The prouct has been designed to work with the national PSTNs and com...

Page 40: ...7 3 Appendix ...

Page 41: ...or individual See pages 2 3 to 2 7 for instructions on how to enter this information into your Samsung FAX machine s memory The Telephone Company may make changes in its communications facilities equipment operations or procedures where such action is reasonably required in the operation of its business and is not inconsis tent with the rules and regulations in FCC Part 68 If such changes can be r...

Page 42: ...CC Rules and Regulations Subpart E of Part 68 You should also know that Your Samsung FAX machine is not designed to be connected to a digital PBX system If you intend to use a computer modem or fax modem on the same phone line as your FAX machine you may experience transmission and reception problems with all the equipment It is recommended that no other equipment except for a regular telephone sh...

Page 43: ...age CAUTION INVISIBLE LASER RADIATION WHEN THIS COVER IS OPEN DO NOT OPEN THIS COVER VORSICHT UNSICHTBARE LASERSTRAHLUNG WENN ABDECKUNG GEÖFFENT NICHT DEM STRAHL AUSSETZEN ATTENTION RAYONNEMENT LASER INVISIBLE EN CAS D OUVERTURE EXPOSITION DANGEREUSE AU FAISCEAU ATTENZIONE RADIAZIONE LASER INVISIBLE IN CASO DI APERTURA EVITARE L ESPOSIZIONE AL FASCIO PRECAUCION RADIACION LASER IVISIBLE CUANDO SE A...

Page 44: ...KAN 1 LASERLAITE APPAREILÀ LASER DE CLASSE 1 TO IEC 825 Safety information PRODUCT SAFETY USA UL 1950 UL LISTING CANADA CSA C22 2 No 950 UL 1950 CSA Certification EEC EUROPE IEC 60950 EN60950 TUV GS Certification CB IEC 60950 LASER SAFETY EEC EUROPE HD 194 EN 60825 USA 21 CFR Chapter 1 Subchapter J CDRH Certified ...

Page 45: ...tem data The Energy star emblem does not represent EPA endorsement of any product of service The equipment has been approved to Commission Decision CTR 21 for pan European single terminal connection to the Public Switched Telephone Network PSTN However due to differences between the individual PSTNs provided in different countries the approval does not of itself give an unconditional assurance of ...

Page 46: ... plug Warning If you cut off the moulded plug get rid of it straight away You cannot rewire the plug or you may get an electric shock if you put it into a socket Important warning You must earth this machine The wires in the mains lead have the following colour code Green and Yellow Earth Blue Neutral Brown Live If the wires in the mains lead do not match the colours marked in your plug do the fol...

Page 47: ...ronmental conditions Temperature 50 F to 89 F 10 C to 32 C Humidity 20 to 85 RH Auto dialer One touch dialing registration for 10 numbers Speed dialing registration for 80 numbers Document size Width 5 8 to 8 5 inches 148 to 216 mm Length Single page 5 to 14 inches 128 to 356 mm Multi pages 5 to 11 7 inches 128 to 297 mm Recording paper size for automatic feeder Letter 8 5 11 inches 216 279 mm A4 ...

Page 48: ...7 11 Appendix A Sample of ITU 4 Chart 9reduced to 60 5 ...

Page 49: ...2 2 copy 3 9 D date and time setting 2 7 delayed fax 4 2 demo page printing 1 12 discard size 5 4 document jam clearing 6 1 loading 3 3 preparing 3 1 document exit tray setup 1 5 document tray setup 1 4 DRPD 5 6 dual job status 3 12 E editing group dial number 5 8 number or name 2 5 one touch dial number 3 14 speed dial number 3 16 error message 6 5 extension phone connection 1 6 receiving 3 8 F f...

Page 50: ... one touch dial 3 13 speed dial 3 15 O one touch dial editing 3 14 sending 3 14 storing 3 13 opc drum cleaning 6 9 P paper jam clearing 6 2 loading 1 9 size setting 5 3 type and size 1 11 pause 2 5 phonebook list 5 1 polling receiving 4 6 sending 4 5 power cord connection 1 6 power failure report 5 1 power save mode 5 3 priority fax 4 4 R recall 3 12 received journal 5 1 receiving in ans fax mode ...

Page 51: ... 3 16 storing 3 15 system data list 5 1 system setup auto reduction 5 4 discard size 5 4 distinctive ring pattern detection 5 6 caller ID 5 5 ECM mode 5 5 fax paper size 5 3 language 5 3 power save mode 5 3 RCV start code 5 5 rings to answer 5 4 send from memory 5 3 sending confirm 5 3 stamp RCV name 5 4 toner save mode 5 3 T TAM cord connection 1 6 telephone line connection 1 5 toner cartridge in...

Reviews: