6
Step 5)
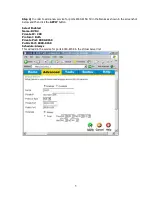
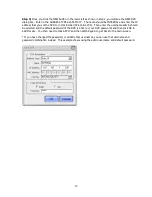
Check that your
VIRTUAL SERVER LIST
looks similar to the screenshot shown below.Your
VIRTUAL SERVER list will have many more services shown, but you should make sure that the DVR and
DVR2 services are listed as shown below, and that the ports and IP
’
s match exactly as shown in the
screenshot or the DVR remote viewing may not work. If it looks similar, you have completed the port
forwarding step and can now logout of the D-Link
™
(closing your browser)
Step 7)
(Optional)
–
Enabling Remote Administration in the router can be a smart idea if you want to
remotely administer the router to open ports, change port forwarding, configure the TZO Dynamic DNS
and more. If you do not enable remote administration, you will have to login to the router locally.
*IMPORTANT: If you enable remote management, be sure to set a different password other than the
default password used in this document. You can also change the remote management port to a custom
port you select. Avoid ports 554-557 and 8000-8159, since these are used by the DVR.
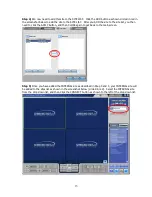
Under the
TOOLS TAB
, scroll down to
REMOTE MANAGEMENT
and then setup the REMOTE
MANAGEMENT features as shown in the screenshot below. Using the D-Link
™
router, you can only set a
specific IP address to control from, so there is some limitation in this router for remote management.


