


SID-450
HIGH RESOLUTION DAY&NIGHT
THREE-AXIS V/F LENS DOME CAMERA
INSTRUCTION MANUAL
P/No. : Z6806-0646-01A
VAN 05. 11
www.samsungtechwin.com
www.samsungcctv.com
•
SAMSUNG TECHWIN CO., LTD.
145-3, Sangdaewon 1-dong, Jungwon-gu, Seongnam-si,
Gyeonggi-do 462-703, Korea
TEL : +82-31-740-8137~8141 FAX : +82-31-740-8145
•
SAMSUNG OPTO-ELECTRONICS AMERICA,INC.
ELECTRONIC IMAGING DIV.
40 Seaview Drive, Secaucus, NJ 07094, U.S.A
TEL : +1-201-902-0347 FAX : +1-201-902-0429
•
SAMSUNG TECHWIN MOSCOW OFFICE
Korp 14, 37-A, PR-KT, Lenningradsky, Moscow 125167, Russia
TEL : +7-95-258-9296,9298 FAX : +7-95-258-9297
•
SAMSUNG OPTO-ELECTRONICS UK, LTD.
Samsung House, 1000 Hillswood Drive, Hillswood Business
Park Chertsey, Surrey KT16 OPS
TEL : +44-1932-45-5308 FAX : +44-1932-45-5325
•
TIANJIN SAMSUNG OPTO-ELECTRONICS CO., LTD.
7 Pingchang Rd, Nankai Dist. Tianjin 300190, P.R China
TEL : +86-22-2761-4724(33821) FAX : +86-22-2761-6514
SALES NETWORK
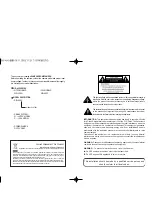
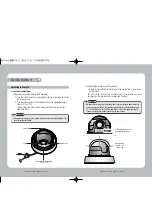
About this manual
Please read this manual carefully before installing and using the camera. Be sure to keep the manual handy for later reference.


