Calibrations
32
3
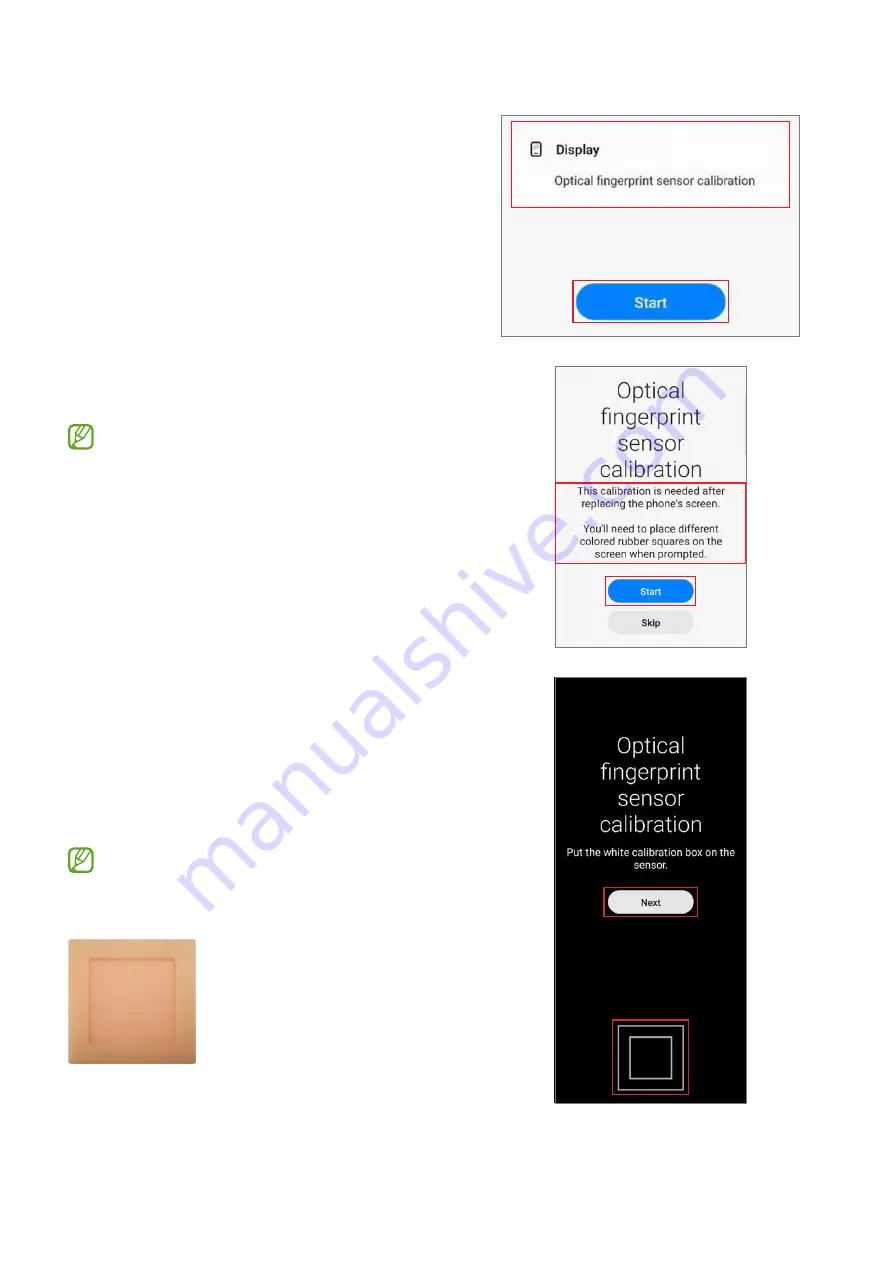
Check the part and calibration and then tap
Start
.
4
Read the on-screen instructions and tap
Start
.
The white calibration box must be
prepared before you start.
5
Put the white calibration box on the sensor
area (below the square side) and push the
rubber by applying force with your finger.
Tap
Next
and keep pushing the rubber
with your finger until you see the success
message.
The bottom side of the rubber that is
shaped like a square should be located
on the square guide line.
Summary of Contents for SM-X818U
Page 1: ...www samsung com REPAIR GUIDE SM X818U SM X816B SM X810 English Rev 1 0...
Page 47: ...Calibrations 47 5 The calibration will perform automatically 6 Check the calibration result...
Page 58: ...Disassembly and Assembly 58 SIM Card TrayRemove 1 Prepare the device to repairbyyourself...
Page 90: ...Disassembly and Assembly 90 7 Separate the charging port completely from the back covermodule...
Page 112: ...Disassembly and Assembly 112 Coaxial cable Blue Coaxial cable Gray...
Page 142: ...Disassembly and Assembly 142 23 Remove the release films from the tapes attached to the FPCB...
Page 154: ...Disassembly and Assembly 154...


