Disassembly and Assembly
65
3
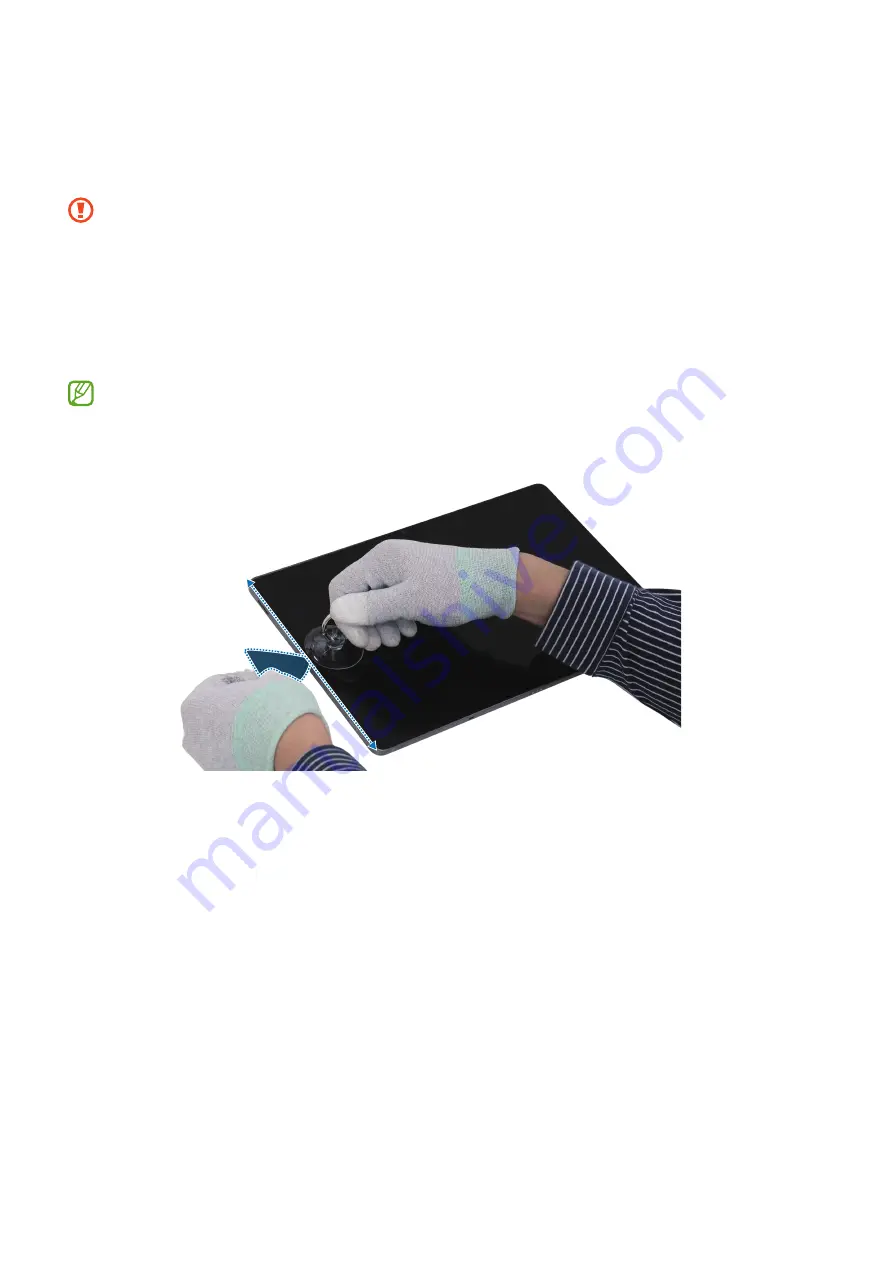
Slide your opening pick along the left edge to slice the adhesive.
Leave the opening pick in the center of the left edge side to prevent the adhesive
from resealing.
•
As the screen can be damaged by excessive force, be careful not to damage the
screen.
•
Be careful that the suction cup does not adhere to the area where the tape or
sticker is attached.
•
As the internal circuitry can be damaged, do not insert the opening pick more
than 1-2 mm.
If you have trouble creating a gap, heat the microwaveable heating bag
additionally, and apply it on the screen to further soften the adhesive. When
reheating, it should be heated no longer than 30 seconds.
Summary of Contents for SM-X818U
Page 1: ...www samsung com REPAIR GUIDE SM X818U SM X816B SM X810 English Rev 1 0...
Page 47: ...Calibrations 47 5 The calibration will perform automatically 6 Check the calibration result...
Page 58: ...Disassembly and Assembly 58 SIM Card TrayRemove 1 Prepare the device to repairbyyourself...
Page 90: ...Disassembly and Assembly 90 7 Separate the charging port completely from the back covermodule...
Page 112: ...Disassembly and Assembly 112 Coaxial cable Blue Coaxial cable Gray...
Page 142: ...Disassembly and Assembly 142 23 Remove the release films from the tapes attached to the FPCB...
Page 154: ...Disassembly and Assembly 154...


