background image

imagine 

the possibilities

Thank you for purchasing this Samsung 

product. Please register your product at

www.samsung.com/register

1-800-SAMSUNG (726-7864)

Microwave Oven

user manual

SMH1611

ENGLISH

This manual is made with 100% recycled paper.

SMH1611_XAA_03898A_EN-01.indd   1

2011-03-16     1:33:28

Summary of Contents for SMH1611B/XAA

Page 1: ...hasing this Samsung product Please register your product at www samsung com register 1 800 SAMSUNG 726 7864 Microwave Oven user manual SMH1611 ENGLISH This manual is made with 100 recycled paper SMH1611_XAA_03898A_EN 01 indd 1 2011 03 16 1 33 28 ...

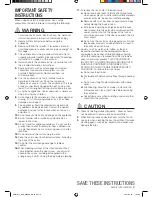
Page 2: ...is manual to take full advantage of your microwave oven s many benefits and features WHAT YOU NEED TO KNOW ABOUT SAFETY INSTRUCTIONS Warnings and Important Safety Instructions in this manual do not cover all possible conditions and situations that may occur It is your responsibility to use common sense caution and care when installing maintaining and operating your microwave oven PRECAUTIONS TO AV...

Page 3: ...ay from heated surfaces including the back of the oven 15 Do not let the cord hang over edge of table or counter 16 When cleaning surfaces of the door and oven that come together when the door closes use only mild nonabrasive soaps or detergents applied with a sponge or soft cloth Unplug the plug before cleaning SAVE THESE INSTRUCTIONS 17 To reduce the risk of fire in the oven cavity a Do not over...

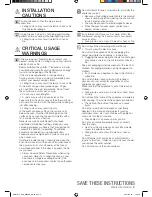
Page 4: ...ectly If there is any damage do not operate the oven and notify your dealer immediately Make sure to install your oven in a location with adequate space Remove all foreign substances such as dust or water from the power plug terminals and contact points using a dry cloth on a regular basis Unplug the power plug and clean it with a dry cloth Failing to do so may result in electric shock or fire Plu...

Page 5: ...en Never try to repair the oven on your own there is dangerous voltage inside If the oven needs to be repaired contact an authorized service center near you Do not attempt to repair disassemble or modify the appliance yourself Because a high voltage current enters the product chassis during operation opening the chassis can result in electric shock or fire You may be exposed to electromagnetic wav...

Page 6: ...may result in children burning themselves Do not place food or heavy objects over the door when opening the door The food or object may fall and this may result in burns or injury Do not abruptly cool the door the inside of the appliance or the dish by pouring water over it during or just after cooking This may result in damage to the appliance The steam or water spray may result in burns or injur...

Page 7: ...ave Cooking Times Power Levels 14 Eco Mode COOKWARE GUIDE 15 15 Microwave safe utensils COOKING GUIDE 16 16 General microwave tips 16 Cooking meat 17 Cooking poultry 17 Cooking seafood 17 Cooking eggs 17 Cooking vegetables 18 Recipes CLEANING AND MAINTAINING YOUR MICROWAVE OVEN 19 19 Cleaning the exterior 19 Cleaning the interior 19 Cleaning the turntable and roller rings 19 Storing and repairing ...

Page 8: ...the specific model and serial number information which is usually located on the back or bottom of the product Please record these numbers in the spaces provided below along with the other requested information Keep this information in a safe place as a permanent record of your purchase to aid in identification in case of theft or loss Also keep a copy of your sales receipt as a proof of purchase ...

Page 9: ...microwave oven _9 01 SETTING UP YOUR MICROWAVE OVEN CHECKING THE CONTROL PANEL Display See page 11 See page 11 See page 14 See page 14 See page 10 See page 13 See page 12 SMH1611_XAA_03898A_EN 01 indd 9 2011 03 16 1 33 30 ...

Page 10: ...s Stop Clear button once ADD 30 SEC BUTTON This simplified control saves you time letting you quickly start cooking at 100 power 1 Press the Add 30 sec button for each 30 seconds you wish the food to be cooked for For example press it twice to cook it for one minute and then press the Enter Start button to start cooking 2 Add 30 sec to a cooking program already in progress by pressing the Add 30 s...

Page 11: ...minutes before using again Amount 4 to 8 oz Veggies Fresh vegetables once Place 1 to 4 servings of fresh frozen vegetables in a microwave safe ceramic glass or plastic dish and add 2 4 Tbs water Cover with lid or vented plastic wrap to cook Stir before letting stand for 3 to 5 minutes Let oven cool for at least 5 minutes before using again Frozen vegetables twice Potato 1 potato once Pierce each p...

Page 12: ...6 0 lbs 1 Press the Auto Defrost button 2 Use the number buttons to enter the weight 3 Press the Enter Start button After pressing the Enter Start button the display counts down the defrosting time The oven will beep twice during the defrost cycle At this time open the door and turn the food as needed Remove any thawed portions then return the frozen portions to the oven and press the Enter Start ...

Page 13: ...s of aluminum foil Let stand covered for 30 60 minutes in the refrigerator Chicken Pieces 0 5 3 0 lbs After each stage rearrange or remove any pieces of food that are nearly defrosted Let stand for 10 20 minutes Bread 0 1 2 0 lbs Arrange the rolls in a circle on kitchen paper in the middle of the turntable Turn over halfway through the defrosting time SOFTEN MELT BUTTON SOFTEN MELT lets you melt c...

Page 14: ...high power levels 1 Use the number buttons to enter the cooking time 2 Press the Enter Start button 3 When the cooking time is over four beeps will sound and End is displayed If you do not enter a power level the microwave oven cooks at the High Power Level by default Cooking at lower power levels Cooking at high power does not always give you the best results with foods that require slower cookin...

Page 15: ...e used to warm food Overheating may cause the polystyrene to melt Paper bags or newspaper May catch fire Recycled paper or metal trims May cause arcing Cookware Comments Glassware Oven to table ware Can be used unless decorated with a metal trim Fine glassware Can be used to warm foods or liquids Delicate glass may break or crack if heated suddenly Glass jars Regular glass is too thin to be used i...

Page 16: ...cooking Areas that need shielding include poultry wing tips the ends of poultry legs and corners of square baking dishes Use only small amounts of aluminum foil Larger amounts can damage your oven Turning Turn foods over midway through the cooking cycle to expose all parts to the microwave energy This is especially important with large items such as roasts Standing Foods cooked in the microwave bu...

Page 17: ...ructions Tuna steaks and salmon steaks Up to 1 5 lbs Cooking Time 7 11 min lb Arrange the steaks on a roasting rack with the meaty portions towards the outside of the rack Cover with wax paper Turn them over halfway through the cooking process Cook until the fish flakes easily with a fork Let stand for 3 5 minutes Power Level Medium High 7 Fillets Up to 1 5 lbs Cooking Time 4 8 min lb Arrange the ...

Page 18: ...inutes until the onion is soft stirring once 2 Add flour salt mustard and pepper mix well Cook at High for 30 to 60 seconds until mixture boils Stir in milk until smooth 3 Stir in red pepper Cook at High for 2 to 3 minutes until mixture boils and thickens slightly stirring twice Stir in cheese until melted 4 Add broccoli and pasta mix well Cover with lid Cook at High for 4 to 6 minutes until heate...

Page 19: ...y splashes or stains To remove hardened food articles and remove smells place 2 cups of water add lemon juice for extra freshness into a four cup measuring glass Run the microwave at High power for 5 minutes or until the water boils Let water stand in the oven for one or two minutes CLEANING THE TURNTABLE AND ROLLER RINGS Clean the roller rings periodically and wash the turntable as required You c...

Page 20: ... or put the grease filter in the microwave oven The aluminum will darken 3 To return the filter to its position slide it into the frame slot on the left or right then push it upwards and to the right or left to lock it REPLACING THE CHARCOAL FILTER If your oven is vented to the inside the charcoal filter should be replaced every 6 to 12 months and more often if necessary The charcoal filter cannot...

Page 21: ... 6 cu ft Timer 99 minutes 99 seconds Controls 10 power levels including defrost Power Source 120 VAC 60 Hz Power Output 1000 Watts Power Consumption 1580 Watts Net Shipping Weight ST 44 2 51 8 lbs B W 43 3 50 8 lbs Outside Dimensions 29 7 8 W X 16 1 2 H X 15 1 8 D Oven Cavity Dimensions 19 5 16 W X 9 5 8 H X 14 3 8 D Shipping Dimensions 33 3 8 W X 19 15 16 H X 19 13 32 D warranty SAMSUNG OVER THE ...

Page 22: ...INCLUDING BUT NOT LIMITED TO ANY IMPLIED WARRANTIES OF MERCHANTABILITY OR FITNESS FOR A PARTICULAR PURPOSE SHALL APPLY AFTER THE EXPRESS WARRANTY PERIODS STATED ABOVE AND NO OTHER EXPRESS WARRANTY OR GUARANTY GIVEN BY ANY PERSON FIRM OR CORPORATION WITH RESPECT TO THIS PRODUCT SHALL BE BINDING ON SAMSUNG SAMSUNG SHALL NOT BE LIABLE FOR LOSS OF REVENUE OR PROFITS FAILURE TO REALIZE SAVINGS OR OTHER...

Page 23: ...note note SMH1611_XAA_03898A_EN 01 indd 23 2011 03 16 1 33 34 ...

Page 24: ...Code No DE68 03898A 01 www samsung com SMH1611_XAA_03898A_EN 01 indd 24 2011 03 16 1 33 34 ...

Page 25: ...e producto Samsung Por favor registre su producto en www samsung com register 1 800 SAMSUNG 726 7864 Horno de microondas manual del usuario SMH1611 ESPAÑOL Este manual está fabricado con papel 100 reciclado SMH1611_XAA_03898A_Mes 01 indd 1 2011 03 16 3 41 23 ...

Page 26: ... el cuidado de su electrodoméstico Lea detenidamente el manual y podrá así aprovechar todas las ventajas y las funciones del horno de microondas LO QUE NECESITA SABER SOBRE LAS INSTRUCCIONES DE SEGURIDAD Las advertencias y las instrucciones de seguridad importantes de este manual no cubren todos los problemas y situaciones que podrían ocurrir Es su responsabilidad usar el sentido común ser precavi...

Page 27: ...chufe en agua 14 Mantenga el cable alejado de superficies calientes incluso la parte posterior del horno 15 No permita que el cable cuelgue del borde de una mesa o mesada 16 Cuando limpie las superficies de la puerta y del horno que se ensamblan al cerrar la puerta utilice sólo jabones o detergentes suaves no abrasivos aplicados con una esponja o paño suave Desenchúfelo antes de limpiarlo CONSERVE...

Page 28: ...aduras en la puerta o una puerta que no esté correctamente alineada Si hay algún daño no ponga el horno en funcionamiento y notifique de inmediato al distribuidor Asegúrese de instalar su horno en un lugar con espacio suficiente Retire todas las sustancias extrañas como polvo o agua de los terminales y puntos de contacto del enchufe con un paño seco regularmente Desenchufe la alimentación y limpie...

Page 29: ... el fuego puede expandirse Siempre respete las Precauciones de seguridad cuando utilice su horno Nunca intente reparar el horno contiene voltaje peligroso en el interior Si se debe reparar el horno comuníquese con un centro de servicio técnico autorizado cercano No intente reparar desarmar ni modificar el electrodoméstico Dado que una corriente de alta tensión ingresa en el chasis del producto dur...

Page 30: ...quen demasiado al electrodoméstico No hacerlo puede provocar quemaduras en los niños No coloque alimentos ni objetos pesados sobre la puerta del horno cuando la abra Los alimentos o el objeto podrían caerse y provocar quemaduras o lesiones No enfríe abruptamente la puerta el interior del electrodoméstico ni el plato vertiendo agua sobre estas partes durante o después de la cocción Esto puede provo...

Page 31: ... derretir 14 Tiempos de cocción y niveles de potencia del microondas 14 Eco mode Modo Eco GUÍA DE RECIPIENTES Y UTENSILIOS DE COCINA 15 15 Recipientes y utensilios aptos para microondas GUÍA DE COCCIÓN 16 16 Sugerencias generales para cocinar en microondas 16 Cocinar carne 17 Cocinar carne de ave 17 Cocinar mariscos 17 Cocinar huevos 17 Cocinar verduras 18 Recetas LIMPIEZA Y MANTENIMIENTO DE SU HO...

Page 32: ...ng indique el modelo específico y el número de serie que por lo general se encuentra en la parte posterior o inferior del producto Registre los números en los espacios provistos a continuación junto con la demás información solicitada Conserve esta información en un lugar seguro como un registro permanente de su compra para ayudarlo en la identificación en caso de robo o pérdida También conserve u...

Page 33: ...HORNO DE MICROONDAS VERIFICAR EL PANEL DE CONTROL Pantalla Consulte la página 11 Consulte la página 11 Consulte la página 14 Consulte la página 14 Consulte la página 10 Consulte la página 13 Consulte la página 12 SMH1611_XAA_03898A_Mes 01 indd 9 2011 03 16 3 41 26 ...

Page 34: ...EG Este control simplificado le ahorra tiempo permitiéndole iniciar rápidamente la cocción al 100 de potencia 1 Presione el botón Add 30 sec Agregar 30 segundos por cada 30 segundos que desee cocinar los alimentos Por ejemplo presiónelo dos veces para programar un minuto de cocción y luego presione el botón Enter Start Ingresar Inicio para comenzar la cocción 2 Agregue 30 segundos a un programa de...

Page 35: ...o nuevamente Cantidad 4 a 8 oz Verduras Verduras frescas una vez Coloque 1 a 4 porciones de verduras frescas congeladas en una fuente de plástico vidrio o cerámica para microondas y agregue 2 4 cucharadas de agua Cubra con una tapa o envoltorio plástico con ventilación para cocinar Revuelva antes de dejar reposar por 3 a 5 minutos Deje enfriar el horno durante al menos 5 minutos antes de utilizarl...

Page 36: ...resar el peso 3 Presione el botón ENTER START INGRESAR INICIO Después de oprimir el botón ENTER START INGRESAR INICIO la pantalla cuenta el tiempo de descongelamiento en forma regresiva El horno emitirá la señal sonora dos veces durante el ciclo de descongelamiento En ese momento abra la puerta y dé vuelta los alimentos según sea necesario Saque las porciones que se hayan descongelado luego coloqu...

Page 37: ...Presas de pollo 0 5 3 0 lb Después de cada etapa reacomode o retire cualquier parte del alimento que esté casi descongelada Deje reposar durante 10 a 20 minutos Pan 0 1 2 0 lb Acomode los bollos en un círculo sobre papel de cocina en la mitad del plato giratorio Dé vuelta a la mitad del proceso de descongelamiento BOTÓN SOFTEN MELT ABLANDAR DERRETIR SOFTEN MELT ABLANDAR DERRETIR le permite derreti...

Page 38: ...de cocción 2 Oprima el botón Power Level Nivel de potencia 3 Use los botones numéricos para ingresar el nivel de potencia 4 Use los botones numéricos para ingresar el segundo tiempo de cocción 5 Oprima el botón Power Level Nivel de potencia 6 Use los botones numéricos para ingresar el nivel de potencia 7 Presione el botón ENTER START INGRESAR INICIO 8 Cuando haya transcurrido el tiempo de cocción ...

Page 39: ...to puede provocar que el poliestireno se derrita Bolsas de papel o periódicos Pueden prenderse fuego Utensilio de cocina Comentarios Papel reciclado o ribetes de metal Pueden provocar un arco eléctrico Recipientes de vidrio Vajilla de mesa Puede utilizarse a menos que esté decorada con un ribete de metal Cristalería fina Puede utilizarse para calentar alimentos o líquidos La cristalería delicada p...

Page 40: ...ción son las puntas de las alas de las aves los extremos de las patas de aves y las esquinas de recipientes para hornear cuadrados Use sólo pequeñas cantidades de papel de aluminio Las cantidades mayores pueden dañar su horno Dar vuelta Dé vuelta los alimentos en la etapa intermedia del ciclo de cocción para exponer todas las partes a la energía de microondas Esto es de especial importancia para p...

Page 41: ...porciones más carnosas hacia la parte exterior de la misma Cubra con papel encerado Délos vuelta a la mitad del proceso de cocción Cocine el pescado hasta que se pueda desmenuzar fácilmente con un tenedor Deje reposar durante 3 5 minutos Nivel de potencia Mediana alta 7 Filetes Hasta 1 5 lb Tiempo de cocción 4 8 min lb Acomode los filetes en una fuente para horno introduciendo cualquier pedazo fin...

Page 42: ...3 Incorpore el pimiento rojo Cocine a potencia Alta de 2 a 3 minutos hasta que la mezcle hierva y se espese ligeramente revuelva dos veces Incorpore el queso y revuelva hasta que se derrita 4 Agregue los brócolis y los fideos mezcle bien Cubra con una tapa Cocine a potencia Alta de 4 a 6 minutos hasta que se caliente toda la preparación y revuelva una vez Revuelva antes de servir Se obtienen 6 por...

Page 43: ...rozos de comida endurecidos y eliminar olores coloque 2 tazas de agua agregue jugo de limón para obtener una mayor frescura en un vaso medidor de cuatro tazas por qué un vaso medidor de 4 tazas a potencia Alta durante 5 minutos o hasta que hiervan Deje reposar en el horno durante uno o dos minutos LIMPIEZA DEL ANILLO Y EL PLATO GIRATORIO Limpie los anillos giratorios periódicamente y lave el plato...

Page 44: ...e el filtro de grasa dentro del horno de microondas El aluminio se oscurecerá 3 Para colocar nuevamente el filtro en su posición deslícelo en la ranura del marco sobre la izquierda o derecha luego empújelo hacia arriba y hacia la derecha o izquierda para trabarlo REEMPLAZO DEL FILTRO DE CARBÓN Si su horno tiene ventilación hacia el interior el filtro de carbón debe reemplazarse cada 6 a 12 meses y...

Page 45: ...caciones Número de modelo SMH1611 Cavidad del horno 1 6 pies cúbicos Temporizador 99 minutos 99 segundos Controles 10 niveles de potencia e incluye descongelamiento Fuente de alimentación 120 VCA 60 Hz Salida de potencia 1000 Vatios Consumo de potencia 1580 Vatios Peso neto envío ST 44 2 51 8 lbs B W 43 3 50 8 lbs Dimensiones externas 29 7 8 Ancho X 16 1 2 Alto X 15 1 8 Profundidad Dimensiones de ...

Page 46: ...ITA INCLUIDA AUNQUE NO EN CARÁCTER TAXATIVO TODA GARANTÍA TÁCITA DE COMERCIABILIDAD O APTITUD PARA UN PROPÓSITO ESPECIAL SE APLICARÁ DESPUÉS DE LOS PERÍODOS DE GARANTÍA ESTABLECIDOS MÁS ARRIBA Y NINGUNA OTRA GARANTÍA EXPRESA O GARANTÍA OTORGADA POR PERSONA COMPAÑÍA O CORPORACIÓN ALGUNA CON RESPECTO AL PRESENTE PRODUCTO REVESTIRÁ CARÁCTER VINCULANTE PARA SAMSUNG SAMSUNG NO SERÁ RESPONSABLE POR PÉRD...

Page 47: ...nota nota SMH1611_XAA_03898A_Mes 01 indd 23 2011 03 16 3 41 29 ...

Page 48: ...N de código DE68 03898A 01 SMH1611_XAA_03898A_Mes 01 indd 24 2011 03 16 3 41 29 ...

Reviews: