- 9 -
4. Disassembly and Reassembly
Disconnect oven power.
Remove Grille & Control Box Assembly.
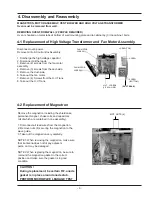
1. Discharge the high voltage capacitor.
2. Disconnect all the leads.
3. Remove (2) screws from the fan motor
assembly.
4. Remove (3) screws from the duct-side.
5. Remove the duct-side.
6. Take out the fan motor.
7. Remove (4) Screws from the H.V.Trans.
8. Take out the H.V.Trans.
Remove the magnetron including the shield case,
permanent magnet, choke coils and capacitors
(all of which are contained in one assembly).
1. Disconnect all lead wires from the magnetron.
2. Remove nuts (4) securing the magnetron to the
wave guide.
3. Take out the magnetron very carefully.
NOTE1: When removing the magnetron, make sure
that it antenna does not hit any adjacent
parts, or it may be damaged.
NOTE2: When replacing the magnetron, be sure to
remount the magnetron gasket in the correct
position and make sure the gasket is in good
condition.
CAUTION !
During replacement, be certain R.F. anode
gasket is in place around anode stub.
PERFORM MICROWAVE LEAKAGE TEST
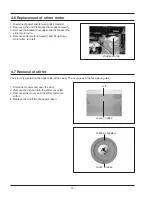
4-1 Replacement of High Voltage Transformer and Fan Motor Assembly.
4-2 Replacement of Magnetron
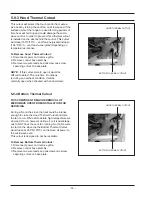
MAGNETRON, MOTOR ASSEMBLY, VENT BLOWER AND HIGH VOLTAGE TRANSFORMER
Oven must be removed from wall.
REMOVING OVEN FROM WALL (2 PEOPLE REQUIRED)
Oven is hooked on metal tabs at bottom of wall mounting plate and to cabinet by (3) top cabinet bolts.
FAN MOTOR
SCREW(2)
FAN MOTOR
SCREW(1)
H.V.T. SCREWS
(2 EACH SIDE)
SCREW(TOP)
(DUCT REAR)
SCREW
(BOTTOM)
SCREW
MGT NUTS (4)

