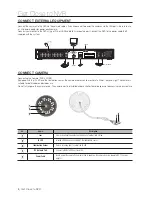
ConneCt externAl equipMent
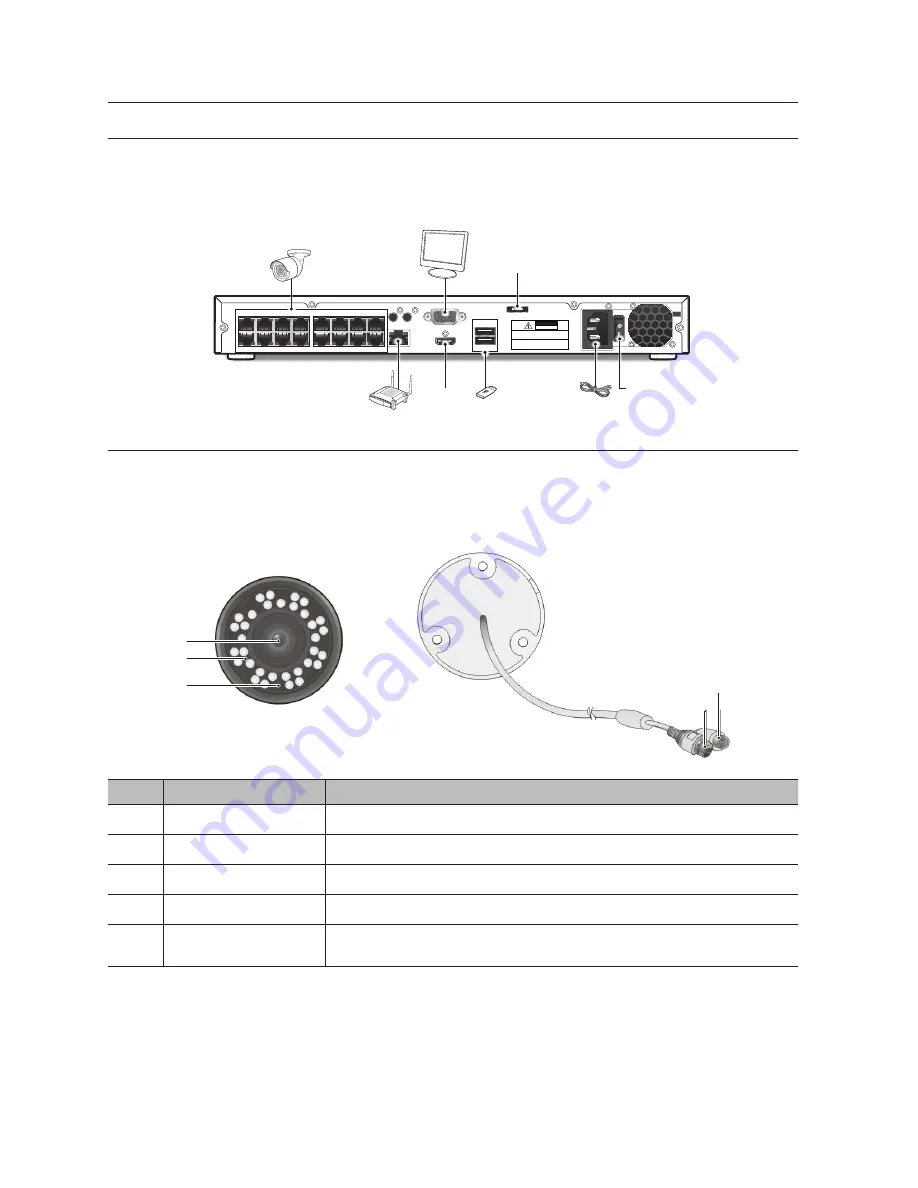
Connect the cameras to the NVR via the network cables. If you choose not to power the cameras via the LAN ports, be sure to use
a 12V power adapter for power each camera.
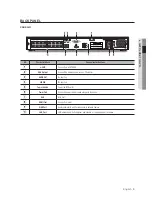
Connect your monitor to the NVR using a VGA or HDMI cable to its respective port. Connect the NVR to the power cable that’s
supplied with the system.
ConneCt CAMerA
Connecting the Camera (SNC-4241BE)
Equipped with the IR LED and the illumination sensor, the camera enables you to monitor at all times, day and night. The camera is
suitable for both indoor and outdoor use.
Do not fully expose the camera to rain. The camera must be installed under a shelter to avoid exposure to excessive rain or moisture.
SN
Name
Description
a
Lens
3.6mm focal length enables you to monitor at a wider field of view.
b
IR LED
Infrared LED lights are controlled by the illumination sensor.
c
Illumination Sensor
Detects incoming light to control the IR LED.
d
IPC Network Port
Connect to NVR via POE port or switch.
e
Power Cable
Use to power the camera if you would l like to power up the camera by using separate DC 12V power
adaptor.
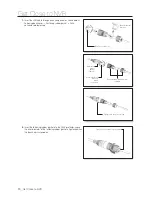
Get Close to NVR
8_
Get Close to NVR
c
d
e
b
a
AC 100
240~IN
VGA
LINEIN AUDIO OUT
WAN
HDMI
LAN1
LAN2
LAN3
LAN4
LAN5
LAN6
LAN7
LAN8
LAN9
LAN10
LAN11
LAN12
LAN13
LAN14
LAN15
LAN16
CAUTION
RISK OF ELECTRI SHOCK
DO NOT OPEN
CAUTION : TO REDUCE THE RISK OF ELECTRICAL SHOCK
DO NOT OPEN COVERS. NO USER SERVICEABLE
PARTS INSIDE. REFER SERVICING TO QUALIFIED
SERVICE PERSONNEL.
WARNING : TO PREVENT FIRE OR SHOCK HAZARD. DO NOT
EXPOSE UNITS NOT SPECIFICALLY DESIGNED
FOR OUTDOOR USE TO RAIN OR MOISTURE.
e-SATA
USB 3.0
USB 2.0
e-SATA
HDMI
Power Switch


