setup screen
to add a video profile
You can add as many codecs as necessary so that a variety of profiles can be applied
according to the recording condition.
1.
Select one from the <
video profile
> options.
2.
Provide the name and select a codec.
3.
Specify the conditions under which the codec will be applied.
4.
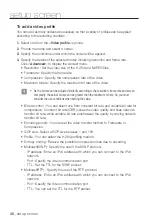
Specify the details of the selected codec including resolution and frame rate.
Click <
advanced
> to display the context menu.
•
Resolution : Set the video size of the H.264 and MJPEG files.
•
Framerate : Specify the frame rate.
•
Compression : Specify the compression rate of the video.
•
Maximum bitrate : Specify the maximum bit rate of the video.
J
`
As the bit rate can be adjusted limitedly according to the resolution, frame rate and screen
complexity, the actual bit rate can be greater than the maximum bit rate. So you must
consider the use conditions when setting the value.
•
Bitrate control : You can select one from constant bit rate and variable bit rate for
compression. Constant bit rate (CBR) varies the video quality and fixes network
transfer bit rate, while variable bit rate emphasizes the quality by varying network
transfer bit rate.
•
Encoding priority : You can set the video transfer method to Framerate or
Compression.
•
GOP size : Select a GOP size between 1 and 150.
•
Profile : You can select the H.264 profiling method.
•
Entropy coding : Reduce the possible compression loss due to encoding.
•
Multicast(SVNP) : Specify the use of the SVNP protocol.
- IP address : Enter an IPv4 address with which you can connect to the IPv4
network.
- Port : Specify the video communication port.
- TTL : Set the TTL for the SVNP packet.
•
Multicast(RTP) : Specify the use of the RTP protocol.
- IP address : Enter an IPv4 address with which you can connect to the IPv4
network.
- Port : Specify the video communication port.
- TTL : You can set the TTL for the RTP packet.
36_
setup screen

